Quantcast
Channel: GameDev Academy
Viewing all 1620 articles
Browse latest View live

Create a Fast Paced Math Game in Unity – Part 2

$
0
0

Check out the other parts to this series:

In the previous blog we created our obstacles, so let’s begin spawning them.  If you haven’t read Part 1 yet, it’s highly recommended. Many of the features in this blog will require what we learned in Part 1.

You can download the project files here.

Spawning the Obstacles

First, create an empty GameObject called “GameManager”. This will hold our obstacle spawner as well as other scripts. Then, create a new C# script called “ObstacleSpawner” and attach it to the game manager.
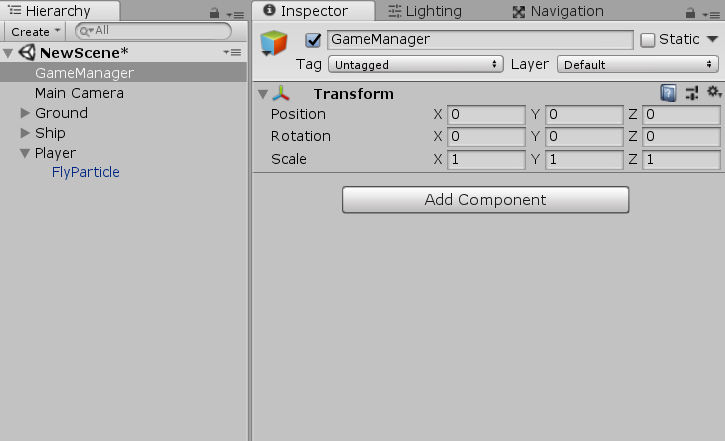
GameManger object added to Unity

This is how it’s going to work. When we spawn an obstacle, we’re first going to decide if it’s going to come from the left or right hand side of the screen. Then with that side decided, we pick a random Y axis value from a pre-defined min and max. The the object is spawned and thrown across the screen.

The “obstacles” array will hold all of the obstacle prefabs. “minSpawnY” and “maxSpawnY” is the vertical range to spawn objects along. “leftSpawnX” and “rightSpawnX” are the X positions of the left/right side of the screen.

public GameObject[] obstacles;      // array of all the different types of obstacles

public float minSpawnY;             // minimum height objects can spawn at
public float maxSpawnY;             // maximum height objects can spawn at
private float leftSpawnX;           // left hand side of the screen
private float rightSpawnX;          // right hand side of the screen

public float spawnRate;             // time in seconds between each spawn
private float lastSpawn;            // Time.time of the last spawn

We’re also going to be pooling our obstacles. This helps with performance as we Instantiate all of them at the start of the game.

// pooling
    private List<GameObject> pooledObstacles = new List<GameObject>();  // list of objects in the pool
    private int initialPoolSize = 20;                                   // size of the pool

Now in the “Start” function we need to calculate the left and right spawn X variables. To do this, we first need to get the width of the camera. Unfortunately that’s not something we can just get, so we just need to do a bit of math. Since the middle of the camera is X=0, we can determine that left spawn X will be -camWidth / 2, with right spawn being the same but positive.

Let’s also call the function to create our pool, which we’ll be creating next.

void Start ()
{
    // setting left and right spawn borders
    // do this by getting camera horizontal borders
    Camera cam = Camera.main;
    float camWidth = (2.0f * cam.orthographicSize) * cam.aspect;

    leftSpawnX = -camWidth / 2;
    rightSpawnX = camWidth / 2;

    // create our initial pool
    CreateInitialPool();
}

“CreateInitialPool” instantiates a set number of obstacles, deactivates them and adds them to the “pooledObstacles” list. We’ll then get objects from that list later on to ‘spawn’ them.

// instantiates the initial objects to add to the pool
void CreateInitialPool ()
{
    for(int index = 0; index < initialPoolSize; index++)
    {
        // determine which obstacle type we're going to create
        GameObject obstacleToSpawn = obstacles[index % 4];

        // instantiate it
        GameObject spawnedObject = Instantiate(obstacleToSpawn);

        // add it to the pool
        pooledObstacles.Add(spawnedObject);

        // deactivate it
        spawnedObject.SetActive(false);
    }
}

“GetPooledObstacle” returns an inactive object from the “pooledObstacles” list. We’ll be calling this function instead of “Instantiate”.

// returns a new pooled obstacle ready to be used
GameObject GetPooledObstacle ()
{
    GameObject pooledObj = null;

    // find a pooled object that is not active
    foreach(GameObject obj in pooledObstacles)
    {
        if (!obj.activeInHierarchy)
            pooledObj = obj;
    }

    // if we couldn't find one, log error
    if (!pooledObj)
        Debug.LogError("Pool size is not big enough!");

    // activate it
    pooledObj.SetActive(true);

    // then send it
    return pooledObj;
}

Now it’s time for the “SpawnObstacle” function, which will spawn a random obstacle.

First, we get an available obstacle from the “GetPooledObstacle” function and set a position for it from the “GetSpawnPosition” function. We’ll get to that soon. Then with the spawned object, we set the move direction to be horizontally across the screen.

// spawns a random obstacle at a random spawn point
void SpawnObstacle ()
{
    // get the obstacle
    GameObject obstacle = GetPooledObstacle();

    // set its position
    obstacle.transform.position = GetSpawnPosition();

    // set obstacle's direction to move in
    obstacle.GetComponent<Obstacle>().moveDir = new Vector3(obstacle.transform.position.x > 0 ? -1 : 1, 0, 0);
}

The “GetSpawnPosition” returns a Vector3, which is the random position for the object to spawn at. Inside the function, we first determine the X position. This is a 50/50 chance of being on the left or right. Then the Y position is a random value between the min and max Y spawn range.

// returns a random spawn position for an obstacle
Vector3 GetSpawnPosition ()
{
    float x = Random.Range(0, 2) == 1 ? leftSpawnX : rightSpawnX;
    float y = Random.Range(minSpawnY, maxSpawnY);

    return new Vector3(x, y, 0);
}

To spawn these overtime, we check each frame in the “Update” function if the time between now and the last time we spawned is more than the spawn rate. If so, we reset the last spawn time and spawn an obstacle.

void Update ()
{
    // every 'spawnRate' seconds, spawn a new obstacle
    if(Time.time - spawnRate >= lastSpawn)
    {
        lastSpawn = Time.time;
        SpawnObstacle();
    }
}

Now back in the editor we can fill out the script variables. Add all of your obstacle prefabs into the obstacles array. I set the Min Spawn Y to be -3.5 and max to be 2. This spawns them just of the ground to just below the ship. For the spawn rate I set it to 0.75, but you can test and tweak this value.
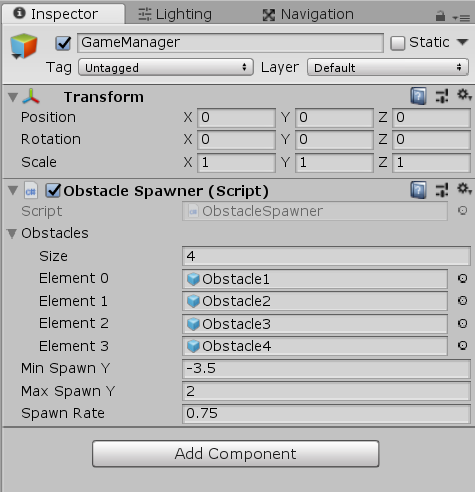
GameManager object in the Unity Inspector window

Here’s how it should look like when you play the game! Make sure that you get stunned when you collide with the obstacles.
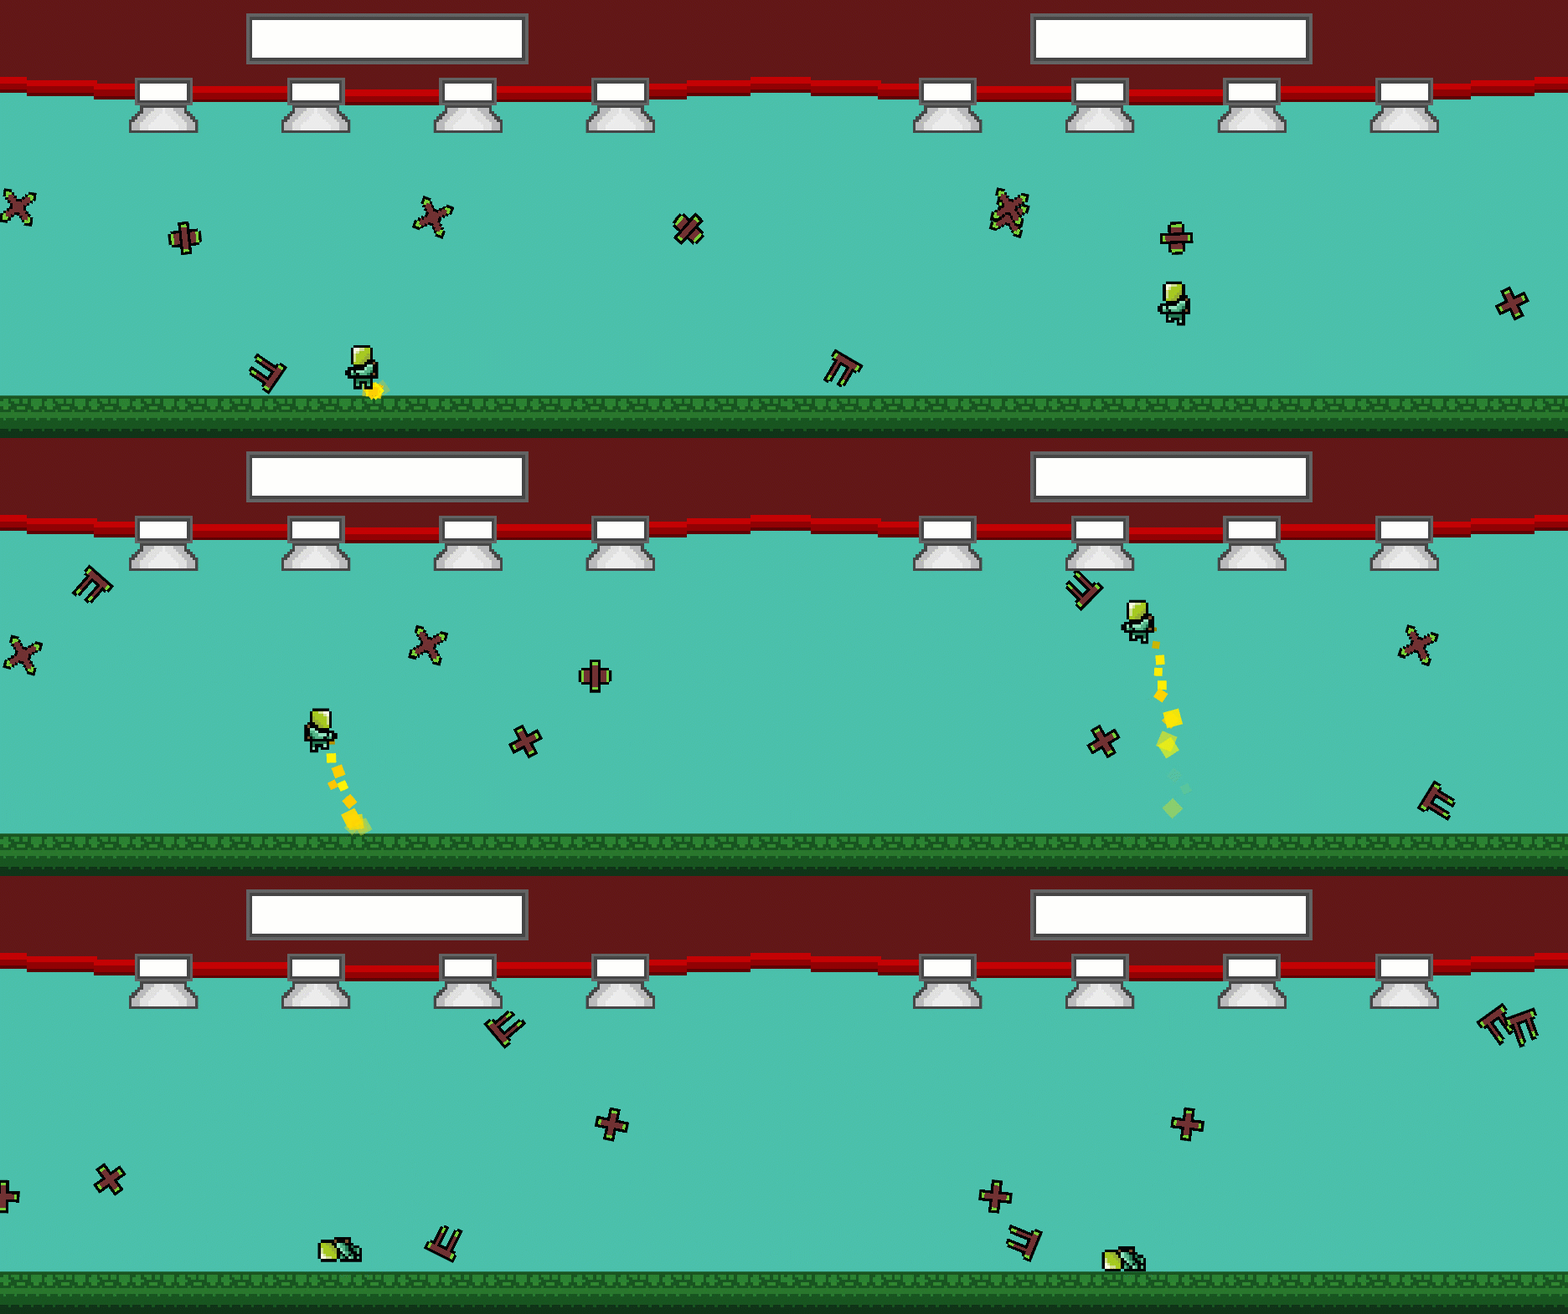
Player jetpacking and avoiding enemies in Unity game

Creating the Base Problem Class

The game manager is going to be a script which holds all of our math problems and runs the game’s loop.

So first up, create a new C# script called “Problem”. This is going to be the base class for our math problems.

Under the pre-made class, create a new enumerator called “MathsOperation”. For our game the format is going to be: [number] [operation] [number]. The way the two numbers are going to be calculated together is determined by the operator. Addition, subtraction, multiplication and division are the ones we’re going to be using.

public enum MathsOperation
{
    Addition,
    Subtraction,
    Multiplication,
    Division
}

We then need to change the pre-made “Problem” class. First, remove the “MonoBehaviour” text at the end of the class definition and add “[System.Serializable]” just above.

We remove mono behavior because we don’t need any of Unity’s pre-made functions and for the fact that this script isn’t going to be attached to any script. The System.Serializable property makes it so that this class can be displayed in the Inspector with all it’s values laid out to edit.

With our variables, we have our two numbers and our operator. “answers” is a float array which will hold all the possible answers, including the correct one. “correctTube” is the index number of the correct answer in the “answers” array.

[System.Serializable]
public class Problem
{
    public float firstNumber;           // first number in the problem
    public float secondNumber;          // second number in the problem
    public MathsOperation operation;    // operator between the two numbers
    public float[] answers;             // array of all possible answers including the correct one

    [Range(0, 3)]
    public int correctTube;             // index of the correct tube
}

Scripting the Game Manager

Now that we have our problem class, let’s make the game manager. Create a new C# script called “GameManager” and attach it to the “GameManager” object.

Here’s our variables. “problems” is an array holding all of our math problems. “curProblem” is the index number of the “problems” array, pointing to the current problem the player is on.

public Problem[] problems;      // list of all problems
public int curProblem;          // current problem the player needs to solve
public float timePerProblem;    // time allowed to answer each problem

public float remainingTime;     // time remaining for the current problem

public PlayerController player; // player object

We also want to create an instance of this script (or singleton). This means we can easily access the script by just going GameManager.instance.[…] without needing to reference it. The only downside, is that you can only have one instance of the script.

// instance
public static GameManager instance;

void Awake ()
{
    // set instance to this script.
    instance = this;
}

Let’s start with the “Win” and “Lose” functions. Right now they’ll just set the time scale to o (pausing the game). Later on we’ll call a UI function to show text saying “You Win!” or “Game Over”.

// called when the player answers all the problems
void Win ()
{
    Time.timeScale = 0.0f;
    // set UI text
}

// called if the remaining time on a problem reaches 0
void Lose ()
{
    Time.timeScale = 0.0f;
    // set UI text
}

Now we need a way to present / set a problem. The “SetProblem” function will carry over an index number for the problem array and set that as the current problem.

// sets the current problem
void SetProblem (int problem)
{
    curProblem = problem;
    remainingTime = timePerProblem;
    // set UI text to show problem and answers
}

When the player gets the correct answer, “CorrectAnswer” will be called. “IncorrectAnswer” will be called if it’s the wrong answer. If they get it wrong, we’ll just stun them.

// called when the player enters the correct tube
void CorrectAnswer()
{
    // is this the last problem?
    if(problems.Length - 1 == curProblem)
        Win();
    else
        SetProblem(curProblem + 1);
}

// called when the player enters the incorrect tube
void IncorrectAnswer ()
{
    player.Stun();
}

When the player enters a tube, the “OnPlayerEnterTube” function will be called, carrying over the id of the tube, which correlates back to the “answers” array in the “Problem” class.

// called when the player enters a tube
public void OnPlayerEnterTube (int tube)
{
    // did they enter the correct tube?
    if (tube == problems[curProblem].correctTube)
        CorrectAnswer();
    else
        IncorrectAnswer();
}

Since we’re having a timer for each problem, we need to check if it’s ran out. If so, then the player will lose.

void Update ()
{
    remainingTime -= Time.deltaTime;

    // has the remaining time ran out?
    if(remainingTime <= 0.0f)
    {
        Lose();
    }
}

Finally, we need to set the initial problem when the game starts.

void Start ()
{
    // set the initial problem
    SetProblem(0);
}

Back in the editor we can begin to create our problems. Here, I have 3 problems, one addition, multiplication and division. Make sure that your “answers” array is as many tubes as you have and set the “correctTube” slider to be the element number with the correct answer.
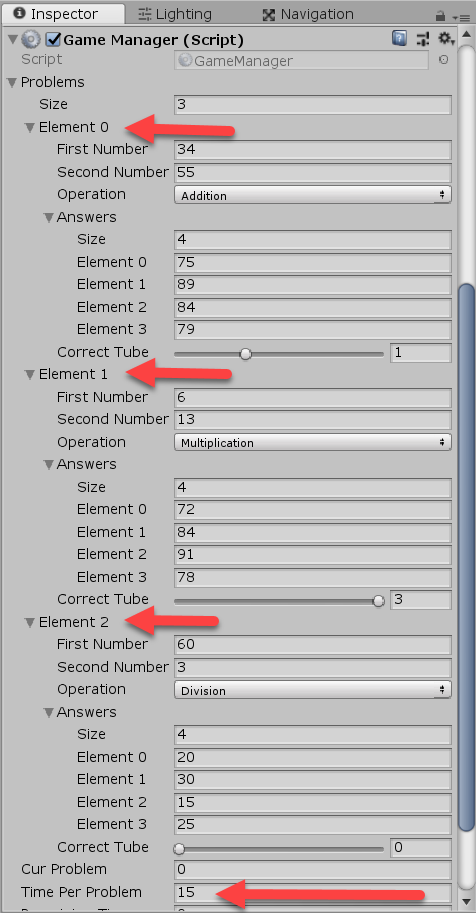
Game Manager Script component with problems array

Creating the UI Elements

It’s going to be pretty hard to play the game at the moment without some UI, so let’s get into that.

What we want to do is have a world space canvas which can hold our text elements. Setting up a world space canvas can be a bit finicky though, so first, let’s create a Canvas.

Then change the “Render Mode” to Screen Space – Camera. Drag the main camera into the “Render Camera” property and you should see that the canvas becomes the same size as the camera.
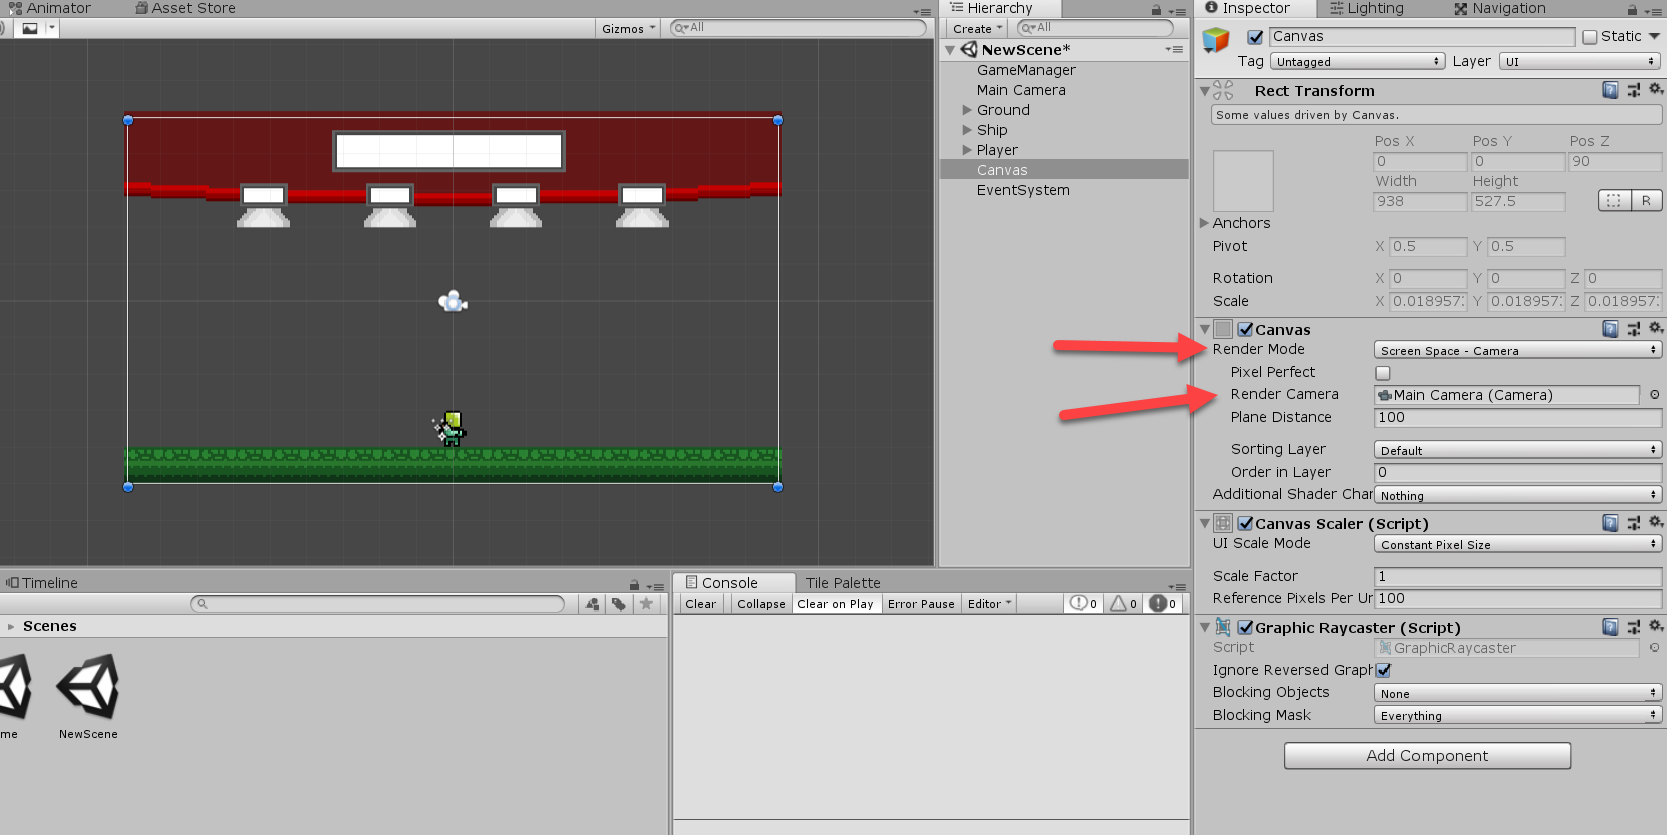
Unity UI Canvas object in the Inspector

Now we can change the “Render Mode” to World Space and sorting layer to “UI”. This prevents us from needing to manually scale the canvas down to the camera size.
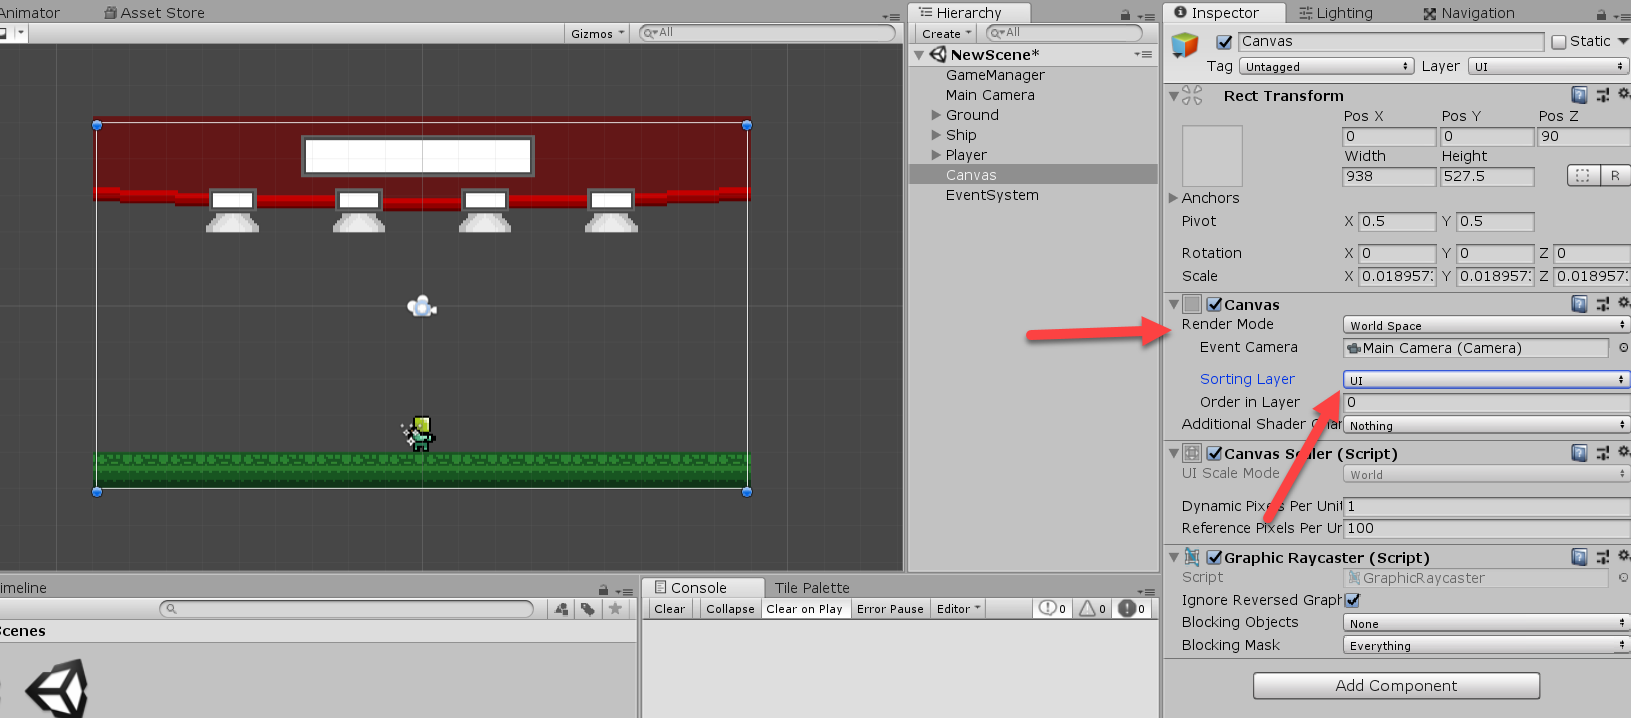
Unity UI Canvas object moved to UI Sorting Layer

Create a new Text element as a child of the Canvas (right click Canvas > UI > Text). Then position it in the middle of the large white rectangle and change the boundaries so it fits.

For the text properties, set it to bold, with a size of 30 and center it horizontally and vertically.
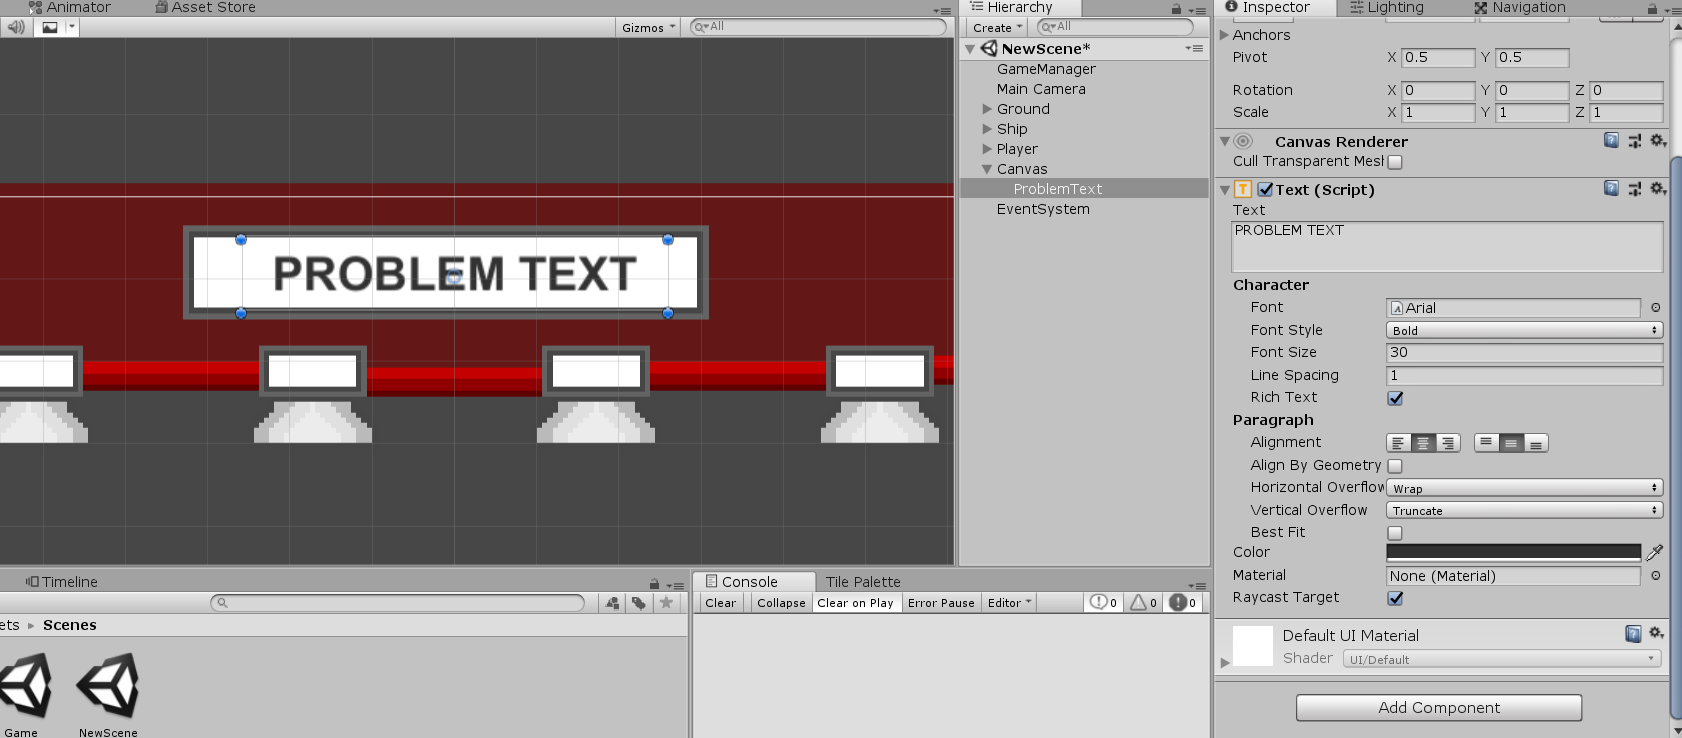
Text object labeled 'Problem Text' added to Unity math game

Then create another Text element for the answer. This is going to be similar to the problem one, but smaller of course.
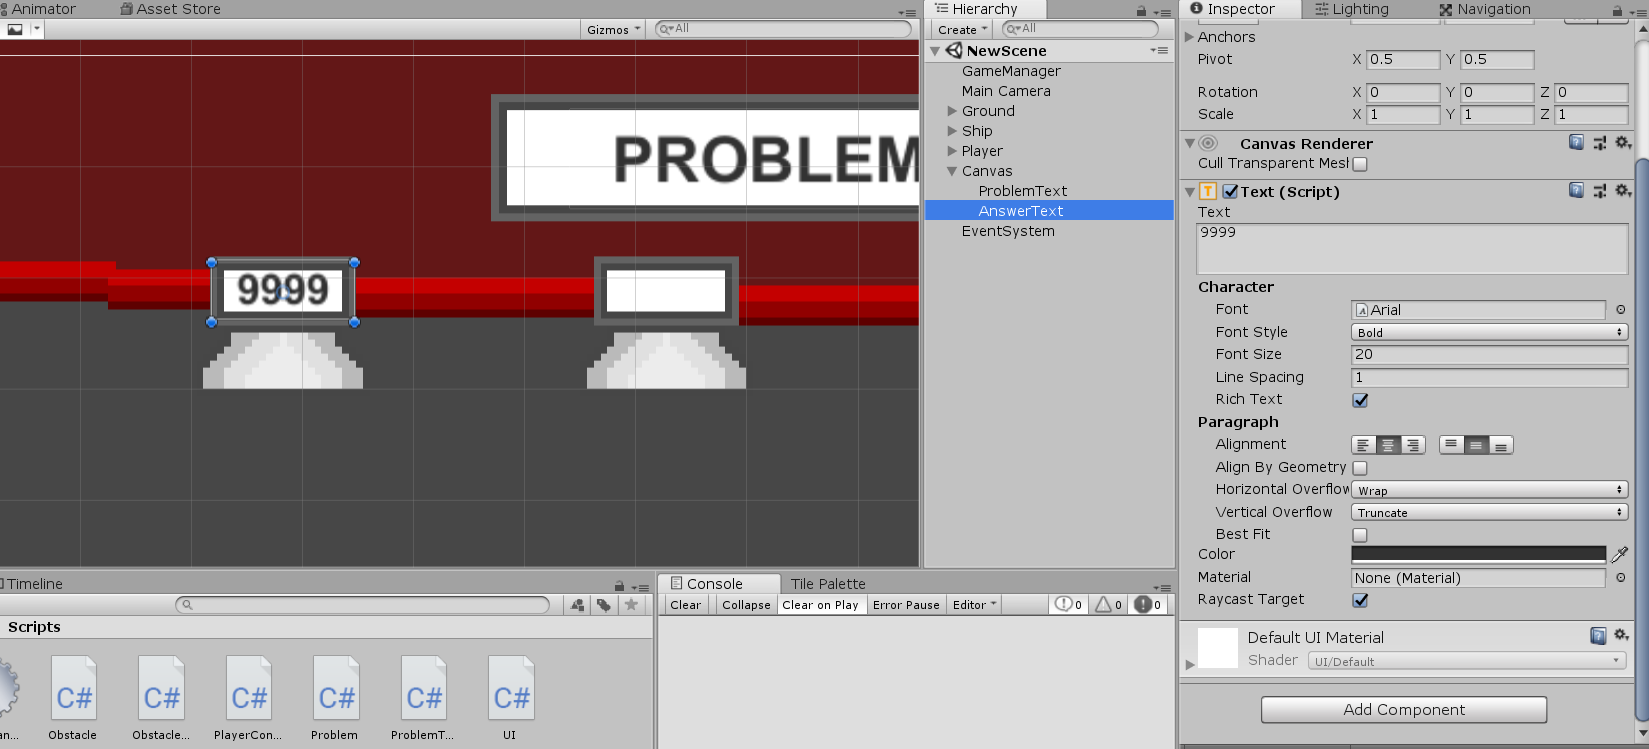
Number text object added above tube object in Unity

Now just duplicate it for each problem tube.

Unity UI with various math problem templates

To show the player how much time they have left, we’ll add in a dial that will retract over time. Create a new Image element (right click Canvas > UI > Image). Then set the “Source Image” to be the UIDial and resize the width and height to be 50. Now to make the image actually be able to reduce like a clock, we need to change the “Image Type” to Filled and then set the “Fill Origin” to Top. Now position it to the right of the problem text.
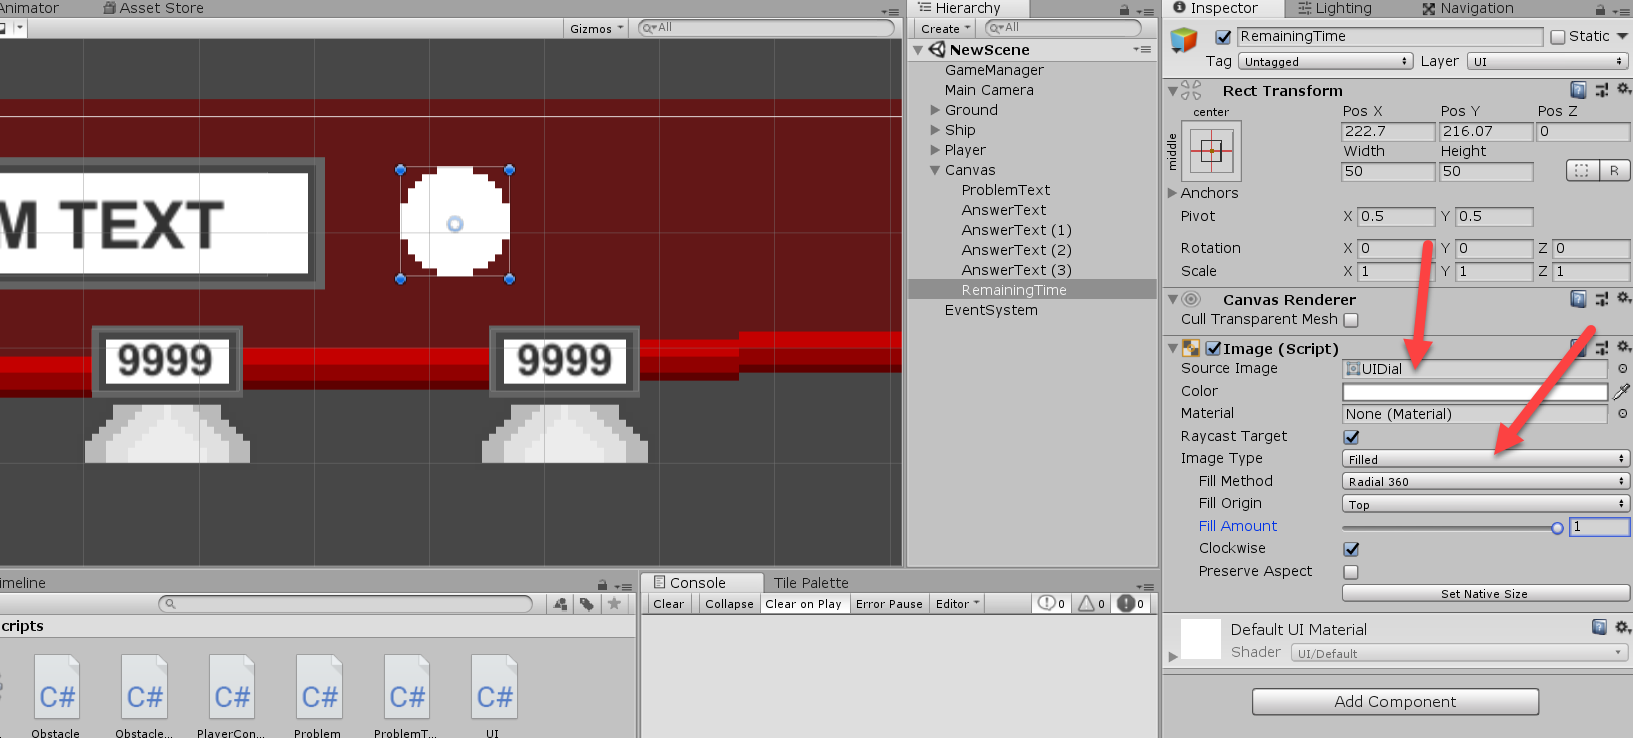
Circle image with Image script component in Unity

When the game ends, we need text to display if they won or not. Create a new Text and place it in the middle of the screen. I added an Outline component since we’ll be changing the text color later on in script. Also disable it, so it doesn’t appear when we start playing.
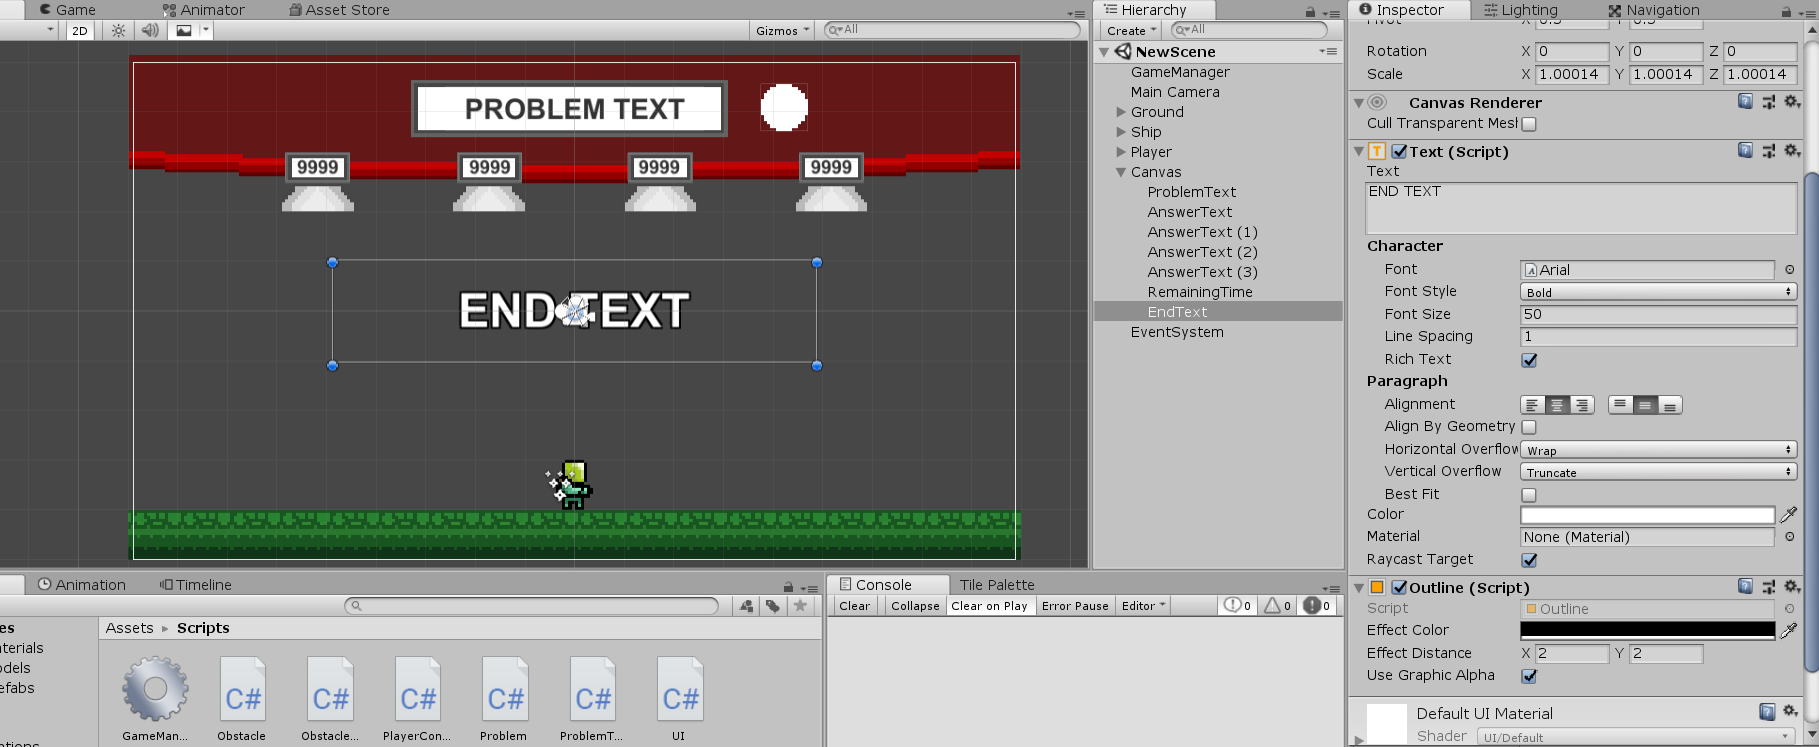
Text object with 'end text' in Unity Scene view

Scripting the UI

Create a new C# script called “UI” and attach it to the “GameManager” object.

We first need to reference the UnityEngine.UI library, since of course we’re going to be modifying UI elements.

using UnityEngine.UI;

For our variables, we have the problem text, answers text as an array. The remaining time dial, end text and remaining time dial rate. I’ll explain that shortly.

public Text problemText;                // text that displays the maths problem
public Text[] answersTexts;             // array of the 4 answers texts

public Image remainingTimeDial;         // remaining time image with radial fill
private float remainingTimeDialRate;    // 1.0 / time per problem

public Text endText;                    // text displayed a the end of the game (win or game over)

We’re also going to create an instance with the UI script, like the GameManager.

// instance
public static UI instance;

void Awake ()
{
    // set instance to be this script
    instance = this;
}

With our time dial, we’re using an Image that is “filled”. This means we can choose what percentage of the image is visible. In our case, we have it radial so it fills up like how a hand goes around a clock.

The “fill amount” is 0.0 to 1.0. Since our remaining time will be around 15 seconds, we need a way of converting 15 to 1 to use in the fill amount value.

void Start ()
{
    // set the remaining time dial rate
    // used to convert the time per problem (8 secs for example)
    // and converts that to be used on a 0.0 - 1.0 scale
    remainingTimeDialRate = 1.0f / GameManager.instance.timePerProblem;
}

In the “Update” function, we’re going to be constantly updating the time dial.

void Update ()
{
    // update the remaining time dial fill amount
    remainingTimeDial.fillAmount = remainingTimeDialRate * GameManager.instance.remainingTime;
}

Now we need to setup the function “SetProblemText” which gets a problem and displays it on the UI.

// sets the ship UI to display the new problem
public void SetProblemText (Problem problem)
{
    string operatorText = "";

    // convert the problem operator from an enum to an actual text symbol
    switch(problem.operation)
    {
        case MathsOperation.Addition: operatorText = " + "; break;
        case MathsOperation.Subtraction: operatorText = " - "; break;
        case MathsOperation.Multiplication: operatorText = " x "; break;
        case MathsOperation.Division: operatorText = " ÷ "; break;
    }

    // set the problem text to display the problem
    problemText.text = problem.firstNumber + operatorText + problem.secondNumber;

    // set the answers texts to display the correct and incorrect answers
    for(int index = 0; index < answersTexts.Length; ++index)
    {
        answersTexts[index].text = problem.answers[index].ToString();
    }
}

Also when the game ends (either win or lose) we need to set the on screen text. “SetEndText” will send over a bool (win = true, lose = false). If it’s a win, the end text will be “You Win!” and the color will be green. If it’s a loss, the end text will be “Game Over!” and the color will be red.

// sets the end text to display if the player won or lost
public void SetEndText (bool win)
{
    // enable the end text object
    endText.gameObject.SetActive(true);

    // did the player win?
    if (win)
    {
        endText.text = "You Win!";
        endText.color = Color.green;
    }
    // did the player lose?
    else
    {
        endText.text = "Game Over!";
        endText.color = Color.red;
    }
}

Now we need to go back to the “GameManager” script and connect the two scripts. In the “SetProblem” function add…

UI.instance.SetProblemText(problems[curProblem]);

In the “Win” function add….

UI.instance.SetEndText(true);

In the “Lose” function add…

UI.instance.SetEndText(false);

Now that we’re done with that, go back to the editor and add the objects to the UI script.

Finishing off the Problem Tubes

The last thing we need to do is add functionality to the problem tubes. Create a new C# script called “ProblemTube” and attach it to all of the 4 problem tube objects we made.

This is all we need to code. We check for a trigger enter with the player and if that happens, call the “OnPlayerEnterTube” function in “GameManager” and send over the tube id.

public int tubeId;  // identifier number for this tube

// called when something enters the tube's collider
void OnTriggerEnter2D (Collider2D col)
{
    // was it the player?
    if(col.CompareTag("Player"))
    {
        // tell the game manager that the player entered this tube
        GameManager.instance.OnPlayerEnterTube(tubeId);
    }
}

Now go back to the editor and enter in the tube id for each tube. 0, 1, 2 and 3.

Conclusion

Congratulations! You’ve now finished your math game!  Try it out for yourself, or share it with your friends.  Either way, you’ve learned to not only set up timers, enemies, and move a character, but how to provide a logic challenge as well.
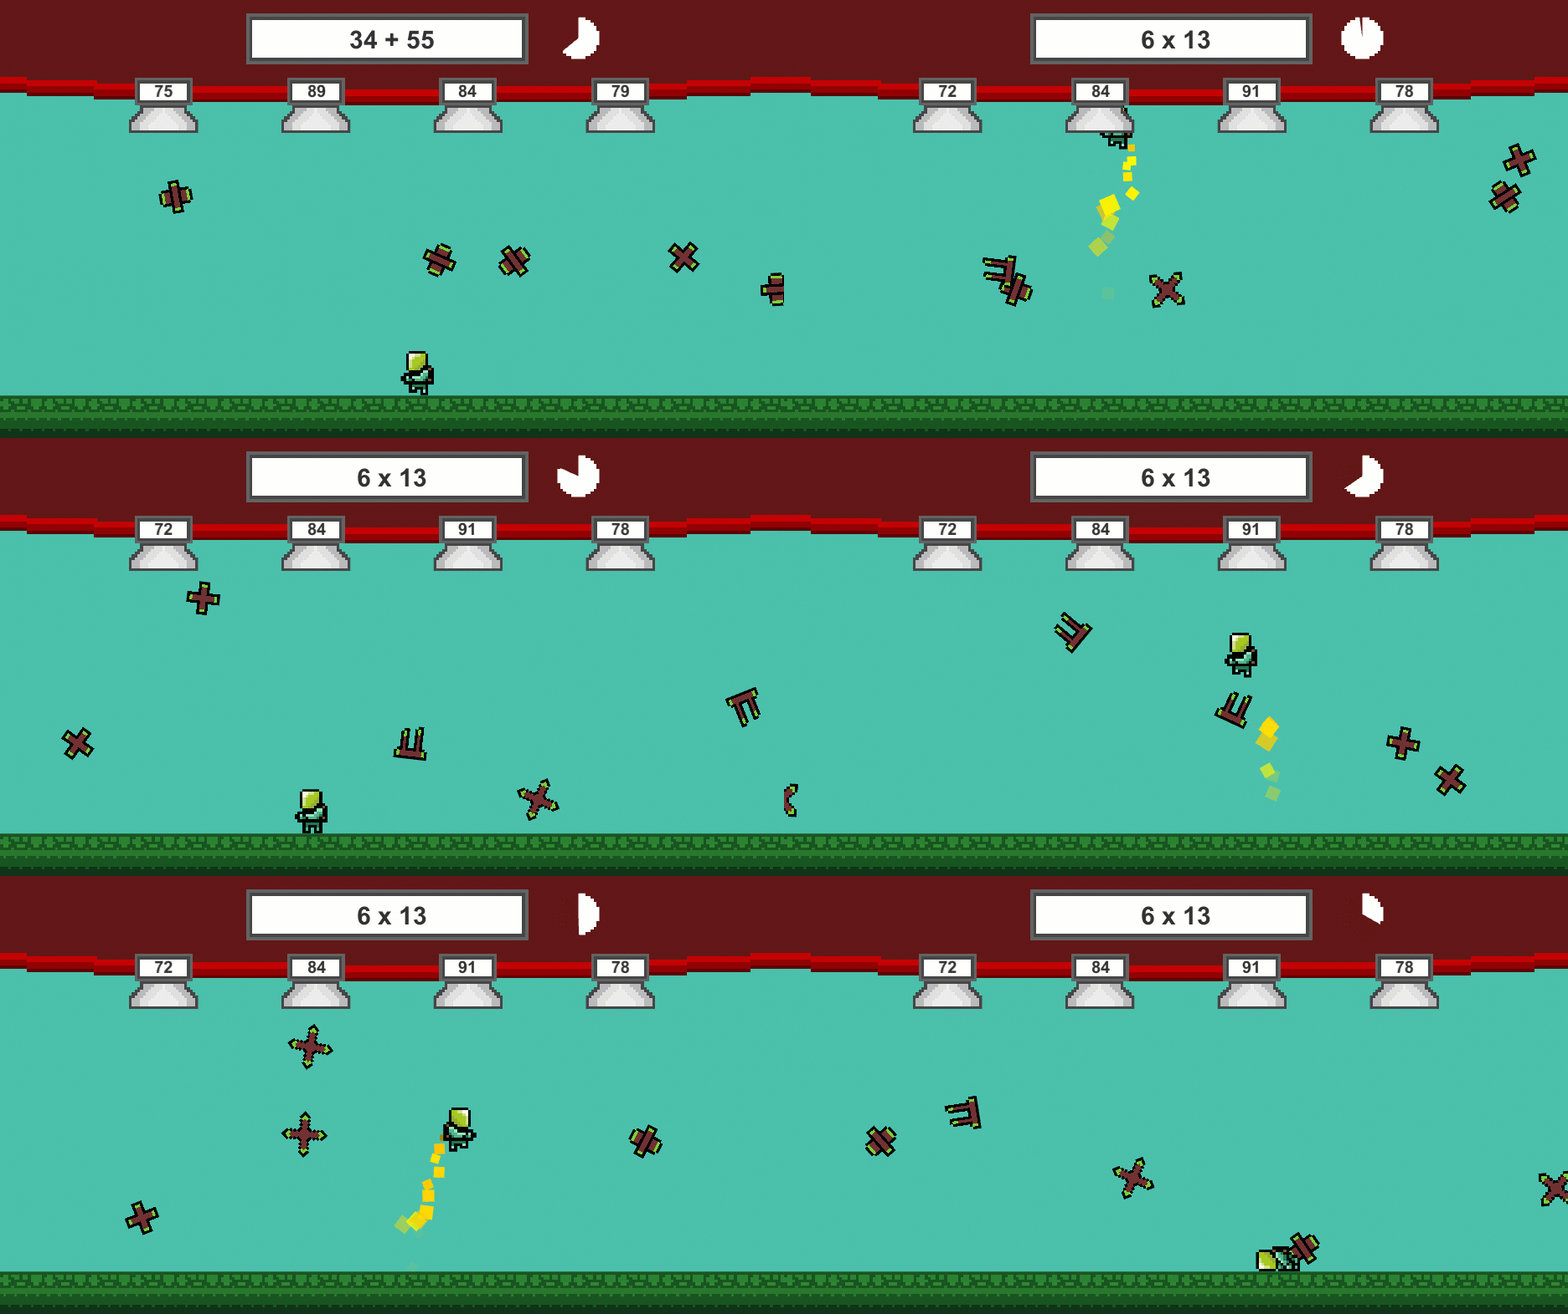
Fast paced Unity math game gameplay


Web Class: Develop a Turn-Based Multiplayer Game

$
0
0

You can access the full course here: Turn-Based Game – Multiplayer Projects

Transcript 1

Welcome, everyone. My name is Daniel Buckley, and I’ll be your instructor for this course. Let’s have a look at what we’ll be making.

We are going to be creating a 2D top-down turn-based strategy game using Unity. This, of course, is going to be multi-player, as well, and it is going to be a one V one game. As you can see here each player can take their turn to move their units and, in a turn, each unit can either move or attack. Each unit also has a set movement distance and a set attack range which is the maximum for that unit. And also when you click on a unit you can see its statistics and as you can see in here the movement the units are moving towards each other and where they will begin to attack. Okay.

Now let’s have a look at how we’ll be creating this. We will be using the Photon Unity Networking framework. This is a free multi-player framework for Unity, and since Unit is now deprecated, this is probably the number one solution. We’ll be creating some units. Each unit will be able to move and attack and each unit also has a max movement and attack distance and they can choose to either move or attack each turn. And as you can see here we have two types of units and really all this involves in creating two types of units is just to change the properties inside of the inspector, just changing the sprites and changing the values for the movement, attack, and speeds and such.

In order for two players to get together to play a game, we will be creating a lobby system. This will involve the player entering in a name and then clicking play game, and what this will do is it’ll either create or join a room. If there are no rooms available, the player will create a room and wait for another player to join. If there is a room available, it’ll pick a random room and join that one.

This will all be done using Unity’s UI system. We’ll be working with canvases, text elements, buttons, input fields, and more. As you can see here, we have quite a few different UI elements, and we’ll be going over each of them explaining how they work, how we can change them, how we can connect them up to a script, and also with anchoring and positioning on the screen.

Zenva is an online learning academy of over 400,000 students. We feature a wide range of courses for people who are just starting out or for someone who just wants to learn something new. The courses are also very versatile. You can choose to follow along with the included project files or even follow along with the included lesson summaries. So you can choose to watch lessons, read them, follow along, or really whatever you want.

Thank you very much for watching. Now let’s get started on our project.

Transcript 2

Welcome back, everyone. In this lesson we are going to be setting up our project.

First of all, let’s set up our actual project folder structure. So down here in our project window, what we want to do is create a new folder, and this folder here is going to be called our Sprites. And this, of course, is gonna hold all of the sprites for our game. Now, we can also create another folder, and this folder is going to be called Tilemap. Because for the background of the map, we are just gonna be using Unity’s Tilemap tools to do that.

And what else we need is one more folder called Resources. And Resources is where we’re gonna be storing all of our Prefabs that we’re gonna spawn in. And the reason why we don’t- not resource, resources – and the reason why we don’t put this in a Prefabs folder is because Resources is a folder that Unity can actually identify and access. And the reason why we need that is because Photon to instantiate an object, you don’t actually instantiate it by a Prefab, you instantiate it by Prefab path, in the Resources folder. So everything that you want to instantiate over the network, you need to put in the Resources folder. So that’s what we’re doing there. Okay.

Now let’s go inside of our Sprites window here, in our Sprites folder. And what we need to do is import a few of our Sprites. The first one is going to be our cursor selector. This is gonna be what appears on the grid to show you which tile you’re selecting. We also need our- we also need our soldiers. This is gonna be one of our units. And then we also need our tanks. This is gonna be our other unit.

We also then need our tile, which is going to be the grass tile that we’re gonna be using. You can choose to use whatever tiles you want. And finally we need a white square, and this is gonna be for the health bar. Now with these five assets here, these are actually using free artwork by Ken, who actually has a wide range of free assets on his website. There will be a link down in the lesson summary to that.

Okay, so first of all what we need to do is actually convert these sprites into something we can use. ‘Cause right now, they are actually set as material. Not materials, but actually as normal textures. But we wanna convert these to Sprites. So let’s select all of these here, and up here in texture type, we want to change this from default to Sprite 2D and UI. Now you can click on the apply button and you should see they now fit to their proper aspect ratios.

Okay, but there are a few things we also need to do, and that is changing the pixel ratio. For the tile grass one here, what we need to do is change the pixels per unit here to 64. And that is because there is 64 pixels horizontally and vertically here. And what we’re gonna do is we wanna make it pretty simple, we wanna make it so that this tile here is one by one unit’s large. Just makes it much easier to work with. So we’ll click apply.

And we actually wanna do the same thing for the soldier and the tanks. So we’ll select all those, change their pixels per unit to 64. Hit apply as well. And for our cursor selected, what we want to do is also do this for 64 as well. Because as you can see down here, this is also a 64 by 64 image, so we’ll do that too. Hit apply. And that should pretty much be it.

Now what we can do is actually go create our scenes. So in our scenes folder here, it should be already pre-built by Unity. We can click the sample scene here. And create a new scene and we’ll call this one Menu. And then we can also create another scene and this one we’ll call Game. Now let’s open up the Game scene. I don’t save the Sample scene. And inside of here what we want to do is create our Tilemap. So, to create a Tile map inside of Unity, which is basically just a bunch of tiles that Unity meshes together in one large sprite.

Actually first of all what we want to do is change our main camera and put it into more of a 2D mode, ‘Cause right now this camera is set for 3D. So what we can do is select the camera and change the projection here from perspective over to orthographic. And what this is, this basically is the difference between capturing depth with perspective, which is what you’d use for 3D. Objects that are further away become smaller. Where as we want orthographic, which means that no matter the distance away the object is, it maintains the same size.

With that then we can also change the clear flags from Skybox to Solid Color. And this makes it so the background is a solid color. We’ll be getting into this a bit more detail later on when we actually get our tile set up, but for now we’ll just leave it for this blue here. And everything should be all right.

So, to create our tiles what we want to do is right-click on hierarchy, go 2D object, Tilemap. Now if we go to the Scene view now you’ll see if we click on this 2D icon up here, this will take us into 2D mode. We should see that if we clicked our grid, we now have a bunch of little squares that we can draw into. But in order to draw in these squares, we need to open up the Tile Palette window.

So let’s go to Window, let’s then go down to 2D, Tile Palette. And this will open up this window here which allows us to create a new palette. Let’s actually do that now. So click on Create New Palette. And we’ll call this one here TurnBasedBackground. Let’s click Create. It’ll ask us to save it somewhere, and we want to save this inside of our Tilemap folder here. Select that folder, and it’ll create it.

Now in order to actually add tiles, let’s go our Sprites folder, and drag in the Tile grass one. It’ll ask us to create it as an asset. We’ll go back to our Tilemap folder and just click save. And there we go. We now have this tile that we can draw with. So if we go into the Scene view here, we can begin to actually draw. If you have this brush here selected, this is the brush tool, we can then start painting.

But you might notice that this is fairly large, and we actually wanna reduce the size of this, of the map. Just so it’s a lot smaller. You can choose of course to make it larger. We’re gonna make it a bit smaller now, so it’s a lot more concise and we can get into battle quicker.

So we’re gonna click on the main camera, and change its size from five down to four. The orthographic size is basically how much, how many units are from the center of the camera to the top and bottom of the frame. So you can see they’re right now four tiles from the top to bottom. So it’s eight in total in the height. And what I want to do is select our grid again, and let’s just fill this in with the green tiles. There we go, it’s finished. I had to put the tile out here a bit more, since they did kinda cut over the edge of the camera.

And also with this game, we are gonna be making it for a 16 by nine aspect ratio. You can, of course, choose to make it whatever aspect ratio you want, but 16 by nine, that’s good for 1080p screens. Pretty much any sort of monitor will be able to run this in 16 by nine.

And yeah, so if we go into Game view now, we can see that our scene is filled with these green tiles, and we’re ready then to start making our game.

Apart from this though, what we need to do is we can close this Tilemap, Tile Palette window off now. And what we want to do is actually go to our Menu scene, and we’re just gonna set that up for 2D as well.

So, we’ll save the Game scene. Go to the Menu scene. And if you look in the Game view, you can see that once again this camera is still built for 3D mode. So let’s change that from perspective to orthographic. Skybox to Solid Color. And let’s exchange this background color to something, we’ll change this to like a green. To show that it’s sort of part of this military sort of themed turn-based game.

And speaking of backgrounds, let’s actually go back to our Game scene. And you might want to notice that there is no grid, because in this sort of game that’s grid-based, you might want a grid here that actually divides the tiles up so you can see exactly how many tiles away you are from something. And to do that what we’re gonna do is click on, not our grid here, let’s go to our Sprites. And what we can do is actually change this pixels per unit here from 64 over to something for example 65. Click apply. And it makes the Sprite slightly smaller, to show that it’s visible like that. Let’s actually change this from 65 to 66, opps 66, just so the lines are a bit more bold like that. There we go.

And what we can do now is actually change the main camera background from blue to whatever color you want the lines to be. You can have them black or white, but for us I think we’re gonna go for a dark green. So it still sorta blends in with the environment, but it’s still easy to tell where those lines are. Yeah, something like that I reckon.

Something else we need to do is also add in some sorting layers. ‘Cause since we’re working with 2D Sprites, we need to tell Unity which Sprites should be rendered over specific other Sprites. Now to do that let’s go up to the Layers button up here and click Edit Layers. Now in here we can open up the Sorting Layers window here, and we can start adding in some sorting layers.

So we can click on the plus here, and we’re gonna enter in UI. We’re gonna add another one, we’re gonna add in Background. Then we’re gonna add in Unit. And let’s rearrange these now so they are actually in the correct order. So we’ll have UI right the front, and then we’ll have Background at the back, and Unit here.

Okay. So with that done we can now actually set our grid to have the background Sprite, have the background sorting list so we can click on the Tilemap here, and then we can go to where it says Sorting Layer, and we’ll change that to Background.

Okay so that’s pretty much it for setting up our project. We’ve imported all the Sprites we need. We’ve got our Menu scene and our Game scene set up and ready to go to start creating our turn-based game. See ya, I’ll see ya’ll in the next lesson where we start to create our network manager.

Transcript 3

Hey everyone, in this lesson we are going to go over two important concepts before we continue on with our project. And these two different concepts are going to be very important in actually being able to relay information over from one computer to another inside of Photon.

The first is Remote Procedure Calls, or RPCs. RPCs allow you to call functions on other player’s computers. So just like on your computer, when typing code you would just go FunctionName, and then brackets. That is how you will call a function, for example.

But let’s just say you wanted to call a function, for example, you have an enemy and you wanna damage them and you wanna call the take damage function on them. Well, normally you would just call their take damage function, but in order for that player to actually have that function be called on their computer, you need to do something. You need to call an RPC, and here is how we can do it.

There’s two different ways to do an RPC. The first one is you go PhotonView, we’ll get to that soon. Dot RPC, and then in brackets, you have the name of the function as a string, and then comma, and then you enter in the player you wanna do, you want to send it to. And this is a Photon player. Remember where you had the player class, which is the Photon Player? And that is the person we want to send this to. And then you can have some parameters there if you do have parameters.

The other way, though, is sending it to an RPC target, and this is not extending it to an individual person, but sending it to a group of people or a specific group of people in a certain way. Here are all the different RPC targets. We have All Via Server, Others, Master Client. All Buffered, All Buffered Via Server, and Others Buffered.

All executes the function instantly on your computer and sends that function out to everybody else inside your room to call that function on their computer. All Via Server sends that function call up the server, and then from the server it tells everybody, including you, to call that function. Others sends that function to everybody else but you.

Master Client sends that function to the Master Client. And then we go into the buffered. Now, what buffered means is that it will actually cache that function call, so what it means is that, let’s just say you call the change color function, for example, just a hypothetical function, and it changes your color to blue. You could call that with All, for example, but what if somebody was to then join the game after you call that? You join the game and, for them, for you everyone’s blue, yet for them nobody’s blue.

The way to have a function call for them that has already been called is to set it in All Buffered. And what this does is cache that function for when new people join the room – it will call that function on their computer. So you’ve got All Buffered, and then you’ve got All Buffered Via Server, and then you’ve got Others Buffered, okay?

So that’s pretty much the gist of RPCs. We’ll get into those in more detail when we start actually using them. But for now, this is just a brief overview on what they do and how we are going to used them in the project. And we are going to use them quite a lot in the project.

Okay, so let’s move on to our next concept, which is the PhotonView. Now a PhotonView is a component which identifies an object across the network. This, if you want to call an RPC to an object, that object needs a PhotonView. Because in Unity, at the moment, how does Photon know which objects are the same across the network?

Each game object does have its own instance ID for the game object, but that is randomly generated and it is actually different, of example, if you had two instances of the game launched, and you had to spawn in an object, that object would have a different instance ID from the other. So at the moment, there is no real way for Photon to know which objects are the exact same across different players’ computers.

And the way you do that is with a PhotonView component, and more specifically, the View ID of that Photon View. So each object inside the world has a unique UID, each player, the network manager, the game manager, the menu, all that sort of stuff, each has its own unique UID. So that Photon, when you send an RPC to that object from across the network, it knows exactly where to send it.

And there’s also different types of PhotonView extension components, for example. You can see that there is an observed components list that you can add stuff to, and what we’re going to be doing is, for our units, we want to be able to actually sync the position of these units across the server.

So when you click on a unit and move them, we want that movement to not only, you know, of course, it’s gonna be moving on your screen, but how are we gonna tell other computers, other people in the room to move that object, as well? We are going to be using something called a Photon Transform View, and what this does is, if you attach it to an object, that means that whenever that object moves, that position, or rotation, or scale will be updated across everyone’s computers automatically, instantly. And it also adds some smoothing, as well, so it’s not jittery.

That just prevents – that just doesn’t require us to do lots of code where we’ve gotta send the new position, receive it, and then serialize, not serialize it, but actually then lure it between your position and the new position. That’s what you used to have to do with networking, but now there’s that component, which makes it much easier. And we’ll get into that in more detail, of course, later on when we get to it. And of course, when we start using our PhotonViews, we’ll get into that in more detail, as well.

So for now, that’s just the brief overview of what an RPC and a PhotonView is. For sure we’ll be using these quite a lot throughout the project, as they are really the core of making a multiplayer game inside of Unity and being able to actually transmit information and Sync up value between computers. So yeah, I’ll see y’all in the next lesson when we actually begin on using these PhotonViews and RPCs.

Interested in continuing? Check out the full Turn-Based Game – Multiplayer Projects course, which is part of our Multiplayer Game Development Mini-Degree.

How to Animate a 2D Character in Unity

$
0
0

Introduction

At the very core of animation is an illusion. The “Illusion of Life” is what it is called. We think an animation looks the best when it produces a greater illusion of a living character. This makes sense, does it not? When we see an animation of a living character, it triggers a memory or recognition of a live being we have seen in real life. Therefore, the task of the animator is to closely follow the rules of movement that we see in the real world because that will greatly increase the illusion that what you are seeing is a real being, moving and functioning. And this is the goal of this tutorial. We are going to start creating this “Illusion of Life” for a 2D character.

This tutorial uses a character that was rigged in this tutorial: Rig a 2D Character in Unity. Please check this out if you would like to learn more about the sprite rigging process in Unity and if you want to be able to follow along in this tutorial. We will be animating a character to run, walk, idle, and jump. The end result is a sprite ready to be scripted into a 2D character for your game.

Requirements and Assets

Basic knowledge of the Unity Editor (how to navigate and open tabs) is required along with how to work with the Unity Animation window (here is a tutorial that will tell you all you need to know about it: How to create animations from models and sprites). You will also need the character that was rigged in this tutorial. You will not be able to follow along without that character. This was rigged with the Sprite Skinning features in Unity and this contains the “2D Animation,” “2D IK,” and “2D PSD Importer” packages that are necessary to run this project. Also, this tutorial will focus on animating not the Unity Animator. If you are looking for information on the Unity Animator, check out this comprehensive guide to the Unity Animator: https://gamedevacademy.org/unity-animator-tutorial/

The source code for this project can otherwise be found here.

Animating!

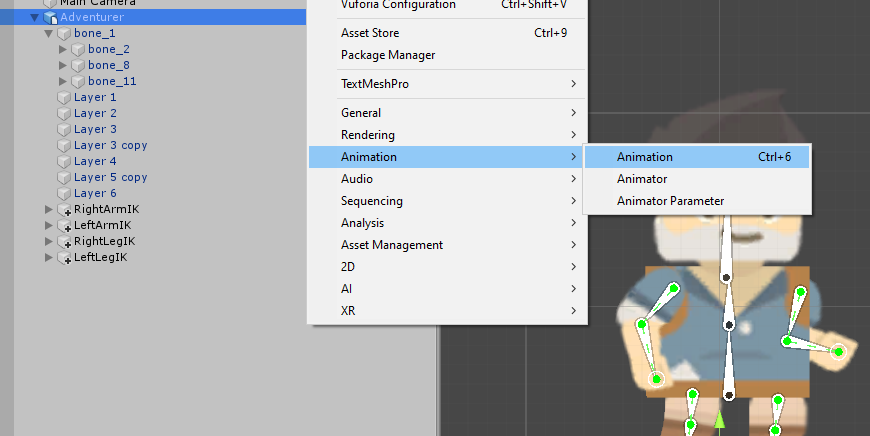
Select the Adventurer character and open up the Animation tab.

Opening the Animation window

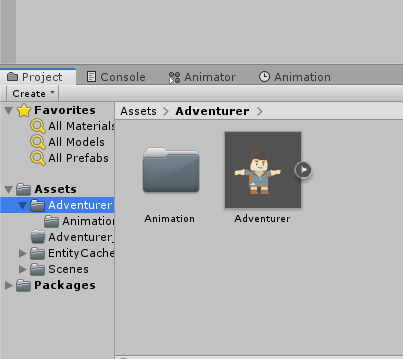
Dock this next to your project and console tab. Now, go to your project tab and open up the Adventurer folder. Create a new folder called “Animation.”

Animation folder in the project tab

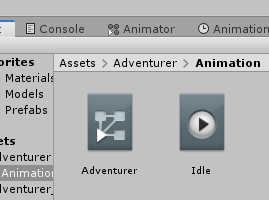
Now we go to the Animation tab and create a new animation called “Idle” that will be housed in our Animation folder. This will also create an Animator Controller in that same folder.

Idle animation in the animation folder/

Now, let’s start animating this character!

The Idle Animation

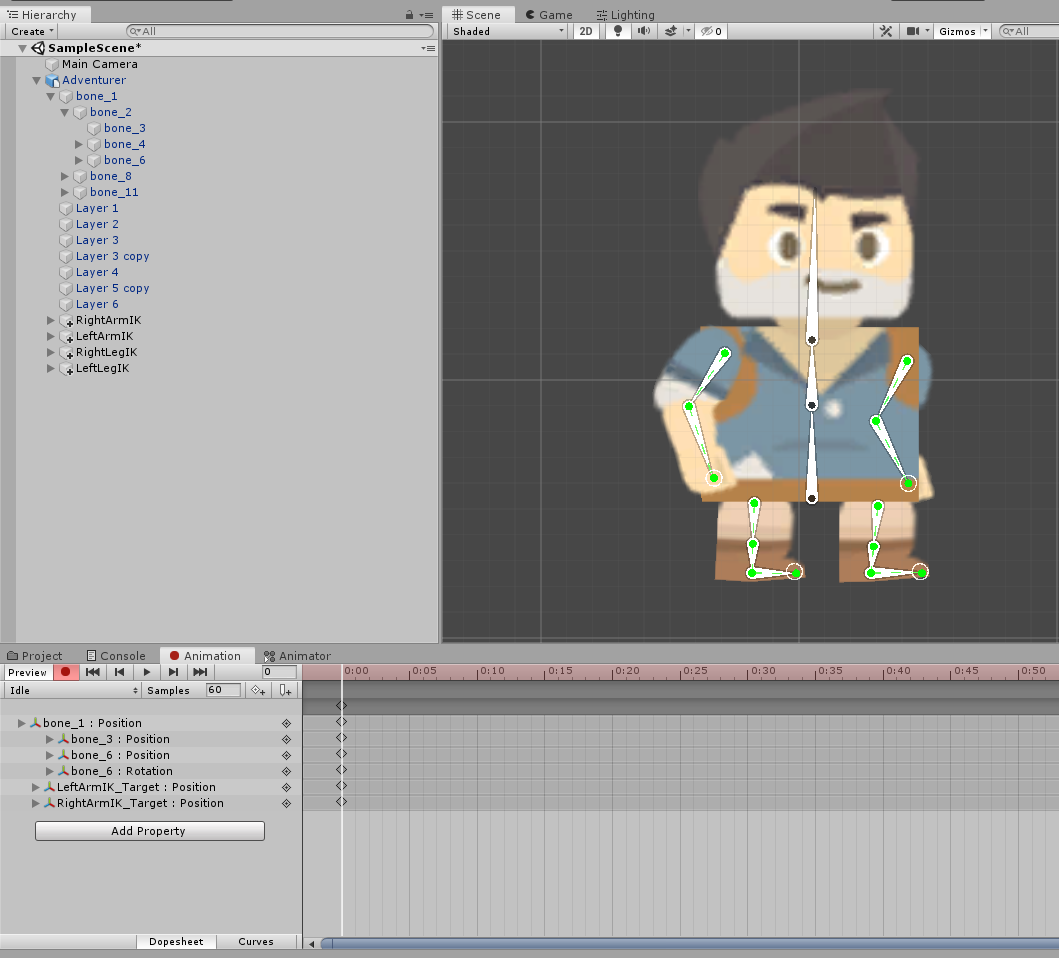
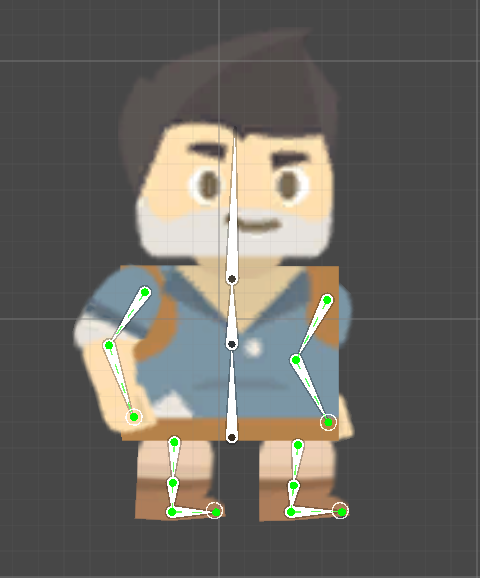
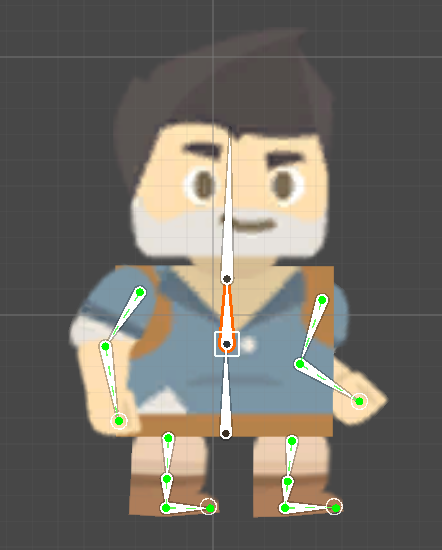
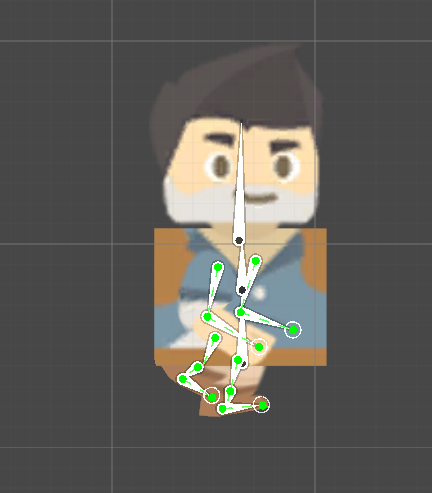
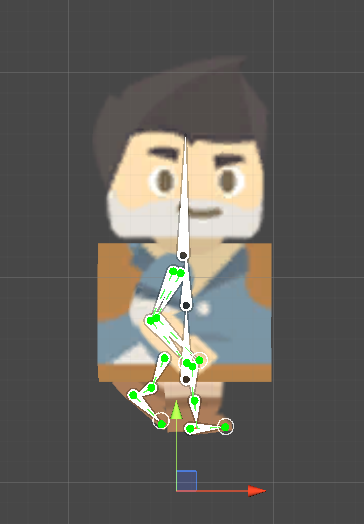
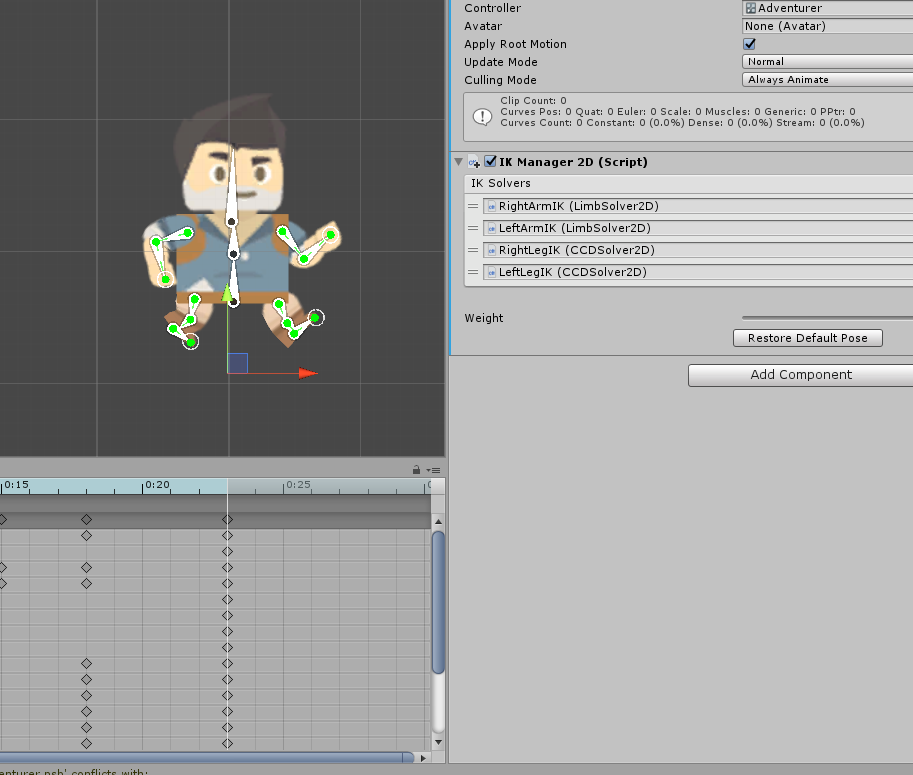
When it comes to the idle animation, the IKs really contribute a lot to the efficiency and speed of animating. We just need to animate a subtle movement, almost like just a breathing motion. Hit the red record button and move the character to this position:

Idle animation pose #1

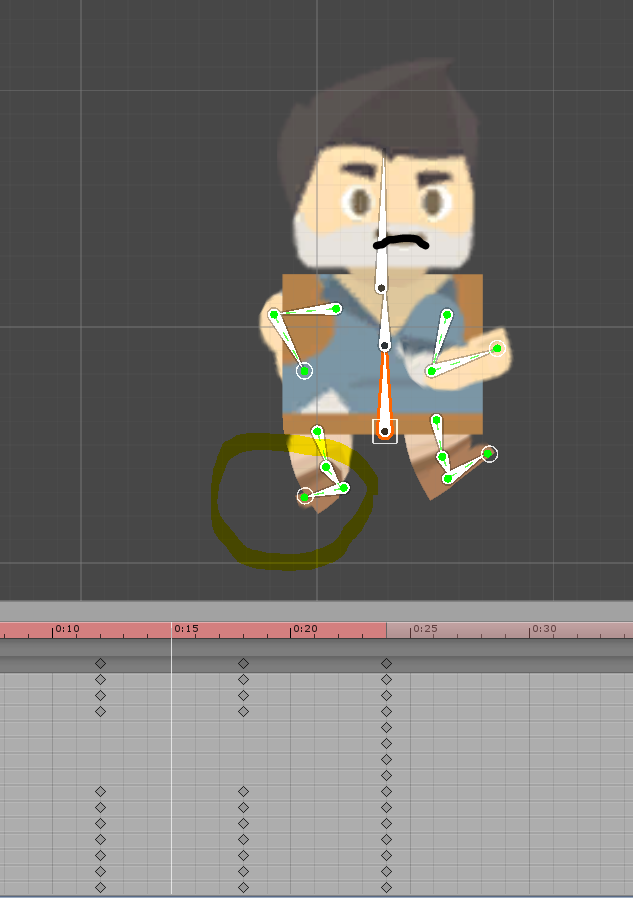
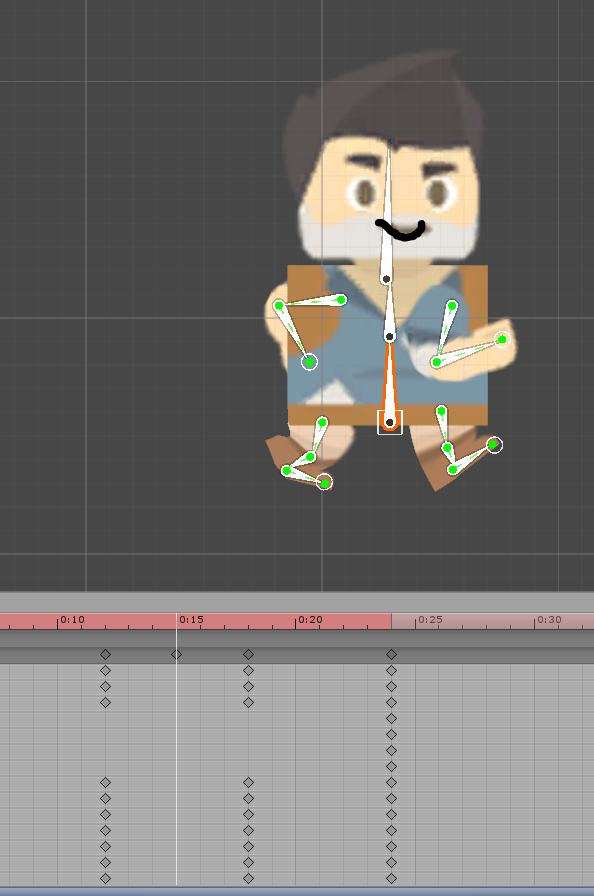
Now go about fifty frames ahead and just barely move the top torso bone straight down. Move the arm IKs to the side so that there is a bit less bend in them and so that there is a sort of “swinging” motion. Here is the pose that I chose:

Idle animation pose #2

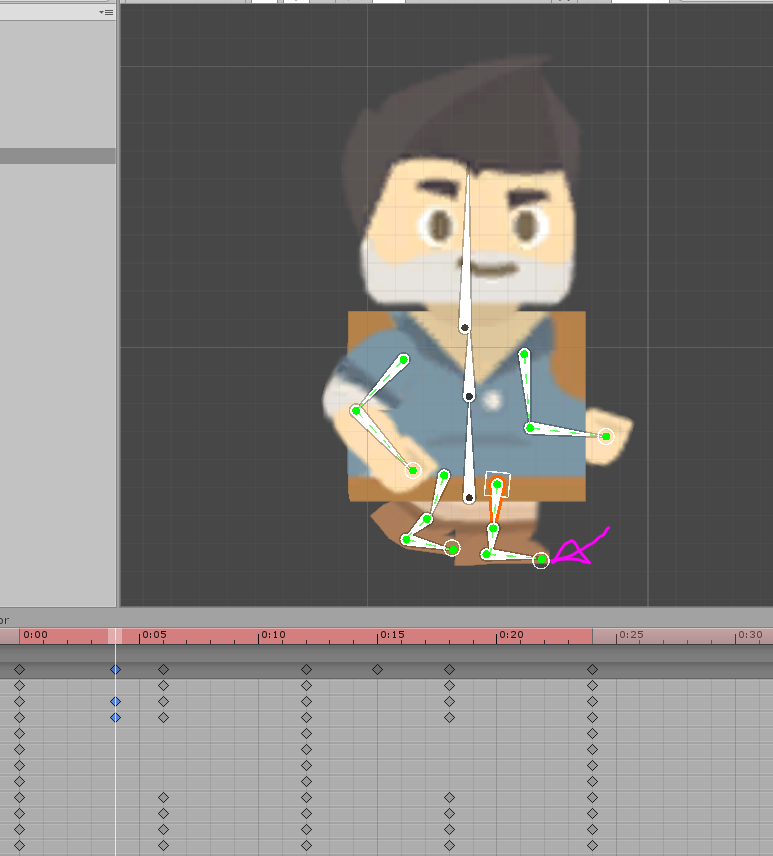
This is just a subtle tweak. If we make large movements, it makes the idle animation look strange. Next, select the first group of keyframes and hit Ctrl-C (Command-C on a Mac). Then paste these keyframes on frame number 1:50.

Final Idle animation pose

Now, we have a nice looping animation! It looks decent but I think we need to add some head motion to enhance the illusion. Just have the head rotate backward ever so slightly. As you can see, it makes a huge difference. Alright! Congratulations! We now have an idle animation!

Idle animation gif

Walk Animation

Create a new animation clip called “Walk.”

Walk Animation being created

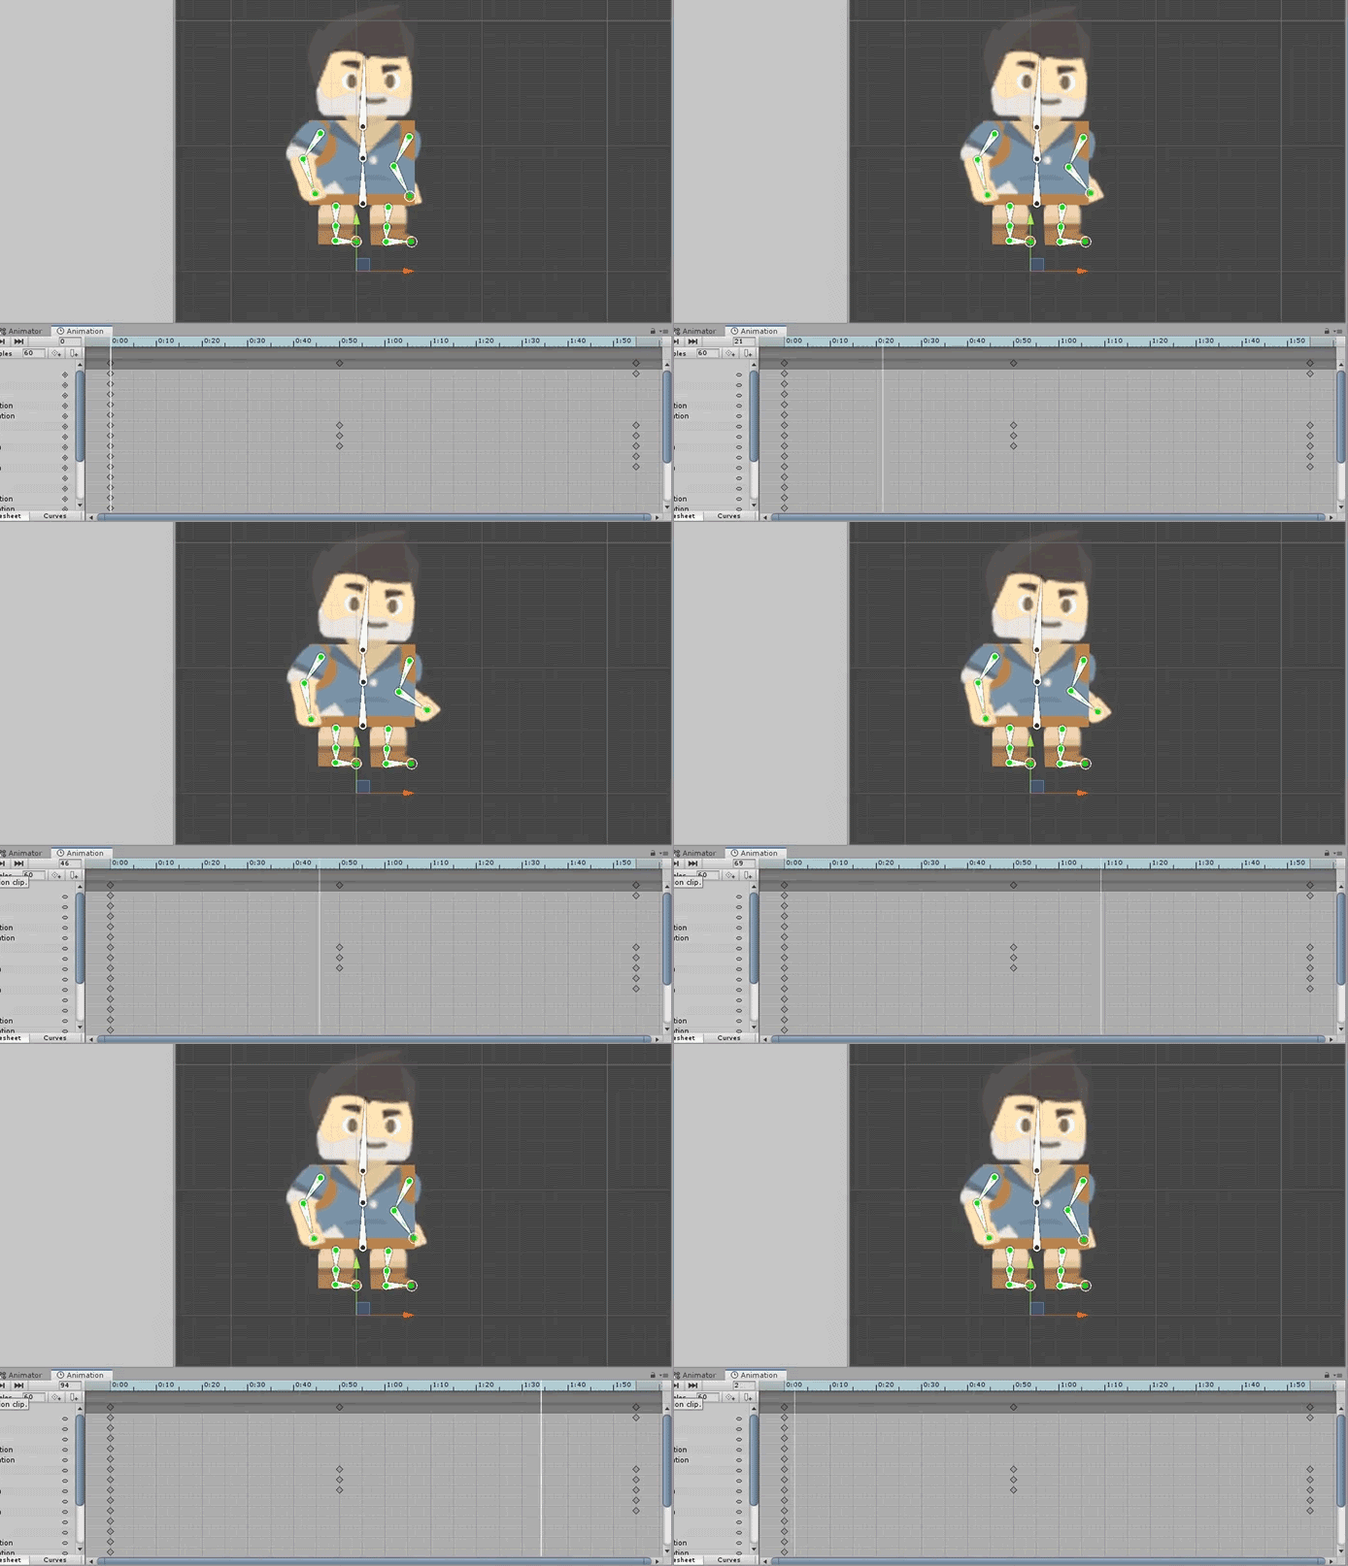
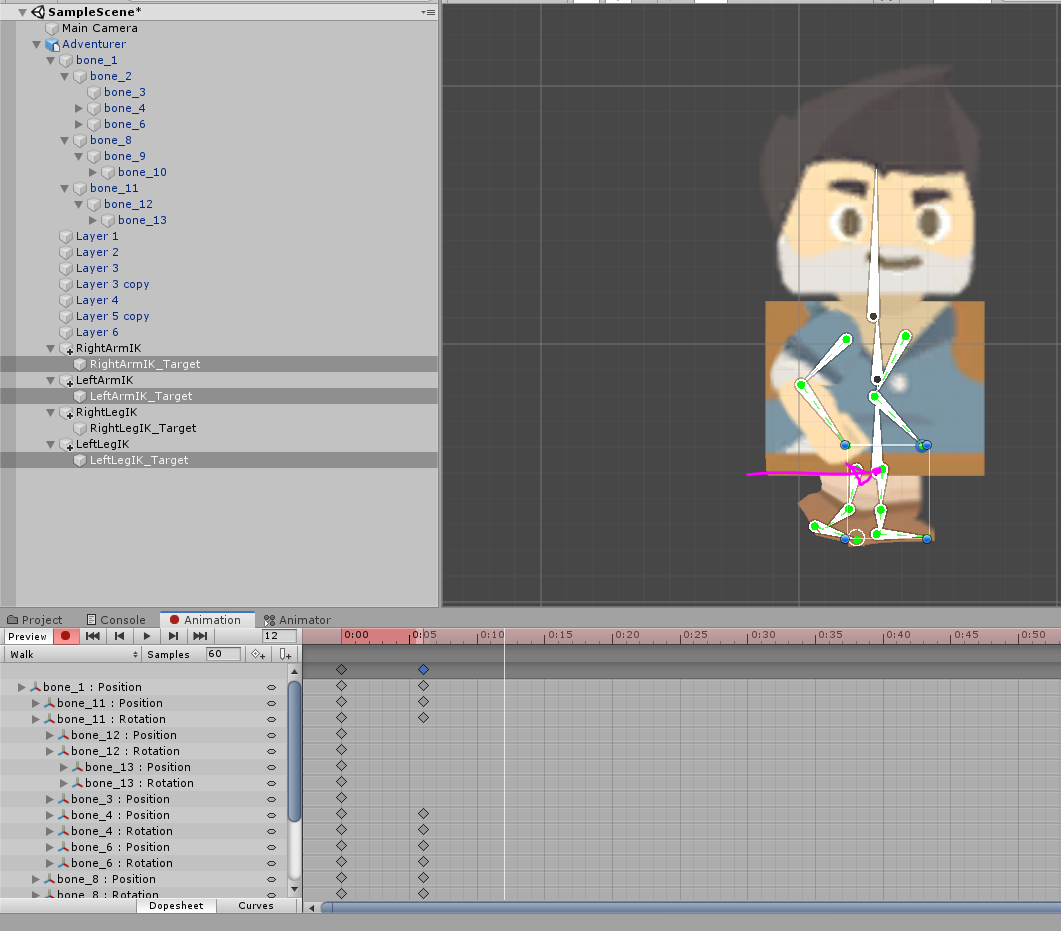
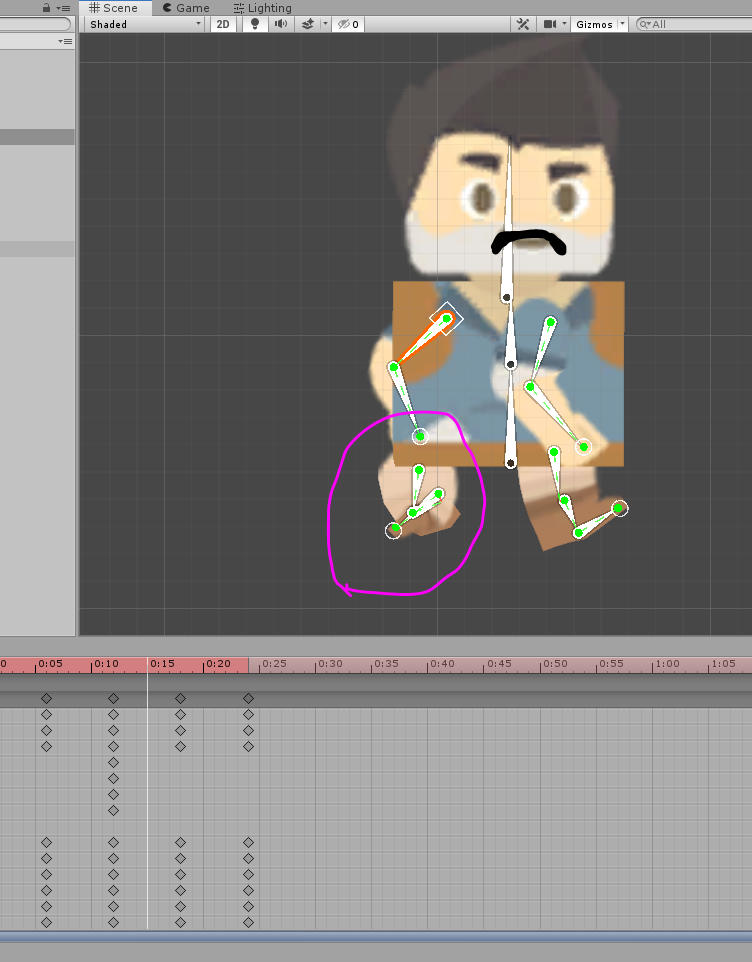
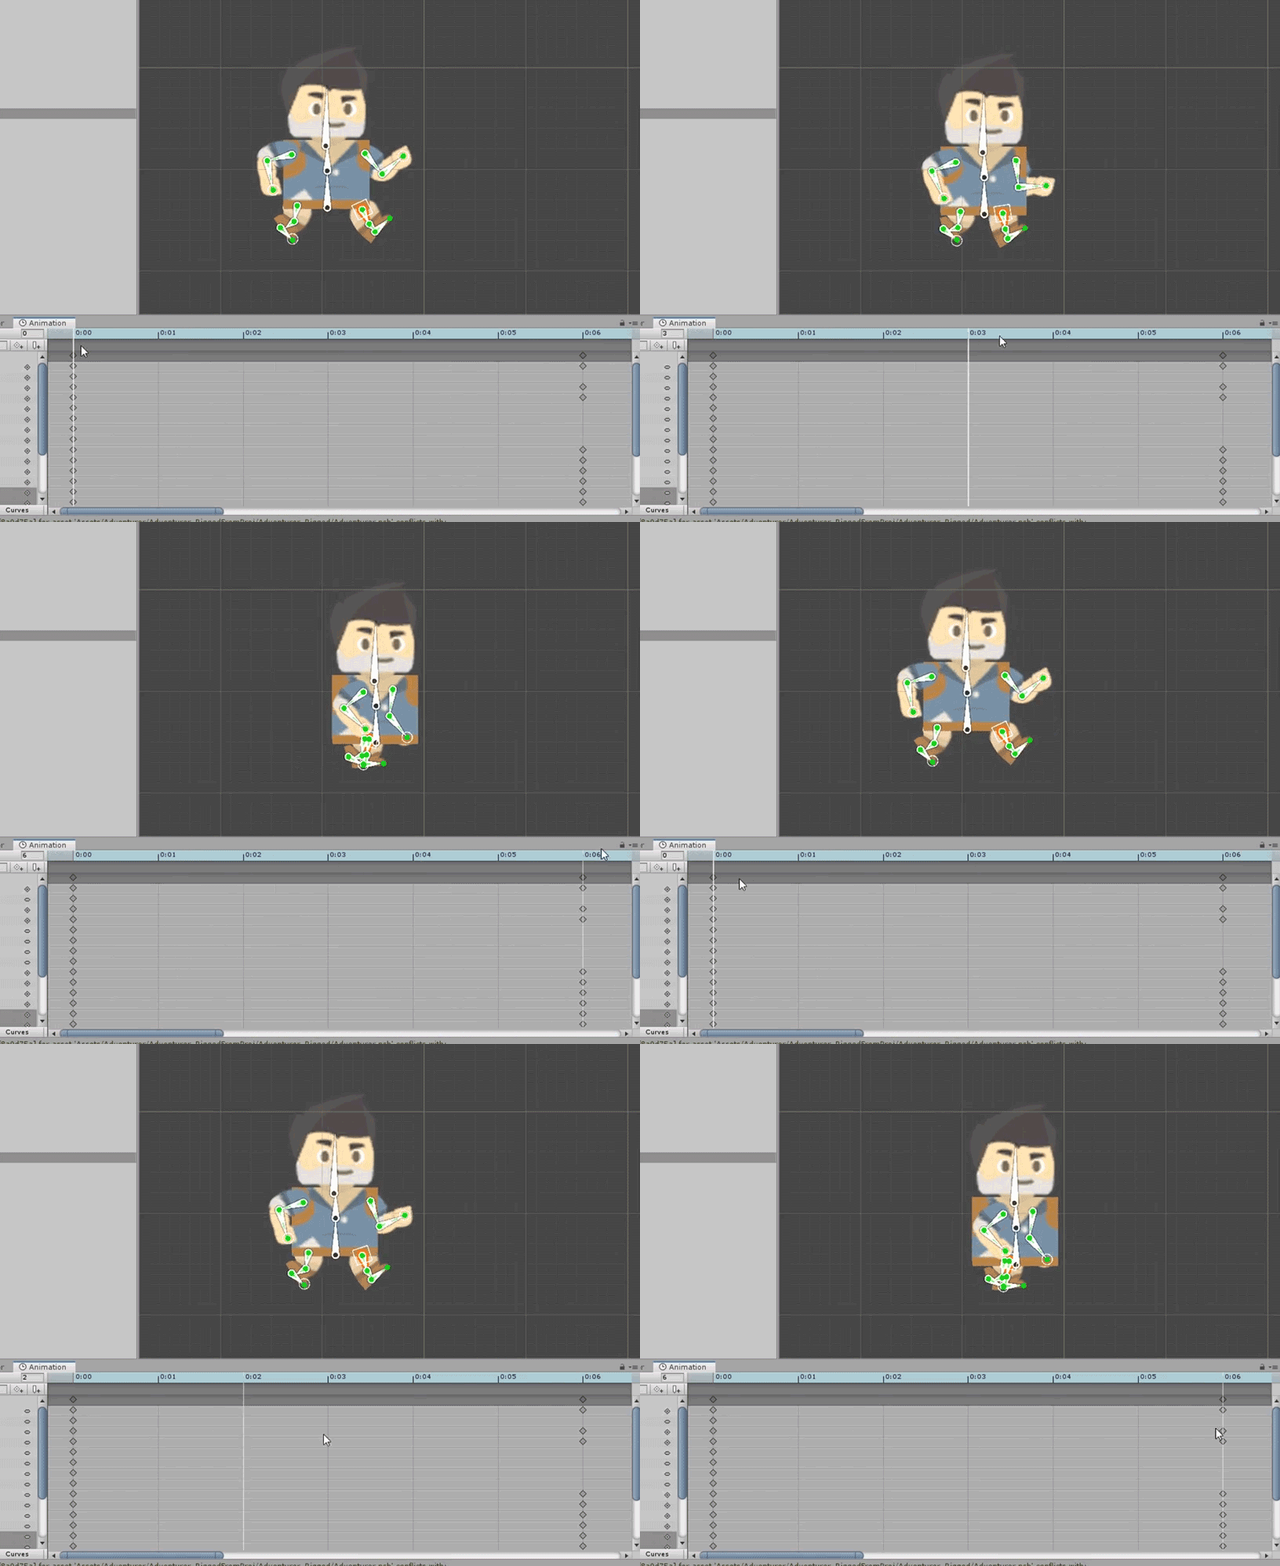
This animation is a bit more technical. Here, we need to know a few important things about the walk locomotion. The main feature of a walk animation is that the character is always touching the ground. We should never have a pose where our character is airborne. Also, I use the word “pose” intentionally. When we animate in 2D, an action is made up of a few key poses. In the case of the walk animation, we have one pose like this:

Walk animation pose 1

As you can see, here we have the right foot (relative to the character) touching the ground.

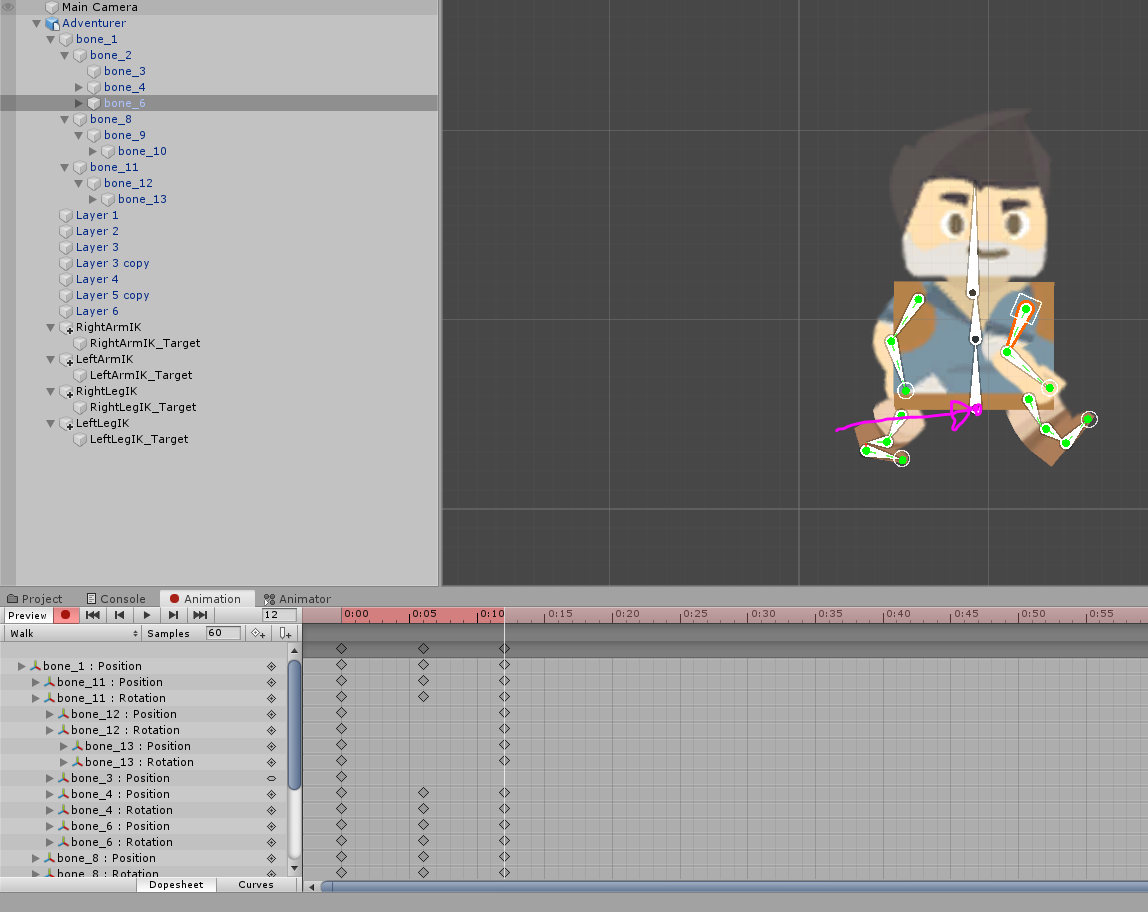
Then, about six frames ahead, we have what’s called a “passing pose.”

Walk animation pose 2

Here, there is a slight movement downwards. This adds a realistic bobbing motion. We also animate the character moving forward by moving the entire character game object. Don’t move the character by any other means except by dragging the entire character object.

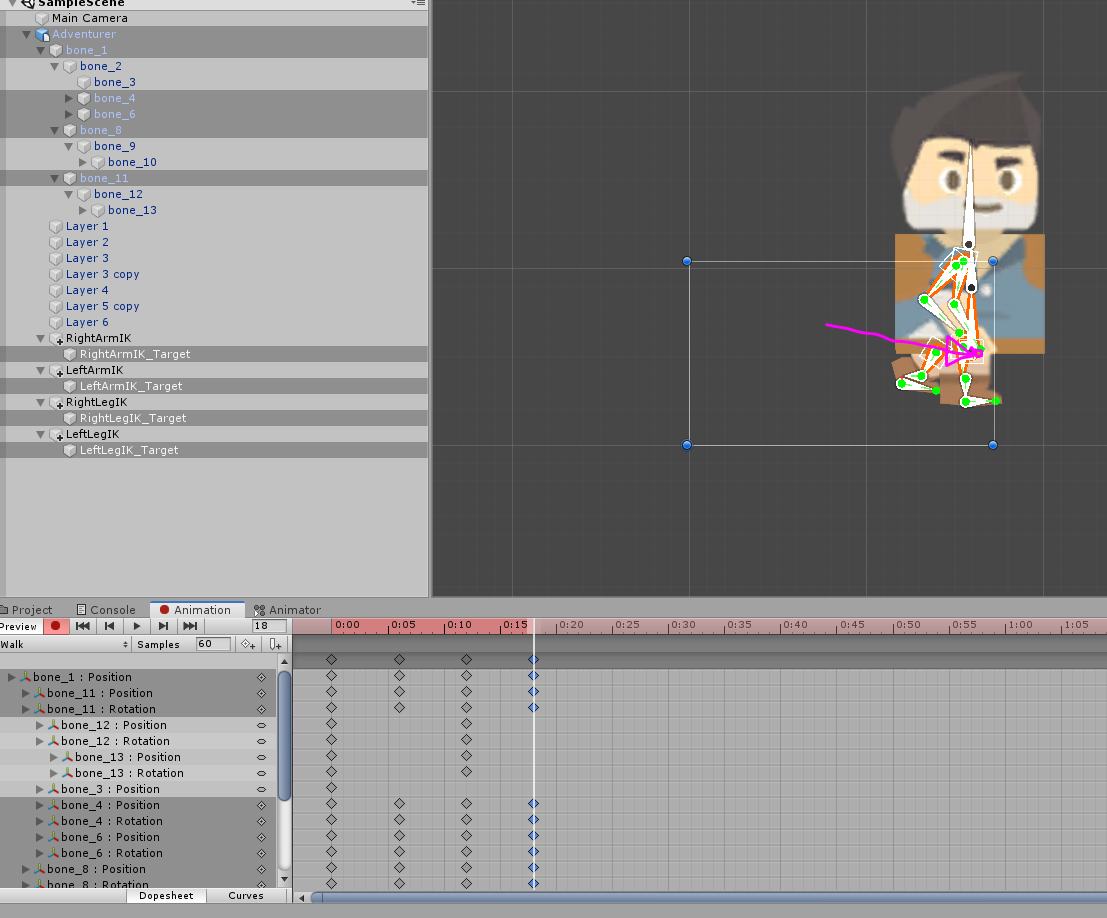
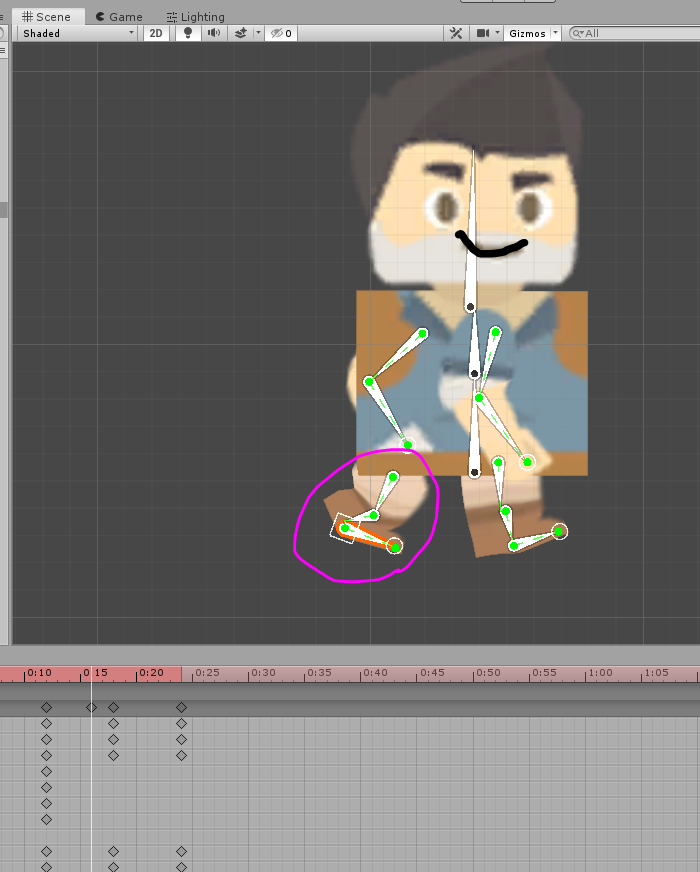
And then another “dynamic pose” with the left foot touching the ground this time.

Walk animation pose 3

This occurs at frame twelve and we are still moving the character forward.

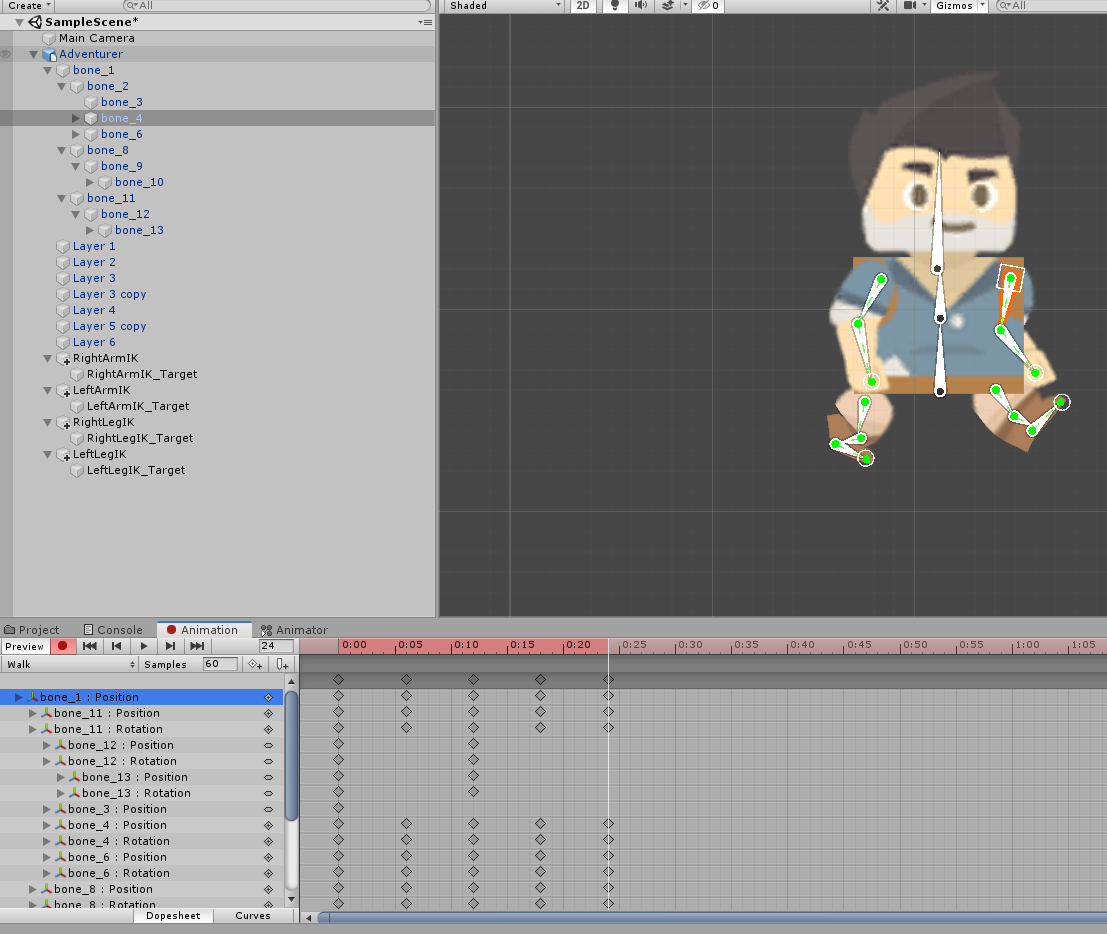
Now, we just need a final passing pose.

Walking pose 4

And then we recreate the same pose as the very first frame!

Walk animation pose 5. Simply the first pose copied to the final frame with proper forward motion.

Simply copy the first keyframe and paste it at this frame. Reposition the character on the X-axis so that our forward motion matches. Now, just go through your animation and tweak any limbs that are bending the wrong direction.

Incorrect limb rotation

Corrected limb

We are done!

Gif of walk animation

Run Animation

The Run animation is similar to the Walk animation except, this time, we need to have one pose where the character is airborne. The distance covered by one step is also greater than the walk animation. Other than that, the run animation has the same general structure (dynamic pose to passing pose to dynamic pose to passing pose etc) but we add one extra pose in order to enhance the illusion.

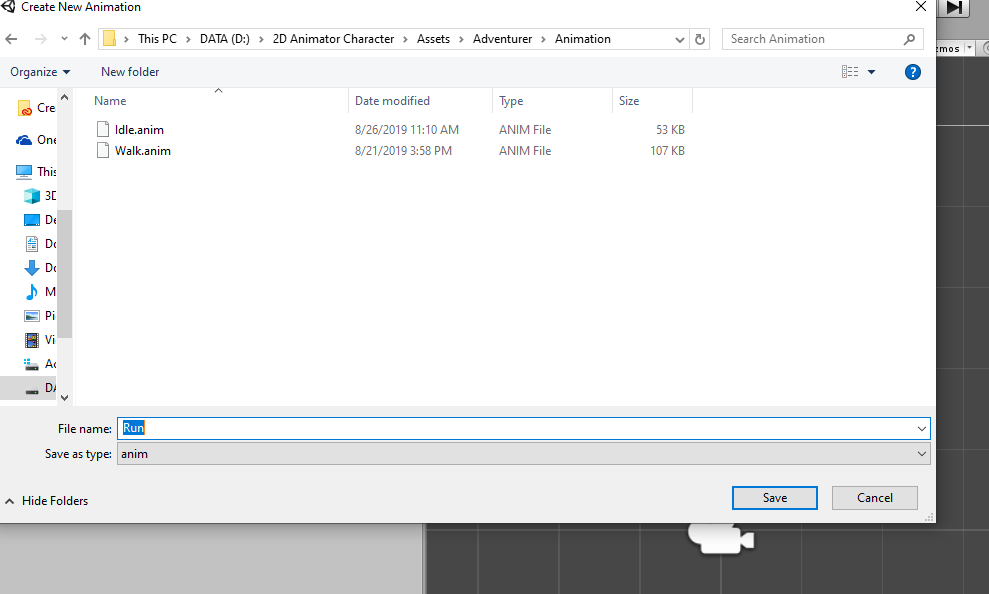
Create a new animation clip called “Run.”

The Run animation being created

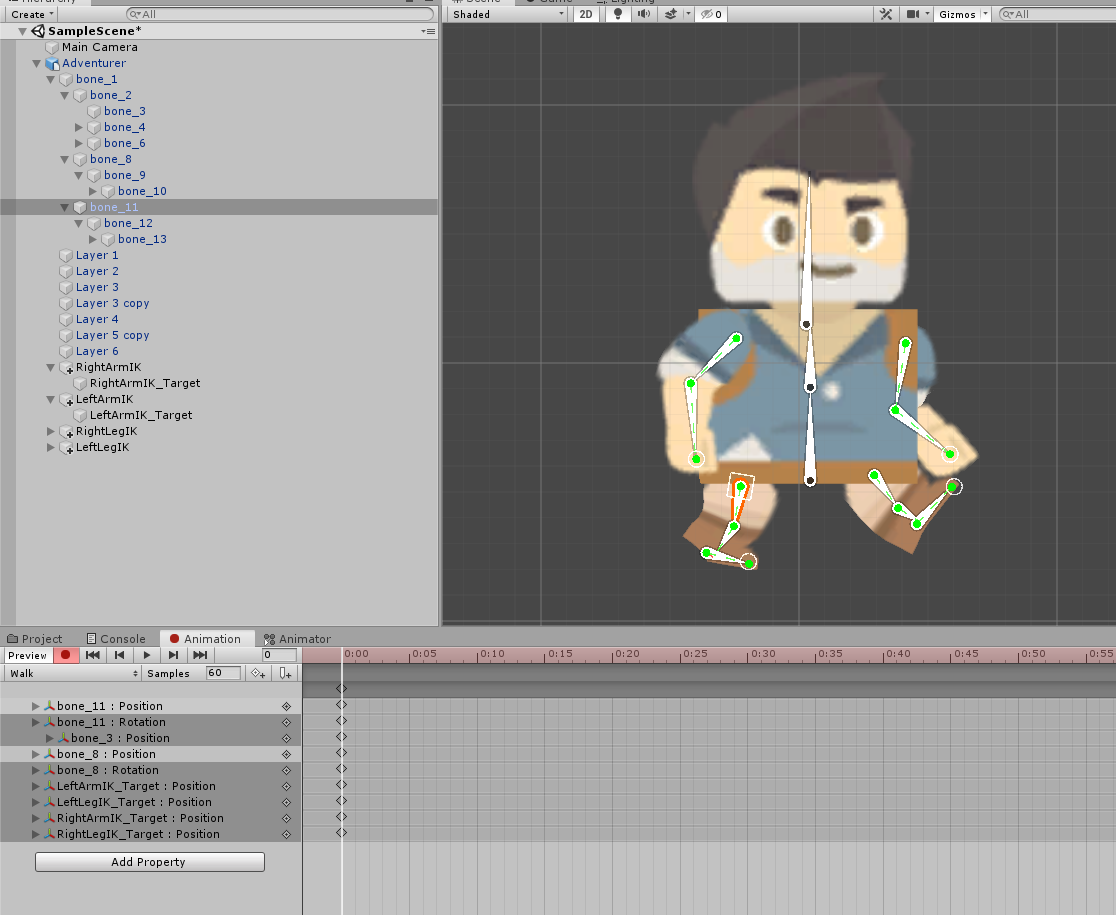
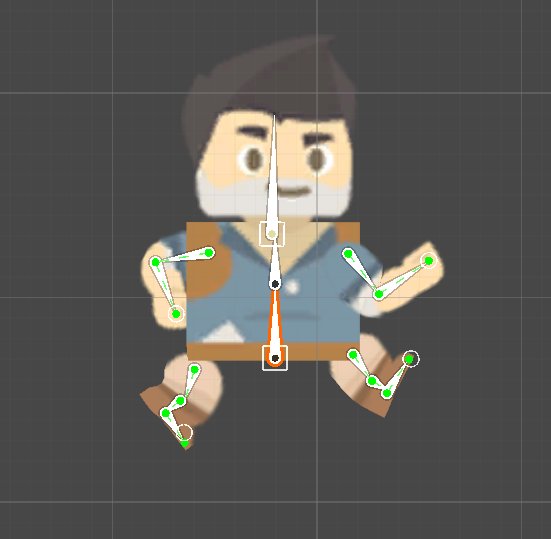
Hit the record button and move the limbs to this pose:

Running pose #1

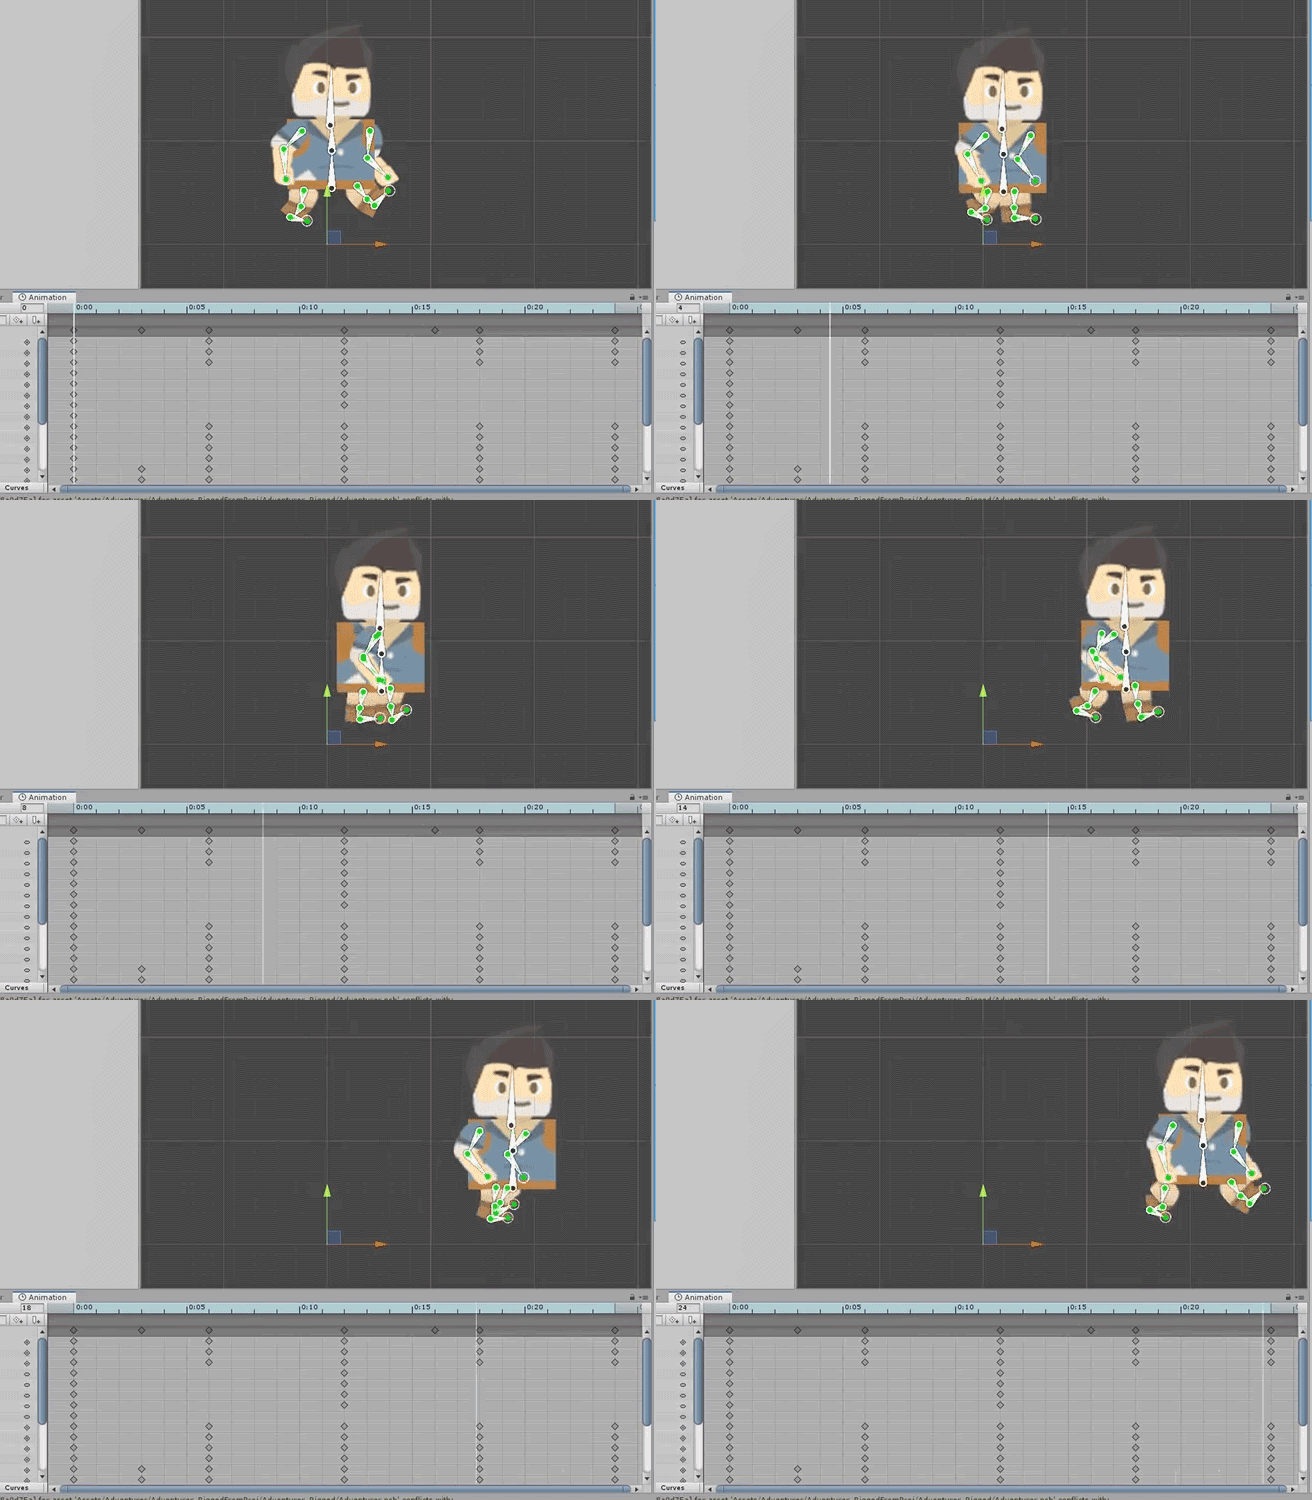
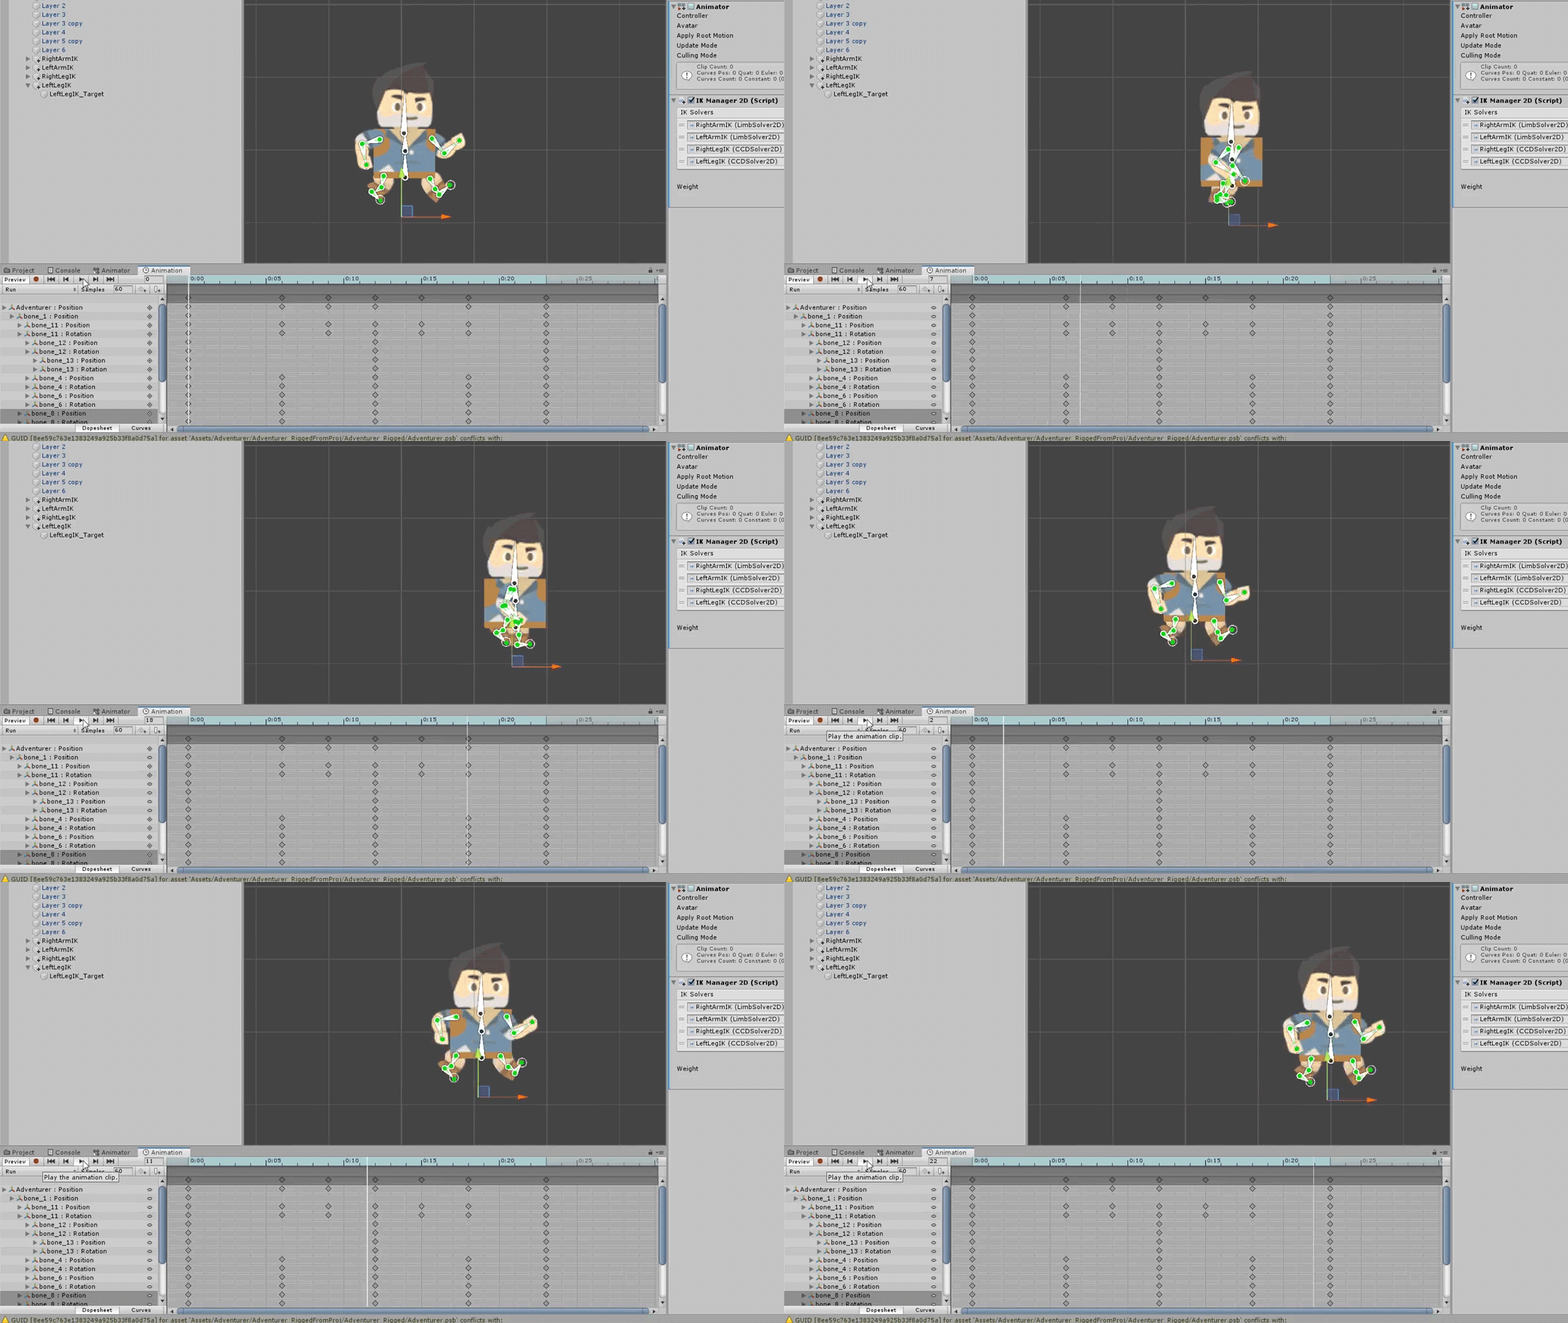
The armature, I found, was very fiddly so be patient while trying to get it to this pose. This is, of course, our first dynamic pose which means that we need to have the entire character move slightly up on the y-axis. Then, after moving six frames forward, we drag the character forward and down while repositioning the limbs to create our first passing pose.

Run animation #2

Scrub through these two keyframes to see if you have an animation that works. Reposition the feet so that there is no foot sliding.

Gif of run animation testing

Now, our second dynamic pose occurs six frames forward:

Run animation pose #3

And then we have another passing pose at frame number 18:

Run animation #4

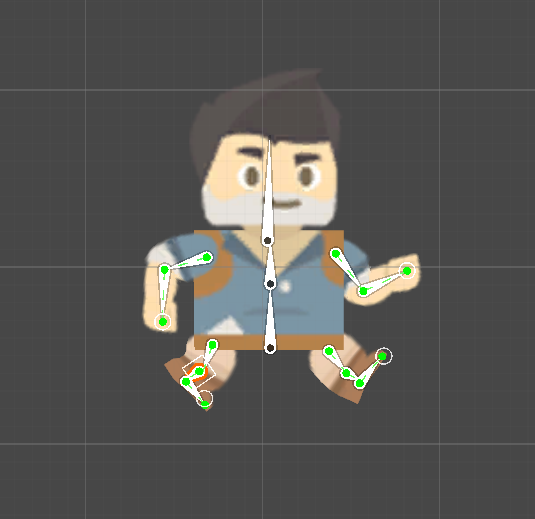
And finally, we have our final dynamic pose where we try and make it look like the first pose. A good place to start is to copy the first frame and paste it at the end. Drag the character forward on the X axis into the correct place. Now move the limbs into roughly the same position as the first pose.

Run animation final pose in which the first frame is simply copied to the final frame and the character is dragged to its proper x position.

Now, we need to go back through the animation and do two things. First, we need to correct any limbs that are bent in an unnatural manner.

Incorrect limb rotation in the run animation.

Corrected limb rotation

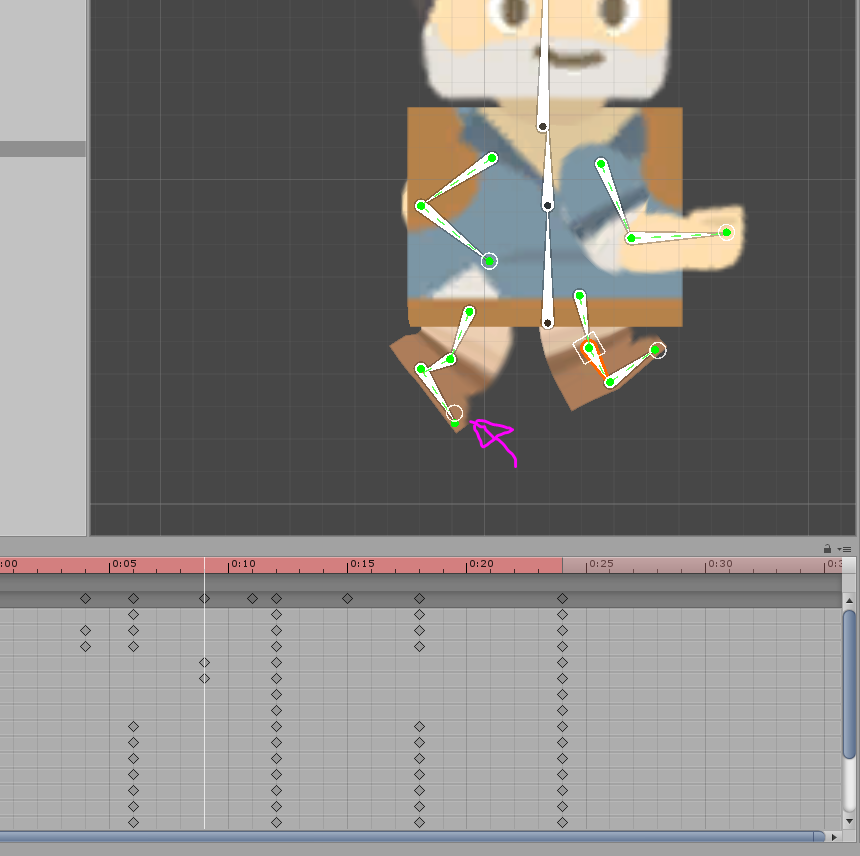
Second, we need to add a pose unique to this run cycle called a “Contact Pose” where we can visibly see the character make contact with the ground. This pose occurs a few frames after the dynamic pose and a few frames before the passing pose. It is simply the forward leg making early contact with the ground.

The Contact Pose.

We need one of these before every passing pose. Also, while we’re here, let’s add a little bit more toe movement after a passing each passing pose to make it look like the character has pushed off from the ground.

Tweaking the toe

The run animation is probably the most fiddly so be patient and try and get your animation to look as realistic as possible. Go through and try to correct any foot sliding as well.

Gif of run animation

The Jump Animations

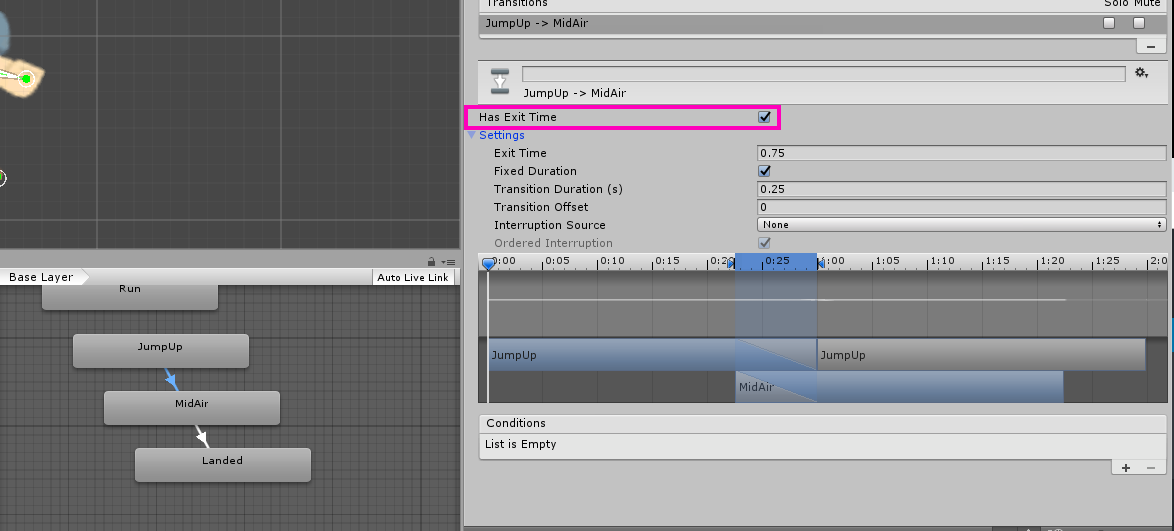
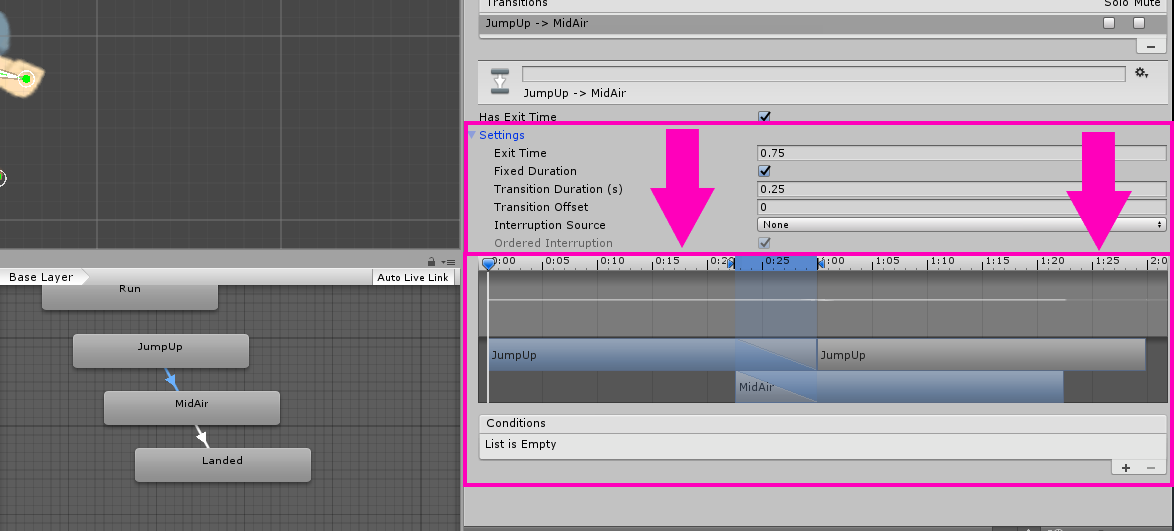
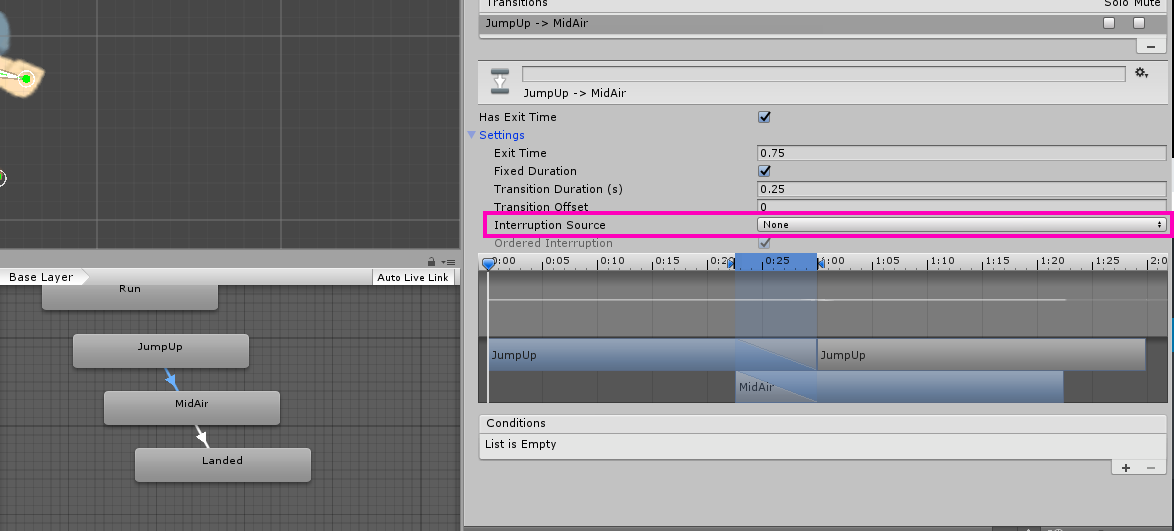
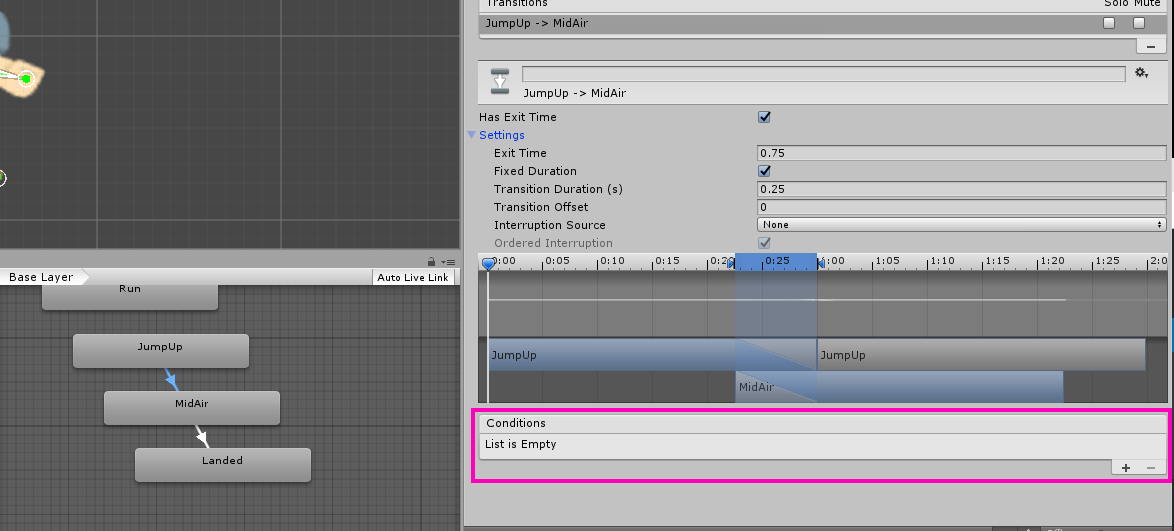
A 2D character wouldn’t be complete without a jump mechanic. But, animating a jump is completely different than animating a run or walk cycle. In those cases, we needed only one animation clip. In the case of a jump animation, we actually need three. Each animation is just a single frame of a single pose. One animation clip is the “jump up” pose where the character has leaped off the ground. The second animation clip is the “mid-air” pose where the character stops moving upward and gravity begins to pull the character back to the ground. The final animation is the “landed” pose where the character has impacted the ground. The reason we do the jump mechanic this way is so that we can have more control over the power of the jump. If we animated a jump mechanic, it locks us into using that exact jump height. What if we wanted to have jump power-ups? We would have to animate a whole new action with an accentuated jump height. With this method, however, we can have the character jump up with a force of 50 or 500 and it makes no difference, all the animations play in their proper place. The Unity Animator does all the hard work for us in this case.

Create a new animation clip called “JumpUp.”

Creating the Jump Up animation

Hit record and simply drag the limbs into a pose that looks like this:

Jump Up pose

And that’s it for that pose! Just make sure it only exists on one single frame. There shouldn’t be more than one frame in this animation clip.

Jump Up pose only occurs at frame one.

Next, create a new animation clip called “MidAir” and position the limbs like this:

Mid air pose.

The character has stopped accelerating upwards and is now falling back to the ground. This pose doesn’t look very natural but it really adds a realistic flair to your jump mechanic.

Finally, create a new animation called “Landed” and make it look something like this:

Landed pose.

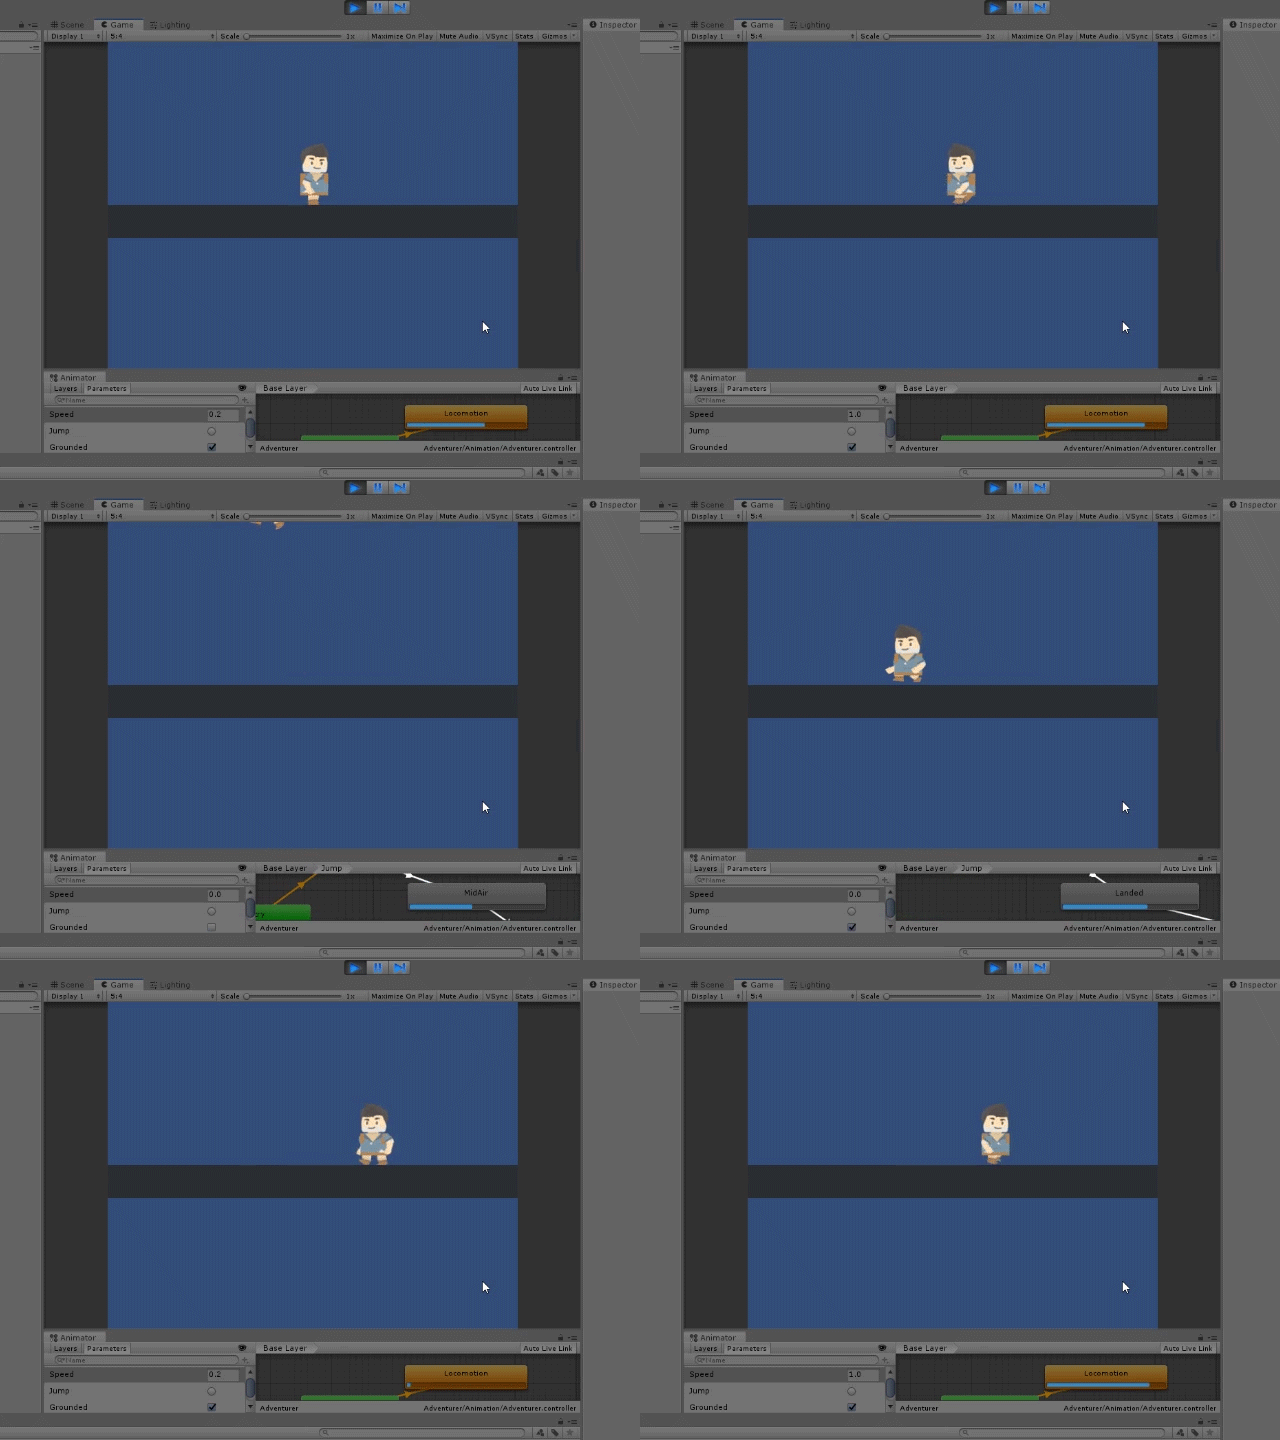
Here, the character has fully impacted the ground after the jump. We now have three animations which will constitute the core of our jump mechanic. All of these poses will be used by the Animator. In the Animator, we will create interactions which will transition and play these animations automatically. The topic of the Unity Animator will be treated in a separate tutorial.

A brief word on Root Motion

When we animated our character to move forward in the run and walk actions, you’ll notice that we built the forward motion into our animation. This is one of two methods of moving the character forward. One of the methods is to animate the character running or walking in place and then script the character’s forward motion. This method is good if you, as a developer, prefer to have your forward motion controlled by a few lines of code and if you just like having that kind of control when you are scripting your character. However, we have chosen the other method and that is to animate the character’s forward motion. The main difference, in this case, is that we, as animators, now have control over the forward motion. The result of this control is that we can make the animation much more realistic. We can add realistic bobbing motion to the character’s run and walk cycle which further enhances the illusion and we can prevent the foot sliding that often takes place if the forward motion were scripted and not animated.

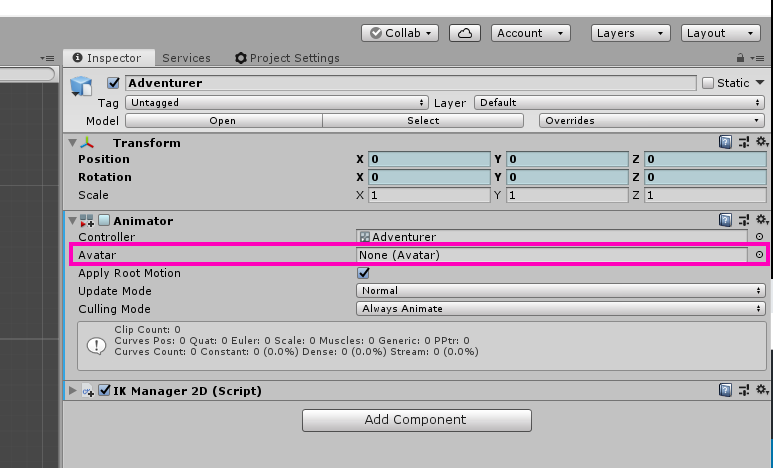
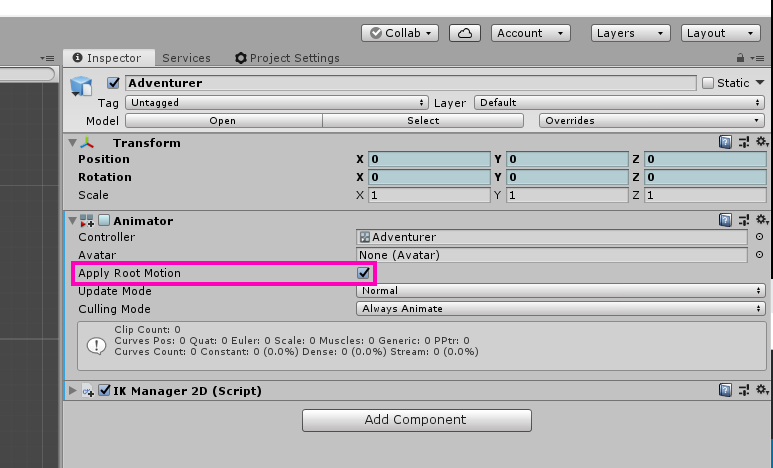
This method has one main drawback, however, and that is that our forward motion is not additive. Whenever we hit play on our animation, the character runs forward and then jolts back to its first position. This is why we need a special Unity Animator function called “Root Motion.” This takes our forward motion and applies it to the character in an additive way. The forward motion will be applied relative to the character’s position. This allows us to create a realistic run and walk animation without having the constraints of a normal animation.

With Root Motion:

A gif of animation with Root Motion.

Without Root Motion:

A gif of an animation without Root Motion.

Conclusion

This tutorial was mainly focused on animating a 2D character and it dove deeper into the actual structure of an animation. Knowing these things will not only allow you to animate 2D characters but also 3D characters as the principles are the same for each medium. Knowing how to create a convincing run or walk cycle is the first step to creating the illusion of life.

Web Class: A Guide to Huge Worlds in Unity

$
0
0

You can access the full course here: Create and Manage Huge Worlds

Transcript 1

Hey, everyone. My name is Daniel Buckley, and I will be your instructor for this course. When creating large-scale games, the very big problem is figuring out how to further improve performance. You’ll constantly be improving minor things and tweaking things to make it so that the end-user can get the smoothest performance possible. This is very prominent when creating huge worlds, and it’s something that we’ll be going over in this course.

A large problem with huge worlds is actually the world itself. If you have a large map, that means you have a lot of terrain elements, probably a lot of other elements such as trees, vehicles, buildings, all sorts of stuff that can really tank the performance. So something we can do to increase the performance is to make it so that we can divide the world up into chunks, as you can see in the images here. We can divide it up into chunks, and pretty much what we can do then is just enable or disable them depending on how far away the player is from that chunk.

Many games do this, many large-scale games. The most obvious one is probably Minecraft, as it does have very obvious chunk pop-ins. But if you don’t want that to pop in all of a sudden, what we’re also gonna do is add in some fog. And this can hide or mask basically the size of the world, and it can, in many ways, make the world feel even larger. Many old games actually also use this method, since they wouldn’t actually be able to render that far out from the camera, so they would put fog in to make it seem like the world is larger.

So we’ll be going over, first of all, how to create a terrain, how to import into Unity, how to split it up, how to make the different chunks load in and load out depending on the player distance, and then we’ll be going over a few other minor different details, like level of detail, and adding in fog.

Zenva is an online learning academy with over 400,000 students. We feature a wide range of courses for people who are just starting out, for people who just want to learn something new. The courses are also very versatile, allowing you to view them whenever and wherever you want. You can choose to follow along with the video courses or even read the lesson summaries. With the included project files, you can also follow along with the projects as you make them throughout the course.

I’ll see you all in the first lesson, where we begin to create our terrain.

Transcript 2

Welcome back, everyone. In this lesson, we are going to be starting to create our terrain. This is just gonna be a basic terrain that we can put inside of Unity, and then split up, okay?

So the program we are gonna be using for this is called L3DT, and this is just a terrain creation program that you can download free online, and this is gonna allow us to quickly create a detailed terrain like the one you can see in the image there. Alternatively, if you do want a more advanced solution, you could use World Machine, but we’re just gonna go with L3DT for now.

So, I’m gonna hop on the website, and show you how you can download it. Here I am on the website. It’s www.bundysoft.com/L3DT, and when we’re on here we just wanna go up to the downloads button here, to downloads screen, and we just wanna download the standard edition here. So just download the current stable release right here, and after this you have to go through a bit of an installer. It’s just like any other installer, and when that’s done you should be able to start the program.

All right, so my download has finished and I have the program open now, all right. So, what we’re gonna do is we’re just gonna create a basic terrain. We’re not gonna go too advanced in all the different options and settings, we’re just gonna create a terrain that we can easily put into Unity and use, all right.

So, first thing we’re gonna do is go and click on this button here which is the create new terrain button. Click on that, and here we just want to select the designable map. So we’ll click next. We’ll click next. Now, these options we don’t really need to go through in detail, we can just skip through all these.

So we can just go next, next, and here in the calculation queue what we want to have is the heightfield, and the texture map. So lets just enable– Actually we’ll just enable all these just so I can show you too, but the one’s we do need is the heightfield so we can actually have a height map which can then generate the actual terrain model, inside of Unity, and the texture map to of course apply a texture to the terrain.

So, you can click next, next, next, next, next, next, and okay, and it should then begin to generate our map. This can take a bit of time. It’ll probably take under a minute hopefully, but it can take around a minute or so, so we’ll get back to you when it’s finished.

Okay, here we are. My map has generated, and here in the texture map we can actually see what it looks like, and because for each of these different tabs here we can see the salinity map, the attributes map, you can even see the terrain normals to have like a normal map of where the mountains are, where all the valleys in there are. We also have a height map, which is one of the things that we do need. There are these colored lines though, in the image but when we do import it into Unity there won’t be those.

So just think of a height map as pretty much showing you where the terrain is high and where it is low. So, the darker the terrain is, the lower down it is, yet the whiter it is, the higher it is, and so when we put this inside of Unity, into our terrain, it can calculate pretty much each pixel, see how it ranges from 0 being black, and 1 being totally white. How it ranges between them, and then set that at its certain height depending on how bright it is, and so then we can actually have a quite, a detailed terrain that way, and then after that we’ll apply our texture map on top of that, so we can have a pretty good looking, detailed texture.

Okay, so how do we actually import these into Unity? Well, what we need to do is, right-click on texture map here, and just click on export layer. We’ll actually save this file format as a PNG, and then we’ll save it inside of our Unity Project. So, just locate your Unity Project, and inside of the assets, inside of the assets folder, I’m just gonna create a new folder here and call it our Terrain, and inside here I’m just– oops, not there, inside our Terrain folder, I’m just gonna name this our Terrain Texture.

Save that, and make sure that the width and height is 1-0-2-4, and then we’ll click okay, and with that saved, we then want to go and save our height map. So we can right-click on that, go export layer, but, thing is with this, we don’t want to save it as a PNG, and that is because the new Unity terrain, it actually uses the RAW format. So we’ll click on RAW for the file format, and we’ll save it in the exact same folder, in our Terrains folder here, and I’m just going to save it as our Terrain Height Map.

Save that, click okay, and that is it. We have our map generated, we have it saved, and now we can actually hop into Unity, set up our project, import all the assets we need and begin to create our terrain.

Transcript 3

Welcome back, everyone. In this lesson, we are going to be importing a few of the assets that we’ll need to create this project. So make sure you just have a new Unity project open or that you have downloaded the existing project files from the course. If you have done that, then this lesson isn’t that necessary. We’re just gonna go revert where to find and install these assets that we’ll be needing. And of course all of these will be included inside of the project files, so if you do wish to download it from there, you can.

So the first asset we’ll be needing is this terrain splitting tool. This is just a script that will allow us to split the terrain, here, pretty much just subdivide up the terrain. And we’ll be doing this a couple of times, so we do have quite a few different chunks that we can load. So just go to this website here. It will be linked in the lesson summary. And we just want to scroll down to the download link. It is a Dropbox download, so we just click on that. And then we again just click on the Download button here and just Direct download.

And what will be downloaded is actually a .unitypackage file. So with this we can just drag it inside of our Unity project here. Drop it inside the project folder. And it should then start to import all the assets we need. You might see here that we do have quite a lot of stuff that we can import, but all we’re gonna be importing is the split terrain script so we can pretty much just disable everything else here, as we only want the split terrain script. So, we’ll click Import. Wait for that to finish.

And here it is inside of our project, ready to go. And up here you can even see there’s the button here, Terrain, Split Terrain, and this is the tool we will be using.

And the next asset that we’ll be needing is just any old sort of FPS controller. You can really use whatever FPS controller you want. I’m just gonna be using this one, ’cause it is a fairly lightweight one and it’s free to download over on GitHub. Again this link will be down inside of the lesson summaries. So you can download it from there. Or you can download it from the project files included in the course.

So, to download stuff on GitHub, you can choose to clone the repository, but we’re not gonna do that. We’re just gonna click on Download ZIP right here. So it’ll download a .zip file. We can open that up inside of whatever sort of .zip program you have. I’ve got WinRAR. And we’ve here, we just want to have this FPS.cs script. So we can first of all just extract that. We can just click on the FPS script here. Click Extract To And we then want to just find our project and export it into the assets folder.

So when that’s done, you should see we now have the FPS script here inside of our project. I’m actually going to create a new folder called Scripts and this is where we’re gonna be storing our scripts. We have this FPS script, but we’re also gonna be having two new scripts that we’re gonna make, that is going to manage all of the loading of the chunks and of the dynamic objects in the scene.

And with that, the final thing we’ll need is just some tree assets that we’re gonna be using to populate the terrain. These aren’t necessary but they will be used by us and you can just download those inside of the course project files or you can go in the Unity Asset Store. Download the Standard Assets and inside the Standard Assets they have a lot of various terrain assets that we can use.

But we’re just gonna be dragging in our environment folder here. We’ll just drag that in here. Load it up. And all this is here is just some SpeedTree assets. We just have some various different trees that we can use for our terrain, to populate our terrain. I’m also going to be going over level of detail with these models later on, okay?

So with that all done, that is our project set up and ready to go. So in the next lesson, we’ll be starting to actually import our terrain into Unity and set it up with the existing terrain tools, all right? So see you all then in the next lesson.

Interested in continuing? Check out the full Create and Manage Huge Worlds course, which is part of our Unity Game Development Mini-Degree.

Web Class: How to Create a 2D Platformer Controller

$
0
0

You can access the full course here: Develop a Puzzle Platformer Game

Transcript

Hey guys! In this first lesson, we’re going to set up our character controller – which is going to require that we import the Standard Assets that Unity provides for us to use that platform character controller. And we’re going to get it set up in our scene with a simple little ground object just so we can get our player up and running so we can get started making our game.

We’re going to start from a blank project here. I am In Unity Hub 2.0, which looks a little different than 1.9 and back, but overall it’s just the same process here, I’m gonna create a new project and I’m gonna create it in the latest beta version available to me which is 2019.2. And I’m going to create a project called Industrial Jones, and it’s gonna be a 2D project. Now this doesn’t necessarily matter here, but it’s just gonna set up our project with some 2D settings that we can change ourselves if we wanted to later on. Then click create project.

So in our blank project, I’m just gonna make sure I’m on the same layout by going up to Layout and going to Default so we have the exact same set up here, and what I want to do is go over to the Asset Store tab. And we’re going to find the Standard Assets that Unity provides by just saying standard asset. And we’re going to download and import these into our project.

Now this includes a few different packages that we do not need. We only want the 2D character controller that gets our platformer up and running very quickly. So what I’m gonna do is I am going to go through them. I don’t think I need any of these scenes, so I’m just gonna turn off sample scenes entirely.

And in Standard Assets I do not care about let’s just collapse all of this here, I don’t want vehicles, utility, prototyping, physics materials, particle systems, fonts, environment. And in the editor, I do not want the water – I do want the cross-platform input though. We do not need the characters folder, it’s just 3D stuff. So we’ll import the entire 2D folder, cross-platform input, and the editor for cross-platform input.

Now we get an error for that, but that’s fine. We can just clear that out and right click and create a 2D object sprite. It’s just gonna be our ground object for now something for us to walk on. So I’m just gonna change the sprite to let’s see, we’ll just make it, doesn’t really matter just a platform just like that, and we’ll just stretch this out here. Just something to walk around on for now. In the next lesson, we will create an entire level based on tiles.

I wanna add a component to this that is going to be a Box Collider 2D. So we can collide with the platform with our player. And speaking of our player, let’s go into our 2D Standard Assets folder here, and I wanna go to Prefabs. And we have some stuff in here, but all I care about is breaking out my character controller and dropping him right inside my scene. And I wanna name this guy Player. Just like that.

And what I, in fact, wanna do, is I wanna create a new folder in my assets folder here, and I wanna call it Prefabs. I wanna have my own separate prefabs from the Standard Assets, and I’m just gonna take my player drag it into Prefabs. And I wanna create an original prefab. Now we could create a prefab variant, which means the base changes of our original prefab would still affect this guy, but we could add changes on top of that. But I just wanna create an entirely new prefab that I have complete control over just like that.

And now watch it happen here – if I were to click play my guy should fall and land on the platform. There we go, and I can just use my WASD or my arrow keys or a controller to move this guy around and Space to jump. Now it’s a very floaty jump and we can get into tweaking all that later on, but for now our guy is running around in our scene. Pretty cool.

So in the next lesson, guys, we’re going to start building our first level. It’s gonna be a very simple level with just some ground tiles and some wall tiles and then, later on, we’ll add in hazards. And then we’ll add in enemies and we’ll add in keys and doors and just all kinds of really fun stuff. So my name is Austin, and I will see you in the next lesson.

Interested in continuing? Check out the full Develop a Puzzle Platformer Game course, which is part of our Unity Game Development Mini-Degree.

Web Class: Design a Unity Level with Tilemaps

$
0
0

You can access the full course here: Develop a Puzzle Platformer Game

Transcript 1

Hey guys, welcome back in this lesson. We’re going to start building our first level, which means we have to import our tile assets. Just our sprite images. We’re going to create a couple of tilemaps for that based on, you know, if it’s the ground, so we can add different colliders to the ground versus just the background or maybe the foreground – things you cannot collide with for instance. Then we’re going to set up a tile palette, which is just a grid of tiles that we can actually click on, and then paint in our scene view on the tilemaps that we just created.

So to do that, let’s jump back into Unity. And what I want to do is first of all is import my tile. So in my assets folder I want to create a new folder and I’m going to call it Sprites. Now, the way you organize this is obviously up to you. But this is how I want to handle this. And inside of sprites, I want to create a Tiles folder. Now this is where Unity is going to build my tiles to. When I take a sprite, I can let Unity convert them into a tile asset for me, and I’m going to put those right inside of that folder. But my sprites are all going to go inside of this sprites folder.

So now on my desktop and in the download a project files that you have, I have industrial Jones assets. And I just have all the sprites I’m going to use for this project. And what I want to do is bring all of these in at once, by just selecting them all and dragging them directly into Unity and dropping them in my folder. And there they all are.

Now if I were to select all these by holding down shift and selecting the last one there, I can see they’re all in 2D and UI, because I have my project set to a 2D project by default. But if it’s not the case, you can just select it just like that. And what I want to do is I want to change my pixels per unit to match what I want my – what – how I want my sprites to be sized in my game world. So I think it makes sense for my tiles to be one Unity unit in size. And to do that I have to take into account the size of my sprites in pixels.

Now I know for some reason these sprites are 70 by 70, I would recommend a power of two if you were to make yours. But in this case, these are Kenney assets or third party assets. So I’m just using them as they are. And I, in fact, created a couple of my own tiles to go with this, or a couple of my own sprites here with the key, the door, and the ladder top because of the way we’re handling this. I had to make it a bit differently. But these are all 70 by 70. And that means I want to set my pixels per unit, since I want one unit to be one tile to be 70. So we have 70 pixels per unit. And I’ll have to do now is apply this to make those changes. Just like that, pretty simple.

So now what I want to do is in my project hierarchy, I want to right-click 2D objects, I want to create a tilemap. That’s going to create a grid object for me and a tilemap object for me. Now, what I care about doing here is first of all, I want his name, this first tile map in my ground. And what I could do is just control D to duplicate that. And I could make one for background for instance, or I make another one for the foreground. How many layers you want to have here, you can go with that and do whatever you would like. But in my case is gonna be very, very simple.

So I want to take my ground, that’s where I want to start painting my ground tiles. But how do I do that? So I want to go up to Window. And I want to find the 2D option here and go over to tile palette. Now this is going to give me my palette that I can start painting from. Not from the default view here next to my inspector. And what I have to do is create a new palette first of all and tell it where my palatte’s going to be stored. So I want to call this palette industrial, because that is the type of tile palette I am creating. I’m using my industrial sprites here. And I want to click Create. And I want to tell it to put this in my tiles folder.

And now with the industrial tile palette selected, I want to take and select all of my tiles and drag them into that palette. And I want to select the tiles folder for it to use for that where it’s going to build my tiles out. And this is what you get. Now, in fact, the door that we’re using is not a tile nor is the key , because we’re using a very simple approach to this.

I, in fact, do not want to have the door in here. So I can do a select edit and the eraser tool and erase the door. And I do not want the key in here. And in fact, I do not want the sol blade in here. And that’s because these items are going to be interactive items in my game world. Now you can have them be interactable – you just have to write or just find a custom brush that allows you to paint, for instance, prefabs. And you’re seeing view which exists. You can find it on the official Unity GitHub, in fact, but for this simplicity of the project here, I’m just going to keep it very simple and just have my tiles be the static tiles in my world.

So now let’s just start painting our level. I want to remove this ground object that we have here, and that’s going to paint some kind of level here. I’m going to say maybe I’m coming into a level from the left here, this is going to be the start of the game maybe – or it’s going to be a circular game.

My idea here with the level is I can probably come out of this scene here into a scene over here, climb down a ladder, come down this way, go through a door over this way. Now I’m below this level where I can climb up a ladder and I can get to a section to grab a key that I could not get to from up here. But I can see the key you know, so I know I need to get this key to unlock this door. So I had to come down this way to grab that key that I go back around and unlock this door and I go over here and do something.

Anyway, we’re going to lay it out in a similar fashion. So it’s going to be like this loop of a level here. So I want to come in originally from the left here, and we’re going to have for instance will have a key up here making you climb down this way and go up there and get it. So I’m just going to do this right here, and I want to add the ground below that just come off a little – that just in case the edge bleeds through there, they would have maybe just come over a bit here. And then we’ll have a gap here for an acid pit. Then will have a gap for a ladder. And then a wall, then a platform here.

Now I have absolutely no idea where I’m going with this – on changes to background because these are not going to be something I can collide with. And if you want to, you can use the rectangle tool and draw a rectangle of sprites and back on the ground just in case I do collide with these right here. And then back to background.

Back on the ground here. Erase that background there. Maybe we could do something like this. So once you’re up here, you’re blocked by like a thing of blocks, you can’t go anywhere there. So you know, the only way to get to this key up here is to come through this door. How do I get to that door? Well probably go down this ladder, and I come up over here. And I climb up the ladder or whatever it’s called to you and that, but this is the idea that I’m working with here. I just had like a roof here, I don’t know.

I’m probably gonna speed through some of this just because, it’s, just you know, whatever I’m coming up with as I go here. And maybe we’ll have a ladder in the middle right here that goes up to a platform up here. And I can have the door that I want to unlock be up here. And the key to unlock it be over here. So it’s like how do I get there? Let’s bring this back a little bit so we can hide another key over here.

At this point, it’s just drawing. It’s just drawing wherever you want to draw.

Interested in continuing? Check out the full Develop a Puzzle Platformer Game course, which is part of our Unity Game Development Mini-Degree.

Web Class: Preparing Unity Projects for Shader Graph

$
0
0

You can access the full course here: Shader Graph for Beginners

Transcript

Hey everyone, and welcome to the first lesson of the course. In this lesson, we’re going to go over how to set up ShaderGraph, and import all the assets we need for this course.

So, first of all, I’m here in the Unity Hub, and what I want to do is create a new project, by clicking on the new button up here. When we’re here, what we want to do is make sure our Unity version is 2018, or 2019. The higher the version the better, but ShaderGraph is not supported on many of the much earlier versions. So, I’m going to select 2019.1.

And what we also want to do is make sure that the template down here is either the lightweight render pipeline, or the high-definition render pipeline. So, I’m going to select lightweight render pipeline here, and that’s just because the ShaderGraph isn’t supported across every thing with Unity at the moment. So, I’m going to select lightweight render pipeline, here. I’m going to rename our project to ShaderGraph Course, and then I’m going to click on the “Create New Project” button.

All right, here we are inside of Unity, and you should see a scene, something like this. This is the default lightweight render pipeline, basic sample scene, which just shows off the graphics for that pipeline. So, what we’re going to do now is actually delete the example assets here, as we won’t be needing them, we’ll be creating our own assets and our own materials for the shaders that we then, later on, create. So, we’ll delete the example assets down there.

And while we’re at it, to make our file size a bit smaller, we can also delete the example assets folder down here, which just contains all of the models, materials and shaders for this example scene, so we can just delete that folder right there. We can also go into the materials folder, we need to keep the sky box, as this is a pretty good sky box, so we’ll keep this one. We can keep pre-sets. We can also then delete the simple camera control script inside of our scripts folder, here. And, we can delete tutorial info, here. We can delete tutorial info, here. And we can delete the “read me” asset, right here, so just delete that as well.

And that is our project files pretty much set up and ready to go. The first thing we need to do is import some of the models that we are going to be using with our shaders. So, I’m going to create a new folder here, and I’m going to call this one our models. And inside of here, I’m going to be dragging in two custom-made models, and one pre-made model that is on the asset store.

So, first of all, we have the smooth sphere. And this is just a sphere that is fairly smooth, and has quite a lot of vertices on it. That is going to be useful for when we create the warping sphere, our shader, so it can show much better how the sphere warps, without having to worry about it looking too blocky, okay? So, this is also included inside of the project files for the course, so you can download them.

And we are then going to drag in the plane, which is another asset, it’s basically a grid with a bunch of miniature faces on this. And that is it for the custom models. Now, we also need to download another model, and this is actually on the assets store. And really for this, you can actually download whatever model you have. If you already have models that you want to use, with these shaders, then feel free to use it on those. But, for us, just as an example to show off the various different shaders, we are going to import a model from the asset store.

So, let’s go on there. And there are many free models on the assets store, but we are going to use Unity’s Robot Kyle, which is a part of their Unity Technology’s publisher page. So, we’ll go up here, and what we want to search for is going to just be Robot Kyle. Here we go, Space Robot Kyle, we can download that, into our project. And then we should be good to go. Yup, we want all of these things here, so click on import. And it shouldn’t take too long, and then we should have our… Inside our assets folder, we should have the Robot Kyle model right here.

All right, so, before we go off, we are going to actually set up our basic scene. We’re going to set out a floor, and then we’ll also bring in the robot model, ready to have shaders applied to it. So, I’m going to just right click here in the hierarchy, go 3D object, cube, and this is just going to be our ground. I’m going to increase the scale to 50 by 1 by 50, so it’s a pretty large area, here.

To also view the sky box in the scene view, we can actually click on this button right here, and it will toggle all the various effects. Fog, sky box, and yeah, you can also, if you click on this little arrow here next to it, you can toggle, on and off, the individual options as well. But we want all of them on, to get the best visual appearance, because we are working with shaders. And yeah, we will have it like that.

Now what we can do is bring in our models, so I’m going to go to the Robot Kyle model folder here. Go into the model folder and just drag in the model, like so. There’s no material applied to it right now, so that’s why it is pink. So, we can go to the Robot Kyle material folder, and I’m actually just going to drag on the robot color, which actually doesn’t work because there’s no texture on it, so…

And to fix this, we can select the material, go up to the inspector here where we can select the shader, and I am going to open this up here, and select lightweight render pipeline, simple lit, and this should open it up, like so. And we should then be able to go onto base map, here, click on the little circle there, and select our robot_colormaterial. We can then change the actual color here to white. And if we look here in the scene, we now have our robot model with the basic texture.

We’re, of course, not going to have this material applied to the model, we’re going to have our own custom model applied later on, but this is just to set-up the model, set-up everything we need, and that is about it.

So, in the next lesson, we are going to go over the basics of ShaderGraph, how to get it open, how to create a new shader, and just a basic overview of the structure of the tool, how to use it, how to connect things together, and how to then create a material with that shader. So, I’ll see y’all in the next lesson.

Interested in continuing? Check out the full Shader Graph for Beginners course, which is part of our Unity Game Development Mini-Degree.

Web Class: Create your First Shader in Unity Shader Graph

$
0
0

You can access the full course here: Shader Graph for Beginners

Transcript

Hey, everyone, and welcome back to the course. In this lesson, we are going to go over how to create a new shader for Shader Graph, and then we’re gonna go over what is Shader Graph, how does it work and what all the various different components in that do, how to connect nodes, how to then create that into a material that we can apply to our model.

So, first of all, I’m going to create a new folder here called Shaders. And this is where we are going to store all of our various shaders we create with Shader Graph. So in here, I’m gonna right-click. To create a brand new shader, we can right-click here in the folder, go to create. Then we wanna hover over the Shader selection and choose PBR Graph. This creates us a Shader Graph. And I’m just gonna call this one our ExampleShader. And as you can see, it creates the shader folder, which is this S here.

And to open the Shader Graph editor, we can either double-click on this file or go up to this Open Shader Editor button in the Inspector. Click on that. Then we should open is a window something like this. It is a graph here that we can then edit and create our shaders in.

So how does it work? Well, Shader Graph is set up using nodes. You connect various nodes together, which can do various different things, like add two effects together, create new ones, allow for inputs. And the final result all plugs into the PBR Master node right here, which is something similar to how you would look at the standard asset, how you look at the standard shader. You have your Albedo, Normal, Metallic, Smoothness, Alpha, all that sorta stuff that, you would want to change the overall appearance of your model.

So, how do we actually navigate? First of all, well what we can do is to move around, we can hold down middle mouse button and start dragging around to just navigate around. You can also zoom in and out with the scroll wheel to have a much better view of your shader. And also, then, to create new nodes, we can right-click and go Create node. And here you’ll see that there are a bunch of various different categories, Artistic. It’s just a various number of selections.

We won’t, of course, be using all of these. We’ll probably be using only around maybe 20 or so different nodes throughout this course. We’ll go over in detail what they do and how they work with the other nodes, as well. But for now, let’s just have a look at some of the other aspects inside of the Shader Graph here.

First of all, you might see up here where it says example shader. This over here is the Blackboard. What the Blackboard is is basically like a variable list. If you’ve ever looked at a material, such as the standard shader or any other sort of materials you’ll see – you’ll notice that in the Inspector there are a bunch of different properties that you can edit, like the color, the smoothness, the metallic level, the mission, all these various different properties that you’ll also if you were to create a variable in a script. So that is basically what the Blackboard is.

To create a new variable or property, we can go and click on this plus icon here. And then we can choose between a bunch of different data types here. Now you might notice that you don’t have your traditional ints or floats here like you do in C#. Instead, if you wanna create just a number, you would select Vector1. And here we could name it something like MyNumber. And then we can enter in a default value for that we can choose if it is Exposed or not. This is pretty much similar to is it public or private does it appear in the inspector for us. This Reference here is if we want to access this property inside of a script, we will be accessing it by this reference, you can change that if you wish.

Some other variable types, you can have your colors, so you can see a default color here in the Color wheel. You can also choose that to be a HDR color, which stands for high dynamic range and allows you to add intensity. So if you do have things such as bloom, or post-processing effects like we currently do in our project, you’ll be able to see these colors more intensely, and they’ll appear to be very broad.

With this, then you can also, create other variables such as Texture2D to allow for inputs of textures. We will be using this in quite a few of our shaders. And that is pretty much all of the different examples will be using for us. You can of course guard for many more of these and have look at how they work. But for now, let’s go over how node work and what we can do with them.

Now a good starting point when working with shader node, when working in the shader, is to create an input node. Now one input node is it’s something that takes from the world or takes from the player’s input. This can be various things such as a number. An example here, for example, we could have one of the properties in the Blackboard, we could also have something like the position of the object, the position of the different vertices of the faces of the object or the normal direction of the object, or we could have something more procedural like some noise, or some randomly generated aspect like so to create a shader.

For example, I’m actually going to bring in the color here. So I can just actually drag this in. And as you can see, it will create a brand new node with our property. And what you can see here is actually a little dot, and what we can do is we can click and drag on that dot. And this will create a connection. Now what we can do is connect this to an input of another node. And a node has two things on it, a node has either and a node has birth one of either – an input and an output.

As you can see here, the property node only has an output because this in and of itself is an input node. And the PBR Master node here, only has inputs as this is pretty much the end, the end position for everything inside of the Shader Graph. There are other nodes that do have birth, and many nodes actually have birth, we could get a node here, we can go create node and we can actually create an add node.

So we can go Add. And what this add node does is it takes two inputs, and adds those values together into the output here. So what we could do is create two colors, and plug them into the add node. And what that would do is add those colors together and create a result and color. So let’s actually do that right now, by going it’s dragging out color here into the A1 input of the add node. As you can see it added like so. And what we could then do is create another color down here.

Now we could create a color here in the Blackboard. But we could also create what you could call hardcoded properties by just going – which is right-clicking here, go Create Node, we’ll search for Color. And it’ll create us a color input note here that we can just edit inside of the shader graph. So it – we’ll drag that also into the add node here.

Now let’s actually set a value for our default color appeal. Let’s set this to maybe a red. And then this one down here, we could set maybe to a green. And as you can see, if you have red plus green, that equals yellow. And then what we can do is actually take this output of the add node and plug this into albedo color, which is going to be what the actual final material looks like. So we can drag this out, plug it into Albedo. And as you can see down here in the main preview, we can actually see what the resulting shader will look like when applied to a model.

Also, in the main preview, you can increase the size, you can drag it around like so you can click on this little white rectangle down here to increase the size or decrease the size. I’m just going to keep this and drag it right down to the bottom here. You can do the same with the with the Blackboard – click on this little white rectangle here to increase the size and drag it around, it’s going to put it back up here as well.
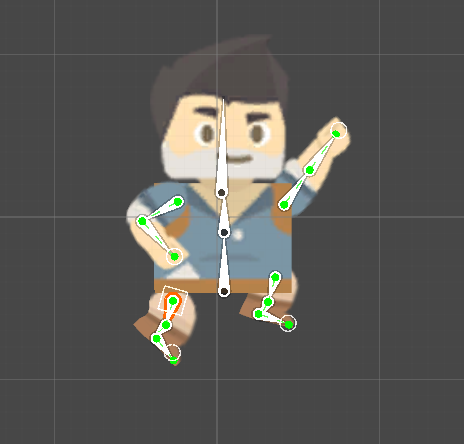
And now what we can also do with the main preview is make it so that it can display a different type of model. We can right-click on the main preview, and we can choose between Sphere, you can have Capsule, we can have a Cube, we can also put a Custom Mesh. So you can click on that. Let’s choose a robot too. And then as you can see, this is what it looks like when applied to a robot model.

That is pretty much the basics of the Shader Graph.

Another thing there is that some nodes like the add here actually have a preview just showing you what so far in the process it looks like. So when we add those two colors together, it creates a preview of the color something all session is that the add node or isn’t just for colors. It’s pretty much for many different things. These aren’t like in C#, where you have very strict rules with what can go where what can be added together. Because in Shader Graph, you can pretty much add various different things together.

And you can get surprising results will be adding stuff like numbers together, colors together – we’ll even be adding colors and stuff like noise maps together to create a colored noise map and various other things as well.
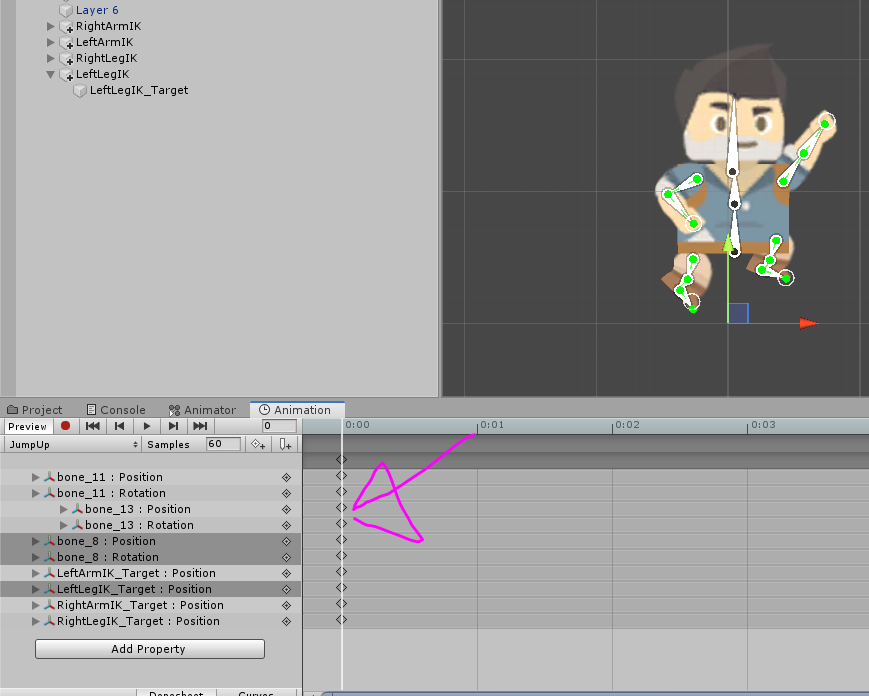
Okay, but how do we actually set this as a material and apply it in game? Well, first of all, let’s click on the Save Asset button up here to save this asset. And then we can just click on the X up here to exit out of the shader graph. And we can then go to assets folder materials. And I’m going to right-click go create. I’m going to create a new material code, test material. And then to set this material to have a shader we can go up to the Shader here, click on this and we want to find Shader Graphs and ExampleShader and as you can see, it will pop up we also have that property’s here we have a number of property, we also have our color property.

And what we all want to do then is in our scene view, we can just simply drag and drop it onto a character. I can then change the color here. And as you can see, it will change the appearance adding this to the color red.

And in the next lesson we are going to be going over, a bunch of different nodes that will be using inside of our feature Shader Graphs, and I’ll just explain how they work and how they can even work together. So I’ll see y’all in the next lesson.

Interested in continuing? Check out the full Shader Graph for Beginners course, which is part of our Unity Game Development Mini-Degree.


A Guide to the Unity Animator for 2D Characters

$
0
0

Introduction

What is it that an animator does? What summary can we give that would accurately describe the operations an animator performs? Is an animator an artist illusionist? Is he a virtual puppet master? What about video game animators? Are they much different from a pen-and-pencil animator?

I would say that when it comes to video games, animators are both an illusionist and a puppet master. An illusionist that crafts a realistic movement, and a puppet master that orchestrates this movement. In this tutorial, we will take an animated character and be its puppet master. We will take the animated motions of this character and dictate to it when it will run, jump, or walk. We will create a system of machines that will intelligently transition between actions and take keyboard input from the user. At the end of this tutorial, we will have a complete 2D character that will behave in such a way you would almost expect it to declare, “There are no strings on me!”

Requirements

This tutorial uses a 2D sprite that was rigged in this tutorial (Rig a 2D Character in Unity) and animated in this tutorial (Animate a 2D Character in Unity). If you are interested in sprite rigging or 2D animation, have a look at those two tutorials. Both are an in-depth view of rigging and animating a character. Or, if you like, you could download the project files from the animation tutorial and jump right into this one. Here is a link to the project files that will get you started in this tutorial: Project Files. This project also requires the “2D Animation,” “2D Sprite Skinning,” and “2D Inverse Kinematics” packages so make sure you have those downloaded and imported into your project before continuing (for instructions on downloading and importing the packages, refer to the first part of this tutorial: Rig a 2D Character in Unity). Also, some familiarity with C# would be quite helpful. If, however, you aren’t confident in your C# coding skills, follow along with this tutorial anyway. You will still be able to complete this project even if you have limited knowledge of C#.

The Animator Component

Let’s start by examining the Animator component. Click on the Adventurer character and have a look at the Animator component.

A view of the Unity Animator component.

The “Controller” field is where we assign an animator controller.

A closer look at the Controller field on the Animator component.

An “Animator Controller” allows us to create interactions between animations. It is where all the running, jumping, and walking actions come together into one unified site. We already have one assigned to this field and you can go to Window -> Animation -> Animator to see what an Animator Controller looks like.

Accessing the Unity Animator window.

A view of the Unity Animator Controller.
As you can see, all of our animations are stored here ready for us to do structure interactions between them. For now, however, let’s go back to the Animator component and continue examining it.

The Avatar field on the Unity Animator component.

The “Avatar” field is fairly self-explanatory. This is where we would assign the Avatar property. You’ll notice this field is empty. This is because an Avatar is primarily for 3D humanoids as opposed to 2D. Since we’re operating in 2D, we have no need for an Avatar.

Root Motion on the Unity Animator.

“Apply Root Motion” will determine whether or not our character will move in an additive way. With this enabled, our animation will be what drives the locomotion of our object not the scripting of the game object. This obviously contributes to a more realistic character animation but it requires the animator to actually animate the character moving forward. All of our walk and run animations have the forward motion animated into the clip so we want this enabled.

With Root Motion enabled:

An animation with Root Motion enabled.

Without Root Motion:

An animation without Root Motion.

“Update Mode” determines what frame rate the Animator should use.

Update mode on the Unity Animator Component.

“Normal” simply uses the frame rate that the Update() method uses. This is the one we’re going to be using as it is will match the current frame rate of the game. “Animate Physics” uses the frame rate that the FixedUpdate() uses. It is best for animations with a lot of physics interactions as this operates on a completely different frame rate than “Normal”. And “Unscaled Time” simply runs all animations at 100% speed. This is best for UI animations that aren’t trying to be realistic and have no physics interactions.

Culling Mode on the Unity Animator Component.

“Culling Mode” determines how the animations will behave when they are outside of the view of the camera. “Always Animate” will keep the animation running. This is obviously the most memory intensive option but for a 2D game, it will not make much difference. “Cull Update Transform” will pause the animation but will continue to update the transform. And “Cull Completely” will disable everything. For the sake of this tutorial, I’m going to set it to Always Animate.

Now that we have some fair knowledge of the Animator Component, let’s start working in the Animator Controller!

Creating the Running Mechanic

If you haven’t already, go to Window -> Animator and dock the animator tab somewhere in your workspace. I chose to put it directly underneath the scene view. You’ll notice that all of our animations show up here as grey rectangles.

Another view of the Unity Animator Controller.

These are called “states” in Unity. You’ll notice that one of them is orange. This is known as the “Default State” and it is this is what will run as soon as we play the game.

A gif of what happens when we press play at the moment.

The first action we need to make for our character is the ability to run and walk. So let’s think about how we’re going to do this. We have two animations, run and walk. We need a way to have both of these played consecutively. When the player presses the left and right arrow keys, the character needs to go from an idle state to a running state without it being a jerky transition from standing to running. We can prevent a jerky transition by having the character blend between the idle, walking, and running animations.

The way we would do this in Unity is by creating what is known as a “Blend Tree.” A Blend Tree will take a series of animations and blend between them based on input from a parameter. This explanation can be a little confusing so let’s see what it looks like in practice.

Right-click in empty space on your Animator and select “Create State -> From New Blend Tree.”

Creating a New Blend Tree

Name it “Locomotion.” Right-click on the blend tree and select “Set as Default Layer State.”

Setting the Blend Tree to a default state

This means that as soon as we hit play, the blend tree will immediately start playing. Now double click on the blend tree to open it.

A View of the Locomotion Blend Tree

A couple of things we should note. First, the “Blend Type” is set to 1D.

1D Blend Type in this Unity Blend Tree

This means the blend tree will only take input from one parameter. The other types (“2D Simple Directional”, “2D Freeform Directional”, “2D Freeform Cartesian”, and “Direct”) use more than one. In this tutorial, we’re only going to be using 1D but have a look at this Game Dev Academy tutorial (Unity Animator – Comprehensive Guide) if you’d like a more in-depth look at this portion of the blend tree.

Second, if you click over to the “Parameters” panel, you’ll see it’s created a new parameter called “Blend.”

Parameters of the Unity Animator

There are different types of parameters (“float”, “int”, “bool”, and “trigger”) and they all behave sort of like variables in the Unity animator. They also can be accessed through scripts which we will be doing a little bit later. A blend tree requires that we have a parameter so it has automatically created one for us. This is what will determine when a certain animation will play. Let’s name it “Speed” since speed is what will determine whether our character is running or walking.

Now, let’s construct the body of this blend tree. Hit the plus icon in the inspector and add three new motion fields.

Adding motion fields on this blend tree.

Drag our Idle, Walk, and Run motions into these fields.

Placing our animations in their proper place on this blend tree.

Because “Automate Thresholds” is checked, we can use the slide on the lower part of the blend tree square to see when exactly our character will be running. Hit play and drag the slider around.

A gif of what the Speed parameter being changed during runtime

As you can see, our character will run or walk based on the value of the Speed parameter. You can customize the thresholds by unchecking “automate thresholds” and changing the values. We usually leave one as the maximum speed value so don’t go past that. I like the current thresholds (idle at 0, walking at 0.5, and running at 1) so I’m just going to leave “automate thresholds” checked.

Creating the Jump mechanic

The final mechanic for our character! This has a bit of a different structure than the locomotion blend tree because, if you will remember, we made three poses for our jump mechanic rather than three animations. So this mechanic is going to make use of something called “Transitions.” The name is fairly self-explanatory, however, we’re going to look at the various ways we can tweak transitions to give us that jumping look.

First, create a new trigger parameter called “Jump” and a boolean parameter called “Grounded.”

Adding two new parameters.

[should be “Grounded” instead of “Ground”]

Jump is what we will use to determine if the player has pressed the jump button and Grounded is what we will use to determine if the player is on the ground. Next, locate your three jumping poses (“JumpUp,” “MidAir,” and “Landed”) and place them near each other. Now, right-click on “JumpUp” and select “Make a Transition.”

Creating a transition from the JumpUp state to the MidAir state

You’ll notice a white arrow has come from the JumpUp state and is now tracking to your cursor.

The transition interface and how it moves with the cursor

Left-click on the “MidAir” state (I use the term “state,” “pose,” and “animation” interchangeably in this section). You have now created a transition! Create another transition from MidAir to Landed and that will complete the majority of our mechanic.

All three jump states connected by transitions

Now, we just need to customize each transition.

Transitions

Select the JumpUp to MidAir transition.

A view of the settings on a transition

Notice all the settings that appear in the inspector.

A look at the Has Exit Time setting

“Has Exit Time” will determine if the animation will play to the end or transition immediately. The other settings under the “settings” drop-down are all fairly self-explanatory and can be configured in the timeline we see in this window.

How to customize the settings via the timeline

This timeline will determine how long the transition will be and where in the clip it will transition. The only setting here that cannot be customized through the timeline is the “Interruption Source.”

A closer look at the Interruption Source

Right now it is set to “None” which means the transition essentially cannot be interrupted (there are exceptions to this which we will look at later). This is the setting we want for the Jump Mechanic but it’s worth having a look at the other options in case you will have need of this in your other projects. Click on this setting and notice all the other options.

A view of the options in Interruption Source

This determines what transitions will play if an interruption to the current transition is detected. All of the options seem kind of ambiguous but if you stare at them for a little while, they start to explain themselves. For example, if it is set to “Current State Then Next State,” when the transition is interrupted, it will play the transitions that are on the current state and then play the transitions on the next state. The converse is true for “Next State Then Current State.” If this transition is interrupted, it will immediately play the transitions on the next state and then play the transitions on the current state. This seems really complicated but I hope you can see how useful this could be. Imagine you had a die sequence. If the character is hit by a fatal bullet, you would want the normal hit animation to play and then you would want the die animation to play (likely in that order). And you would want all of this to interrupt whatever transition was currently playing. Interruption Source seems complicated but I hope you see how useful it could be.

The final setting we need to look at is the “Conditions” box.

Highlighting the Conditions box on the transition

Here we can tell the animator to check certain parameters in a “true-false” scenario. If all the conditions are met, then the transition will play.  If this is empty, it will simply play the transition after the Exit Time has elapsed. We will be using the conditions box to determine if the “Jump” trigger has been activated and whether the player has landed. At the moment, however, there is some important clean up we must do in order to complete our Jump Mechanic.

Sub-State Machines

Zoom out and have a complete look at your Animator Controller.

A chaotic Unity Animator Controller

It looks very cluttered. There are half a dozen animation states, transitions going all over the place, and just a general lack of order. This leads to a very inefficient workflow because we have to implement a few more transitions into this to complete the Jump Mechanic. This is where we need to introduce a tool called a “Sub State Machine.” A Sub State Machine is essentially an instance of the Animator Controller that exists within the larger Animator Controller. This means we can put all our Jump poses in the Sub State Machine and have them behave in the exact same way they are now. This will tidy our workspace and increase our Controller’s efficiency.

Right-click in empty space and select “Create Sub State Machine.”

Creating our first Sub-State Machine

Name this “Jump.” Delete the Idle, Walk, and Run animations if they’re still in the animator.

Deleting the Walk, Idle, and Run animations

Now, select all three of our jump poses and drag them on top of the sub-state machine to place them inside of it.

Placing the jump poses in the Jump Sub State Machine

Double click on the sub-state machine to open it up.

Inside the Jump Sub State Machine

You can go back to the Base Layer by using the bread-crumb in the top left corner.

The bread-crumb navigation on the Unity Animator

You’ll notice the presence of four states. “Any State,” “Entry,” “Exit,” and “(Up) Base Layer.”

Highlighting the default states in the Sub-State Machine

“Any State”, “Entry”, and “Exit” exist in the base layer; Up Base Layer is the only new state we get inside of this sub-state machine. Any State means if the condition of the transition coming from it is true, then it will transition no matter what animation is currently playing. This is the only state that will interrupt Interruption Source when it is set to “None.” Entry is simply whenever the sub-state machine has been transitioned into. In the Base Layer, this is what is called right as soon as you hit play in the editor. If you were to transition into this sub-state machine, it would go through this state. “Up Base Layer” and “Exit” function in similar ways, however, in Up Base Layer you can specify which state you’d like to transition into while the Exit state simply goes to the Entry state on the base layer.

Configuring the Jump Sub-State Machine

On paper, the functions of these states may be confusing but if you take them at face value, they make intuitive sense. For our Jump Mechanic, we want to transition from the “Any State” to our JumpUp pose. Right-click on the Any State state and make a transition. This transition needs to have a condition. This condition needs to be the “Jump” trigger parameter.

The settings on the Any State -> JumpUp transition

Just like that. Now, whenever this trigger is switched, the character will jump no matter what action is currently running.

The settings for this transition are simple. We need to disable “Has Exit Time” since we do not want the previous animation to run to completion and we want the character to jump right away. Next, we need to specify a duration. It should be something very short since, as I’ve stated before, we want there to be no delay with this jump. I’ve found a value of “0.25” to work well.

Highlighting the settings on the AnyState -> JumpUp transition

For this next transition (the Jump to Mid Air transition) we make use of the “Grounded” boolean parameter. Since this parameter is what we will use to determine whether the character is touching the ground or not, we want the “Mid Air” pose to play while the character is in the air. Create a condition for the Grounded parameter when it is set to “false.” This is the only condition we need so let’s set the other settings. It doesn’t matter much if there is an exit time on these animations since they are so short. Simply leave it to whatever it is by default. Now we need to set a duration. We want the transition to be very quick as we transition from Jump to Mid Air. Set it to “0.1” as this gives us just enough transition while not slowing down the mechanic.

Highlighting the settings on the JumpUp -> MidAir transition

We are done with this transition! We just have to configure two more.

The Mid Air to Landed transition is similar to the previous transition in that it needs to be extremely quick. This is the moment where the character impacts the ground and it would look awkward if there was a delayed reaction. Set the duration to be almost nothing at “0.01”. For this transition, it might be a good idea to disable exit time in case leaving this checked would contribute to a few moments of delay. And finally, we need to have a condition. Just like the previous transition was when the character was in the air, this one will be when the character impacts the ground. Therefore, we need a condition for the Grounded parameter when it is set to “true.”

Highlighting the settings on the MidAir -> Landed transition

And with that, our transition configured! Now on to the final one.

This final transition is when the character “picks himself up” after impacting the ground. This transition should have no conditions and we can leave exit time enabled since we’re not worrying about delayed reactions here. As for the duration length, I set mine to 0.25 but I encourage you to tweak this value. A larger value will get a “slow getup” look while a shorter value will have a “quick pick up.”

The final aspect we need to configure with this transition is where it will transition to. We have two options, we could transition into the Up Base Layer state or the Exit state. We could get the same result for each option but one has some apparent benefits that the other doesn’t possess. The best choice here is to transition into the Exit state for two reasons; the first being that it increases the scalability of the Animator Controller. If we used Up Base Layer, we would have to specify which state to transition to. This isn’t a problem for us now since we only have one other state (the Locomotion state) but what if we had more than one? We would have to prioritize which state to transition into after we are finished jumping which is something that shouldn’t be done when it comes to creating an efficient Animator Controller. The second reason is that it makes our animator controller look very tidy. Have a look at the Base Layer and notice how clean it looks having only one transition on the Locomotion state. Ultimately, transitioning to the Exit state is the best choice for tidiness and scalability.

Highlighting the settings on the Landed -> Exit transition

Alright! That is all for our Jumping Mechanic! It is now complete

Scripting our Character

If you were to hit play, you could control the character by fiddling with the values in the parameters panel but that makes for a very lousy game. Instead, we need to be able to modify these values through some form of input such as the keyboard.

Create a new folder called “Scripts” and create a new C# script called “PlayerController.”

A newly created script called PlayerController

Here is the code that will go into it:

using System.Collections;
using System.Collections.Generic;
using UnityEngine;

public class PlayerController : MonoBehaviour
{
    private Animator thisAnim;
    private Rigidbody2D rigid;
    public float groundDistance = 0.3f;
    public float JumpForce = 500;
    public LayerMask whatIsGround;

    // Use this for initialization
    void Start()
    {
        thisAnim = GetComponent<Animator>();
        rigid = GetComponent<Rigidbody2D>();
    }

    // Update is called once per frame
    void Update()
    {
        var h = Input.GetAxis("Horizontal");

        thisAnim.SetFloat("Speed", Mathf.Abs(h));

        if (h < 0.0)
        {
            transform.localScale = new Vector3(-1, 1, 1);
        }
        else if (h > 0.0)
        {
            transform.localScale = new Vector3(1, 1, 1);
        }

        if (Input.GetButtonDown("Jump"))
        {
            rigid.AddForce(Vector3.up * JumpForce);
            thisAnim.SetTrigger("Jump");
        }
        if (Physics2D.Raycast(transform.position + (Vector3.up * 0.1f), Vector3.down, groundDistance, whatIsGround))
        {
            thisAnim.SetBool("Grounded", true);
            thisAnim.applyRootMotion = true;
        }
        else
        {
            thisAnim.SetBool("Grounded", false);
        }

    }
}

This script requires the character to have a 2D Rigidbody component and a collider of some sort. I set up my scene to look like this so I could test out my character:

The character with a rigidbody, collider, the PlayerController, and a ground to stand on.

With this script, it is important to note how we access the parameters from the animator controller. We use a variable of type “Animator” and access a parameter by saying “.SetBool(*Name of Parameter*, *value*).” Two other important features are how we take input and how we assign the value of the “Grounded” boolean. Assigning this boolean was the most mystifying for me when I was learning how to work the Unity Animator. What we’re doing is sending a raycast (a raycast is simply a ray shot in a specified direction that can collect data about what it hits) in the downwards direction and thereby determining if the character is touching the ground or not.

The way we are taking input is by saying “Input.GetAxis(“*specify name of the axis*).” This is a good way to take input since it is cross-platform, meaning, we wouldn’t have to change this value if you were to export it as a console game or as a PC game. Go to Edit -> Project Settings -> Input to see exactly what is going on in with this method.

Accessing the Input Menu

The Input settings menu

For a desktop game, the “Horizontal” input is the left and right arrow keys. Therefore, if you hit play, you can now operate our character through the keyboard. Pretty cool, isn’t it?

A gif of the completed character controller

If you attempt to jump in your game and notice that the character always seems to be stuck in a jump pose, check the “What is Ground” variable on your PlayerController script. It needs to be set to “Everything” in order for it to work.

Setting What Is Ground to Everything

Conclusion

This character was rigged, animated, and scripted all from scratch. If you were able to complete all three of our animation tutorials, I, with the power vested in me as a game developer, do declare you an official video game “Puppet Master.” It is no small achievement to have completed all of that. I am sure you will find these skills used over and over again in your own video game projects. That’s it for me.

Keep making great games!

Web Class: Learn Materials in Unity

$
0
0

You can access the full course here: Intro to Game Development with Unity

Transcript 1

Welcome back everyone. In this lesson we are going to be going over materials inside of Unity.

Materials define how an object looks in the game. They can define the texture of the object, the color, the reflectiveness, how transparent it is. In the example to the right, what we have is three different three different materials.

Now, a material in Unity is in asset that takes on the properties of something called a Shader. A Shader is a bunch of code that you can write which defines how the game engine renders an object on your screen. It takes into consideration the viewing angle, the lighting and a bunch of other properties such as color, texture. Runs that object through a specific shade and presents what it looks like to your screen. Unity has their own standard shader, which is what we’ll be using and that allows us to change many different things. We can add textures, color, transparency, emission a bunch of other features that is included on Unity’s standard shader.

On the example to the right here, we have three different materials that are being used to create the cars. We have the wheel material which is using a the Unity Standard Shader and a car texture. Then we have the blue car material which is using another car texture, a blue color tint and a custom bodywork shader that they have created. And yeah let’s hop into Unity now and create our first material.

Okay, so what we wanna do is go to the assets folder here and I’m gonna right-click and create a new folder. So, I’m going to right-click, go Create folder and I’m gonna call this folder, Materials. We can double click to open that folder and inside here, I am going to right-click, go Create and I can then select Material to create a brand new material. For this material, I’m just gonna call it, My Material and we have this material created now.

And on the right hand side, inside of this inspector we can see all of the properties that we can change. You can change the color by selecting this little color box here. You can change what the material looks like. And as you can see down here is a preview. We can click and drag this up to have a look at the preview here. So, we can change the color, we can change how metallic it is, you can change the smoothness, we can change the many things, we apply textures, emission. If you have a texture you can then do tiling and offset of that texture and a bunch of other stuff as well.
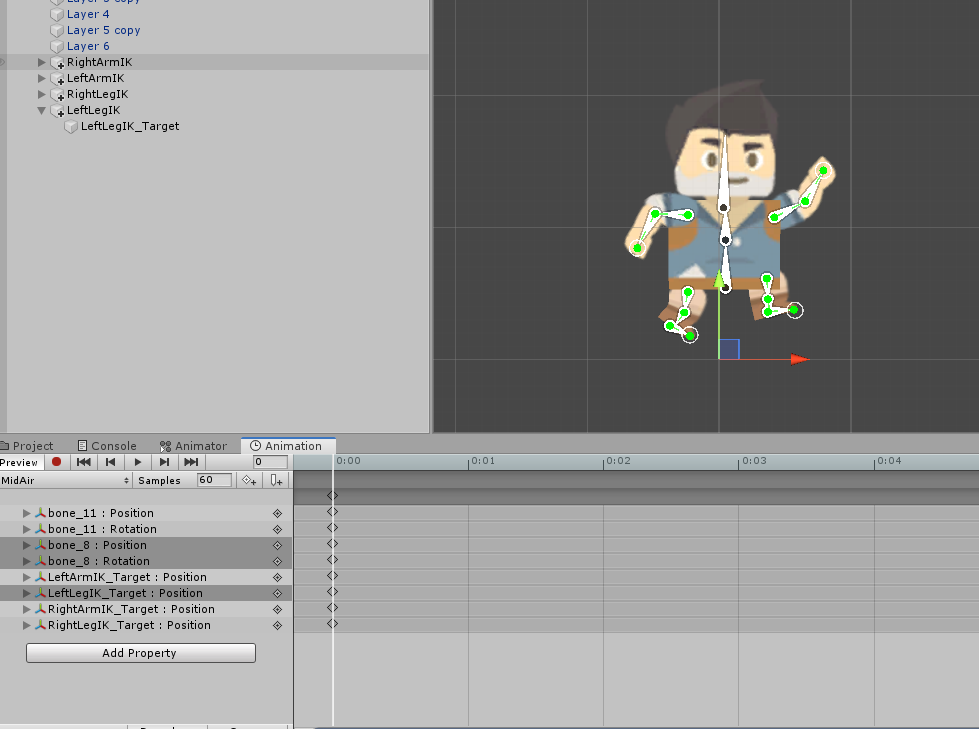
Now, if we look up here where it says, shader. We can select which shader we want to use on this material. So, I can select shader here and you can see there is a bunch. Unity, does come with a bunch of different shaders that we can use. Most of the shaders are specific for one certain aspect like shades for particles, for UI, for sky boxes, for sprites. So, we can go through maybe select one. Let’s go unlit and color. And this will create a solid color that we can choose right here. We don’t want this so let’s actually switch back to the standard shader by clicking right here.

And now how do we apply a shader to a model? Well, to do that I’m just gonna first of all change the color here to red and then we can drag this material this material asset on to whatever model we want in the scene. So, I can click. I can let go and as you can see this capsule now has the material. If you don’t wanna drag and drop materials on we can actually select the model and in the inspector under the mesh renderer component here we can open up the little materials tab and just set this material here. By clicking on the circle and selecting whatever sort of material we want from here.

So, we have material applied now. Let’s actually look through how these materials work and how we can change them to make them look like whatever we want.

So, first of all I’m gonna right-click here. I’m going to create a new 3D sphere. I can probably move it over here and now let’s create a another new material. So, I’m gonna right-click, go Create, I’m gonna go Material and I’m just gonna call this one our Sphere Material. Then I can drop and drag it on to here. We can’t see it yet because it is what it is the exact same as the default shader but if we change the albedo color here to let’s just say a yellow or a green, we’ll change it to a green. You can see that it looks green.

Let’s begin with the metallic slider. This determines how metallic the object looks like. How sort of metally it looks like. If we increase it more you can see that it’s starting to look more like a metal green ball. We can make that really less metallic or more.

The smoothness determines, when light hits this object how much reflection is there. If the smoothness is on zero then the light will hit it and there won’t really be any reflections applied to this. If we bring the smoothness up and more you can see that it starts to actually reflect the skybox, outside surrounding it. We can zoom in. We can see that, yes. This is the skybox because the light from the sky is bouncing on this sphere here and reflecting off. We can increase the metallic level then to make it even more prominent and so this kind of looks like a very metallic mirror ball almost. And if we change the color to white you can see that this does indeed start to look very very reflective.

Well, let’s just say you want a texture on something. Well, what I’m gonna do here is I’m gonna right-click, I’m gonna go 3D object and I’m gonna create a plane. Now, a plane is basically just one big flat model here. It’s just one flat face. We can maybe bring this down here maybe make it a bit bigger less at the scale to maybe three by three by three. So, it’s pretty large and what I’m gonna do is I’m going to right-click here, go Create, New Material and I’m gonna call this material our Ground.

Now, if you downloaded the included project files then you should be able to drag in a folder called Textures and inside of this folder here we have a stone texture as you can see here and we also have a normal map. And this sort of determines how light behaves when it hits it. It can add more depth and make it seem like the object is actually there interacting with your world.

So, what we’re gonna do is I’m gonna go back to my assets folder here, go Materials, click on my Ground and I’m gonna drag and drop it like so. To add a texture to a material. Where it says Albedo, I can click on the little circle to the left and I’m gonna select our stone underscore textures texture like so. And as you can see we now have that texture applied fairly quickly. I’m gonna bring the smoothness right down to zero so it looks a bit more like stone.

And we can actually set then the tiling as well. So, down here in tiling an offset I can increase the X to basically add more tiles and the Y as well to increase more along the Y. I’m gonna probably set this the two by two just so if there’s a couple more bricks there and the offset pretty much just offsets the texture. So, if you do want some sort of scrolling textures you can affect this in script but for us we’ll just keep it at zero for now.
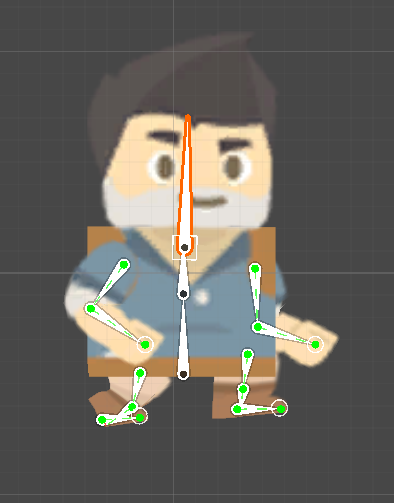
We can also apply a normal map. These aren’t necessary but if you do want to make your textures look a bit better you can do so. So, we can click on little circle here next to normal map and I’m gonna select this stones underscore normal. It will sort of reload and as you can see these stones now look like they have a bit more depth and sort of reflect with the light a bit better. You might see that says, this texture is not marked as a normal map and that is because when you import a normal map you kinda do have to mark it as a normal map so it knows. So, we can just simply click on Fix Now and it will be fixed like so.

So, there we go we have our ground material, we have a metal sphere here. In the next lesson we’ll continue on with currents and materials. We’ll be looking at transparency and emission. So, I’ll see you in the next lesson.

Transcript 2

Welcome back everyone. In this lesson we are gonna continue on with learning materials inside of Unity. In the previous lesson, we created a red material for our little play here. We then created a metallic sphere, which reflects the environment. And we also created a plane here with a texture and normal map on it.

So, in this lesson, we are gonna be going over emission and transparency. Let’s start with transparency.

So first of all, I’m gonna select this sphere here, and press Ctrl + D to duplicate it, and I’m just gonna move it off to the side here. Maybe move it down a bit as well. And what I’m gonna do then is create a brand new material here, so I’m gonna right-click in the project window. Go to create, material, and I’m gonna call this one our ‘TransparentMaterial’. I can tell drag and drop that on, and first of all what I’m gonna do is change the rendering mode of the material.

As you can see right now, it is set to opaque. So this means pretty much we can’t see through the object, it is a solid object. We can click opaque, and we can change this to transparent. Nothing has changed yet, because we actually haven’t changed the alpha value, which determines how transparent it is. So we can click on the albedo color here, and just change the alpha value. At the moment, it’s at 100, so it’s 100% visible, but we can then move that down, and as you can see, we can slowly begin to look through our object. If we that to zero, then it’s not at exactly invisible, and that is because the transparent rendering mode is a bit different than what you might want.

And what you might want is actually the fade mode which we can select here. And that means that if it’s at 0%, it’s totally invisible, yet at 100% it’s totally visible. So we can put that probably about maybe 50, we can put it about there. And what we can do then is, let’s also change the color to something, we’ll make that maybe a blue, and yeah. As you can see we have our transparent object. We can see through it, we look at different things. And also, the shadow is transparent as well, or translucent actually. It’s less bright than the opaque objects.

Now, let’s create an object with something called emission. Inside of Unity, lighting is basically what illuminates the world, and right now we have our directional light up here. So it is here emitting light. Now, this directional light isn’t based on this position here. In fact the directional light, doesn’t matter where we move it, it doesn’t change. That is because, unlike a normal light, which when you move it, it changes basically what it’s looking at, this directional light acts as if it’s the Sun, so it comes from one direction, and the only way we can change the angle of the shadows, is by changing the rotation.

As you can see, it changes, objects get darker the higher up the Sun gets. When it gets down, it’s get dark. Now, Unity standard shader interacts with the light. It checks where it’s coming from, and where your viewing angle is to pretty much calculate what the object will look like, how much it will reflect. Is it darker on this side because it’s not in direct view of the light? Whereas over here, it is in direct view of the light, so it is brighter. And of course, there are shadows created. Now what emission does is make it so that an object looks as if it is glowing, looks as if it is emitting light, when in reality it’s not.

So what we can do, let’s duplicate this sphere here again. Move it over here, you can duplicate it with Ctrl + D. And what we’re gonna do is create a new material, so right click, create, material, and I’m gonna call this one our ‘EmissionMaterial’. I’m gonna drag and drop it on. Set smoothness down to zero, and I’m gonna set the albedo color to, let’s just say, a purple, and then we can scroll down, and here where it says emission, we can tick that, and it will open up with this here, a new color. Let’s click on the HDR, and I’m gonna change this color to something like so. Maybe make it a purple-pinky again.

And then we can do is increase the intensity here, So I’m gonna click the +1, maybe +2, and as you can see, this object is now illuminating light. Now it’s not really illuminating light. It just visibly looks like it’s illuminating light. If you wanted to create, for example, a light bulb, you would have a light bulb object, and you would have a emission on that, so it looks bright, no matter of the environmental lighting, and then you probably have a light component attached to it.

So, let’s actually go to our directional light, and disable it. You can disable or re-enable objects by clicking on the little tick right here, next to the name of the object, so if I click that, the directional is disabled. All the other objects here, they look much darker, because there is no light on them, whereas our emission material object here, it looks exactly the same. You see, we can toggle on and off the directional light, and nothing is changing for that. That is because this emission here does not really care what the outside light is doing to it. It is emitting its own light on the material, irrelevant to whether or not there is light on it, whether or not it is in shadow, or anything like that.

OK, now let’s have a challenge. I want you to create a table using cubes, and then create a wood material, and apply it to the table, with the included wooden texture.

So, if you go to the asset window. You should, if you download the included project files, have a folder called ‘Challenge 2’. Just drag that into the project window here, and inside we have a ‘Challenge 2’ scene, we can open that up, and we have a wood texture, and wood normal map. So, create a table with four legs, and apply these materials to the table. So check back in once that’s done.

OK, hope you gave that a shot.

Now, what I’m gonna do is show how to do it. First of all, here in the hierarchy, I’m gonna right-click, go create 3D object, cube. I’m gonna set the cube’s position to zero, zero, zero, maybe 0.5 on the Y. I’m gonna set the scale now to maybe two by 0.5 by two. Actually, we’ll set that to 0.3 on the Y, so it’s a bit thinner. And down here in the project window, I’m gonna right-click, go create, material, and I’m gonna call this one ‘Wood’. Actually I’m gonna call this one our ‘TableTop’.

We can then drag this ‘TableTop’ onto the table there, and I can tell drag in our wood texture to the albedo little box here. Drag the normal map into the little normal map box here, and there we go. We got our table material here all set up. I can actually set the smoothness right to zero if we wish. I’ll keep it there, 0.5.

Now, for the legs, I’m just move this up a bit. I’m gonna go Ctrl + D on this top here, and for the scale, I’m gonna set this to 0.3 by 1 by 0.3. We could also use, to move it around, we can just do it like this, or we could use vertex snapping. So I’m gonna press V, go to the top right corner here, click, drag and, actually no, top left here. Click, drag ’till it snaps to there. Ctrl + D, do the same, like so. Ctrl + D, press V to go to vertex snapping. Move it over there, and do the exact same over here as well, whoops. And do the exact same here as well.

So there we go, we got our table, but you might notice that the legs look a bit weird, and that is because if you use a single material on an object that has, on multiple objects that have different scales, then the material can be warped. So if I press R for example, and move this, you can see that this material stretches.

Now, let’s just say we’re back here. We can actually create another material, so we’ll go create, material, and I’ll call this one our ‘TableLeg’. We can drag in our wood texture, again to the albedo, normal map into the normal map, and drag this into our legs. Now, at the moment it’s the exact same. It’s not gonna look too different right now. We can drag it in like so. But we can do is down to our tiling here, and reduce the X of it, ’cause right now we’re having the entire texture spread across the face of the model here. So we can reduce this down a bit, so it looks a bit move like the wood, maybe about 0.3, and then on the Y, we’ll also put that at 0.3. So as you can see, these legs now have a bit more of a uniform shape to the texture.

It’s not squished any more, and we have our wooden table complete and ready to go. In the next lesson, we are going to actually make a start on programming inside of Unity. Learning the C# programming language, and get in to actually start scripting. I’ll see you all then, in the next lesson.

Interested in continuing? Check out the full Intro to Game Development with Unity course, which is part of our Unity Game Development Mini-Degree.

Web Class: Setting up Unity for Mobile Games

$
0
0

You can access the full course here: Mobile Game Development for Beginners

Transcript

Hey everyone. In this lesson we are gonna be going over how to set up Unity for Android or iOS so that you can then create a game, and build it to either your Android or iOS device.

First of all, I’m here inside of the Unity Hub. What we need to do is make sure that we actually have the Android or iOS components installed to our version of the Unity editor. I’m gonna click on the installs button up here to go to where I have all the different versions of the engine that are installed. And I’m gonna be using Unity 2019.1. As long as you’re using 2019, then building to Android you don’t actually need to download the external Android SDK or anything like that. It’s all built into Unity already.

All we need to do, once you have your version of Unity installed, we need to click on these three little dots here. And then select add component. What we want to do is we want to either select Android Build Support and the Android SDK & NDK Tools. This is about 4.8 gigs, and this will install all the stuff we need in order to build to an Android device. Otherwise, if you want to build to an iOS device, then you can just select the iOS Build Support down here. But, for now, in this course I’m gonna be building to an Android device, so I’ll be selecting the Android Build Support and Android SDK & NDK Tools. And then I’ll just click on next here. We can then click on I have read and agree with the above terms. Click done, and it should then begin to install.

Now, inside of Unity there isn’t really that many differences that we’ll be doing, depending on if you’re building to Android or iOS. It’s all relatively the exact same, except for when we’re actually building the project for Android where I would just build it directly to a device, whereas with iOS you do have to build it, and then build it again inside of Xcode. But if you’re building to an iOS device we’ll go over how to set up Xcode, how to set that all up, and connect it to your device.

All right, once that’s finished installing we can just check to see if we have all the components added. Yep, and it seems that I have Android Build Support already installed, or if you’d done iOS Build Support that will be installed as well. What we can do now is create a new Unity project. I’ll click on the new button up here. I’m gonna enter this as just MobileCourse. The Unity version, we want to use that 19.1, as that’s where we installed our Android component. And then we can just click create projects and get inside of the editor.
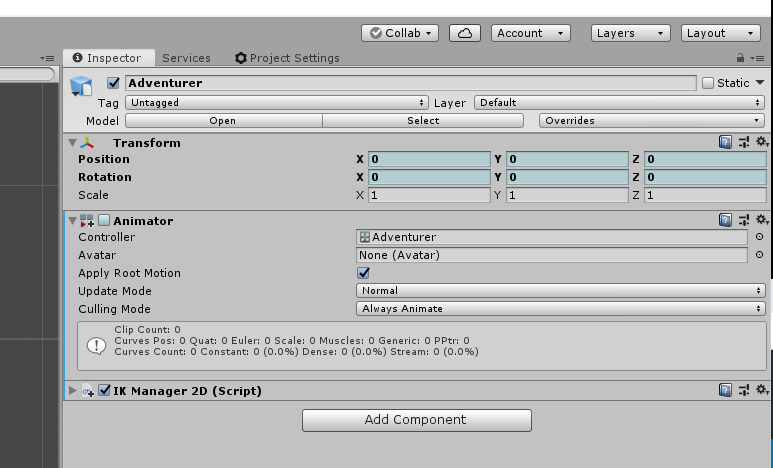
All right, here we are inside of the Unity editor. Now what we need to do is convert our platform over to either Android or iOS. Now, as you can see in the top of the screen here, it says we’re in the PC, Mac, and Linux standalone platform inside of Unity. To change that we can go file, build settings. And here in the build setting what we should see now is either the Android or iOS platform here. I’m just gonna select Android, and then click on the switch platform button.

Now, depending on how large your existing project is this could take some time. But since we are in a brand new project that’s empty it happens almost instantly. Now you can see at the top of the screen it says Android.

In the next lesson, we are gonna be going over just setting up the editor a bit. We’ll be adding in our folders, importing some assets, and just setting up a little basic scene where we can start going over all the different touch inputs and gestures in future lessons. We’ll also go over how to set up some different aspect ratios in the game view to match whatever your device is. So see you all in the next lesson.

Interested in continuing? Check out the full Mobile Game Development for Beginners course, which is part of our Unity Game Development Mini-Degree.

Web Class: How to Detect Touch Input for Mobile

$
0
0

You can access the full course here: Mobile Game Development for Beginners

Transcript

Hey everyone, in this lesson, we are going to be setting it up so we can actually touch stuff on the screen. We’ll be detecting touch inputs, and then we’ll be shooting a ray cast towards what we touched and interacting with that object in some way. What we’re gonna be doing with the interaction is actually changing the color of whatever we touched to a random new color.

So what we’re gonna do now is go to our Scripts folder, I’m gonna right click here, I’m gonna create a new C# script called ColorChanger. And what I’m gonna do is also just attach this to our main camera here. And then we can open up the script inside of Visual Studio.

Okay, so to begin, we are going to actually just have one function, and that one function is going to be the update function, which gets called every single frame of the game. And this is actually the only function that we’re gonna be needing and using in this script. So, inside of the update function, what do we wanna do?

So the first thing I’m going to do in the update function is check are we touching the screen? So we can go if input to access the actual input class of Unity – which has many things such as keyboard inputs, mouse inputs, and, of course, touch inputs.

So it will go if input .touchCount if this touchCount is greater than zero, so if there are more than zero touches on the screen and the input.touches, now touch input.touches is a array of all the different touches that are currently on the screen, so to access the first or if there is only one touch on the screen, we can just access the zero element, the first element of the array. If that touch.phase, now there’s also a phase for a touch. And there are multiple different phases such as began, moved, stationary, released.

So if this touch phase equals equals, TouchPhase.Began, so, if there is more than one touch on the screen, and that touch has just begun, if this is the frame that this touch has just touched the screen, then what we’re going to do is create a ray cast from where we touched it on the screen first of all. So it will create a new ray here, and it’s gonna be equal to our Camera.main.ScreenPointToRay. And the point on the screen we want to create a ray cast from is going to be the Input.touches, the first touch .position. So this is gonna create a ray cast on the screen from where we touched, and it’s gonna be shooting at whatever we are pointing at.
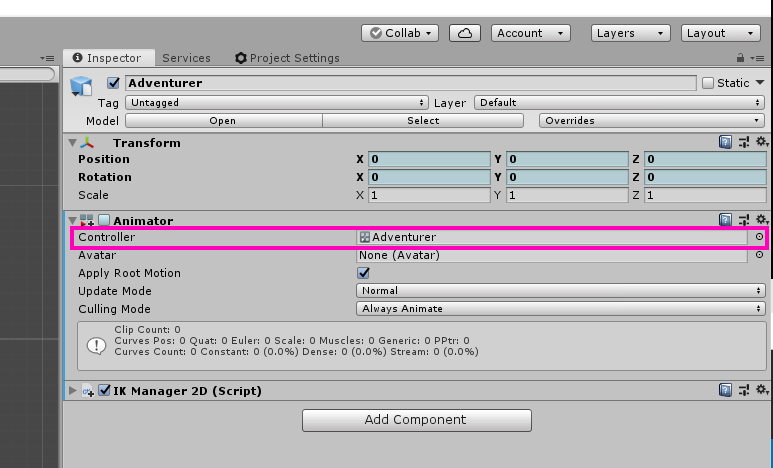
Since we are gonna be hitting an object and we need to know information about that object, we also gonna create a RaycastHit object here, which is gonna store all the info of whatever we hit. And finally down here we can shoot the ray cast by going if Physics.Raycast we can enter in our ray. And then we wanna send this out to the hit of pretty much whatever we hit, we wanna send it to hit.

And so if we shoot that Raycast, what we wanna first check of all is, did we hit something? So, if hit.collider doesn’t equal null, if we did hit something, then what we want to do is change this object mesh renderer color. So I’m gonna create a color variable here, I’m just gonna call this our newColor. And this is just gonna be equal to a new Color and we’ll just give it a random red, green and blue values.

So I’ll just give it a Random.Range between 0.0 and 1.0 because this Color class here, it takes in its RGB and A values not as zero to 255 as it would be in the editor, it’s actually between zero and one. So we’ll do that. Then actually, I’ll just copy this Random.Range here and paste this for the green and blue values. And for the alpha, I’m just gonna set this to one and then I’ll flexor.

So now we have a new random color. That can really be anything on the color wheel and what we wanna do now is set this to the object we hit, we wanna set it to its mesh renderer. And for that, we can just go hit.collider.GetComponent, we wanna get the MeshRenderer component, which is pretty much the component that renders the mesh, applies the material and so on. And with this, we wanna just access the material variable, and access the color of that material and set this to be our new color. So great, that’ll all work.

But since we’re in the editor and not actually on a mobile device, we won’t actually be able to test this out. So what we can do is actually also down here, create a different version that will actually work on the desktop work inside the Unity editor. And for this, we’re just gonna be checking for mouse inputs.

So here we’ll just go if Input.GetMouseButtonDown. If the mouse button was zero, which is the left mouse button, so on the frame that we push our left mouse button down. We pretty much wanna do exactly the same as we done up here so I’ll just copy this, paste it in here and I just wanna change Input.touches to be Input.mousePosition all like so and something else you can do in Unity is make it so that only certain code is actually ran or actually is actually compiled depending on the platform that you’re playing it on.

So what we can do is actually just above this if statement here for the mouse inputs, we can go hashtag if and then a space, we can go UNITY_EDITOR and then after this if statement here we can just go #endif. Now what this does is basically makes it so everything between this hashtag if and this #endif will only be compiled so the game will only recognize this if we are in the platform of Unity editor. So once we build this to our mobile device, this code here weren’t even be looked, it won’t even exist really in the final game. It won’t be recognized. And this is a great way if you do have something like this because mouse inputs can also be detected on touch inputs. So this would be quite conflicting if this was included inside of the mobile build.

All right, so that script ready to go, we can go back to the editor, wait for that to compile, wait for our last to go, we can press play. And when we select a object, we should be able to change its color. So I’ll click on the ball here. And as you can see it changed. We can click on this over here, we get to click on a bunch of different things. And the color will change. So you can press play.

And actually what I’m gonna do is move the camera a bit closer since it is kind of far at the moment. So I’ll just move it down like so. And yeah, there we go.

So in the next lesson, we are gonna be testing this out on our device. We’ll be first of all building this to an Android device. And then the lesson after that will be for all you iOS users. We’ll be going over how to build this to iOS, how to set it up through Xcode and have it on your device. So I’ll see you all in the next lesson.

Interested in continuing? Check out the full Mobile Game Development for Beginners course, which is part of our Unity Game Development Mini-Degree.

Web Class: Optimizing Mobile Apps in Unity

$
0
0

You can access the full course here: Mobile Game Development for Beginners

Transcript

Hey, everyone. In this lesson, we are gonna go over a couple different scripting optimizations that you can implement in your projects in order to increase performance. As with mobile games, especially, performance is something you always need to keep in mind.

So, the first thing we’re gonna look at is caching objects. Now, whenever you wanna access and object inside of Unity, you might think that, oh, the GameObject.Find function, I can just easily find objects that way or get a component. Here in this example, I’m finding the object, Ball, and accessing the MeshRenderer component to change the color to blue every single frame. Now, this is a very expensive line of code and when I say expensive, I mean that it is using a lot of processing power and it takes quite a long time to run in terms of a function.

And what we can do with this is actually cache of the MeshRenderer component of the ball instead of having to find the ball every frame and find the MeshRenderer component every frame. So, instead, what we can do is cache it. We can create a private variable for that Ball MeshRenderer and in the Awake function, that is where we will call the GameObject.Find function to find the ball object and get the MeshRenderer component.

What this will do is greatly reduce the amount of time it takes to run the Update function as we are only calling the GameObject.Find and GetCompnoent for the ball once in the whole game, whereas before, we were calling it probably around 60 times a second if you’re at 60fps on a mobile. This is just a lot easier and this is really what you should be doing if you do have these sort of large and expensive functions being called quite regularly.

Here is also a list of all the other sort of functions that you should really cache if you’re calling them every frame or if you’re calling them quite often. Your GameObject.Find and then you’ll see we got GameObject.FindObjectOfType. Now, this is probably one of the most expensive ones as what this is doing is, like GameObject.Find, GameObject.Find is looking through the scene for a specific object with a specific name.

Well, what GameObject.FindObjectOfType is doing – is doing the exact same thing as Find but for each of those objects, it is actually pretty much calling the GetComponent function so it’s looking through every object and every component for a specific one and that is actually quite a performance hitting function that you should only really be calling once for an object when it’s been initialized.

Then, there is FindObjectWithTag which looks through all the objects for a specific tag. This is actually what the camera does, the Camera.main. Whenever you call Camera.main, this is, behind the scenes, what it is calling. So, when you think of that, it’s really something that you shouldn’t really be calling every frame as well. Same with GetComponent, and of course, Camera.main.
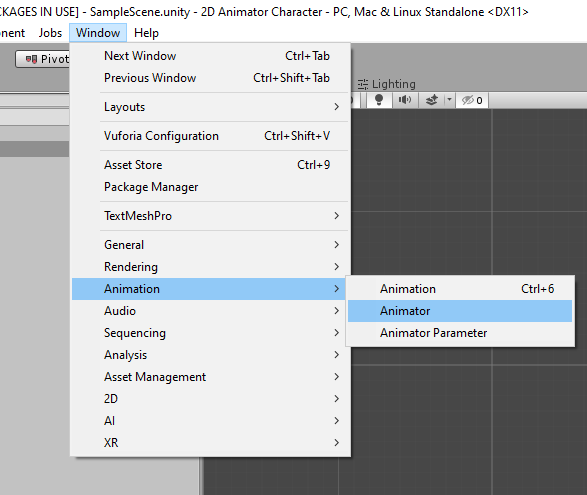
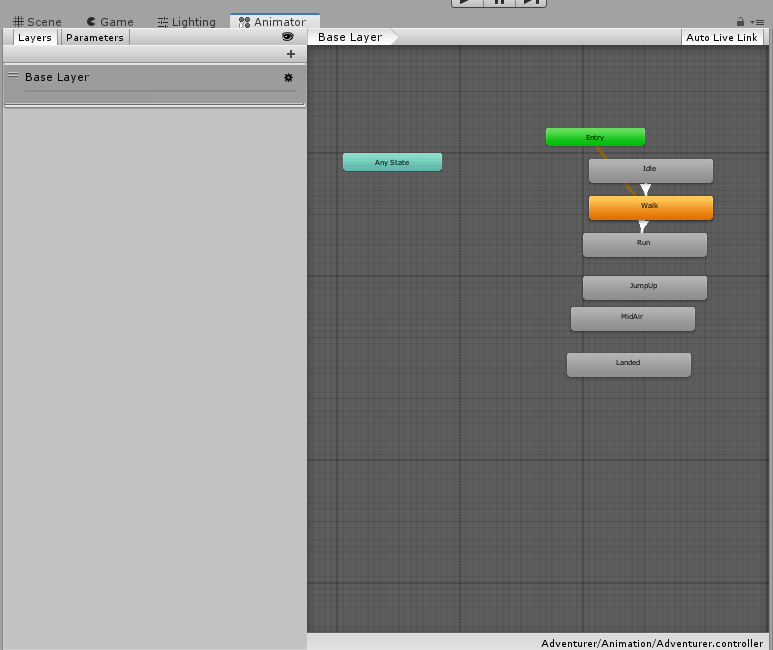
Something else you should also keep in mind when creating functions inside of Unity is reducing the amount of time you need to call them. Sometimes you’ll have a really expensive function like something to do with pathfinding or calculating something quite large. In this case, you don’t necessarily have to always do it every single frame. If it’s something that is not required every single frame then you can actually reduce that quite a bit.

For example, if it is a pathfinding function, you don’t need to constantly be updating the agent’s path every single frame. Instead, you can do it every point two seconds, like we see on the right. And what we’re doing is reducing the amount of times we call this function from 60 times a second, if you’re running at 60fps, right down to five times a second.

And all we’re doing is creating a private variable called lastCallTime and we are just checking to see that if our current time take away the last time we called this function is greater than or equal to point two seconds or really whatever frequency you want. Then we are calling the expensive function and of course then, in the expensive function, you then want to set the lastCallTime to equal the current Time.time, so that it is then reset and it keeps on going around to call that expensive function every point two seconds as if it is something to do with pathfinding, it is not really that noticeable a difference from every frame to five times a second.

Finally, here’s just a list of other optimizations that you really should keep in mind when creating projects in Unity and especially in mobile. Debug.Log is one that pops up quite a lot, you’ll constantly be using this to debug stuff and test various functions out but when you actually release your game, you don’t need these, as the player, at the end of day, will never see these Debug.Logs and what they are, they’re actually quite expensive, whenever you call one, there’s quite a lot that goes on behind the scenes and if you actually look at the profiler when calling Debug.Log, it’s actually pretty expensive.

Also, reducing the frequency of Raycasts. Try and avoid calling Raycasts every single frame if you have to, you could use something similar to this function call optimization where you call every point two seconds. But yeah, Raycasts and Raycast hits are pretty expensive as well. Also in Update, try and avoid using Loops, try and avoid Looping through stuff every single frame as it does have to Loop through every single element inside that array or however many times you’re calling that Loop in the Update function.
So, yeah, just try and avoid that and also if you’re instantiating a lot of objects that are the same and they’re being destroyed such as bullets or particle effects, you can actually implement Object Pooling. And what this does is, when an object is created, it’s not actually instantiating it, it’s actually taking it from a Pool which you actually instantiate a bunch of the same objects at the start of the game and you sort of reuse them so instead of destroying them at the end, you just disable them and when you want a new one, they’ll Pool a look through, see if they have one available, re-enable it or if there’s not one available, it will create a new one. This is known as Object Pooling.

There are a large amount of different ways to do it, you can go from very simple options to very complex options but Object Pooling is something you do need to keep in mind if you’re creating a game that uses bullets or lots of particle effects. So, yeah, that’s about it. I’ll see you all in the next lesson.

Interested in continuing? Check out the full Mobile Game Development for Beginners course, which is part of our Unity Game Development Mini-Degree.

How to 3D Animate in Unity

$
0
0

You can access the full course here: Humanoid Animation Tools for Beginners

Part 1

Animator Component

In this lesson, we’ll be looking at the Animator component in Unity. Let’s start by creating a new Unity project. For this project, we’re going to be using some of Unity’s standard assets. These can be found on the Asset Store (Window > Asset Store). Search for Standard Assets and import that package from Unity Technologies.

With the standard assets, let’s drag in the Ethan model (Standard Assets > Characters > ThirdPersonCharacter > Models). Then for a floor, let’s create a new cube (right click Hierarchy > 3D Object > Cube).

Humanoid Unity model added to scene

If we select the model in the scene, you’ll see that it has an Animator component attached.

Unity Inspector for 3d model of Ethan

  • Controller: An animation controller which lays out the animations we can player, their relations/transitions between each other and the conditions to do so.
  • Avatar: The rig or skeleton that can morph our model.
  • Apply Root Motion: If disabled, animations that move like a run animation will not move.
  • Update Mode: How the animation frames play.
    • Normal: Updates every frame.
    • Animate Physics: Based on physics time step (50 times per second).
    • Unscaled Time: Normal, but not tied to Time.timeScale.
  • Culling Mode: Determines if the animations should play off-screen.
    • Always Animate: Always animate the entire character. Object is animated even when offscreen.
    • Cull Update Transforms: Retarget, IK and write of Transforms are disabled when renderers are not visible.
    • Cull Completely: Animation is completely disabled when renderers are not visible.

Learn more about the Animator component here.

For the next lesson, let’s create an Animation Controller which will contain our animation state machine. In the Project panel, right click the Hierarchy > Create > Animation Controller. Call it Ethan.

Unity Animation controller for Ethan 3d model

Now select the Ethan model in the scene and drag the controller into the Controller property.

Unity Ethan model being assigned to animation controller

In the next lesson, we’re going to be looking at animation state machines.

Part 2

States and Transitions

In this lesson, we’re going to be looking at and creating an animation state machine in Unity. This involves states and transitions.

  • States: Animations that will play when they are transitioned to.
  • Transitions: Conditions to transition from one state to another.

Let’s now go over to Unity and open up the Animator window (Window > Animator).

Let’s find an animation to drag into the animation controller. Search t:animationclip to find all the animation clips in the standard assets. Drag the HumanoidWalk animation into the Animator screen. It being orange, means that this is the default state. This will be played first when the object is initialized.

Human walk animation being add to states in Unity

Let’s now drag in the HumanoidRun clip. You’ll see that this clip isn’t orange. We can make it the default clip by right clicking it and selecting Set as Layer Default State.

Human run animation being added to Unity states

Let’s now make a transition between these two states. Select the HumanoidWalk and click Make Transition. Then click on HumanoidRun. This will create a new transition from the walk animation to the run animation. By default, this means that when the walk animation has finished playing, the run animation will play.

Human walk animation connected to run animation in Unity

If we press play, the two animations will play. When the run animation is finished, nothing will happen. We can transition that into the Exit state, so that it loops back around to the Entry state.

Human run animation connected to exit parameter in Unity

A better method is to just have the run animation transition back into the walk animation.

Human entry parameter connected to walk animation in Unity

States

Let’s select the humanoid walk state and have a look at the Inspector.

Inspector in Unity showing Human walk animation

  • Motion: Animation that the state will play.
  • Speed: How fast the animation will play.

Transitions

Let’s select a transition and have a look at the Inspector. Transitions can allow an animation to fade into another. Here, we can modify when, how and how fast the transition takes place.

Unity inspector with walk to run animation transitions

  • Exit Time: When in the clip will we begin to transition into the next.
  • Transition Duration: Duration of the transition.

Let’s now restructure our controller a bit and add in an idle animation for the default one.

Unity animation state controller with walk and run

In the next lesson, we’ll be going over the animator parameters and transitions.


Transcript 1

Hey guys! In this first lesson we’re going to look at the animator components, as this is what is going to control everything that we’re going to be doing for our characters. The component that’s responsible for handling the animations for our character, for handling which avatar is assigned to our character. And a few other settings that are going to be very important for animating our characters. So we’re gonna look at what an actual character avatar is, and then go over a few of the settings of the animator component.

And we’re gonna do this from a brand new project. I wanna create a new Unity project, using the latest version available to me, which is 2019.2 Beta 10. So let’s create a new project using this, and I’m gonna say, Humanoid Animation Course. And we’re gonna use 3-D, that looks good to me there. So create a new project.

So for the most part throughout this course, we’re going to be using the Unity-provided character controllers, that we can find if we go to Asset Store. And if you don’t have this layout, make sure you go up to layout and go down to default, so you get the default Layout, so we’re all working in the same workspace here. And I am gonna search for standard assets. It’s completely free and has all of the things that Unity provides for us.

But what we care about for this case is going to be the 3-D character controller, as that comes with a completely rigged character, that will allow us to play with animations and check out how we work with animations in Unity. Now to keep this simple, I’m simply going to import everything. But for this, all you need is the character folder. But I’m just gonna grab everything all at once here.

Alright, so I have the standard assets imported. I don’t want this sample scenes folder that it imported for me, though. I know I don’t care about all of that stuff in there. All I care about with this is going to be our models folder, inside of characters, third person, models, and we have Ethan in here. Which is gonna be the model we play with for the first bit of this. And then by the end of it, we’re going to get some third party models, and we’re going to do some cool animations. And share it between different models, and retarget it based on different avatars, and all kinds of fun stuff.

So for now though, we’re gonna look at the Ethan model. What I’m gonna do is, I wanna drag this guy out into my scene here, and just place him out in the world. And with him selected, if I hit the F key, I will center him. And also, just to make this look more like a scene, I’m gonna add a floor. So wanna create a cube, and I’m just going to scale this out, just like that. And then just bring it down under our guy there.

So now with our Ethan selected, now this is just a rigged model. There are no things on this model at the moment that help it move, even though it as an animator component, which we’ll get to here in a second. You can go to prefabs and grab a third person character controller, which already has a physics-based character controller on it, that you can move around in your game world. But we’re not doing that. We don’t care about all that. We’re just looking at animations and how we can use them on our characters. And especially how we an use them on multiple characters. And decide when certain animations are played, and all this fun stuff.

So with Ethan selected, I notice we have an animator component here, that has a controller field. Which has nothing on it, because we do not have an animator controller created and configured for this. Which we will get to in a bit. And then we have an avatar field, which has an Ethan avatar asset already applied to it. So with this selected, if I were to select my avatar here, it would show me this is a physical asset, in my assets folder. And if I select this, I can see in the inspector I have a configure avatar button. Now this is gonna take me to a different scene, so if you need to save your scene go ahead and do that.

Now there appears to be a lot going on here. But all this really is, is the system that Unity uses to understand which bones apply to which body parts. That way, if we were to use the same avatar on multiple different rigs, or different rigs on one avatar, it understands which bones should be moving and animated based on the motions. Because we have it set up and assigned. And Unity’s really good at doing this automatically. But as long as you have this set up well and correctly, you should have no problems retargeting animations and using the same animation across multiple rigs. As long as they are using a valid avatar, or at least, in this case, the same avatar.

Now if we go down to done here, it will take us out of this scene for this. And what I’m gonna do is go back and select my Ethan here. Frame him up again. We have apply root motion. Which is going to allow the animation to physically move the character in 3-D space, using what’s called root motion.

Now there’s a lot going on here that has to happen for this to work. If an animation has movement in a form of a vector, and it is physically moved in space, this will allow the animation to actually move your object in space. And we will be using this for our animations, because the animations can look a lot more realistic if they are actually in control of moving the character. Helps you avoid the skiing effect. Where you’re sliding across the ground, or it doesn’t look like you’re actually walking. As well as jumping is done really easily this way, because the actual animation handles the physical position of your object in the game world.

The same goes for if you were to do dodge rolls, or evades or anything like that. This is all handled, where it’s moved based on the animation. So it looks really good and it’s really easy to do, as long as you have proper animations.

And then we have update mode, which is going to determine if the animation should update on the physics time step, so as the physics simulation updates, every, 50 times per second in fact. This will do the same. Or if you should be not on scaled time, which means, the scale time let’s say is set to one. You’re gonna be running at the normal rate. If I set it to unscale time, this is not going to matter, what the normal rate is. So if I were to set my time scale to zero, which is something you would typically do if you were to stop a simulation every game, or pause the actual game. This animation would still run, even if you had done that. But typically, we’re gonna be just using normal for this.

And culling mode will determine if the objects renderer is off-screen, so it’s not in view of the camera or any camera, what should be happening. In this case, we are only going to be doing the basic animation so that we can get events fired back to us, if we cared about those. And that doesn’t happen all that much, anyway. Or you could say, “Always animate.” So the actual thing is always evaluating, always animating, and we’ll see what that does later, whenever we have conditional branches in our state machine.

But that would be something that we would typically leave on update transforms, being cold. Because if it’s off-screen, we don’t necessarily care if our character is animating properly. We just care that it still understands what is happening. And the last one is cold completely, which means nothing happens once it’s off-screen. And that can be good for some things, if you have a lot of statically animated objects.

So in the next lesson we’re gonna look at the actual state machine, which is going to use an animator controller asset to work. So what I’m gonna do is create one of those really quick. And we have a few from the assets that we imported. What I’m gonna do is inside of this, I’m gonna create an animator controller. And I’m gonna call it Ethan. And what I can do now is assign this to Ethan, as Ethan’s animator controller, and if we were to select this, double click on it, we get this. Now this is what we’re gonna check out in the next lesson, guys. A lot of fun stuff we’re gonna be able to do here. My name is Austin, and I will see you in the next lesson.

Transcript 2

Hey guys, welcome back. In this lesson we’re going to look at the state machine itself and check out states and transitions. The state machine is what is responsible for determining when and where, we transition into and out of individual animation. So we’re gonna check out what the actual state machine is, and kind of how it works and then look at individual states which are just in this case individual animations that the machine is responsible for determining when we go into these animations and we go out of those animations.

So we have a walk animation. Remember walk, when does that walk animation become a run animation? Oh, it becomes a run animation when going at this speed. But we don’t want to just jump into that new animation, we wanna transition into it, we wanna blend into it, so it doesn’t look like we abruptly started running. We want to kind of smoothly start running. And to do that, we’re going to look at a few different things later on, but for now we’re gonna look at transitions which is what allows us to define conditions to get from one animation or one state into another state.

So let’s check that out really quick in. Now we created our animated asset here, and that’s what we’re looking at, right here in this grid. Now if I hit Shift+Space, it will make everything that I had selected and focused on full screen so we can work in this, very nicely just like here. So what we have, first of all, are a few default states, or at least points that we can come into and go out of other states. And this whole grid represents an entire state machine itself. So any state, entry and exit.

So what I want to look at here first, before we go over these, is I want to grab animation, bring it in here and then check out what the state looks like, as it is represented in this state machine. So I wanna go down and I wanna just go search in the search bar here. I know the standard assets comes with a bunch of nice animations and again, later on, we’re gonna find some more third party animations to use. What I’m gonna do is say t:animation clip and that allows me to look at all of the animation clips and I’m going to, zoom out of this so we can actually read the words here.

What I wanna do just to look at this, let’s grab HumanoidWalk and I’ll drag that in. Now notice we have a line coming from entry over to HumanoidWalk. And we’ll get into that here in a second. And then maybe we’ll have HumanoidRun as well, and drag that in. Now this one’s gray and that one’s orange. And we have a line coming from that one.

So what’s going on here? Is entry is the starting point of this state machine. It’s where it comes from, to go into something else. To start the first state or to start the first animation. And now this one since it was the first animation I dragged in, is by default, the default starting active state. If I right-click on this, we can see it is already set as the layer default state, which means this will be the first animation to play whenever the state machine is activated, which if we keep in mind here, whenever this animator is instantiated, Ethan the controller is active.

So if I were to right-click on this one and say set as layer default state, now that line goes from entry up to that. And this line will later on represent what a transition is. But for now, it’s just saying, hey, you’ll come from entry, which can be the path between a different state machine and this state machine. Or it can just be the starting point of the only state machine. Which in this case is exactly what it is.

Now I could say we can come from any state, right-click Make transition, go up to HumanoidRun. Which means I would come in from any other state and go straight into HumanoidRun. Or if nothing else is happening, this will be the default state that is activated. And that gives me a transition, which we’ll get into here in a bit. But let’s just delete that for now. And see how this is going to work.

So let’s make our walk animation the default because want to start walking first. And we’re just gonna play around some animation to see what we can do with them. And I’m going to right-click HumanoidWalk and do make transition again, and say hey, we can go from HumanoidWalk straight into HumanoidRun. Now what we can do is defined conditions, that says if this condition is met, then we go into HumanoidRun. which is what we’re going to do later on, whenever we want to control it, say with input, or based on the speed or how where to hit the jump button, things like that would invoke a transition. But in this case, we don’t have that stuff set up. So we’re just gonna go straight from HumanoidWalk straight into HumanoidRun.

But what I wanna do is do that run out the gate. Once HumanoidWalk is complete, then go into HumanoidRun. So check this out, I’m gonna take my animator, drag it down here, so we can see what’s happening with it. And I’m also going to just click play right here. And we see, let’s get a better view of this. Click Play, go back into a scene view. And we see and start to walk and then go straight into running. And he’s just running indefinitely. Now that’s an animation and we can see that animation playing.

If I pause this here, we can see that animation playing and looping over and over from HumanoidRun. Now the reason it’s doing that, is because we have no exit from HumanoidRun. We go from walk certain to run, and then nothing else. What I could do, if we stop this, I could go from going from HumanoidRun straight into exit and so they have nothing else to do. All that’s going to do is loop back into entry. And just keep doing that over and over.

So let’s check that out. Let’s get up on him here. He walks then runs walks, walks then runs you can see what’s happening. goes choo, choo, choo, choo, choo, choo. And that’s what it’s doing, pretty cool. So we’re going into the exit there.

What about if we didn’t go to exit, but we just went back and forth? We can go up to run and then back down to walk and still having the entry because we have to start somewhere. Try this out. Doing the same thing, because we’re just looping back and forth. Now with HumanoidWalk selected, we can look at some of the properties that this stage has, and properties that apply to the animation clip as well.
So first of all, we have the animation clip that is HumanoidWalk. Notice we can add in these clips in there instead. But this one we wanna use, we can also rename it. I could just name it walk just like that, we have speed, which is pretty self explanatory. But if I were to speed this up, it’ll just speed it up times 10 In that case. So he’s just when he’s in that state, he’s really fast. Just speeds up the animation itself.

And we have a multiplier, which can be based on a parameter which we’ll get into in a bit, we don’t have parameters in use yet. Normalize time to be based on a parameter as well. Once again, we don’t have that. Mirror is simply going to mirror the animation from left to right for the back, whatever you’d like to do them. And there’s a bunch of stuff here, that we will simply not be using, for such as foot IK, inverse kinematics, which is good for accurate foot placement on different types of terrain and all that kind of stuff. But in this case, all we care about in here for now, it’s gonna be our list of transitions.
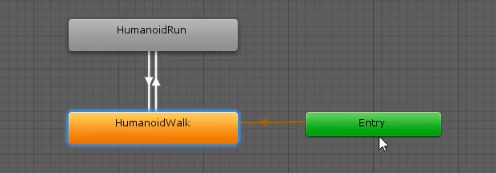
So I can transition out of walk into HumanoidRun, and then out of run back into walk. And what I can do is look at exactly how this is doing that. So if I go to the settings, of the transition out of walk into run, we see a bunch of stuff, you have has exit time. Which means we cannot transition out of walk, since we’re going out of here with this transition until the state is complete. Until the animation clip has completely play.

So what that means is, if I don’t have this, and there’s no conditions defined for transition, is always going to snap out of walk because there’s nothing keeping it there. But if I haven’t defined, I could say wait, no we could wait five seconds before we come out of that. And that’ll just walk for a while. And then five seconds later, we will transition out and then back in, and then five seconds later, you get the idea. Fixed duration is going to be the length the transition takes.

So if I were to set this up to be a higher speed, the transition between one to the next state will be a lot slower, so it will take us longer to transition. So if we had to have a be a snappy switch from walking to running, you’d want this to be a lower value. Whereas if you want it to be a slower transition, make it a higher value. Pretty simple stuff.

And the transition offset here, you can actually see that we can drag these actual handles around, and do this in here ourselves, and it will change the values for us. This is a nice representation of what it’s going to look like, in the end. Interruption Source is simply saying, what can interrupt this transition? The current states changing can interrupt it. The next states changing and interrupt it. If you go from the current state into the next state, or from the next state into the current state. Now these are more technically specific things that again, we won’t be using for this, but they are there if you need them.

So I could just drag an idol. Make it the default. Go from that to walk, from walk into that. And then from run back into walk, just drag this around here. So he goes some idle, into walk into run, idle, walk, run. Very cool, in the next lesson guys, we are going to, check out those animator parameters and also check out some of the conditions that we can use with those parameters. My name is Austin and I will see you next time.

Interested in continuing?  Check out the full Humanoid Animation Tools for Beginners course, which is part of our Unity Game Development Mini-Degree.

An Overview of PlayFab for Multiplayer Games

$
0
0

You can access the full course here: Player Authentication with Azure PlayFab

Setting up the PlayFab App

To begin, let’s go to the PlayFab website: http://playfab.com. If you have a Microsoft account, click Login, otherwise Sign Up.

Microsoft Azure PlayFab website

When you login, you’ll be taken to the Developer page. Here, click on the New Studio to create a new studio.

Azure PlayFab developer page

All we need to do here, is enter in a Studio Name. Then click the Save Studio button. This will redirect you back to the Developer page. Click on your studio to go to the Dashboard.

Azure PlayFab New Studio setup screen

The Dashboard is the visual interface between you and the database. We can view data about our players and navigate to many of the different databases. Feel free to click around and look at the different pages.

Azure PlayFab dashboard

In the next lesson, we’ll be hop into Unity and start to create our project.

Transcript

Hey everyone! In this lesson, we are gonna be going over basically what is Playfab and how can we use it in our games.

At its core, PlayFab is a backend for your game. And this is for stuff such as storing play information like player accounts. Maybe play information as well. And all sorts of stuff that you want players interacting with each other, for example, maybe trading, selling items, all the sort of stuff that you won’t have directly on the client-side. Something that you want in the back end so when the player turns off the game and turns it back on, that information will still be there.
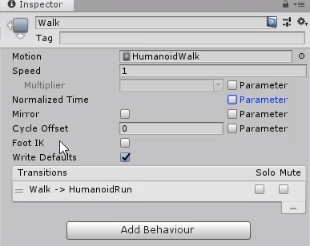
Traditionally you would have to do it pretty much all on your own. You would have to create your own databases and maybe set up servers and create all the backend code that can interact with your game that the client has. But in this case, PlayFab has that all set up for us and really takes away the stress of wondering how to do it and if you’re doing it in the right way. Taking into consideration stuff such as authentication and making sure that there can’t really be any abuse from the client-side of things.

So, let’s actually look at a bunch of different features here inside of PlayFab. Right now, I’m on the PlayFab website which is just Playfab.com and I’m gonna go up to features here and game services. And here we can have a look at all the different features that PlayFab has.

There’s player authentication and linked accounts. You can create player accounts with a user name, password, email. You can also do it automatically so that the player doesn’t really have to enter any information, it just automatically knows what device they’re on and creates an account for that. You can also log in with Facebook, Google, all those other sort of things that you see with games as well.
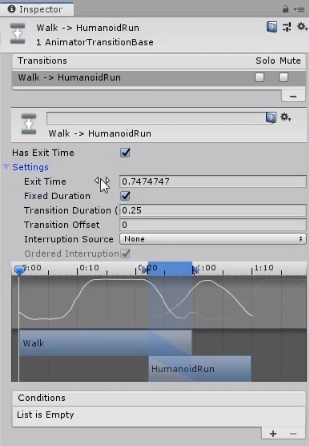
There’s also leaderboards, you can set up leaderboards, ranking players based on pretty much anything. You can send push notifications and emails to your players. Maybe if you’re informing them about a new service or a new update on the game. Of course, you can store and manage player data. Any sort of data, really, that you’d want you might wanna store how much gold or something a player has or certain features that you need for a game. Maybe other players also want to be able to access information from other players.

Multiplayer services as well. Now, these multiplayer services, this isn’t really working with Unity at the moment so we’re not really gonna be focusing on this.
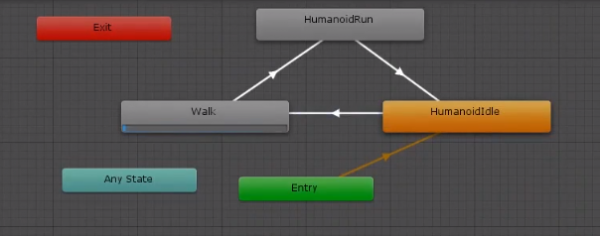
There’s commerce which is a big part of PlayFab. This involves having items, players can have inventories that can hold items, you can trade items between players. In-game characters, allow you to create separate characters for your player maybe in your game. Players can play as different classes or different sort of things and this is how you do it. This is very similar to the way you can store individual information for each character, individual inventories, all that sort of stuff.

And finally, you can create and track virtual currencies. This can be used to purchase items from the store. You can also trade currency between players, you can hand it between each other. You can also make it so that players can even buy this currency through in-game purchases. So really, this is just a list of all those sorts of services that you can have in your game and PlayFab makes it so we don’t have to do this all by ourselves, we don’t have to set up the player authentication and logging in, we don’t have to set up all the item stores, all the inventory systems, all that sort of stuff. It is already created for us here on Playfab and all we need to do in Unity is just connect to the API and create calls between it.

PlayFab also has both a free and paid plans. Very similar to Unity with the free plan you have access to quite a lot of the stuff. If we just scroll down here and click on compare all pricing tiers, we can see that all the stuff we really need such as in-game commerce, player profiles, content management, that all comes with the free version of PlayFab.

Now, it’s only really necessary to get the paid plans if you do wish to have access to these professional features. Or if you get over 1000 monthly active users. So, these are unique users each month. If you get over 1000 of those, then you are required to get one of the paid versions of PlayFab. Very similar to Unity how if you get over $100,000 in revenue, you need to upgrade to a pro plan. But for now we can just use the free plan, we can just use the essentials plan right here. As it really is just all the stuff we need right here.

So now, what we’re gonna do is let’s actually login to PlayFab or sign up. If you do have a Microsoft account, you can just login – but we can also sign up if you wish. And once you do that you’ll be taken to the developer page here. I’ve already got a game and studio here set up. But what we can do is just click on this new studio button right here and this will create us a new studio.

Now, the name doesn’t have to be unique or anything like that in general. This can just be whatever you want, just something that you can identify it with. So here I’m just going to call this PlayFabCourse and the authentication provider is going to be Playfab. We can click on save studio. And it will create our new studio here.

So here I can see PlayFabCourse right here. Let’s click on my game. And here we are inside of PlayFab. Now, we land here on the dashboard and there’s a bunch of information. Now, you can’t really see anything because there isn’t, well, no one’s actually connected to this API. No one’s connected to our game yet. So we’re not gonna see any information here. But we can see stuff such as unique users, the API calls, a bunch of other stuff as well. Logins, new users, purchases. This is very useful if you just want to have a front end, direct sort of view on how your app is going perhaps.

There’s also other information down here such as reports but what we wanna be focusing on is the left-hand side here which has a bunch of different tabs that we can select and look at. You have players, economy, leaderboards, multiplayer, groups, content, automation, analytics, add ons, settings, admin, and help.

Let’s click on the players tabs and have a look at this. This here is going to be a list of all our players. Now, whenever a player creates a new account, they’ll be popping up right here so we can have a look at all the players who are in our games. And we can even go into their player accounts and see their individual information. What sort of information are they storing, what sort of items are in their inventory, and yeah, a bunch of other information that we want to save to the cloud here for later use when they maybe log in again or if other players wanna access information about other players.

We then have the economy and here we can create something called the catalog. Now, a catalog is basically a container or a list of item, categorized items perhaps. So let’s just say you have a shop, you could create a new catalog here for that shop and in there you would list a bunch of different items that sort of relate to that catalog. With those items you can give it a unique ID, a display name, maybe even a price. And other things as well such as is it tradable, is it consumable, is it stackable? All the sort of stuff that we want to know when we are implementing them into our game.

Over here in the currency tab up top. We can create new currencies, so in your game you might want to have multiple as well. You can create as much as you want and you can use those individual currencies for purchasing the items and maybe just giving them to other players as well. There’s leaderboards which of course allow you to create leaderboards based on any sort of ranking. Multiplayer, we’re not gonna be looking at that since that is not really implemented into unity yet.
Groups, allow you to create groups for players. Maybe if you wanna have parties or clans, you would create a group for that party or clan and just add the respective people to that. The groups also allow you to store data in them or share data between the players in the group. Content here, this is just pretty much like global sort of information here in the title data.

File management, you can upload files to read. Email templates, push notification templates. Maybe you wanna send your users information about a new update, you could do it that way. In automation there’s something called the cloud script.

Now, when you are setting up stuff and making API calls inside of Unity, you don’t always wanna do everything from Unity. Because, let’s just say you want to access information about another player. Let’s just say you wanna get a player’s inventory because you want to be able to maybe see what items they have. Now, if you were to make an API call to the server from the client app to get the player’s items, then that could actually be abusable. Maybe if someone gets into your game code, maybe figures out a loophole around it. Then they’d actually be able to access information from the player, not just from the inventory.

So, this is where the cloud script comes in handy. You can send a call to the cloud script and on there in the cloud that is where all the game information of the player is and it sends back just the specific information that you need. We won’t be using that in this course, but it is something that is very useful in the PlayFab API.

Okay, that is about it for now. This is just a very brief overview of the dashboard here. There’s, of course, a lot more settings and a lot more things to look at and learn, but for now, we’ll keep it at that. In the next lesson, we’ll actually begin to set up our unity project, implementing the PlayFab plugin and setting that all up. So I’ll see you all then in the next lesson.

Interested in continuing? Check out the full Player Authentication with Azure PlayFab course, which is part of our Multiplayer Game Development Mini-Degree.


RTS Box Selection in Unity Tutorial

$
0
0

You can access the full course here: Real-time Strategy Project – Unit Movement

Multiple Units

To begin, let’s duplicate the unit a few times and move them around. Then select the Player and drag the unit objects into the Units list.

Unity with units added to Unit script component

Box Select UI

For the box select, create a new UI canvas. As a child of that, create a new Image object.

Unity UI Canvas with raw image added

Select the image and set the color to 255, 255, 255, 128.

  • Rename the image to SelectionBox

Unity Inspector with Image color picker open

Finally, in order to set up the image to work easily with mouse coordinates, set the anchoring to Bottom – Left. We can then disable the object by default.

Unity Inspector with Anchor box circled

UnitSelection Script

In the UnitSelection script, let’s create a new variable for the selection object and the start position of the mouse.

public RectTransform selectionBox;
private Vector2 startPos;

In the Update function, let’s set the start pos variable in the mouse down if statement.

startPos = Input.mousePosition;

Then, let’s check for when the mouse button is held down and released.

// mouse up
if(Input.GetMouseButtonUp(0))
{
    
}

// mouse held down
if(Input.GetMouseButton(0))
{
    UpdateSelectionBox(Input.mousePosition);
}

The UpdateSelectionBox function will update the selection box on-screen.

// called when we are creating a selection box
void UpdateSelectionBox (Vector2 curMousePos)
{
    if(!selectionBox.gameObject.activeInHierarchy)
        selectionBox.gameObject.SetActive(true);

    float width = curMousePos.x - startPos.x;
    float height = curMousePos.y - startPos.y;

    selectionBox.sizeDelta = new Vector2(Mathf.Abs(width), Mathf.Abs(height));
    selectionBox.anchoredPosition = startPos + new Vector2(width / 2, height / 2);
}

Back in the editor, make sure that the selection box is references in the UnitSelection component, then press play to test it out.

UnitSelection Script

Back in the UnitSelection script, let’s fill in the mouse up if statement in the Update function.

// mouse up
if(Input.GetMouseButtonUp(0))
{
    ReleaseSelectionBox();
}

The ReleaseSelectionBox function will disable the selection image and select all units that are inside of it.

// called when we release the selection box
void ReleaseSelectionBox ()
{
    selectionBox.gameObject.SetActive(false);

    Vector2 min = selectionBox.anchoredPosition - (selectionBox.sizeDelta / 2);
    Vector2 max = selectionBox.anchoredPosition + (selectionBox.sizeDelta / 2);

    foreach(Unit unit in player.units)
    {
        Vector3 screenPos = cam.WorldToScreenPoint(unit.transform.position);
        
        if(screenPos.x > min.x && screenPos.x < max.x && screenPos.y > min.y && screenPos.y < max.y)
        {
            selectionUnits.Add(unit);
            unit.ToggleSelectionVisual(true);
        }
    }
}

Back in the editor, we can now select multiple units.


Transcript

Welcome back everyone. In this lesson, we are gonna be continuing on with selecting our units. In the previous lesson, we set it up so that we can click on a unit to select it and then click off of it to deselect it. Now in this lesson, we are gonna be working on group selecting units, so we can then click and drag to select a wide range of units here.

And as a matter of fact, let’s actually start by duplicating this unit a few times. So I’m just gonna Control + D, move him over here, Control + D, move him over there, Control + D, move him over there. So we now have a group of units and since we have multiple units now, we need to select our player object and add these to our units list here. So I’m just gonna drag and drop them in this array here because all units that we want to control or are recognized as ours, need to be inside this playlist right here. So like before, we can click play, we can select units, as you can see here, I’m selecting these different units, but we can only select one at a time.

So what we’re gonna be doing now is be setting up that box select so we can select, for example, all of these at the same time and then control them. Now to begin with this, what we are gonna be doing is setting up a UI to actually have this square which is going to be the selection rect box and what I’m going to do is go right click, I’m gonna go UI, Canvas, to create a new UI canvas here in the editor and as a child of that canvas, I’m gonna create a UI image.

Now, to get a better view of this image, let’s going into 2D mode here. Click the 2D button, press F to focus on the image, and there we go. If we look in the game view, we can see we have the image right here on screen. But we don’t want it like this ’cause right now, this image is pretty much all white, so if we do hover it over on top of, and let’s make it a bit bigger.

If we do hover over a unit, we can’t really see what we’re looking at, so we need to make this slightly translucent. So for the color here, I’m gonna set this to about 255 divided by two, so about 128, that’s what we’re gonna have. So we can see the unit and we can still see what we’re selecting. Let’s rename this here to our SelectionBox.

And what we also want to do then is change a few things here in the rect transform. Right now, the actual anchoring is set to the center of the screen. So zero, zero is in the center of the screen and if you look here at the position X and the position Y, these values will change based on where I move this. If I move it to the left, you’ll see that it goes into negative and if I move it to the right, you’ll see that it goes into the positive. Same with the Y, vertical, it goes into the positive and downward, it goes into the negative.

Now we don’t want it this way, because the way we’re gonna be setting it up with our mouse cursor and all that, the way that screen position works, which is what our mouse cursor works in, it’s different than this. Zero, zero isn’t the center of the screen, it’s actually the bottom left of the screen. So we need to change this so that zero, zero for this selection box here is actually in the bottom left corner of the screen and to do that, we can just change the anchoring.

So let’s click on the anchor box here and I’m gonna set this here to bottom left. So now, as you can see, zero, zero is down here in the bottom left, which is what we want, which is great. Okay, so I’m just gonna move this back here. I’m gonna deactivate it so it’s not visible by default and now let’s go inside of our unit selection script and I’m gonna start by adding in a new variable. This is going to be our public RectTransform object which is gonna be our selectionBox.

And we also need a few other variables. First of all, we need the start position for our click. So when we initially click down on the screen, we need to figure out what that position is so we can then figure out how big, how wide we make the box. So I’m gonna have a private vector2 for out startPos and there we go, that’s all we need for now.

So down here in the update function, we are gonna be adding in two more if statements. Right now, we have for if the mouse is down, then we need to figure out when the mouse is up, so we can select the units that are inside the box. And we also need to know every frame that the mouse is clicked down, so that we can then update this selection box. So here, I’m gonna go for mouse up, this is done by going if(Input.GetMouseButtonUp(0)) for the left mouse, and for mouse held down, this is gonna be (Input.GetMouseButton(0)) for the left mouse.

Okay, so whenever we click the mouse button down, we want to first of all, set the start position. So here, we can go startPos equals Input.mousePosition, so we’re getting the first position of the mouse on the screen when we click down. And whenever the mouse is held down, what we want to do is update the selection box. So we want to basically make the selection box, change its width, its height, its position to basically look as if we’re dragging a box across.

So down here, I’m gonna create a new function called void update the selection box and this is gonna send over a vector2 for the current mouse position. So up here in the if GetMouseButton down, I’m gonna call the UpdateSelectionBox, sending over the Input.mousePosition. Okay, so down here in UpdateSelectionBox, this function here is going to be called when we are creating a selection box and what we want to do is basically enable the selection box so if this selection box is disabled, we want to enable it.

So we can go if(!selectionBox.gameObject.activeInHierarchy). So if this is currently not active in the hierarchy, then we want to enable it. So selectionBox.gameObject.SetActive(true). Okay, now what we want to figure out is the width and the height of the box. What is the width gonna be and what is the height gonna be? The width is gonna be the distance between the start position of the mouse and the current position of the mouse on the x-axis and the height is going to be the distance between the two but on the y-axis.

So here, we can go float for the width, this is gonna be equal to our curMousePos.x, subtracting out startPos.x. And the height is gonna be equal to the curMousePos.y minus the startPos.y. Okay, now what we want to do is set the size of the selection box and then also select the position of the box. So first up, the size of the box is going to be basically, the width and the height right here. So what we can do is go selectionBox.sizeDelta to edit the width and the height of the box. This is gonna be equal to a new Vector2 and for the width, this is gonna be the width and the height.

Now a problem with this right now is that the width and the height here have a possibility of being into the negative. If our start position is, let’s say zero, or let’s just say the start position is somewhere and we move our mouse to the left, this number here is gonna go into a negative, so we want this to be positive and a way to do that is by making an absolute.

So with width here, we can make this a Mathf.Abs for absolute and then enter the width. So if this number is a negative, it’ll just simply make it a positive number. Same for the height here, we can go Matf.Abs, like so.

Okay, now what we want to do is set the position of the box because this is also gonna change as we increase, decrease, and modify the size of the selection rect. So to change the position, we can go selectionBox.anchoredPosition equals, and this is gonna be our start position plus half of the width and half of the height, because if you go back to the editor and we click on our selection box right here, you’ll see that the pivot point, the center point, is in the middle of the box. So this is half of the box width after from the left and it’s also half the box height away from the bottom left here as well. So we need to add that difference onto the initial start position.

So we can just go here, equals startPos plus new Vector2, width divided by two and height divided by two. Okay, we got all this set up right here, now let’s actually go and test this out inside of the editor. I think everything here should be pretty good. So let’s go back inside the editor, let’s disable this selection box right here and on our player, let’s drag in the selection box, rect transform, into the unit selection script, press play, and we should see that we can then click and drag and as you can see here, it’s just like as you would see on your computer or in other RTS games as well. We can Click + Drag, let go doesn’t really change anything at the moment, we need to implement that still. But we can also Click + Drag here.

And yeah, so this is the basics of actually getting this working. Now all we need to do is make it so that when we release, this disappears and all the units that are inside of this selection box, get selected. So we’re gonna be working on that in the next lesson and I’ll see you all then.

Welcome back everyone. In this lesson we’re gonna be continuing on with our box selection. In the previous lesson we set it up so that currently we can click and drag to visualize the box. Letting go doesn’t do anything and it doesn’t select the units yet, which is what we’re gonna be working on in this lesson. So let’s open up our unit selection script right here. We were working on the UpdateSelectionBox function.

And what we want to do now is go up to our Update function and inside of here we’re gonna be working on the GetMouseButtonUp if statement right here. So when we let go of our mouse button what we want to do is call a function that we’ll create down here. And this is going to be called our void ReleaseSelectionBox. So we can call that over here in GetMouseButtonUp, ReleaseSelectionBox and this is gonna first of all disable the selection visual right here and it is also going to determine what units are inside of the box.

So first of all let’s disable the box. So selectionBox.setactive false, whoops, selectionBox.gameObject.setActive false. And what we want to do now is determine the min and the max for this object. We wanna know the bounds of this, the bounds of this basically selection box on screen. And we’re gonna be storing this in two Vector2 variables. First up we have a Vector2 for the min. And this is gonna be the min for the x and the y. So what’s the minimum x value? So what’s the left hand side x value? And what’s the minimum y value? So what’s the bottom left y value?

So this position here is basically gonna be the bottom left of the selection box and this is gonna be equal to our selectionBox.anchorPosition. And since this here is the center of the rectangle, we need to subtract the width and the height divide by two. So subtract selectionBox.sizeDelta divide by two. And then we also have our vector2 for the max, which is gonna be the top left position of the box. And this is gonna be equal to our selectionBox.anchorPosition, so the center of the selection box. And then we need to add on top of that the width and height divided by two to get the top left. So plus selectionBox.sizeDelta divide by two.

Okay so we got the min and the max positions of this box. And with these what we’re gonna be doing is looping through each of our units and converting their world position into a screen position, and then determining whether or not they are inside the bounds of these two values. So let’s loop through each of the units. So we got foreach, unit unit in player.units, so each of our player units here. What we want to do first of all is convert this unit here which has a world position, a global world position into a screen position. So here we’ll have a vector3 screenPos and that’s gonna be equal to our camera.WorldToScreenPoint and this can convert a world point into a screen point. The world point we wanna convert is going to be our unit.transform.position.

So now we have the unit as a screen position and what we want to do of that is determine okay, is the x position of this unit greater than the min x and is the x position less than the max x. So we then know that vertically this unit is inside the selection box. Then we need to go okay, is this unit’s screen y position greater than the min y and is it less than the max y. And with these four checks we can then determine that okay, this unit is inside of the selection box, so select it, otherwise just skip over it.

So to do this we can just go if our screenPos.x is greater than the min.x and the screenPos.x is less than max.x and the screenPos.y is greater than min.y and the screenPos.y is less than the max.y, then what we can do is go selectedUnits.add unit like so. Okay so we got our unit selected here and then we can then toggle the selection visual on the unit. So go unit.ToggleSelectionVisual true.

Okay, there we go. It’s probably a bit to get a hold of inside this function, because it is quite large. Just gonna add a comment up here explaining what it does. So pretty much we’re disabling the selection box, ’cause we no longer want to see. We’re getting the min and the max positions on this selection box, so the bottom left and the top right positions of the box. Then we’re looping through each of our units. We are converting our unit position to a screen position and then we are basically determining here in this if statement whether or not this screen position of the unit is inside of our selection box. If so we are then selecting that unit.

Okay, so we’ve got that all set up and pretty much for now that should be all we need to do. We can now go back inside the editor, wait for the scripts to compile. We can then press play. And what we should be able to do is just like before, as you can see we can select the individual units, but if we have our box and let go it disappears. Let’s select this unit here. There we go, we got that on selected.

Let’s try select all of ’em. There we go. We can also select all the units, we can select these two over here. We can select these three. We can select all of ’em, we can select one, we can select this one, select all of ’em. So yeah as you can see here, we have our selection system up and ready to go. Now what we need to do is actually get these units moving. We need to be able to right click on the ground and basically tell the units to move to that position.

And that’s gonna be done in the next lesson where we start to work on our unit commander script. So I’ll see you all then in the next lesson.

Interested in continuing? Check out the full Real-time Strategy Project – Unit Movement course, which is part of our Strategy Game Development Academy.

How to Create an RTS Camera Controller

$
0
0

You can access the full course here: Real-time Strategy Project – Resource Gathering

Camera Setup

The camera controller will allow us to move the camera around with the keyboard and zoom in/out. This is similar to many other RTS games and their camera systems.

Before we start scripting, let’s change the camera transform a bit.

  • Set the Position to 0, 20, -17
  • Set the Rotation to 50, 0, 0

Unity Transform component with position and rotation circled

Now with this Main Camera object, we need to make it a child of another object. This will make it easier to move the camera around. First, create a new empty GameObject called Camera.

  • Set the Position to 0, 0, 0

Next, drag the Main Camera in as a child of the Camera object.

Unity Hierarchy with Main Camera as a child object

CameraController Script

Create a new C# script called CameraController and attach it to the Camera parent object. Open it up in Visual Studio.

To begin, let’s add in some variables.

public float moveSpeed;
public float zoomSpeed;

public float minZoomDist;
public float maxZoomDist;

private Camera cam;

In the Awake function, we can get the camera and set it to the cam variable.

void Awake ()
{
    cam = Camera.main;
}

Next, we’ll create the Move and Zoom functions, calling them every frame in the Update function.

void Update ()
{
    Move();
    Zoom();
}

void Move ()
{

}

void Zoom ()
{

}

In the Move function, we’ll first get the keyboard inputs.

float xInput = Input.GetAxis("Horizontal");
float zInput = Input.GetAxis("Vertical");

Next, we want to get the vector direction to move in and apply it to our position.

Vector3 dir = transform.forward * zInput + transform.right * xInput;

transform.position += dir * moveSpeed * Time.deltaTime;

Let’s quickly go back to the editor and fill in the properties.

Unity Inspector with Camera Controller script

Back in the script, let’s fill in the Zoom function.

float scrollInput = Input.GetAxis("Mouse ScrollWheel");
float dist = Vector3.Distance(transform.position, cam.transform.position);

if(dist < minZoomDist && scrollInput > 0.0f)
    return;
else if(dist > maxZoomDist && scrollInput < 0.0f)
    return;

cam.transform.position += cam.transform.forward * scrollInput * zoomSpeed;

Finally, we’re going to create another function which we’ll be implementing later on. The FocusOnPosition function will move the camera to a certain position.

public void FocusOnPosition (Vector3 pos)
{
    transform.position = pos;
}

Back in the editor, we can press play and test it out.

  • WASD or Arrow Keys = move camera
  • Scroll Wheel = zoom

In the next lesson, we’ll start to create the resource objects.


Transcript

Welcome back everyone. In this lesson we are gonna be working on our camera controller script, which is going to allow us to both move the camera left to right, forward and back as well as zooming in and out. So we can get a good view of our game scene and be able to navigate around. The camera is also gonna have the ability to focus on a certain position, so at the start of the game we’re gonna be focusing on our unit spawn area so that the camera can easily show the player where our units are spawning, and later on, if you wanna implement stuff such as pressing a button to move to an idle unit, then this is also going to allow that.

So first of all, we need to change our setup of our main camera right now. If we go on the scene view here you’ll see that the main camera, it is just by itself, but what we need to do is we need to put this main camera inside of a container. And that is going to allow us to easily move around and figure out the center point down here, to figure out what is at the center of the camera, because if we don’t, trying to center this camera on a certain point, we’ll have to do some trigonometry, and yeah, it can get a bit confusing so we’ll just keep it like this.

So what we need to do is first of all, get our camera here, and we need to place it inside of an empty object. So I’m gonna create a new empty game object here, I’m gonna call it our camera, I’m gonna set it to zero, zero, zero, and now we just need to set the camera here, oh, drag this in as a child, and we need to set the main camera here to a position where we want the center of the map to be in the center of the screen.

So I’m gonna set the y position here to 20, z to -17, and the rotation on the x-axis to 50. So there we go, it looks like we’re pretty much aiming in the center there, which is good. Field of view at 40, which is also good. And now what we can do is on our main camera object right here, let’s create a new script inside of the scripts folder, and I’m gonna be calling this one our camera controller. We can then select our camera object that we just created here, and I’m gonna drag on the camera controller script, and now let’s open it up inside of Visual Studio to begin scripting.

Okay, here we are. First up, I’m just going to remove the start and update function just to get it a bit clean here when we enter in our variables, and first up for our variables, we need to know the move speed, this is going to be how fast are we gonna be moving the camera around with our arrow keys, then we also need to know a zoom speed, so how fast are we gonna be zooming in and out, so zoom speed here. And then, we also need to know what is the minimum distance we can zoom in, and the max distance we can zoom out, because we don’t wanna be zooming through the terrain or really far out, so I’ll go public float minZoomDist and another public float for the maxZoomDist.

What else we need is going to be the camera, because when we are zooming the camera, we’re gonna be moving it based on its forward direction yet when we’re moving the camera, we’re gonna be moving this parent object around. So here, I’ll just go private camera cam, and there we go.

Now what we can do is inside of the Awake function I’m going to just go cam = camera.main to get the camera easily like that, and now what we can do is create our two functions, the move function and the zoom function. And these are gonna be called every frame inside of update, so I’m just gonna go void move and then void zoom, and then inside of the update function up here we are going to be calling the move and the zoom functions every frame.

Okay, so let’s begin with the move function. This is gonna take in two inputs, it’s gonna take in the keyboard horizontal and vertical axes, which are bound to your arrow keys and your WASD keys. Horizontal is A and D, or left arrow and right arrow, and vertical is W and S, or up arrow and down arrow. And this is a range between negative one and one, with zero being the default, which means nothing has been pressed.

So let’s get our xInput first, so float_xInput = Input.GetAxis, horizontal and then for the zInput, which is gonna be our forward and back, we’re gonna get our Input.GetAxis, vertical. Okay, so we’ve got our input. Now what we need to do is basically move the camera based on these. And the way we’re gonna do that is by just moving this parent camera object in the forward, and left and right direction.

So what we can do with that is create a Vector3 called dir, and this here is gonna be equal to our transform.forward multiplied by zInput, plus our transform.right multiplied by the xInput. So this is gonna get a direction to move that. If we’re not pressing anything then this is just gonna be a empty vector. So then what we can do is add this on top of our transform position, so transform.position += direction, multiplied by our move speed, and then we need to multiply it by Time.deltaTime, because we don’t wanna move our move speed every single frame, we wanna move it every single second. So Time.deltaTime will convert this down to a second range, and make it so that it is frame rate independent, it doesn’t depend on a certain frame rate.

Okay, so let’s actually go test this out right now. I’m gonna go into Unity. For our camera controller right here I’m gonna set the move speed to 15, zoom speed to 25, min zoom dist to 10, and max zoom dist to 50. These are just the values that I found that were pretty good, press play, and as you can see here, we can use WASD to move our camera around like so, and then we’re gonna be working on the scroll wheel. The scroll wheel is gonna be zooming us in and out, so let’s go do that now.

So what we can do down in zoom here is, we need to first of all get the scroll input from the scroll wheel. And to get that we can just go float scrollInput = Input.getAxis and we wanna get the mouse scroll wheel, so Mouse Scrollwheel. And like with the other inputs, this is gonna be a range between negative one for scrolling down, and one for scrolling up. And with this, then, we also need to calculate a distance between the camera and the center point, between the parent object, because the camera is going to be calculating pretty much how far it can zoom in and out based on that distance.

So float dist = Vector3.Distance between us, so transform.position, this parent object that is currently in the center of the screen at zero, zero, zero, and the cam.transform.position, which is up in the air. Then what we need to do is check, okay, if this distance is less than the minimum distance, and we are trying to scroll up, then we cannot zoom in any more. So return. So if dist is less than minZoomDist and the scroll input is greater than zero, then return, because we can no longer zoom in, because we’ve already hit the max, so don’t bother trying to affect the zoom any more.

Otherwise, so else if out dist is greater than the max zoom distance, and we have our scroll input trying to scroll down, so we’re trying to scroll out, then we also want to return, because we don’t wanna be able to zoom out when we’re at this distance, either. So finally, if we’re within the range of the min and max zoom, then we can affect the camera position by just going cam.transform.position += cam.transform.forward, multiplied by the scrollInput, multiplied by zoomSpeed. There we go.

Okay, so we got that all set up now, Let’s also add in the function to focus on a position, which is only one line of code. So we’ll go public void FocusOnPosition. It will require a Vector3 for the pos, and all we’re doing here is just gonna go transform.position = pos.

Okay, so let’s test out our zoom function right now. We’re pretty much moving along the camera’s forward direction, which is the blue axis the z axis, local to the camera, whichever is pointing in the direction that the object is looking at, so we’re gonna be moving along that axis based on our scrollInput, and then multiplied by our zoomSpeed, so we can affect how fast the zoom is.

So back in our Unity right now, let’s press play and test it out. So we can move around like before, we can then zoom out with scrolling, as you can see. I’m at the max zoom distance, I can’t scroll out any more. Then, we can zoom in and I’m at the max zoom in distance, the min distance, so I can’t scroll in any more.

And yeah, that’s basically the camera control set up and ready to go, when we do have units spawning set up, whenever we click on spawn unit, we’ll have the camera focus on that position, and it will also focus on that at the start, so we don’t have to manually move the camera around when testing in the game. That is the camera controller script set up and ready to go.

In the next lesson we’re gonna be working on setting up our player, give them the ability to gather resources and use those resources, so I’ll see you all then.

Interested in continuing? Check out the full Real-time Strategy Project – Resource Gathering course, which is part of our Strategy Game Development Academy.

Free eBook – Unity Animation for Beginners

$
0
0

We are excited to announce our latest eBook: Unity Animation for Beginners.

Created by Tim Bonzon, an expert animator and Unity developer, this eBook will show you how to work with several of Unity’s animation features – including to the Animator component, the Animation Timeline, Cinemachine, and more.  You will also learn to rig, animate, and create animation states for a 2D character from scratch directly in Unity.

Not only will you learn in-demand skills that will allow you to create dynamic and eye-catching assets, but these practice-based tutorials will teach you animation techniques that can be used for your own game projects.

Download the eBook here

A Guide to Resource Management for RTS Games

$
0
0

You can access the full course here: Real-time Strategy Project – Resource Gathering

Creating the Resource Object

To begin, let’s create a new empty GameObject called Resource_Tree. Next, drag the Tree model into the scene as a child of the empty object.

  • Set the Position to 0, 0, 0
  • Set the Scale to 0.12, 0.12, 0.12

Unity tree object and its transform component

Next, select the Resource_Tree object.

  • Set the Tag to Resource
  • Set the Layer to Resource

Unity Inspector with Tag and Layer circled

Resource Components

Now let’s work on the scripts. Create two new C# scripts and attach them to the Resource_Tree object.

  • ResourceSource
  • ResourceSourceUI

Unity Inspector with resource management scripts added

Next let’s work on the collider which will detect mouse clicks. Add a new CapsuleCollider component.

  • Set the Center to 0, 2, 0
  • Set the Radius to 1
  • Set the Height to 4

Unity tree object with collider component added

For AI navigation, let’s add a NavMeshObstacle component.

  • Set the Shape to Capsule
  • Set the Radius to 1.3
  • Set the Height to 4
  • Enable Carve

Unity Nav Mesh Obstacle component

Now if we go to the Navigation window, you’ll see that the tree is carving into the nav mesh.

Unity scene with Navmesh added

ResourceSource Script

Let’s now open up the ResourceSource script with Visual Studio and begin scripting.

First, let’s add a new library at line 4.

using UnityEngine.Events;

Then, just above the class, let’s create an enumerator to store our resource types. Right now, we just have food but in the future you may want to add more.

public enum ResourceSource
{
    Food
}

Back in the class, let’s create our variables.

public ResourceType type;
public int quantity;

// events
public UnityEvent onQuantityChange;

The GatherResource function will be called when a unit is at the resource, gathering it. They will send over the player to collect the resource, and the amount to collect.

public void GatherResource (int amount, Player gatheringPlayer)
{
    quantity -= amount;

    int amountToGive = amount;

    if(quantity < 0)
        amountToGive = amount + quantity;

    if(quantity <= 0)
        Destroy(gameObject)

    if(onQuantityChange != null)
        onQuantityChange.Invoke();
}

Back in the editor, let’s set the properties.

  • Set the Type to Food
  • Set the Quantity to 100

Unity Resource Course script component

In the next lesson, we’ll be working on setting up the resource UI to display the remaining quantity.

Resource UI

As a child of the Resource_Tree object, create a new canvas object. This will hold our UI elements. Rename it to PopopCanvas.

  • Set the Position to 0, 4.6, -0.7
  • Set the Width to 240
  • Set the Height to 120
  • Set the Scale to 0.01, 0.01, 0.01
  • Set the Render Mode to World Space
  • Attach a new Image component

Unity Inspector with various UI components circled

Set the color of the image component to a dark grey.

Unity UI Image with dark grey color

As a child of the canvas, create a new image object.

  • Set the Position to -60, 0, 0
  • Set the Width to 80
  • Set the Height to 80
  • Set the Source Image to UIIcon_Tree

Unity UI image with white tree sprite added

As a child of the canvas, create a new Text – TextMeshPro object. Rename it to Quantity.

  • Set the Position to 63, 0, 0
  • Set the Width to 113
  • Set the Height to 120
  • Set the Font Style to Bold
  • Set the Font Size to 50 (different to image)
  • Set the Alignment to left-middle

Unity UI image with text mesh pro text added

LookAtCamera Script

In order for the canvas to be looking at the camera, let’s create a new C# script called LookAtCamera. Attach this to the canvas and open it up in Visual Studio.

[ExecuteInEditMode]
public class LookAtCamera : MonoBehaviour
{
    private Camera cam;

    void Awake ()
    {
        cam = Camera.main;
    }

    void Update ()
    {
        transform.eulerAngles = cam.transform.eulerAngles;
    }
}

The ExecuteInEditMode attribute means that this script will run in the editor, even if we’re not playing the game. So when you save the script and go back to the editor, you’ll see that the canvas is now looking at the camera.

ResourceSourceUI Script

Now let’s work on the ResourceSourceUI script. Open that up in Visual Studio. We’ll begin by adding in the Text Mesh Pro library.

using TMPro;

In the class, let’s create our variables.

public GameObject popupPanel;
public TextMeshProUGUI resourceQuantityText;
public ResourceSource resource;

The OnMouseEnter function is built into Unity’s MonoBehaviour. It gets called when our mouse enters the collider of the object.

void OnMouseEnter ()
{
    popupPanel.SetActive(true);
}

Then in the OnMouseExit function, we’ll de-activate the panel.

void OnMouseExit ()
{
    popupPanel.SetActive(false);
}

The OnResourceQuantityChange function is going to be a listener to the onQuantityChange event in the ResourceSource script.

public void OnResourceQuantityChange ()
{
    resourceQuantityText.text = resource.quantity.ToString();
}

Back in the editor, let’s fill in the properties.

  • Add a new listener to the OnQuantityChange event and link that up to the function we just made
  • Set the Resource Source UI’s component properties to their respective objects

Unity Inspector with prefab assignments for script components

If we press play, you can see that the canvas gets enabled and disabled when we mouse over the resource.


Transcript

Hey everyone, and welcome back. In this lesson we’re gonna work on starting to create our resource, which is gonna be a tree that the units can then gather and which gives them food, and with this food, they can then spawn more units.

So to begin, I’m gonna create a new empty game object. I’m gonna call this one here our Resource_Tree. And I’m gonna set it to zero, zero, zero position so that we can get it in the center of the screen for now. Now with this resource tree, if we go on the scene view and press F to focus on it, there’s nothing there right now. So, let’s actually go to our Models folder and drag in the tree as a child of the empty object. Let’s bring the tree to the center.

As you can see, it is very large. We probably don’t want it that large. So, I’m gonna bring the scale down here to maybe 0.12 as that looks fairly to scale. And if we go to the game view here, we can see that the tree is in view, and it looks fairly decent size.

So now what we can do is go back to our Resource_Tree object here and let’s start off by changing the tag to resource and the layer to resource as well. If this here pops up we can just click no, this object only. And now we can begin with the components. Now with our resource, we are gonna have a script, which manages the quantity of food that is in it, the type of resource, and whenever a unit wants to get that resource, it will go for this script, so you can check okay, do I have enough of this to give away? If so, give it. If not, give what I have left and then destroy the resource.

So in our Scripts folder, I’m gonna create a new C# script here called ResourceSource. Go to our Resource_Tree here and I’m gonna drag and drop that script on. Let’s also add in another script. And this is gonna be our resource UI because with this tree, we’re gonna have it so that if we hover over the tree, then a little window is gonna pop up that shows us basically the quantity of food left in this resource.

So, let’s create a new tree. This is gonna be called our ResourceSourceUI. We can then select our Resource_Tree and attach that as well. So, we have these two scripts on right now. And we need to add two more components. The first is a capsule collider, and this is going to be here to detect our mouse clicks ’cause we’re gonna have enemy selected or we’re gonna have units selected. And then we’re gonna be right-clicking on this tree, so we need a collider for that to be detected. For this capsule collider, I’m gonna set the radius here to about one, a height of four, and let’s bring this Y center up to about two so it’s, so the capsule sits around there.

Along with this capsule collider, we also want to add in a navmesh obstacle. In the previous course, we did work on setting up a navmesh, which, if we go to the navigation panel right here, you can find that by going Window, AI, Navigation. It has basically a blue plane for the surfaces that the units can walk on.

Now, with this tree here, we could select this tree, and then go to where it says object, and then we’ll select the model, then go navigation static, not walkable. But the problem with that is, when these trees then eventually get destroyed once the resource is over, then there will still be a gap here in the navmesh where that tree once was. Because these navmeshes, by default when you bake them, they’re not dynamic, as the name entails they’re baked, So they’re baked into the actual mesh.

So a way we can get around this by making this a dynamic object, is by adding a component called a navmesh obstacle. So, navmesh obstacle right here, we want to make it a capsule shape, let’s set the center here to zero, zero, radius of, we can set that to 1.3, and we can have a height of 4. Now if we go to navigation, you’ll see that nothing’s happening. And the reason why is because we need to set this navmesh obstacle to carve, which will then carve into the existing navmesh.

So if we go back to the navigation panel now, you’ll see that this navmesh now has a big gap in it, where this tree is. And if we actually move this tree around you’ll see that that gap also follows along. So if this tree was then to all of the sudden be destroyed, then this would just be filled in, and then units would be able to walk across it.

So now that we have our tree objects set up and ready to go, What we can do now is actually begin to implement the resource here. We’re gonna begin by looking inside the resource source script here, so let’s open that up inside of Visual Studio, and inside this script what we’re gonna be focusing on is setting it up so that whenever a unit wants to get a resource, it’ll check if it can, if so, it’ll give it. Otherwise it will destroy itself.

So I’m gonna remove the start and update functions, here, and I’m gonna add in two variables, the first is gonna be the resource type. Now we could have this as a string, or an integer to refer to a certain ID, but what I’m gonna do is use an enumerator, which is basically a list of different things that we can assign as a variable. So I’ll show you what I mean.

First up, to do this we’re gonna go public enum for enumerator, and I’m gonna call this one our ResourceType. Now in two brackets here we can then enter in all the different possible values for this enumerator, so really right now we’re only gonna have one, so I’m just gonna enter in food, but if you had multiple, you could go food, comma, and then you could go something like wood, comma, stone, and et cetera. But we only have food, so I’m just gonna leave that there.

And back inside the class, I’m gonna create that as a variable, so I’ll go public ResourceType, and call this one type, so now in the inspector or in script, we can basically set type to be food, or stone, or wood, or whatever we would have inside this enumerator, here. Since we have only one, it’s gonna default to food, so we don’t really have to modify that in any way.

So with the type now what we can do is also add in a quantity for how much of this resource there is, so we can go public int quantity, and after this we also want to have a event. And this event is gonna be called whenever the quantity gets changed, and this is gonna be useful for alerting the UI system for the resource to update its UI to display the new quantity.

Now to do that, I’m just gonna add in a using UnityEngine.Events library right here so we can use events, and then I’m just gonna go events, just to label this off, and I’m gonna call this one our public UnityEvent onQuantityChange. Now we can get into our main function, which is gonna be gather resource, and this here is just going to be a public void GatherResource, and it’s gonna send over two things. First of all, an amount for how much it wants to gather, and the play for the gatheringPlayer.

Now we’re not gonna be sending over the unit that’s gathering this, because it doesn’t really matter, all we need to know is what player are we going to be giving the resource to? Because each unit has an owner player, the player that owns that unit, so that unit is going to send over its owner player here, and then we are going to give this player here the resource, pretty much.

So what we want to do, first of all, is subtract amount from quantity, so we can go quantity -= amount and then we need to figure out an amount to give, because we can’t just give them the amount here that they want, because what if this is, for example, five, and we only have two left? Then we can only possibly give them two, so that’s something we need to keep in mind. So I’m just gonna go here, int amountToGive, and by default, I’ll make this amount.

Now to check if we need to modify this a bit, we can go if quantity is less than zero, so if the quantity right now is less than zero, then that must mean we’re in the negative, which we don’t want, so we wanna balance that out and give the player here less than they want. So for this we can go amountToGive = amount + quantity. So for example, if we are on, currently, a quantity of five and we want to get 10, we can’t do that.

So right here, we’re setting quantity to be -10, since we’re doing basically five take ten, quantity is now -5, amountToGive, we can only give them five since that’s all we really had left, so we’re setting amountToGive to be equal to the amount plus quantity, so 10 plus -5 is going to be five. So we’re gonna give them five, even though they asked for 10 but you know, we only have five left. Apart from this then, we just want to go if our quantity is less than or equal to zero, we want to destroy the resource, so I’m just gonna go destroy gameObject.

And now all we need to do on this function here is call the onQuantityChange event since the quantity here has changed, we want to call the event. So first of all, we need to check if there is any listeners on the event, because if there’s not, it’ll throw up errors. So if onQuantityChange doesn’t equal null, then onQuantityChange.Invoke. And there we go, that’s pretty much all we have to do for this script here, so let’s go back into the editor now.

And what I’m gonna do is set the type here on the resource source to food of course, ’cause that’s the only one we have left, and quantity, we can just set that to 100, or whatever really you want. You can test this out later on once we set up our units’ ability to gather the resource, where we can set up their rates of gather, and stuff like that.

So in the next lesson we’re gonna be working on setting up the resource source UI right here, which is gonna make it so when we hover over the resource it is gonna show us the remaining quantity. So thanks for watching, and I’ll see you all in the next lesson.

Welcome back everyone. In this lesson we are gonna be continuing on with our resource tree over here. In the previous lesson we set up the object and the resource source script. Which just allows us to actually get some of that resource, and when it reaches a quantity of zero it gets destroyed. So in this lesson we’re gonna be working on the little UI panel that appears whenever you hover over the resource. It shows you basically the quantity remaining.

So to do that let’s open up our resource tree here, and as a child of the resource tree I’m gonna create a new canvas, which is gonna be holding our UI. I’m gonna rename this here to our PopupCanvas. And in order to make this a canvas that we can shrink, resize and position, we need to change it from a random mode of screen space to world space. And this makes it so it isn’t attached to our camera screen, rather it is a object in the world that we can move in 3D space.

So now that we have that done, we can then modify the X,Y position. I’m gonna set X to zero and Y to around a 4.6, and the width we’ll have that at about 240 and height of 120. And right now you’ll look at it see, see that is a very large canvas, so a way to fix this is by then shrinking down the scale. I’m gonna bring the scale down to .01 on the X, Y and Z axis. And as you can see, here it is, right here, we have the canvas, which is around the size we want. Now let’s also set the position on the zed to be negative .7, just so it is in front of the tree, and that we can see it then.

So what we wanna do now is, let’s add a component to this canvas. And I’m gonna add in an image component, so we can have a little background here. And the color I’m gonna make this is going to be a dark gray color, something similar to this right here. And with this image now, we can also, on this canvas object, we can remove the graphic raycaster component. This just means we won’t be able to raycast anything, so we won’t be able to click on any buttons, but that’s not really necessary, so we can just remove that.

So we’ve got the popup canvas here setup, now let’s add in the two elements which are gonna make it up. That is going to be the tree icon here on the left, and on the right hand side, the quantity text. So on the canvas I’m gonna right click go UI image. And this here is gonna be our icon. Now all we need to do here is, I’m gonna set the position on the X to be around negative 60, and then we can also shrink it down a bit, so I’m gonna bring the width down to 80, and the height down to 80 as well. And then we can set the source image right here, to be the UI icon tree. There we go, we got the tree icon.

And after that we can work on the actual quantity text. So to do that, I’m gonna right click on our popup canvas, go UI, text, TextMeshPro, and this is gonna ask you to import some TMP essentials. Text Mesh Pro is basically a new sort of UI system for Unity. It’s a replacement for their default one, which really isn’t the best. Text Mesh Pro makes it so that the text is actually in mesh, rather than just a pixel image. So the text is a lot crisper and there’s also a lot more basically options that you can do to apply to the text.

So we got our text here, I’m rename this here to our Quantity. Let’s also set the width here to be 114, height of 120, and I’m gonna sext the X position to be 63, so it’s on the right hand side right here. We can just put an example text for now, I’m just gonna put 100. Let’s make it centered, so we’re gonna go alignment here to be in the middle. And let’s also make it bold so it’s a bit bigger. It’s also pretty small text so we can increase the size to around let’s just say 50.

If you look in the game view, we can see the panel right there, but it’s not lookin’ at the camera. Well we could just rotate it upwards to face the camera, but then what happens if we want to maybe adjust our camera position over time? Well the problem with that is that, it is then going to require us to re-rotate the canvas again. So something we can do is create a script that can automatically rotate the canvas to look at the camera.

And what I’m gonna do is create a brand new script here. And this is going to be called look at camera. Okay, we can then open this up inside of Visual Studio, and what this script basically does is just rotates the canvas, or any object really. You can attach it to any object, and it will be looking at the camera. So, we can remove the start function, and I’m gonna replace this with the awake function, but first let’s create our variable, which is gonna be a private camera cam, so we can access the camera.

And then in the void awake function, we are going to set cam to be equal to camera dot main. And then in the update function, which gets called every frame, we can rotate the object to face the camera. And to do that, we can just match the camera rotation, so transform dot eulerAngles equals cam dot transform dot eulerAngles. And now what we can do is hop back inside the editor and as you can see nothing happens yet, but when we press play, we’ll see that the canvas is not lookin’ at the camera ’cause we haven’t attached it yet.

So on our popup canvas, let’s attach the look at camera script, press play, and there we go. It’s lookin’ at the camera, we can move around. But you might want to have this canvas look at the camera while we are in, not playing the game. And a way to do that is, if we go back to our script here. What we can do is add in an execute in edit mode attribute to this class. So up at the top of the class, I’m just gonna go in square brackets, ExecuteInEditMode, and what this means is this script here is going to be running inside of the edit mode, when we’re not playing the game.

So if we save this and go back to the editor, what you’ll see is, the actual panel is now looking at the camera. And this is because it is running that update function, even when we’re not playing the game. So that it can automatically adjust to look at the camera at all times. Which is pretty cool.

So apart from that, what we can do now, is start to work on the actual UI script that the popup canvas has. And that is going to be the resource source UI script, which we have attached to our resource underscore tree object. Let’s open this up inside of Visual Studio, and in here we can begin to actually start scripting.

So what we’re gonna have in here, is just a few things, first of all let’s add in the using TMPro library, because we need to access the TextMeshPro classes. And then for our variables we can have our public gameobject popupPanel, and this is what we’re gonna enable or disable if the mouse is over or not. And then we have a public textmeshproUGUI for the resource quantity text. Then we have a public resourceSource for the actual resource that this is attached to.

And now what we can do is enable or disable the panel when it is hovered over or hovered out. And to do that we can just use a inbuilt function in monobehaviour, which is void OnMouseEnter, so when the mouse enters the collider of this object, we want to go popupPanel, dot, SetActive, true. And when the mouse exits we’ve OnMouseExit, then what we can do is basically disable the panel, so popupPanel dot SetActive, false.

Now we’re setting the panel to be true or false, but what happens when we want to update the quantity text? Well if you remember in our resourceSource script here, we have an event called onQuantityChange, which gets called whenever a unit has gathered the resource. So what we want to do is create a function that will be called when that event is called, and that is going to be a public, void, OnResourceQuantityChange, and all this is gonna do, is set the text to be our resources quantity right here, so we can just go rsourceQauntityText, dot text, equals our resource, dot quantity.

Now you see that an error pops up, and this is because we are trying to assign a string, which is the text here, to be an integer, which is quantity. So a way we can convert this integer to a string is just by going dot, ToString, at the end, like so.

Now let’s hop inside of the editor again, and let’s connect this script up to it’s various objects and the event. So we can drag in the Popup Canvas here for the PopupPanel. The resource quantity text, that is our quantity here. Resource that’s the ResourceSource and then let’s add a new event here on the onQuantityChange event, drag in the ResourceSource UI, and set the function to be ResourceSource UI, dot, on resource quantity change.

Now if you press play, you’ll see, of course, nothing really happens, and that is because we don’t have the units actually able to mine the resource yet. So what we’re gonna be working on in the next lesson is actually having these units begin to understand that there’s a resource here and allow them to move over to it, and start mining it. So thanks for watching and I’ll see you all in the next lesson.

Interested in continuing? Check out the full Real-time Strategy Project – Resource Gathering course, which is part of our Strategy Game Development Academy.

How to Get Started Programming in C++

$
0
0

You can access the full course here: C++ Programming for Beginners

Installation

To write and run C++ code, we will use the IDE Visual Studio Code (VSC). It’s a fantastic IDE with thousands of plugins to help you write code in dozens of different languages. It also looks great and is easy to use. The best part? It’s free! Also, the process of installing VSC and the necessary plugins are pretty much identical between Mac and PC so both types of users can follow the same instructions. We’ll hop on over to this website here:

https://code.visualstudio.com/download

Visual Studio Code website

It’s the official download page for visual studio code. Select your operating system and download the appropriate file. Follow the instructions in the installer. Once that’s done, go ahead and open VSC to find a welcome screen that looks something like this:

Visual Studio Code welcome screen

This screenshot is from version 1.41 so if you have a later version, things may look slightly different. VSC doesn’t come packaged with the necessary plugins automatically so we will need to install one to allow us to write C++ code and another to help us compile and run it.

C++ Plugins

The first plugin can be found by opening up the Extensions window (click on the Extensions button at the bottom of the leftmost panel) and searching for “C++” (in the search bar at the top). The one we want is an official Microsoft plugin and looks like this:

C++ Extensions for Visual Studio Code

As you can see, this package has already been installed but where is says “uninstall” above, it should say “install” for you. Go ahead and press that to install it. Don’t worry, it’s free too! You may have to restart VSC to apply the plugin.

Next, we want a way to run the code in VSC, as the plugin we just installed only lets us write C++ code. To avoid the long, roundabout way of installing the platform specific compiler and linking it to VSC, we can use the plugin “Code Runner”. Once again, it’s free to install. In the same extensions window, search for “Code Runner” in the search bar. It should look like this:

Code Runner Extension in Visual Studio Code

Just like before, press the install button and that’s it! You can now write and run C++ code!

Now that we have everything we need, we should give VSC a test run with our new plugins. VSC works best with project folders so open Finder (for Mac) or File Explorer (for PC) and create a new folder somewhere. It doesn’t really matter where for now as this is just going to be used for testing purposes so somewhere like the Desktop is fine. Once you have created a new folder (it should be empty), open it with VSC. Click on the “Explorer” button on the left panel at the top and click on the “Open Folder” button:

Visual Studio Code with Open Folder selected

Select the folder you just created. This should display the welcome screen again but you just click out of that. Now we need a file to contain our code. We very often call the entry point into a program “main” so you may as well do the same. Create a new file by selecting “File” (in the main menu at the top) and selecting “New File”. You can also create a new file by pressing cmd + N for Mac users or ctrl + N for PC users. Save the file by selecting “File” and selecting “Save As…”. You can also save the file by pressing cmd + s for Mac users or ctrl + s for PC users. Make sure it’s in the folder you just created and call it “main.cpp”. Your configuration should look something like this:

Visual Studio Code with blank main.cpp file

Now we need to write some code to run so copy and paste the following code:

#include <iostream>

int main()
{
	std::cout << “Hello World!”;
}

Don’t worry, we’ll explore the syntax in greater detail later. You will probably notice that the #include <iostream> line has a red squiggly line underneath it. That’s because we haven’t set the compiler path and is, unfortunately, something we have to do with every project. To do so, bring up the browse window by pressing cmd + shift + p (for Mac) or ctrl + shift + p (for PC). Search for “C/C++: Edit Configurations (UI)” and open the window. It should look like this:

IntelliSense Configurations window in Visual Studio Code

Although a few of the variables in the windows may be different, it should look generally the same. Under the “Compiler path” subheading, click on the dropdown button and select “/usr/bin/clang”. Give the file a save and close it. When you go back to main.cpp, the red squiggly line should be gone! Now make sure you save main.cpp. In the upper right corner of VSC, you should see a play button. Go ahead and press it to run the code. Be aware that it will run only the highlighted code if you have code highlighted or will try to run the current file you’re in so make sure you’re in main.cpp every time.

This will run the code in main.cpp (all the code is doing is getting the program to print out “Hello World!”) so you should see the terminal window open at the bottom and some output similar to this:

Hello World C++ program running

The exact text you see will differ based on where your files are saved but you should see Hello World! In there somewhere. My editor text is also much bigger than the default for your easy viewing. Congratulations! You have successfully built and run your very first C++ program!

Project and File Structure

Before we jump into learning the language, let’s talk about how C++ programs and files are structured so that we can understand what’s going on above. C++ programs are started using a main function. This is declared with the int main() {} code above and for now, we want all of our code between the {} otherwise we won’t be able to run it. Our main function is simple because we aren’t passing in any arguments and are running things with a fairly sophisticated compiler in VSC. More rudimentary C++ programs sometimes have a “makefile” which is a way of compiling all of the files at once without running them. A compiler takes code that we can read and write and turns it into machine instructions that the computer can understand and execute. We won’t worry about that here; the key takeaway is that the main function marks the start of a C++ program and when that function finishes running, the program terminates.

Now it’s bad practice to put all of our code in one file so generally we create separate files for related functionality. For example, different game components such as characters, items, rooms, etc. will all have their own separate files. However, we often need to reference other files and libraries in order to get access to the goodies inside. This is done through #include statements. The #include <iostream> above includes the input-output library so gives us access to the std::cout function. Go ahead and delete the #include <iostream> statement and you’ll notice that you immediately get an error with the std::cout code. Most functionality that isn’t declared in the current file and is not part of the basic C++ library will likely need to be imported.

One final thing to note about files in C++ programs is that we very often divide our functionality into .h and .cpp files. The .h files are header files that basically act as blueprints telling the program what variables, functions, etc. that part of the program needs to finish setting up. The .cpp files are C++ files that contain the fully set up variables, functions, etc. that the .h files say they should have. These are the files that contain the code and are actually run. For example, if we needed a bunch of variables and functions in main.cpp, we could create a main.h file, fill it with templates for the variables and functions, and then actually add the body of those variables and functions in main.cpp. Just make sure to #include the .h files in the corresponding .cpp files, otherwise you won’t get access to anything you wrote in the .h file. This may seem redundant but it’s considered best practice and will help you to organize your project. Your coworkers will greatly appreciate it!


Transcript

What’s up, guys? Welcome to the first tutorial in our Learn C++ course. This will be on installation and project setup. We’ve got two very easy tasks ahead of us. What we’ll do here is download and install Visual Studio Code, and then I’m gonna really quickly show you how to start a project, we’ll just become a bit more familiar with the IDE and the whole process.

So, let’s head on over to a browser first. Because of course, we need to download it. And we’re going to search for download Visual Studio Code. So I have Chrome open here, although any browser should work. We’re gonna go to this second link, code.visualstudio.com/download. This will take us right to the downloads page. Now, I’m using a Mac, so obviously it makes sense for me to download the Mac installer. But if you’re using Windows or Ubuntu, please download your respective installers. I’m gonna go ahead and click on that, and it should take you to the get started page and start the download as well.

Now, just a heads up, I am recording on a Mac, so everything I do will be from a Mac standpoint. However, once we have everything installed and the plugins in place, everything will be exactly the same between Mac and PC. I’m not a 100% hundred percent sure about Ubuntu ’cause I personally don’t really work with Ubuntu very much. So I recommend you go with either Mac or PC, but there we go.

So, now that this is downloaded, we’re gonna go ahead and open it up. I’ll really quickly show you what it looks like from a Mac standpoint, and then I’ll talk you through the process of if you’re downloading it using a PC. Okay, so you can see that this downloads the the ZIP file. I open up the ZIP file there, and it shows me this Visual Studio Code.app. If you’re using a Mac, all you need to do is drag and drop this into your applications folder and you’re good to go. That’s it. The Visual Studio Code is downloaded and you can open it up and use it.

Now, if you’re using Windows, likely this will open up the installation wizard. I think one of the first steps is just to click next, and then say read and accept the license, and then it will give you a few different screens that ask you to set up various variables, and also to set up stuff like the path, exactly where you want to save it, and so on and so forth. You can actually just use the default values for all of those. So don’t mess around with them at all, just use the default values, click next right the way through. It will give you the installation process, it will show you that installation bar, and then it should be good to go. You’ll have Visual Studio Code installed. So again, just use all the default settings for now. We’ll mess around with things a little bit in the next tutorial.

Okay, so once you have those in place. I’m just gonna go ahead and delete my Visual Studio Code app in the installer there, because I actually already have it right here. Okay, so once that’s done, we’ll go ahead and open up Visual Studio Code for the first time. This isn’t the first time for me, obviously. I wouldn’t be very good at making this course if it was. And this will show us the welcome window here. Okay, so there’s lots to take in here. You can customize the appearance, tools, languages, et cetera. You can find some tutorials here. There’s a bit of help. Gives you recent projects. You probably won’t have anything in here. But it also gives you the option to start new files and projects, et cetera.

So this right here is the file window. Any files that you have open will be displayed here in a tab-like structure. So if you have many files open, you select one at a time and it opens it up. Just a heads-up, likely you won’t have this little play button here just yet. I’ll show you how to get that in the next section. Now, we’re interested in two pieces of this whole screen here.

First it’s gonna be the file explorer up at the top. This is a way to view all of the project files that we have open. Now, we actually don’t have a project open. This is just the main IDE. So that’s why we don’t have anything exciting to see here.

The second is gonna be our extensions button. So we click on this extensions button and it gives us a way to browse for various different plugins. We’ll install two specific plugins in the next section. But for now, just know that it exists. We’ll come back to that later. I do think that this looks a little bit different in Windows, a slightly different symbol, although it does exactly the same thing.

So, before we go any further, all I want to do here is show you how to set up a new project. It’s very, very easy. All we need to do is go to our finder or file explorer, choose the location you wanna save it on. I’m probably gonna go with desktop, just ’cause that’s easy for me to access. I’m gonna create a new folder. So I’m doing Command + Shift + N. I think for you Windows users it’s probably Control + N or Control + Shift + N.

And I’m just going to call this something like C++ Practice. So we recommend you do the same. The name isn’t too, too important, because we’re just going to be using this to test out our language basics. When we go to build our actual project we’ll call this something a bit more significant.

So now that we have the folder created, we don’t need anything in it just yet, we’re gonna go back to our file explorer here, we’re gonna go to open a folder, and we’ll go ahead and find where we saved that folder. It should be on desktop, C++ Practice, down at the bottom. We’ll go ahead and open that guy up. So once again it will show us the welcome window. If we don’t want that we can just exit out. We don’t have any files in this project, which is why there’s nothing here. If we did it would show you all of the files here. It would show you any open files under open editors there. But otherwise, that is it.

So, I just wanted to show you how to download and install Visual Studio Code, how to open up a new instance of it where the couple things that we’ll need are, and finally, how to start a new project. If you do wanna start a new file, then you can go to file, new file here, although I don’t recommend you do so just yet because we haven’t added the C++ extensions that we’ll need. So that’s what we’ll do in this next section coming up, stay tuned for that. Thanks for watching, I will see you guys in the next one.

What is up everyone, welcome to the second tutorial in our learn C++ course. Here we’ll be completing a setup by adding our C++ compiler. This is an essential component for what’s called building and running the C++ code.

So we’ll need two plugins. The first will be the C++ coding tools. I think this is IntelliSense. It’s actually a direct Microsoft plugin and then we’re going to install the C++ compiler. That will be a plugin called Code Run or Code Runner I believe it’s called and will allow us to easily compile and run C++ code.

So lets head on over to Visual Studio Code now and we’re just going to start by going to our plugins or our extensions, this window here and then we go and search for first our C/C++ extension. Okay so it should be this very first one. This C/C++ IntelliSense, debugging, code browsing, etc. So as you can see I already have this installed because my only options are disable and uninstall although your options should be install if you don’t already have it. Go ahead and click on the install button.

Don’t worry it’s totally free and is necessary to build and run our code. You can see it’s got over 9,000,000 downloads at this time so it must be fairly well trusted.

Okay so this may prompt you to restart Visual Studio Code. If it does then please do so open up your project folder and we can go ahead and install the other one. Okay so I’m assuming that you have that installed and we can install the second plugin. If not then you’ll probably want to pause this video, make sure that’s good to go and then come back.

Now the second one that we’ll want to install is going to be our code runner. So we go and search for Code Runner here. Okay it should have this .run, it’s called Code Runner and it’s got over 3,000,000 downloads so quite well trusted and allows you to run all of these languages and more. We’re only really interested in C++ but I found this is by far one of the best extensions to allow us to do so. So we’re gonna go ahead and once again install that. Make sure it’s good to go and again these plugins should only take a couple of minutes to install at most. If you need to restart Visual Studio Code please go ahead and do so and then come back.

We’ll need to preform a little bit more setup. Okay so I’m assuming that’s good to go. Now what we’ll want to do is show all commands. Now I actually can’t press Command + Shift + P because that pauses my recording so we’re going to go to settings here and we’re going to go to the command palette. It’s exactly the same thing. Okay so what we’ll want to do is go to C\C++ edit configurations, so C\C++ and we go and search for edit configurations and we don’t really want the JSON we want the UI it’s just a little bit more user friendly.

Okay and this will open up this window here. So this is the IntelliSense configurations. We need this because we need to essentially specify our compiler. If we don’t specify the compiler then we’re not going to be able to actually compile and run our code. Okay so usually this actually filled in but for whatever reason it isn’t. We’re going to go ahead and add a configuration. We can just call this the configuration name Mac for me is fine although you’ll maybe want to do Window or something like that if you are using a PC.

Okay the next thing we’ll want to do is select our compiler path. Now most operating systems actually come with some sort of compiler already installed. For Mac we’re going to want to chose the clang compiler not the clang++. Make sure it is the /user/bin/clang. So you want to go ahead and make sure you have that. Windows I think they actually recommend a MinGW compiler. I don’t have this because again this inst a PC this is a Mac so the clang is the one I’ll want to go for.

Windows users again that’s going to be the MinGW. If you don’t have the MinGW compiler you can actually find this just by opening up a new window, we go and search for MinGW okay and we’re going to go to mingw.org and this will kind of allow you to search for the most recent downloads. Make sure that you get the most recent version of MinGW and get that installed so you can just kind of download and install it there.

Once that’s done you should be able to add that to your list of compilers there or rather specify your compiler path from that. Okay so from there you’ll want to make sure everything looks the same. You’ll want your workspace folders. The default here you’ll want clang x64 or MinGW if you have that option for Windows otherwise everything is looking pretty much good to go. So we can go ahead and give this a save. I’m just pressing Command + S here. Window users that Control + S or you can just go to file, save okay? We’re gonna go ahead and close that up and we should be good to go.

So if we go back to the file explorer and start opening up and creating C++ programs we should be able to actually compile and run them. We’re not going to do that just yet, we’re actually gonna save that for the next section though because we just want to get everything setup here. Okay so that’s it for now. Like I said when we come back we’ll be writing our very first C++ program to explore kind of how files and projects are structured. So thanks for watching I’ll see you guys in the next one.

What is up everyone? Welcome to the third tutorial in our Learn C++ course. Here we’re just gonna take a few minutes to talk about the C++ file structure. So it goes a bit beyond that, we’ll actually start by covering how C++ programs in general are structured. Then we’ll talk about the files specifically, how they’re structured, we’ll get into the main function and header files, we likely won’t create any header files here just ’cause we really don’t need them. But then we’ll talk about what the purpose of those is and how to include them under the include headers as well. We’ll also toss a name space in, but likely these words won’t mean a whole lot until we actually get to those topics.

So let’s head on over to Visual Studio Code again. And probably the first thing we want to do is actually start by creating a file of our own. So we’ve got all of the compilers and everything set up, we should just be able to create a new file here. We can actually go to file, create a new file. We should probably save this file right away. Make sure it’s a C++ extension. You need to go down here and select a C++, or you can actually just save it as a .cpp file. So we’re going to make sure that we’re saving it under CPP practice, in the same project folder. And I’m just gonna call this main.cpp.

Okay, so that’s C-plus-plus, because we can’t include that actual plus symbol in the file extension. Okay, so this may give you a red squiggly right off the bat saying that there’s basically nothing in this file to run. In this case it seems to be doing okay. So, we’re going to start just by creating this function called main, and actually we should specify int, main like this, and then we’re just going to put into the curly braces, it doesn’t matter whether down here or up here, it really doesn’t matter.

Okay so the reason I created this function before talking about anything else, is because main plays an integral part in the overall C++ program structure. Now, we’re not gonna be building something super, super complex, with dozens and dozens of files, we’ll probably end up with maybe about a dozen files or so. So it’s not gonna be too too crazy, and all those files are gonna be either C++ files or header files.

Now the C++ files contain the code that is actually run. So this means if we’re building this function here, this int main function, then this is going to contain the code that will actually run. The header files, on the other hand, are just a way to set up a template. So, if we had a header, and a C++ file, so main.h, that would be a header file, then essentially that would be used to say that we’re going to have a main function, but we’re not gonna fill in the body of it. So here we can fill in the body of the main function, but the header file is just used to say that our main.cpp file should have a main function. But we’re going to let the main.cpp actually implement that function, or actually provide the body of that function.

Same goes with any variables that we might declare. We might actually declare some variables in the header file, the .h file, but we’ll actually implement them. We’ll give them values in the .cpp file. Okay, so just keep that in mind as we go. The .cpp files are used to actually run code, and the header files, or the .h files, are generally just used to say what should be in the .cpp files. Okay, generally speaking for each of the .cpps we’ll have a header file to go along with it. In this case, because the main is a very special file, we won’t really need one.

Okay so, then that comes to the purpose of this main function. Now the main function itself is kind of the entry point into the program. This is going to be the very, very first thing that’s run in our program, even if we had a hundred other files, we’re going to run our main function first. This is the entry point, and so it needs to be performing all of the setup, or at least calling functions and files that will help to perform the setup. So this will be kind of the entry point into the code, that’s why I said main.cpp is generally a very special file.

So that’s for the most part what we need to know about program structure, we’ll have a main file, that will be the one that runs first, and for each of the other files, generally speaking, we have header, and then we have CPP files that kind of correspond with each other.

Okay, so next up will get into the meat of a file itself. Now we’re not really gonna differentiate too much between the header and the CPP files, just ’cause we don’t have a header file here. But generally speaking, we’ll start with some include statements. Now an include statement will be like this, #include. And is a way to include any other libraries or any other files that we might need. So if we did need a header file, we would include it up here. Same with if we needed any other libraries or anything in this file, any other functions that we needed access to that weren’t declared in this particular file, we need to include them all.

So very often you’ll see lots of these include statements. In this case we’re actually going to include just the one, that’s gonna be iostream, like this. So note, there’s no need for quotes or anything like that. Sometimes you will see some quotes if we’re including a header file, we generally wrap them in quotes like that. So generally speaking, if we’re including files we wrap them in these double quotes. If we are including libraries, like iostream is a library, that means it contains a bunch of functions and stuff, then for that we don’t actually need the quotes here, we’re fine with just the angular brackets.

Okay, we’ll talk more about the main function in just a second. One other thing I want to point out before moving forward is these double forward slashes. This represents a comment, so anything we put here will be completely ignored by the compiler. Now this is clearly nonsense, it doesn’t do anything. If I were to get rid of that then we’d have an issue here, you can see it right away there’s an issue. But the double forward slash makes it a comment. So basically, the compiler ignores all comments, they are really just there for the coders to read.

So let’s say that I was building my main function, and I realized that there is a weird bug. So it’s producing some output I don’t expect, or it’s not quite working, then I can make a comment saying “Main function is not working properly.” Maybe give a more detailed description of the issue, and then kind of put like a “TODO fix this function”, or something like that. It doesn’t even have to be an error, it could just be describing how the function works so that anyone reading your code can just look at the comments and quickly say “Okay, this function does this, I can ignore this. “Well, this function does this, “I need to pay attention to it.”

Okay, so we talked about the headers, we talked a little bit about main function, we talked about how projects and files are structured. One thing to note actually, with regards to Visual Studio Code specifically, because we’re using a special kind of a compiler we don’t need what’s called a makefile. Now some kinds of C++ compilers will need a file that’s called a makefile, which basically helps to build or compile the files. So in that you’d put all the files that need to be compiled and then that would kind of take care of that for us.

That’s not really something we have to worry about, just because we’re using Visual Studio Code and the specific plug-in. So okay, so just be aware of that if you are developing in a very basic environment, so just like a tech set as you’re in Terminal, you will likely need a makefile as well. It’s a bit beyond this course, so we’ll not worry about that for now.

Okay, so last thing I want to talk about here before we fix this issue that’s clearly something wrong, is gonna be that all of the code that we’ll write, at least for now, and over the next several tutorials, is gonna be inside of this main function. So we will put all of the code in these brackets here, and we won’t put any of that code outside of the brackets. So before or after the main function. And that’s because all of the code in C++ programs needs to be actually run within functions. We can kind of set things up and declare things outside of functions, but as soon as we want something to run then we need to put it inside of a function somehow.

Okay, so just be sure to not write any code outside of main, other than comments, comments are fine, again, because they’re not really run, they’re just kind of ignored. Okay, so finally let’s just go ahead and see what this issue is, it’s probably something to do with the compiler path. Thought we fixed that issue, but let’s see if we can figure out what’s going on there. So let’s go take a look in our command pallet, we’ll go into edit configurations and see if that is an issue.

So for whatever reason the compiler path has defaulted back to GCC, pretty sure we said that to C-lang, but that’s okay. And, so, that should be good. Okay, so once we get that done, this issue should go away. And it has indeed, because we’ve gotten rid of that red squiggly. Again, if you’re using Windows, probably you’ll do min-gW instead of the C-lang. Just make sure it is switched to a compiler that actually works, and doesn’t give you that red squiggly line.

Okay, last thing we’ll do here is just run this program. Now, it’s really not gonna do anything. Don’t worry about that, in fact, let’s actually just do this. We’ll do standard, we’ll do c-out, and actually it should be this, c-out, and we’ll just Hello World! Just the classic, I’m sure you guys have all seen Hello World! at some point in your lives. So don’t worry about exactly what this means, essentially this is just outputting this value here. We’ll talk more about that in the next section. So we just wanna go ahead and run that code.

Okay, we can see if we run this we’re not getting any output, and that’s because we haven’t saved the file. So we need to make sure that this is saving everything before we run it, the compiler is a little finicky like that. If you see this black dot inside of an X, that means you need to save the file. So we’ll go ahead and give that a rerun. And you can clearly see that Hello World! is printed there.

Okay, so that’s all we want to cover here. We talked about the file and the project structure of C++ programs. When we come back will be focusing more on this stuff which is input, output, so stay tuned for that. Thanks for watching, see you guys in the next one.

Interested in continuing? Check out the full C++ Programming for Beginners course, which is part of our C++ Programming Bundle.

Viewing all 1620 articles
Browse latest View live