Quantcast
Channel: GameDev Academy
Viewing all 1620 articles
Browse latest View live

Complete Guide to Procedural Level Generation in Unity – Part 1

$
0
0

In this tutorial series we are going to procedurally generate levels using Unity. In the first tutorial we are going to use pseudorandom noise to generate height maps and choose terrain types according to the height in each part of our level. In the next tutorials, we are going to assign biomes for each part of the level and in the end, we are going to generate a level map object that can still be manually edited according to the game needs.

In order to follow this tutorial, you are expected to be familiar with the following concepts:

  • C# programming
  • Basic Unity concepts, such as importing assets, creating prefabs and adding components

Before starting reading the tutorial, create a new Unity project.

Source code files

You can download the tutorial source code files here.

Generating noise

In order to procedurally generate levels, we are going to use noise functions in our code. A noise function is basically a function that generates pseudorandom values based on some input arguments. By pseudorandom it means the values look random, despite being algorithmically generated. In practice, you can see this noise as a variable, which can be used as the height, temperature or moisture values of a level region. In our case, we are going to use it as the height of different coordinates of our level.

There are different noise functions, but we are going to use a specially popular one called Perlin Noise. You don’t need to fully understand Perlin Noise, since Unity provides an implemention it. What I’m going to explain in this tutorial is how you can use it in your code.

So, let’s start by creating a script we are going to generate a noise map. First, create a new script called NoiseMapGeneration. This script will have a function called GenerateNoiseMap, which will receive as parameters the map height, map width and a scale. Then, it will generate a matrix representing a noise map, with the noise in each coordinate of the level.

For each coordinate, we generate the noise vaue using the Mathf.PerlinNoise function. This function receives two parameters and generate a value between 0 and 1, representing the noise. Notice that we are going to use the x and z axes to access the level coordinates, while the y axis will be used to change the height of our level in a given coordinate. So, the parameters for the PerlinNoise function will be the x and z indices divided by the level scale. In practice, the level scale parameter acts as a zoom parameter in the level. In the end, it returns the noise map.

public class NoiseMapGeneration : MonoBehaviour {

	public float[,] GenerateNoiseMap(int mapDepth, int mapWidth, float scale) {
                // create an empty noise map with the mapDepth and mapWidth coordinates
		float[,] noiseMap = new float[mapDepth, mapWidth];

		for (int zIndex = 0; zIndex < mapDepth; zIndex ++) {
			for (int xIndex = 0; xIndex < mapWidth; xIndex++) {
                                // calculate sample indices based on the coordinates and the scale
				float sampleX = xIndex / scale;
				float sampleZ = zIndex / scale;

                                // generate noise value using PerlinNoise
				float noise = Mathf.PerlinNoise (sampleX, sampleZ);

				noiseMap [zIndex, xIndex] = noise;
			}
		}

		return noiseMap;
	}
}

Now we need some way to visualize this noise map. What we are going to do is creating a Plane GameObject to represent a tile in our level. Then, we can show the generated noise values by painting the tile vertices according to their corresponding noise values. Again, this noise can represent anything you want, such as height, temperatura, moisture, etc. In our case, it will represent the height of that vertex.

Creating level tile

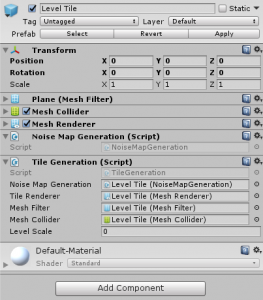
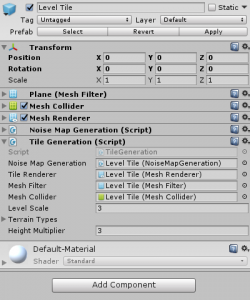
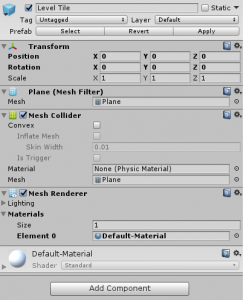
Let’s start by creating a new Plane (3D Object -> Plane) object called Level Tile. This will create the object below, already with a Mesh Renderer, which we are going to use to show the noise map.

Level Tile object in the Unity Inspector

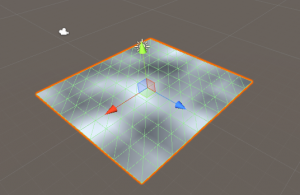
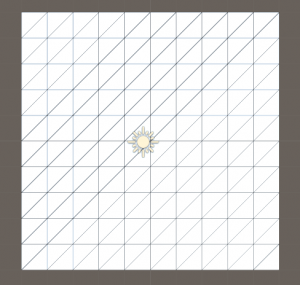
Before showing the noise map in the tile, it is important that you understand how a Plane mesh looks like. The figure below shows the a Plane created in Unity along with its Mesh. Notice that the mesh vertices are not only the four Plane vertices. Instead, the Mesh contains several intermediate vertices that are connected inside the Plane. Basically, what we are going to do is using each one of those vertices as a coordinate for our noise map later. This way, we can assign a color to each vertex (which will be a height later) according to each generated noise value.

Grid tile in Unity Scene view

Now, we create the following Script called TileGeneration. This script will be responsible for generating a noise map for the tile and then assigning a texture to it according to the noise map. As this noise map will be used to assign heights to each vertex, from now on I’m going to call it a height map.

First of all, notice that the script has the following attributes:

  • noiseMapGeneration: the script which will be used to generate the height map
  • tileRenderer: the mesh renderer, used to show the height map
  • meshFilter: the mesh filter component, used to access the mesh vertices
  • meshCollider: the mesh collider component, used to handle collisions with the tile
  • levelScale: the scale of the height map

Basically, in the Start method it will call the GenerateTile method, which will do all this stuff. The first thing it does is calculating the depth and width of the height map. Since we are using a square plane, the number of vertices should be a perfect square (in our case, the default Unity Plane has 121 vertices). So, if we take the square root of the number of vertices, we will get the map depth and width, which will be 11. Then, it calls the GenerateNoiseMap method with this depth and width, as well as the levelScale.

public class TileGeneration : MonoBehaviour {

	[SerializeField]
	NoiseMapGeneration noiseMapGeneration;

	[SerializeField]
	private MeshRenderer tileRenderer;

	[SerializeField]
	private MeshFilter meshFilter;

        [SerializeField] 
        private MeshCollider meshCollider;

	[SerializeField]
	private float mapScale;

	void Start() {
		GenerateTile ();
	}

	void GenerateTile() {
                // calculate tile depth and width based on the mesh vertices
		Vector3[] meshVertices = this.meshFilter.mesh.vertices;
		int tileDepth = (int)Mathf.Sqrt (meshVertices.Length);
		int tileWidth = tileDepth;

                // calculate the offsets based on the tile position
		float[,] heightMap = this.noiseMapGeneration.GenerateNoiseMap (tileDepth, tileWidth, this.mapScale);

                // generate a heightMap using noise
		Texture2D tileTexture = BuildTexture (heightMap);
		this.tileRenderer.material.mainTexture = tileTexture;
	}

	private Texture2D BuildTexture(float[,] heightMap) {
		int tileDepth = noiseMap.GetLength (0);
		int tileWidth = noiseMap.GetLength (1);

		Color[] colorMap = new Color[tileDepth * tileWidth];
		for (int zIndex = 0; zIndex < tileDepth; zIndex++) {
			for (int xIndex = 0; xIndex < tileWidth; xIndex++) {
                                // transform the 2D map index is an Array index
				int colorIndex = zIndex * tileWidth+ xIndex;
				float height= heightMap[zIndex, xIndex];
                                // assign as color a shade of grey proportional to the height value
				colorMap [colorIndex] = Color.Lerp (Color.black, Color.white, height);
			}
		}

                // create a new texture and set its pixel colors
		Texture2D tileTexture = new Texture2D (tileWidth, tileDepth);
		tileTexture.wrapMode = TextureWrapMode.Clamp;
		tileTexture.SetPixels (colorMap);
		tileTexture.Apply ();

		return tileTexture;
	}
}

After generating the height map, the script will call the BuildTexture method, which will create the Texture2D for this tile. Then, we assign this texture to the tile material.

The BuildTexture method will create a Color array, which will be used to create the Texture2D. Then, for each coordinate of the height map, it will choose a shade of grey based on the height value. We can do this by using the Color.Lerp function. This function receives as parameters two colors (in our case black and white) and a float value between 0 and 1 (in our case the noise value). Then, it chooses a color between the two ones selected according to the float value. Basically, the lower the height, darker will be the color. In the end, it creates a Texture2D using this Color array and return it.

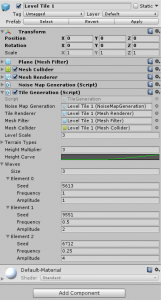
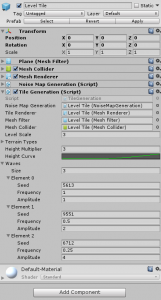
Now that the TileGeneration script is complete, we add both our scripts to the Level Tile object.

Level Tile in Unity Inspector with Tile Generation script

And then, we can try playing our game to visualize the height map. The image below shows a height map generated using a scale of 3. Hint: it is easier to visualize the tile if you switch back to the Scene view after starting the game. This way you can easily move the camera to see tile by different angles.

Tile game object with height map applied

Assigning terrains types

Our next step is to assign terrain types (such as water, grass, rock, mountain) to different height values. Also, each terrain type will have a color associated with it, so that we can add colors to our Level Tile.

First, we need to create a TerrainType class in the TileGeneration Script. Each terrain type will have a name, height and color. Also, we need to add the [System.Serializable] tag before the class declaration. This will allow us to set the TerrainType attributes in the editor later. Finally, we are going to add another attribute to the TileGeneration Script, which will be an Array of TerrainTypes. Those will be the available terrain types for our level.

[System.Serializable]
public class TerrainType {
	public string name;
	public float height;
	public Color color;
}

public class TileGeneration : MonoBehaviour {

        [SerializeField]
	private TerrainType[] terrainTypes;

}

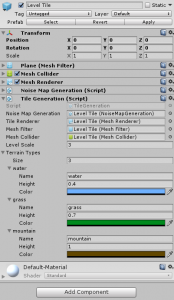
Then, we can set the terrain types for the Level Tile in the editor. Those are the terrain types I’m going to use. You can set them as you prefer, but it is important that the terrain types are in a ascending order of height values, as this will be necessary soon.

Level Tile in the Unity Inspector with Terrain Types settings

Now let’s change the TileGeneration script to use those terrain types to assign colors to the tile. Basically we are going to change the BuildTexture method to, instead of picking a shade of grey for the color, we are going to choose a terrain according to the noise value (using a ChooseTerrainType method). Then we assign the terrain type color to that level tile coordinate.

private Texture2D BuildTexture(float[,] heightMap) {
		int tileDepth = heightMap.GetLength (0);
		int tileWidth = heightMap.GetLength (1);

		Color[] colorMap = new Color[tileDepth * tileWidth];
		for (int zIndex = 0; zIndex < tileDepth; zIndex++) {
			for (int xIndex = 0; xIndex < tileWidth; xIndex++) {
				// transform the 2D map index is an Array index
				int colorIndex = zIndex * tileWidth + xIndex;
				float height = heightMap [zIndex, xIndex];
				// choose a terrain type according to the height value
				TerrainType terrainType = ChooseTerrainType (height);
				// assign the color according to the terrain type
				colorMap[colorIndex] = terrainType.color;
			}
		}

		// create a new texture and set its pixel colors
		Texture2D tileTexture = new Texture2D (tileWidth, tileDepth);
		tileTexture.wrapMode = TextureWrapMode.Clamp;
		tileTexture.SetPixels (colorMap);
		tileTexture.Apply ();

		return tileTexture;
	}

The ChooseTerrainType method will simply iterate through the terrainTypes array and return the first terrain type whose height is greater than the height value (that’s is why it is important that the terrain types are in ascending order of height).

TerrainType ChooseTerrainType(float height) {
		// for each terrain type, check if the height is lower than the one for the terrain type
		foreach (TerrainType terrainType in terrainTypes) {
			// return the first terrain type whose height is higher than the generated one
			if (height < terrainType.height) {
				return terrainType;
			}
		}
		return terrainTypes [terrainTypes.Length - 1];
	}

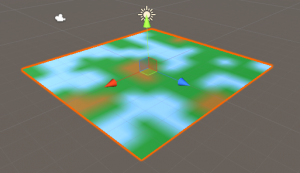
Now we can try playing the game again to see our tile with colors. You will notice that the tile looks a little blurred, but don’t worry about that now. It will look better once we have multiple tiles in the level.

Level Tile with earth-like colors applied

Changing mesh heights

We have assigned terrain types to the tile coordinates. However, it is still a plane, even in the mountain regions. What we are going to do now is using the height map to assign different heights to the tile vertices. We can do that by changing the y coordinate of the vertices.

In order to do so, we are going to create a new method in the TileGeneration Script called UpdateMeshVertices.  This method will be responsible for changing the Plane Mesh vertices according to the height map, and it will be called in the end of the GenerateTile method. Basically, it will iterate through all the tile coordinates and change the corresponding vertex y coordinate to be the noise value multiplied by a heightMultiplier. By changing the heightMultiplier we can change how the level looks like. In the end, it updates the vertices array in the Mesh and call the RecalculateBounds and RecalculateNormals methods. Those methods must be called every time you change vertices in the mesh. We also need to update the Mesh in the MeshCollider.

public class TileGeneration : MonoBehaviour {

	[SerializeField]
	private float heightMultiplier;

	private void UpdateMeshVertices(float[,] heightMap) {
		int tileDepth = heightMap.GetLength (0);
		int tileWidth = heightMap.GetLength (1);

		Vector3[] meshVertices = this.meshFilter.mesh.vertices;

		// iterate through all the heightMap coordinates, updating the vertex index
		int vertexIndex = 0;
		for (int zIndex = 0; zIndex < tileDepth; zIndex++) {
			for (int xIndex = 0; xIndex < tileWidth; xIndex++) {
				float height = heightMap [zIndex, xIndex];

				Vector3 vertex = meshVertices [vertexIndex];
				// change the vertex Y coordinate, proportional to the height value
				meshVertices[vertexIndex] = new Vector3(vertex.x, height * this.heightMultiplier, vertex.z);

				vertexIndex++;
			}
		}

		// update the vertices in the mesh and update its properties
		this.meshFilter.mesh.vertices = meshVertices;
		this.meshFilter.mesh.RecalculateBounds ();
		this.meshFilter.mesh.RecalculateNormals ();
		// update the mesh collider
		this.meshCollider.sharedMesh = this.meshFilter.mesh;
	}
}

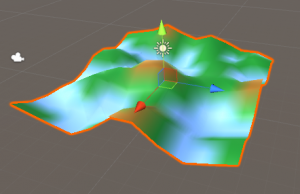
Then, we can assign a heightMultiplier to the Level Tile and try running the game. The figure below shows a tile using a heightMultiplier of 3. We can see the mountains on it, but there is still a problem. We are applying heights even for water regions, which make them look weird, since they should be plane. That’s what we are going to fix now.

Level Tile object in the Unity Inspector Level Tile with greater height map applied

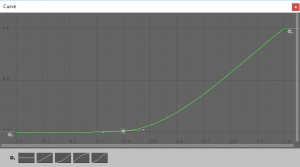
What we are going to do is creating a custom function that receives as input height values from our height map and returns corrected height values. This function should return a 0 value for all height values below 0.4, so that water regions are plane. We can do that by adding another attribute in the TileGeneration Script which is an AnimationCurve. Then, when assiging the y coordinate value of each vertex, we evaluate the height value in this function, before multiplying it by the heightMultiplier.

using System.Collections;
using System.Collections.Generic;
using UnityEngine;

public class TileGeneration : MonoBehaviour {

	[SerializeField]
	private float heightMultiplier;
	
	[SerializeField]
	private AnimationCurve heightCurve;

	private void UpdateMeshVertices(float[,] heightMap) {
		int tileDepth = heightMap.GetLength (0);
		int tileWidth = heightMap.GetLength (1);

		Vector3[] meshVertices = this.meshFilter.mesh.vertices;

		// iterate through all the heightMap coordinates, updating the vertex index
		int vertexIndex = 0;
		for (int zIndex = 0; zIndex < tileDepth; zIndex++) {
			for (int xIndex = 0; xIndex < tileWidth; xIndex++) {
				float height = heightMap [zIndex, xIndex];

				Vector3 vertex = meshVertices [vertexIndex];
				// change the vertex Y coordinate, proportional to the height value. The height value is evaluated by the heightCurve function, in order to correct it.
				meshVertices[vertexIndex] = new Vector3(vertex.x, this.heightCurve.Evaluate(height) * this.heightMultiplier, vertex.z);

				vertexIndex++;
			}
		}

		// update the vertices in the mesh and update its properties
		this.meshFilter.mesh.vertices = meshVertices;
		this.meshFilter.mesh.RecalculateBounds ();
		this.meshFilter.mesh.RecalculateNormals ();
		// update the mesh collider
		this.meshCollider.sharedMesh = this.meshFilter.mesh;
	}
}

Now let’s create this heightCurve. We can do this in the Editor, by selecting it in the Level Tile object. The curve should look similar to the one below. You can create a curve like this by selecting the third one in the menu, then adding a Key (right-click -> Add Key) in the 0.4 point and then dragging it to 0. You will also need to change the borders of the Key so that it is plane up to 0.4.

Height curve with a steep climb after 0.4

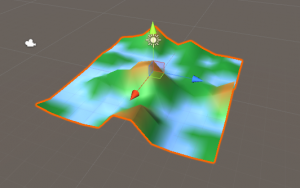
Finally, if you try playing the game it should show the level with plane water areas, which should look much better.

Level Tile object with heightCurve applied

Building a level with multiple tiles

The last thing we are going to do in this tutorial is adding multiple tiles to build a whole level. Each level tile will generate its own height values and the neighbor tiles should have continuous heights. So, the first thing we are going to do is making sure that Level Tiles will have the same height values in their borders.

We can do that by making sure that we are calling the PerlinNoise function with the same argument values for the border pixels. In order to do so, we are going to add offset parameters in the GenerateNoiseMap function. Those offsets are added to the x and z indices when calculating the x and z samples. Later, those offsets will correspond to the Level Tile position, so that the height is continuous along the tiles.

public class NoiseMapGeneration : MonoBehaviour {

	public float[,] GenerateNoiseMap(int mapDepth, int mapWidth, float scale, float offsetX, float offsetZ) {
                // create an empty noise map with the mapDepth and mapWidth coordinates
		float[,] noiseMap = new float[mapDepth, mapWidth];

		for (int zIndex = 0; zIndex < mapDepth; zIndex++) {
			for (int xIndex = 0; xIndex < mapWidth; xIndex++) {
                                // calculate sample indices based on the coordinates, the scale and the offset
				float sampleX = (xIndex + offsetX) / scale;
				float sampleZ = (zIndex + offsetZ) / scale;

                                // generate noise value using PerlinNoise
				float noise = Mathf.PerlinNoise (sampleX, sampleZ);

				noiseMap [zIndex, zIndex] = noise;
			}
		}

		return noiseMap;
	}
}

Then, we need to add those offset parameters when calling GenerateNoiseMap in the TileGeneration Script. The value of those parameters will be the opposite of the x and z coordinates of the Level Tile.

void GenerateTile() {
		// calculate tile depth and width based on the mesh vertices
		Vector3[] meshVertices = this.meshFilter.mesh.vertices;
		int tileDepth = (int)Mathf.Sqrt (meshVertices.Length);
		int tileWidth = tileDepth;

		// calculate the offsets based on the tile position
		float offsetX = -this.gameObject.transform.position.x;
		float offsetZ = -this.gameObject.transform.position.z;

		// generate a heightMap using noise
		float[,] heightMap = this.noiseMapGeneration.GenerateNoiseMap (tileDepth, tileWidth, this.mapScale, offsetX, offsetZ, waves);

		// build a Texture2D from the height map
		Texture2D tileTexture = BuildTexture (heightMap);
		this.tileRenderer.material.mainTexture = tileTexture;

		// update the tile mesh vertices according to the height map
		UpdateMeshVertices (heightMap);
	}

Before creating the whole level with several tiles, let’s create just two of them and put them side by side to check if the heights are continuous on the borders. For example, I created the two tiles below.

Level Tile 1 object in the Unity Inspector Level Tile 2 object in the Unity Inspector

Then, when running the game, they should look like a single level with two tiles.

Level Tile objects next to each other with height maps applied

What we are going to do now is generalizing this to a level with any number of tiles. First, save the Level Tile object as a prefab, so that we can instantiate copies of it later. Then, let’s create a new Script called LevelGeneration. This script will be responsible for creating multiple Level Tiles. It will have the following attributes:

  • mapWidthInTiles: number of tiles in the x axis
  • mapDepthInTiles: number of tiles in the z axis
  • tilePrefab: Level Tile prefab, used to instantiate the tiles

Then, the GenerateLevel method will create the Level Tiles by iterating through all the tile coordinates. For each tile, it calculates its position based on the tile coordinate and then instantiate a copy of it from the Level Tile prefab. In the end, this GenerateLevel method is called inside the Start method.

public class LevelGeneration : MonoBehaviour {

	[SerializeField]
	private int mapWidthInTiles, mapDepthInTiles;

	[SerializeField]
	private GameObject tilePrefab;

	void Start() {
		GenerateMap ();
	}

	void GenerateMap() {
		// get the tile dimensions from the tile Prefab
		Vector3 tileSize = tilePrefab.GetComponent<MeshRenderer> ().bounds.size;
		int tileWidth = (int)tileSize.x;
		int tileDepth = (int)tileSize.z;

		// for each Tile, instantiate a Tile in the correct position
		for (int xTileIndex = 0; xTileIndex < mapWidthInTiles; xTileIndex++) {
			for (int zTileIndex = 0; zTileIndex < mapDepthInTiles; zTileIndex++) {
				// calculate the tile position based on the X and Z indices
				Vector3 tilePosition = new Vector3(this.gameObject.transform.position.x + xTileIndex * tileWidth, 
					this.gameObject.transform.position.y, 
					this.gameObject.transform.position.z + zTileIndex * tileDepth);
				// instantiate a new Tile
				GameObject tile = Instantiate (tilePrefab, tilePosition, Quaternion.identity) as GameObject;
			}
		}
	}
}

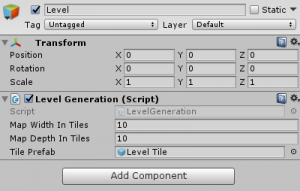
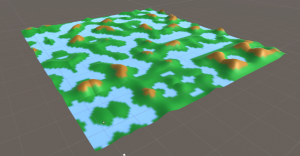
Now, remove the Level Tiles from your scene and add a single Level object, with some tiles in the x and z axis. The figure below shows an example of a Level with 10 tiles in each axis. You may also want to change the Level Scale and Height Multiplier for the Level Tiles to make the level look better. In the figure below I used a Level Scale of 10 and a Height Multiplier of 5. However, you can still see some repeating patterns in the level, as well as some weird-shaped regions. So, our last step in this tutorial will be to polish a little bit the Noise Map generation to make the level look more natural.

Level object with Level Generation script attachedLarge level map with terrain generation applied

Adding multiple waves

What we are going to in order to polish the noise map generation is adding more noise waves. Basically, when you call Mathf.PerlinNoise, you’re sampling points from a noise wave. So, if we change this wave frequency and amplitude we change the noise result. Another way of changing the noise values is adding a random seed in the samples. By creating multiple waves with different frequency, amplitude, we can generate more interesting noise, which will led to levels that look more natural. The different seed values, by their turn, allows us to remove the repetitions in the level.

So, first, let’s create a Wave class inside the NoiseMapGeneration Script. Like the TerainType, the Wave will be a Serializable class with a few attributes. The attributes we are going to use are the seed, frequency and amplitude of the wave, as discussed earlier.

[System.Serializable]
public class Wave {
	public float seed;
	public float frequency;
	public float amplitude;
}

Then, we change the GenerateNoiseMap method to receive an Array of Waves as parameter. Then, instead of calling Math.PerlinNoise a single time, we call it once for each Wave, using the wave seed, frequency and amplitude. Notice that the frequency is multiplied by the sample value, while the amplitude is multiplied by the noise result. In the end, we need to divide the noise by the sum of amplitudes, so that its result will remain between 0 and 1.

public float[,] GenerateNoiseMap(int mapDepth, int mapWidth, float scale, float offsetX, float offsetZ, Wave[] waves) {
		// create an empty noise map with the mapDepth and mapWidth coordinates
		float[,] noiseMap = new float[mapDepth, mapWidth];

		for (int zIndex = 0; zIndex < mapDepth; zIndex++) {
			for (int xIndex = 0; xIndex < mapWidth; xIndex++) {
				// calculate sample indices based on the coordinates, the scale and the offset
				float sampleX = (xIndex + offsetX) / scale;
				float sampleZ = (zIndex + offsetZ) / scale;

				float noise = 0f;
				float normalization = 0f;
				foreach (Wave wave in waves) {
					// generate noise value using PerlinNoise for a given Wave
					noise += wave.amplitude * Mathf.PerlinNoise (sampleX * wave.frequency + wave.seed, sampleZ * wave.frequency + wave.seed);
					normalization += wave.amplitude;
				}
				// normalize the noise value so that it is within 0 and 1
				noise /= normalization;

				noiseMap [zIndex, xIndex] = noise;
			}
		}

		return noiseMap;
	}

Now, we need to add an Array of Waves as a new attribute of the TileGeneration Script, so that we can send it to the GenerateNoiseMap method.

public class TileGeneration : MonoBehaviour {

	[SerializeField]
	private Wave[] waves;

	void GenerateTile() {
		// calculate tile depth and width based on the mesh vertices
		Vector3[] meshVertices = this.meshFilter.mesh.vertices;
		int tileDepth = (int)Mathf.Sqrt (meshVertices.Length);
		int tileWidth = tileDepth;

		// calculate the offsets based on the tile position
		float offsetX = -this.gameObject.transform.position.x;
		float offsetZ = -this.gameObject.transform.position.z;

		// generate a heightMap using noise
		float[,] heightMap = this.noiseMapGeneration.GenerateNoiseMap (tileDepth, tileWidth, this.mapScale, offsetX, offsetZ, waves);

		// build a Texture2D from the height map
		Texture2D tileTexture = BuildTexture (heightMap);
		this.tileRenderer.material.mainTexture = tileTexture;

		// update the tile mesh vertices according to the height map
		UpdateMeshVertices (heightMap);
	}
}

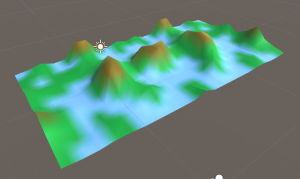
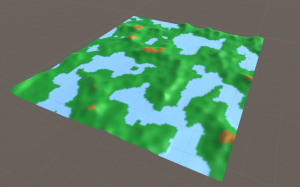
Finally, we add some Wave values in the Level Tile prefab and then we can play the game again to see the new level. The figure below shows the values I’m using in this tutorial to generate the level in the righthand figure. Notice that I changed the Level Scale and Height Multiplier again, to make the level look better. You may have to try different values until you find the one that looks better to you.

Level Tile object in the Unity Inspector Level Tile object with numerous generated waves

And this concludes this procedural level generation tutorial! In the next one we are going to generate tempereatures and moisture values for our level, so that we can select biomes for different level areas.
Access part 2 here


Mastering Unity’s New Tilemap Editor: Building 2D Levels

$
0
0

Introduction

In October of 2017, Unity Technologies released Unity 2017.2. This version released a new tool called the Tilemap Editor, which not only allows the user to create vast and complex grid-based layouts in a matter of minutes, but also eliminates the need for a third party program (such as Tiled) to create a similar result. According to Rus Scammel (Project Manager of Unity for 2D), the Tilemap Editor will allow users to “…literally paint directly in Unity”, and that is exactly what it does. In this tutorial, we will look at the Tilemap Editor and the tools that go with it. Through this relatively simple project, you will learn skills that can be applied to complex levels in your future projects.

Importing the Assets

You can download the 2D assets we are going to be using here. These are from the Kenny asset website and are free to be used in any project, commercial or private. Check out their website here.

Setting up our project

Create a new project. Create a new folder called “Scenes”.

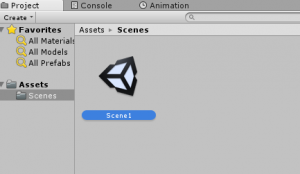
Create a new scene in that folder called “Scene1” and the open Scene1.

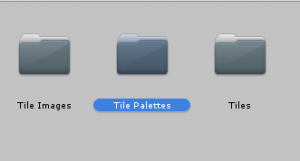
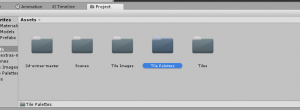
Now, create a new folder called “Tiles”. This is where we will be storing all our tiles for the Tilemap Editor. Then create two folders, one called “Tile Palettes” and another called “Tile Images”.

The use of these folders will become apparent as you move through this tutorial. Next, import the asset pack you downloaded and drag its contents into the “Tile Images” folder.

Now we need to head to Github. This is where Unity Technologies stores the extra tools that we will be using. Click this link: it will take you to the download page. Once it has finished downloading, unzip the package and drag it into the “Assets” folder of our project.

We will be looking at the specifics of what is in this package later in the tutorial. Once you have completed all of this you can head to the next paragraph!

Tilemaps and Grids

If you have a look at the assets provided, you’ll notice there are a several environment types to choose from, including “Cake”, “Castle”, “Choco”, “Dirt”, “Grass”, “Metal”, “Purple”, “Sand”, “Snow”, and “Tundra”.

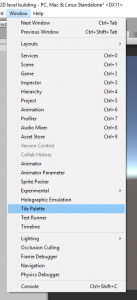
Look through each of these and pick the one that you like best. This will determine what kinds of tiles we need to put in the Tilemap Editor. Once you have a tileset picked out, navigate to Window -> Tile Palette.

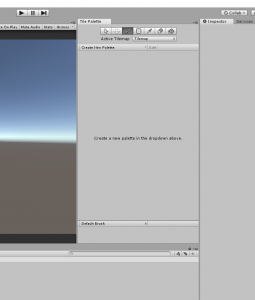
Chose an appropriate place to put this on your workspace (I prefer the right side of the scene view).

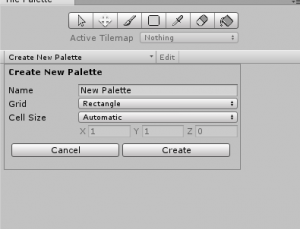
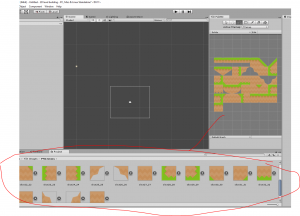
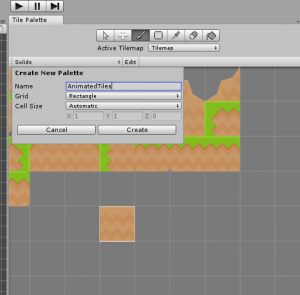
Next, click “Create New Palette”. A Palette is a set of images that we use to “paint” with. The name Palette is very appropriate since it resembles the palettes used by painters. The settings here are pretty self-explanatory, we don’t need to change them so just leave them set to default.

Call this one “Solids” since this palette is going to house the tiles that players are not allowed to pass through, such as the ground and the walls. Save “Solids” in the “Tile Palettes” folder. Now, drag all of your selected environment images into the Tile Palette window.

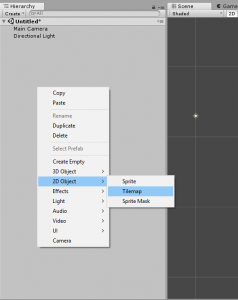
You may have to drag them in one by one. Save each tile in the “Tiles” folder. Before we start painting we need to create something called a “Tilemap” in our scene. Right-click in the hierarchy and go to 2D Object -> Tilemap.

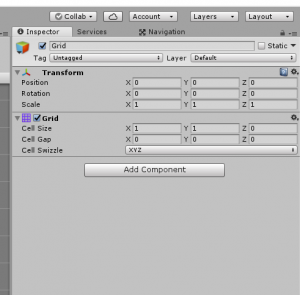
This has created two things: a “Grid” and a “Tilemap”. This is how the Tilemap Editor works, there is only one Grid in the scene, but there can be several Tilemaps. The Grid creates the Grid that the Tilemap rests on. If you select the Grid you will notice a “Grid” component attached to it.

There are three things that we can change with this component: “Cell Size”, “Cell Gap”, and “Cell Swizzle”. “Cell Size” is the size of each square on the Tilemap. Only change this value if it is absolutely necessary, as the Cell Size applies to all Tilemaps within the Grid. “Cell Gap” determines how much distance there is between each square in the Grid. Once again, this should be changed with caution since this also applies to all of the tilemaps. “Cell Swizzle” is the direction that the Grid is facing. You can experiment with this value if you choose, but for this tutorial leave it set to “XYZ”. Now that we’re familiar with the Grid game object, what about the Tilemaps? Let’s take a look…

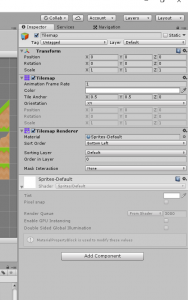
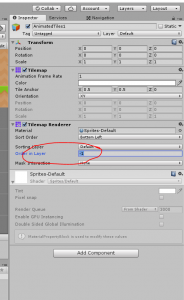
There are two components, “Tilemap” and “Tilemap Renderer”.  Most of the settings in the “Tilemap” component should be pretty self-explanatory and, at first glance, there are a lot of things that we can control. “Animation Frame Rate” is for animated Tiles. If this Tilemap contained any animated Tiles, we could change the speed of the animation with this value. We don’t have any animated tiles (but we will soon!) so just leave this set to 1. “Color”, as the name suggests, is the color of the Tiles in this Tilemap. With this, we can also set alpha or transparency values for things like water or clouds. “Tile Anchor” is, well, the Tile’s Anchor! Right now it is set to the center of each tile which is a where I need it to be. “Orientation” is the direction the tiles will be facing. I would only change this if I was doing a 3D game since, at times, it isn’t even in 2D space. Feel free to experiment with this value, but I’ll just leave it set to “XY”. In “Tilemap Renderer” we can change the material that each tile is rendered with, which we are going to leave set to the default. The rest of the settings deal with what order the tiles are rendered in. The ones that we are going to be paying attention to are the “Sorting Layer” and the “Order In Layer”. “Sorting Layer” defines what lay this Tilemaps rests in. We are going to be changing this value as we move on. “Order In Layer” is used if there is more than one object in a Sorting Layer. This is another value that should be changed with caution since it can get kind of confusing if there are several Tilemaps, with their own Order In Layer value, to determine which is rendered first. So, that is how Tilemaps and the Grid works! Let’s look at the Tile Palette now!


The Tile Palette

There are a couple of tools in the Tile Palette that we need to look at.

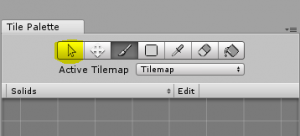
This one is called the “Selection Tool” and allows you to select a tile in the Tile Palette window in order to see it’s settings.

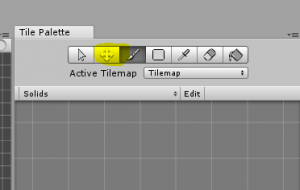
This one is known as the “Move Tool” and allows you to move tiles around in the scene view.

This is the “Brush Tool” and allows you to paint in the scene view, with the tile that you selected in the Tile Palette window.

This is called the “Fill Selection Tool” and it allows you to select a certain area to fill with the selected tile.

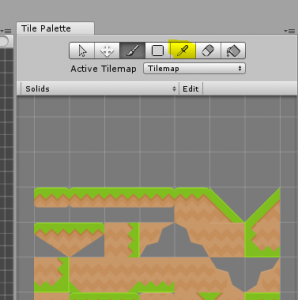
This is the “Tile Sampler” works just like a color picker in an image manipulation program like Photoshop or Gimp.

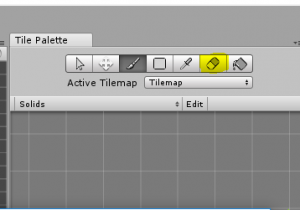
This is the “Eraser” and erases the tiles in the scene view, a shortcut to this is Shift-Click.

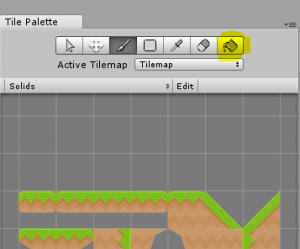
Finally, the “Fill Tool” and will fill an area with the selected tile without having to first select the area to fill. This one should be used for areas that are bounded by other tiles, otherwise, you can fill the entire scene view with the selected tile which is taxing on the RAM and the GPU. So those are the tools you can use to start painting your scene! The last important thing to look at is this button right here:

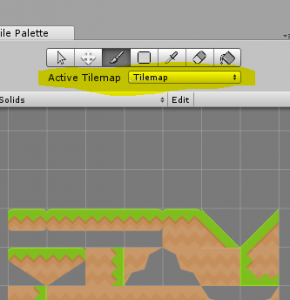
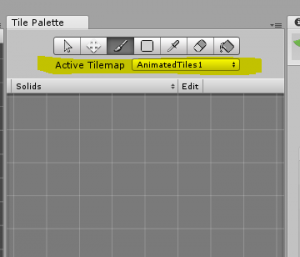
This determines which tilemap you are painting on. If you have multiple tilemaps in your Grid, then you need to set this to the tilemap that you want to paint on. This is something to watch out for. If you ever encounter a problem, whether it is overlapping tiles or tiles that are not animating, check this first. The last important thing to look at here is the tile images themselves. If you were to try and start painting now you would notice one thing about your tiles, they are overlapping!

To fix this, we have to find the tile images in our project window and change the import settings.

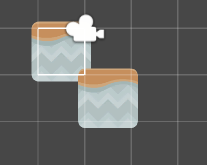
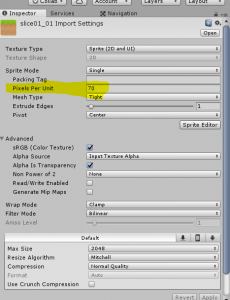
The value we need to look at is the “pixels per unit” value. A larger value decreases the size of our image and, conversely, a smaller value increases the size. We have to employ some trial and error here in order to find the correct value. Fortunately, I have found a value that corrects this problem fairly well.

Select all of the tile images that you used, change the “pixel per unit” value, and then click “apply”. Now they shouldn’t be overlapping!

If you are ever importing different tiles then you might have to do some experimentation in order to find the correct value.

Brushes and Rule Tiles

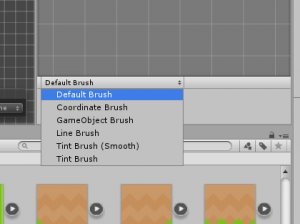
Let’s look at a few more tools before we start creating our environment. Near the bottom of our Tile Palette window, you will find a button that says “Default Brush”. If you click on it, it will show you a couple of different brushes.

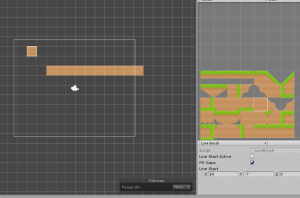
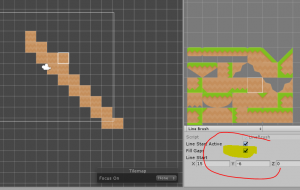
We aren’t going to be using many of these brushes in this tutorial, but I encourage you to experiment with them in order to become familiar with them. The one that we are going to be using is the “Line Brush”. If you select this one you can click once to start the line, then click again and it will have the selected tile painted in a line between the two points.

Also, if you check “Fill Gaps”, the brush will try and make a diagonal line smoother by “filling the gaps” in the line.

So that’s how we can use different kinds of brushes!

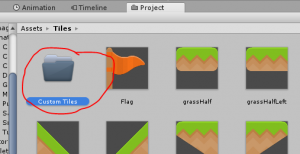
The final tool that we will be using is known as “Rule Tiles”. Imagine that you are designing a 2D platformer. You start to make your levels using the Tilemap Editor only to find out that you are slowed down by having to trace the shape of the land, place the edge tiles in their proper places, and then fill in the middle space by using either the Fill Tool or the Fill Selection Tool. (This example may not be relevant to you but it certainly was to me when I was making my 2D platformer). Fortunately, the the Tilemap Editor has a solution to this! That’s right: Rule Tiles. Go to your “Tiles” folder and create a new folder called “Custom Tiles”.

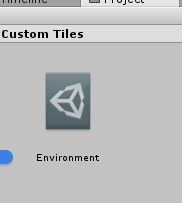
In this folder, right-click and select Create -> Rule Tile and name it “Environment”.

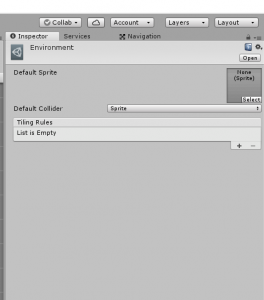
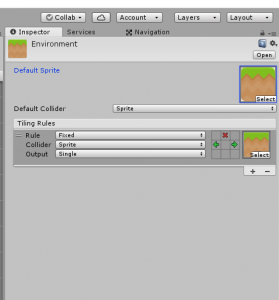
A  Rule Tile is a specific set of tile images that we can give custom instructions to in regards to their placement or appearance.

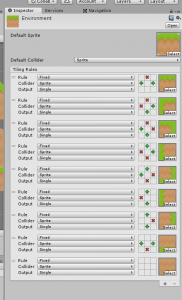
It doesn’t matter what the Default Sprite is set to, but it is best to set it to a tile that is in your selected environment tile images. “Default Collider” specifies to how the tiles will have physics interactions. Leave it set to “Sprite”. Now, create as many “Tile Rules” as there are images in your selected set of environment tiles. If you aren’t going to use all of the images then just exclude those from the number of Tile Rules. Now, drag each tile image into their respective positions on the Tile Rules’ list. Now if you click on any of the squares you will notice that it creates an arrow, if you click again you will notice it creates a red X, and if you click again it leaves it blank.

An arrow signifies that the tile is continuing from the direction the arrow is pointing. And an X means that the tile “stops” or has an edge at this point. With this knowledge, let’s go through and assign arrows and Xs to each image. This can be kind of tricky to get used to so take a look at my final Rule Tile:


All we need to do now is drag the Environment rule tile into our Tile Palette and start painting.

You’ll see that it changes the image based on the tile’s position. This really speeds creation time up. The next part of Rule Tiles that we are going to explore is the animated aspect. Create a new Tile Palette and Tilemap called “Animated Tile”.

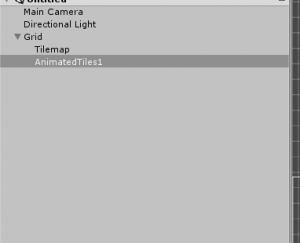
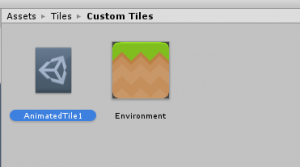
Now, create a new Rule Tile called “AnimatedTile1”.

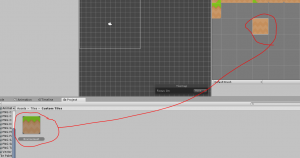
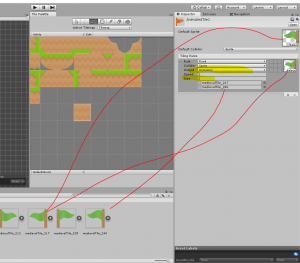
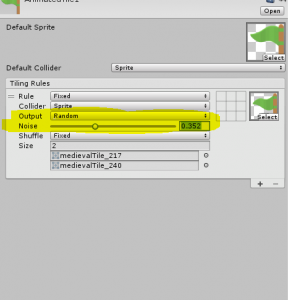
Now go to the “Animations” folder in the asset pack and pick a set of animated tiles. Set the default sprite to one of these, then create a new tile rule. Change the “output” type to be “Animation”. Set the “Size” to be the number of sprites in your animation and then drag the animated sprites into their respective positions. Now create a new tilemap called “AnimatedTiles”. This screenshot sums up the whole process.

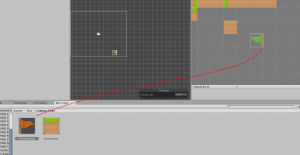
Drag “AnimatedTile1” into the Tile Palette

and set the active Tilemap to “AnimatedTiles”.

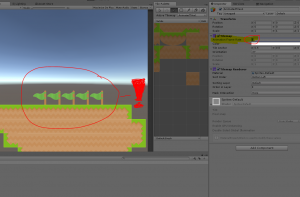
Now start painting! Before we hit play, let’s go to the “AnimatedTiles” tilemap and change the “Order In Layer” value to -1.

This makes the animated tiles rendered before the “Solids” tiles. If you hit play you’ll notice that our tiles are now animating!

The last part of a rule tile is the “Random” output. With “output” set to random, you can have it chose randomly between a set of tile images.

I didn’t use this part of a Rule Tile but feel free to try it if you would like.

Tile Colliders

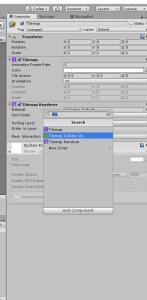
The very last part of this tutorial is about Tile Colliders. On any tilemap, click Add Component and search TilemapCollider.

Find the component and assign it. Now our tiles will actually prevent an object from passing through them! Fantastic!

Outro

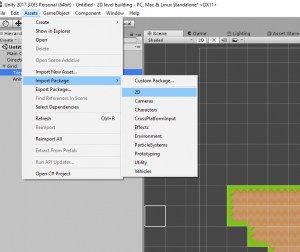
Whew! The last part! Now you can start creating your scene ’till your heart’s content! Once you’re done, you can test it out by importing Unity’s 2D assets by going to Assets -> Import Package -> 2D.

The already have a 2D character controller which you can use to break-in your new level.

Keep making great games!

Create a Basic Multiplayer Game in Phaser 3 with Socket.io – Part 1

$
0
0

In this multipart tutorial, we will be using Phaser 3 and Socket.io to create a simple multiplayer game. For our multiplayer game, we will follow the client-server game architecture. If you are not familiar with the client-server game architecture, the client is responsible for displaying the game to the player, handling the player’s input, and for communicating with the server. The server, on the other hand, is responsible for broadcasting that data to each client.

The goal of this tutorial is to teach you the basics of creating a multiplayer game. You will learn how to:

  • Setup a Node.js and Express server that will render our game and communicate with it.
  • Setup a basic Phaser 3 game that will act as our client.
  • Use Socket.io to allow the server and the client to communicate.

You can download all of the files associated with the source code for part one here.

Learn Phaser 3 with our newest Mini-Degree

The HTML5 Game Development Mini-Degree is now available for Pre-Order on Zenva Academy. Learn to code and make impressive games with JavaScript and Phaser 3!

Get Instant Early Access

Tutorial Requirements

For this tutorial, we will be using Node.js and Express to create our server. We will also be using NPM to install the required packages we need for the server to run. In order to follow along with this tutorial, you will need to have Node.js and NPM installed locally, or you will need access to an environment that already has them installed. We will also be using the Command Prompt (Windows) / Terminal (Mac) to install the required packages, and to start/stop our Node server.

Having a prior experience with these tools is a plus, but it is not required for this tutorial. We will not be covering how to install these tools as the focus of this tutorial is making a game with Phaser. The last thing you will need is an IDE or Text Editor for editing your code.

To install Node.js, click the link here: and choose the LTS version. You can download and use the current version with this tutorial, however, the LTS version is recommended for most users. When you install Node.js, NPM will also be installed on your computer. Once you have these tools installed, you can move on to the next part.

Setting up the server

The first thing we are going to do is create a basic Node.js server that will serve our game files. To get started, create a new folder on your computer, it can be called anything you want. Then navigate inside this folder and create a new file called 

server.js
. Open up 
server.js
 and add the following code to it:
var express = require('express');
var app = express();
var server = require('http').Server(app);

app.use(express.static(__dirname + '/public'));

app.get('/', function (req, res) {
  res.sendFile(__dirname + '/index.html');
});

server.listen(8081, function () {
  console.log(`Listening on ${server.address().port}`);
});

In the code above we:

  • referenced the express module, which is a web framework that will help us render our static files.
  • created a new instance of express and called it 
    app
    .
  • supplied the app to the HTTP server, which will allow express to handle the HTTP requests.
  • updated the server to render our static files using 
    express.static
     built-in middleware function in Express.
  • told the server to serve the 
    index.html
     file as the root page.
  • had the server start listening on port 8081.

Before we can run the server, we will need to install the required modules for the server. Open your terminal/command prompt, and navigate to your project folder. Once there you will need to run the following command: 

npm init -f
. This will create a 
package.json
 file in your project folder. We will use this file to keep track of all the packages that our project depends on.

Now, we will install 

express
. In your terminal run the following command: 
npm install --save express
. This will create a folder called node_modules in your project folder, and by adding the 
--save
 flag to the command, npm will save this package in our 
package.json
 file.

Setting up the client

With the basic server code finished, we will now work on setting up our client-side code. In your project folder, create a new folder called 

public
. Any file we put in this folder will be rendered by the server that we set up. So we will want to put all of our static client-side files in this folder. Now inside the
public
 folder, create a new file called 
index.html
. Open up 
index.html
 and add the following code to it:
<!DOCTYPE html>
<html>

    <head>
        <meta charset="utf-8">
    </head>

    <body>
        <script src="//cdn.jsdelivr.net/npm/phaser@3.0.0/dist/phaser.min.js"></script>
        <script src="js/game.js"></script>
    </body>

</html>

In the code above, we set up a simple HTML page and we referenced two JavaScript files, 

phaser.min.js
 (the phaser game framework) and 
game.js
 (our Phaser game code). Back in the 
public
 folder, create a new folder called 
js
 , and in this folder create a new file called 
game.js
. Open up 
game.js
 and add the following code to it:
var config = {
  type: Phaser.AUTO,
  parent: 'phaser-example',
  width: 800,
  height: 600,
  physics: {
    default: 'arcade',
    arcade: {
      debug: false,
      gravity: { y: 0 }
    }
  },
  scene: {
    preload: preload,
    create: create,
    update: update
  } 
};

var game = new Phaser.Game(config);

function preload() {}

function create() {}

function update() {}

Let’s review the code we just added:

  • We created the configuration that will be used for our Phaser game.
  • In the config object, in the type field, we set the renderer type for our game. The two main types are Canvas and WebGL. WebGL is a faster renderer and has better performance, but not all browsers support it. By choosing AUTO for the type, Phaser will use WebGL if it is available, otherwise, it will use Canvas.
  • In the config object, the parent field is used to tell Phaser to render our game in an existing 
    <canvas>
      element with that id if it exists. If it does not exists, then Phaser will create a 
    <canvas>
      element for us.
  • In the config object, we specify the width and height of the viewable area of our game.
  • In the config object, we enabled the arcade physics that is available in Phaser, and we set the gravity to 0.
  • In the config object, we embedded a scene object which will use the 
    preload
    ,
    update
    , and 
    create
     functions we defined.
  • Lastly, we passed our config object to Phaser when we created the new game instance.

With our basic client-side code setup, we will now test our server and make sure everything is working correctly. Back in the terminal/command prompt, run the following command: 

node server.js
 and you should see the following line appear 
Listening on 8081
. Now, if you open up your web browser and navigate to 
http://localhost:8081/
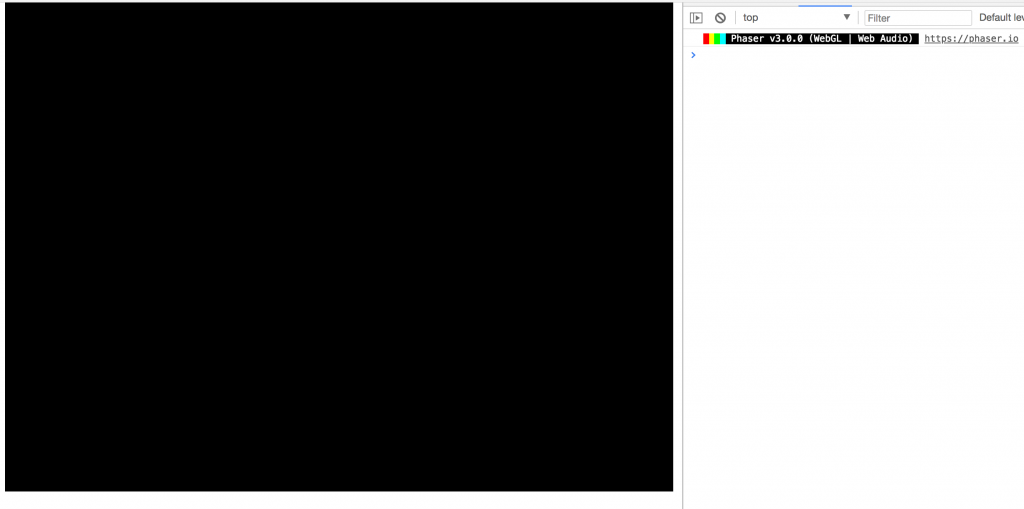
, you should see a black box on the web page, and if you open the console in the developer tools, you should see a log with the version of Phaser your game is running.

Blank Phaser 3 game running in Google Chrome

Adding Socket.IO

With our server now rendering our game, we will now work on adding Socket.IO to our game. If you are not familiar with Socket.IO, it is a JavaScript library that enables real-time, bi-directional communication between web clients and servers. To use Socket.IO, we need to update our client and server code to enable the communication between the two.

Back in your terminal, run the following command: 

npm install --save socket.io
. If your server is still running, you can either: open a new terminal window and run the code in your project folder, or stop the server (CTRL + C) and then run the command. This will install the Socket.IO node package and save it in our 
package.json
 file.

Now, in 

server.js
 add the following code below the 
var server = require('http').Server(app);
 line:
var io = require('socket.io').listen(server);

Then add the following code above the 

server.listen
 line:
io.on('connection', function (socket) {
  console.log('a user connected');
  socket.on('disconnect', function () {
    console.log('user disconnected');
  });
});

In the code above we:

  • referenced the socket.io module and had it listen to our server object.
  • added logic to listen for connections and disconnections.

Next, we will update the client side code to include the Socket.IO library. Open up 

index.html
 and add the following line at the top of the 
<body>
 element:
<script src="/socket.io/socket.io.js"></script>

Then, open up 

game.js
 and add the following line inside the
create
 function:
this.socket = io();

Now, if you start the server back up again, and refresh your game in your browser, you should see the user connected/disconnected messages in your terminal.

Console information denoting users connecting and disconnecting

Adding players – Server

Now that we have our socket connections setup, we can move on to adding players to our game. In order to keep all of the player’s games in sync, we will need to notify all players when a user connects or disconnects from the game. Also, when a new player connects we will need a way to let the player know of all the other players in the game. To do all of this we will need to store some player data, and we will use the socket connections to send messages to our players.

For this tutorial, we will store the player data in memory on the server. Normally, we would want to store this data in some type of database, that way it would be persistent, and if the server fails, we could easily recover the state of the game.

In 

server.js
 add the following line below the 
io
 variable:
var players = {};

We will use this object to keep track of all the players that are currently in the game. Next, in the callback function of the socket.io 

connection
 event add the following code below the 
console.log('a user connected');
 line:
// create a new player and add it to our players object
players[socket.id] = {
  rotation: 0,
  x: Math.floor(Math.random() * 700) + 50,
  y: Math.floor(Math.random() * 500) + 50,
  playerId: socket.id,
  team: (Math.floor(Math.random() * 2) == 0) ? 'red' : 'blue'
};
// send the players object to the new player
socket.emit('currentPlayers', players);
// update all other players of the new player
socket.broadcast.emit('newPlayer', players[socket.id]);

Let’s review the code we just added:

  • When a player connects to the web socket, we store some player data in the 
    players
     object and we use the 
    socket.id
     as the key.
  • We are storing the rotation, x, and y position of the player, and we will use this to control were we create sprites on the client side, and use this data to update all players games. We also store the playerId so we can reference it in the game, and we added a team attribute that will be used later.
  • We used 
    socket.emit
     and 
    socket.broadcast.emit
     to emit an event to the client side socket. 
    socket.emit
     will only emit the event to this particular socket (the new player that just connected).  
    socket.broadcast.emit
     will send the event to all other sockets (the existing players).
  • In the 
    currentPlayers
     event, we are passing the 
    players
     object to the new player. This data will be used to populate all of the player sprites in the new player’s game.
  • In the 
    newPlayer
     event, we are the passing the new player’s data to all other players, that way the new sprite can be added to their game.

When a player disconnects, we need to remove that player’s data from our 

players
 object, and we need to emit a message to all other players about this user leaving, that way we can remove that player’s sprite from the game.

In the callback function of the socket.io 

disconnect
 event add the following code below the 
console.log('user disconnected');
 line:
// remove this player from our players object
delete players[socket.id];
// emit a message to all players to remove this player
io.emit('disconnect', socket.id);

Your 

server.js
 file should look like the following:
var express = require('express');
var app = express();
var server = require('http').Server(app);
var io = require('socket.io').listen(server);

var players = {};

app.use(express.static(__dirname + '/public'));

app.get('/', function (req, res) {
  res.sendFile(__dirname + '/index.html');
});

io.on('connection', function (socket) {
  console.log('a user connected');
  // create a new player and add it to our players object
  players[socket.id] = {
    rotation: 0,
    x: Math.floor(Math.random() * 700) + 50,
    y: Math.floor(Math.random() * 500) + 50,
    playerId: socket.id,
    team: (Math.floor(Math.random() * 2) == 0) ? 'red' : 'blue'
  };
  // send the players object to the new player
  socket.emit('currentPlayers', players);
  // update all other players of the new player
  socket.broadcast.emit('newPlayer', players[socket.id]);

  // when a player disconnects, remove them from our players object
  socket.on('disconnect', function () {
    console.log('user disconnected');
    // remove this player from our players object
    delete players[socket.id];
    // emit a message to all players to remove this player
    io.emit('disconnect', socket.id);
  });
});

server.listen(8081, function () {
  console.log(`Listening on ${server.address().port}`);
});

Conclusion

With our server code for adding players in place, this brings part one of this tutorial to an end. In part two we wrap up our multiplayer game by:

  • Adding the client side logic for adding players to our game.
  • Adding logic for player input.
  • Adding collectibles for the players to collect.

I hoped you enjoyed part one of this tutorial and found it helpful. If you have any questions, or suggestions on what we should cover next, let us know in the comments below.

Phaser Tutorial – How to Create an Idle Clicker Game

$
0
0

What is an idle click game?

Also known as clicker and incremental games, these type of games have you clicking something repeatedly or idling to gain some form of currency (e.g. cookies, money, energy) which you then use to buy upgrades. It’s a very simple concept at the core, but quite addictive!

Clicker games were first made popular in 2013 with a game called Cookie Clicker. Since then many games have been created in this genre, the themes and flavor of these games vary widely. From cookies to fantasy rpg, sci fi, farming, sand castles, etc.

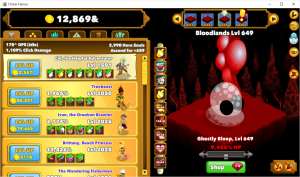
One such clicker game that I’ve played quite a bit is Clicker Heroes, it’s a fantasy RPG style game where you click various monsters to progress. In this tutorial, we are going to build the foundations of a clicker game similar to Clicker Heroes that you can build upon and add your own style and flair.

Screenshot of Clicker Heroes game

Tutorial source code

You can download the tutorial source code here.


Getting started

Source Control

The first thing that I do when starting any project is create a folder, and initialize it for git source control. If you don’t already have git, you can download it for your OS from the official site. With any software development, it is critical to have backups. Using source control, specifically git, is a much more robust and safe solution than simply copying or zipping your files periodically. It’s also important to do micro commits, save your progress in very small increments so that you can roll back to any point if you find that you’ve added some new code that is breaking everything. Also it prepares your codebase automatically for upload to a service like github or bitbucket. There are many things beyond simply committing your code that you can do with git, if you are new to git I encourage you to checkout the Git and Github Fundamentals course at Zenva Academy.

After installing git for your system, open the folder you created in a command window, and simply type

git init
  and it will be ready to go.

Gathering Art

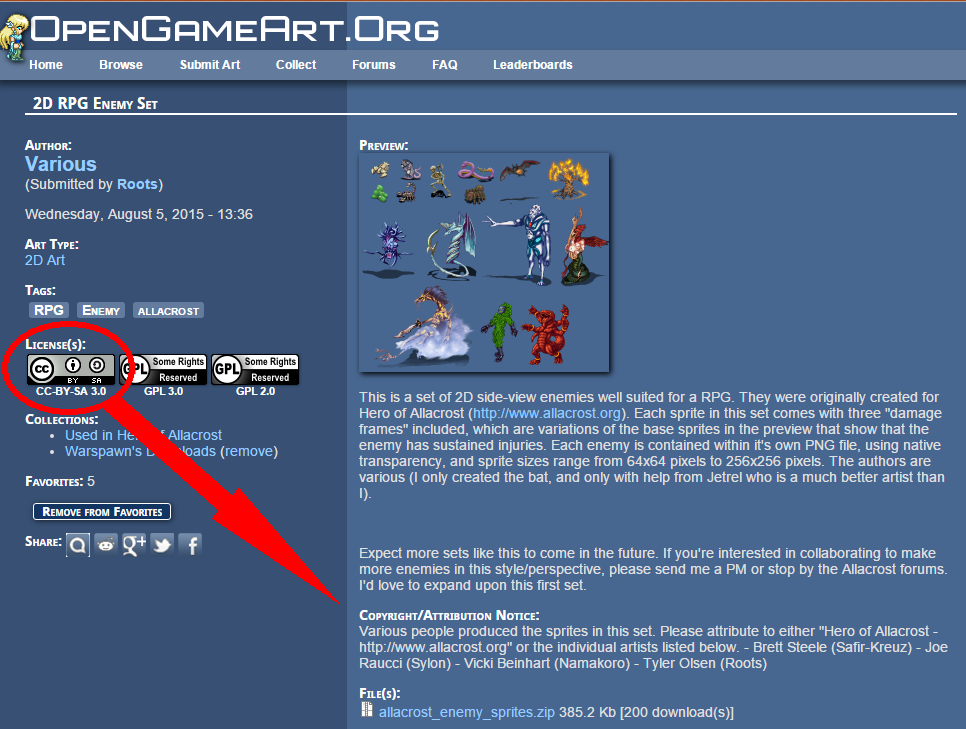
We need to get some sprites for the monsters. A great site to find free art that you can use for your projects is OpenGameArt.org. Much of the artwork is either public domain or licensed to the Creative Commons. A quick search and I’ve found a resource with a variety of monster sprites. This particular set is licensed under CC BY SA 3.0 which basically means that you must give credit to the original authors, and any modifications you make must be shared under the same license. There are other licensing options available to artists, and some do not allow the use of the resources in commercial applications, so be sure to check the licensing on the site.

OpenGameArt.org website with CC-BY-SA 3.0 license highlighted

The monster images that I’ve chosen come in various sizes, each with 4 frames representing various damage states. For this game, we don’t really need the extra damage states, so I have cropped all of the images to just the first frame. For the purposes of this tutorial, I think that 1 image per monster is all that we’ll need. It would be nice if these monsters were animated, but the single image works well for a placeholder right now.

In addition to the monsters, we’ll need some rpg icons for the upgrades and loot. It’s not likely that we’ll use all 496 images in this set, but we can prune the collection later before we are ready to release of the ones that we don’t use. We’ll also need something to use as a background for our world, this forest scene will do nicely.

You’ll find all of the sprites in the assets/images folder of the companion source code to this project. If you’re downloading your own selection of images to use, place them in there as well.

Reminder: Once you’ve added your files, go ahead and commit them to source control.

Setup Phaser

You’ll need to download Phaser, you can either clone the github repo or download the release or use something like Bower to install it. Phaser games are web based games, so first we need a HTML page to host it. Create a file called index.html in the root of your project folder and put this for the contents.

<!doctype html>
<html>
    <head>
        <meta charset="utf-8">
        <title>Click of the Titans</title>
        <style>body {margin: 0;padding: 0;}</style>

        <script src="lib/phaser.min.js"></script>

        <script src="src/game.js"></script>
    </head>
    <body>

    </body>
</html>

Reminder: micro commits, commit your index.html file right now!

You may have noticed that we added a reference to game.js located in the src folder. We don’t have that file yet, let’s create it now.

var game = new Phaser.Game(800, 600, Phaser.AUTO, '');

game.state.add('play', {
    preload: function() {
        game.load.image('skeleton', 'assets/allacrost_enemy_sprites/skeleton.png');
    },
    create: function() {
        var skeletonSprite = game.add.sprite(450, 290, 'skeleton');
        skeletonSprite.anchor.setTo(0.5, 0.5);
    },
    render: function() {
        game.debug.text('Adventure Awaits!', 250, 290);
    }
});

game.state.start('play');

In Phaser, everything starts with an instance of the Game class. We are passing it the width and height of the game screen that we want as well as the renderer. Phaser supports both Canvas and WebGL based rendering, Phaser.AUTO tells it to pick based on what’s available in the browser (WebGL if available).

In the preload phase of our “play” game state we are going to load up one of our monster images so that we can have something to show other than a blank screen. Each state in Phaser has several phases in its lifecycle, and

preload
  is one of the first.

Next up is

create
 , after assets are loaded, it’s safe to create sprites using them. The Sprite is one of the main game objects in Phaser, most everything that you create in the game world will generally have a sprite involved. Adding a sprite takes a few parameters: the x & y coordinates of where it should be located on the screen, and a key that can be used to reference it later. We’re also going to change the anchor for the sprite to the center of the image. The anchor is the point in space where the sprite is positioned or rotated around. By default the anchor is set to the top left most point of the image
0, 0
  I ususally like to work with the anchor in the center of the image, because if I want to spin the sprite, I want it to spin around the center instead of the top left (like a wheel).

Finally,

render
  is one of the last phases in the lifecycle, it happens after update (we don’t need update for this game). Most of the time Phaser handles rendering internally, but for now we’ll just add some fun text to make our screen more exciting.

Reminder: now’s a great time to commit your file!

Running your game

We’re almost ready to fire up Phaser and see what we have, except that it’s not just as simple as clicking on index.html and loading it in your browser. Due to security restrictions the browser will not allow you to load assets asynchronously. For that reason you need to run a server, or load the files in a different manner. PhotonStorm has posted an article listing several options for servers, however if loading the software to run a server isn’t something that you are interested in, I have another option. If you are running Google Chrome, you can actually setup your game to run as a Chrome application quite easily. Doing this elevates your game out of the browser sandbox (and actually gives you a set of APIs to access native systems such as the file system and networking) and these restrictions no longer apply. There are however a different set of security restrictions involving resources located outside of the files packaged with the app. Depending on how you want to distribute your final product, creating a Chrome app may be a great choice. I’ll include the basic files needed to launch this as a Chrome App, if you are interested in learning more I encourage you to read more at the official documentation.

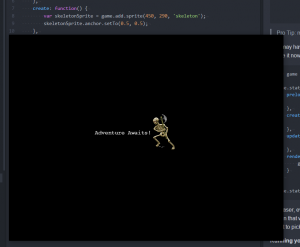
Once you launch your game, you should see this:

New Phaser game with Skeleton and "Adventure Awaits" message

Now you know that Phaser is up and running. We’ve loaded a sprite and written a bit of text to the screen! We’re almost done 🙂 … well not quite, but we’re ready to start actually making a game.
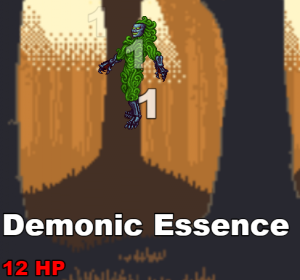
Setting the Stage

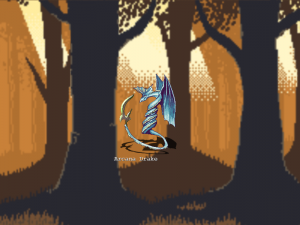
The first thing that we want to do is get rid of that boring black background and bring our world to life. In the

preload
  method, add all of the images that make up the forest background. There happen to be four different images for this because it is designed to be used as a parallax scrolling background. Typically this type of background is used in side scrolling platformer games, but it gives us the option of doing an animation effect later.
this.game.load.image('forest-back', 'assets/parallax_forest_pack/layers/parallax-forest-back-trees.png');
this.game.load.image('forest-lights', 'assets/parallax_forest_pack/layers/parallax-forest-lights.png');
this.game.load.image('forest-middle', 'assets/parallax_forest_pack/layers/parallax-forest-middle-trees.png');
this.game.load.image('forest-front', 'assets/parallax_forest_pack/layers/parallax-forest-front-trees.png');

In the

create
  method since we have 4 different images that make up the background, we’ll create a Group of TileSprite objects. Using a javascript array of the image keys, we can use the built in forEach method to quickly and elegantly create all four in the correct order.
var state = this;

this.background = this.game.add.group();
// setup each of our background layers to take the full screen
['forest-back', 'forest-lights', 'forest-middle', 'forest-front']
    .forEach(function(image) {
        var bg = state.game.add.tileSprite(0, 0, state.game.world.width,
            state.game.world.height, image, '', state.background);
        bg.tileScale.setTo(4,4);
    });

A TileSprite is a type of image that is meant to be repeated or tiled over a large area. To create one you need to pass it not only the x & y coordinates, but also a width and height for how big the area that it needs to cover should be. Just like the Sprite, you give it the image key to use. The final parameter that we pass it is our group, so that each one is automatically added to the background group. We want the background to cover the whole screen, so we’ll pass in the game world’s width and height. Also, in this case, our image isn’t really meant to be tiled like a mosaic, so we’ll scale the tiling so that it looks more like one image (play with the scale numbers to see what I mean about the tiling).

Let’s take a moment to talk about the group that we created. Groups are an extremely powerful feature of Phaser that are capable of a whole lot more than just the name suggests. At the very base level, they act as a collection, sort of like an array, and they have several methods available for traversing and manipulating the items in the collection. Another important aspect of groups is that the children of the group are positioned, rotated, and scaled all relative to the group itself. If we set 

group.x = 10;
 then it will move all of the children over by 10 as well. The position of the children is relative meaning that if a child item also has it’s x coord set to 10, then it will actually be placed at x 20 on the screen (assuming that the group itself is not a child of another parent that isn’t at 0,0). We will use groups extensively in our game and I encourage you to read the documentation to find out more about all of the methods and properties that are available.

Reminder: time to commit your files!

The Army of Darkness

After setting the stage, the next thing we need is something to attack. Time to unleash the horde of monsters that we’ve collected. In order to be able to use all of our monsters, we need to load each image. Let’s change the

preload
  section of our
play
  state to do just that. Each one needs a key to reference it by, and the path to the image file.
this.game.load.image('aerocephal', 'assets/allacrost_enemy_sprites/aerocephal.png');
    this.game.load.image('arcana_drake', 'assets/allacrost_enemy_sprites/arcana_drake.png');
    this.game.load.image('aurum-drakueli', 'assets/allacrost_enemy_sprites/aurum-drakueli.png');
    this.game.load.image('bat', 'assets/allacrost_enemy_sprites/bat.png');
    this.game.load.image('daemarbora', 'assets/allacrost_enemy_sprites/daemarbora.png');
    this.game.load.image('deceleon', 'assets/allacrost_enemy_sprites/deceleon.png');
    this.game.load.image('demonic_essence', 'assets/allacrost_enemy_sprites/demonic_essence.png');
    this.game.load.image('dune_crawler', 'assets/allacrost_enemy_sprites/dune_crawler.png');
    this.game.load.image('green_slime', 'assets/allacrost_enemy_sprites/green_slime.png');
    this.game.load.image('nagaruda', 'assets/allacrost_enemy_sprites/nagaruda.png');
    this.game.load.image('rat', 'assets/allacrost_enemy_sprites/rat.png');
    this.game.load.image('scorpion', 'assets/allacrost_enemy_sprites/scorpion.png');
    this.game.load.image('skeleton', 'assets/allacrost_enemy_sprites/skeleton.png');
    this.game.load.image('snake', 'assets/allacrost_enemy_sprites/snake.png');
    this.game.load.image('spider', 'assets/allacrost_enemy_sprites/spider.png');
    this.game.load.image('stygian_lizard', 'assets/allacrost_enemy_sprites/stygian_lizard.png');

In the

create
  method is where we’ll want to create Sprite objects for these images so that they can exist in the game world. Much like the background images, it’s faster and easier to read if we put all the information that we need to load into an array. This time however, we need more than just the image key. We’re going to want to display the name of the monster on the screen below it, so that the player knows what they are facing. To do this we’ll create an array of objects that has a name property suitable for display, as well as the image key.
var monsterData = [
    {name: 'Aerocephal', image: 'aerocephal'},
    {name: 'Arcana Drake', image: 'arcana_drake'},
    {name: 'Aurum Drakueli', image: 'aurum-drakueli'},
    {name: 'Bat', image: 'bat'},
    {name: 'Daemarbora', image: 'daemarbora'},
    {name: 'Deceleon', image: 'deceleon'},
    {name: 'Demonic Essence', image: 'demonic_essence'},
    {name: 'Dune Crawler', image: 'dune_crawler'},
    {name: 'Green Slime', image: 'green_slime'},
    {name: 'Nagaruda', image: 'nagaruda'},
    {name: 'Rat', image: 'rat'},
    {name: 'Scorpion', image: 'scorpion'},
    {name: 'Skeleton', image: 'skeleton'},
    {name: 'Snake', image: 'snake'},
    {name: 'Spider', image: 'spider'},
    {name: 'Stygian Lizard', image: 'stygian_lizard'}
];

After that, we’ll need to create the actual sprites for them in order to render them in the game world. Time for another group!

this.monsters = this.game.add.group();

var monster;
monsterData.forEach(function(data) {
    // create a sprite for them off screen
    monster = state.monsters.create(1000, state.game.world.centerY, data.image);
    // center anchor
    monster.anchor.setTo(0.5);
    // reference to the database
    monster.details = data;

    //enable input so we can click it!
    monster.inputEnabled = true;
    monster.events.onInputDown.add(state.onClickMonster, state);
});

When it comes to sprites, groups have a special method create that we can use. For other game objects we need to create them using the normal game factories, and add them as children to the group, the create method only works for sprites. It takes the normal sprite parameters; position and image key, but also lets you pass in a flag as to whether or not the sprite “exists”. This parameter is most often used in object pooling, which we’ll cover a bit later. Each sprite we’ll set the anchor to the center, and set a reference to our monsterData item so that we can reference it later (to display the name).

We’re also going to want to be able to click the monsters (it’s a *click*er game after all), we can tell Phaser to register click events by setting inputEnabled to true. Doing so will enable several input events, we’re interested in what happens when we click the mouse button down (or tap it). For that we’ll tell it to use the

onClickMonster
  method of our state, and that it should be called in the context of our state (javascript “this”). We haven’t created that method yet, we’ll do that in a minute.

In this game, we only ever want to face one monster at a time, so we need a reference to the monster that we are currently facing. Another cool feature of a group is that we can let Phaser randomly select one using

getRandom()
 . Then set the position of the monster to roughly the center of the screen, a little off so that we have room for some other things later.
this.currentMonster = this.monsters.getRandom();
this.currentMonster.position.set(this.game.world.centerX + 100, this.game.world.centerY);

Next we can modify our render method so that we can show the name of the monster that we are up against.

render: function() {
    game.debug.text(this.currentMonster.details.name,
        this.game.world.centerX - this.currentMonster.width / 2,
        this.game.world.centerY + this.currentMonster.height / 2);
}

Finally, we need to add that

onClickMonster
  handler so that something happens when we click them. For now, we’ll just change out the monster on each click so that we can test running through our list (epic insta-kill!). Each click we’ll set the currentMonster to another random one, and position it in the center of the screen. We’ll move the other monster off screen so that we can’t see it at the same time.
onClickMonster: function() {
    // reset the currentMonster before we move him
    this.currentMonster.position.set(1000, this.game.world.centerY);
    // now pick the next in the list, and bring him up
    this.currentMonster = this.monsters.getRandom();
    this.currentMonster.position.set(this.game.world.centerX + 100, this.game.world.centerY);
},

Reminder: time to commit your files again!

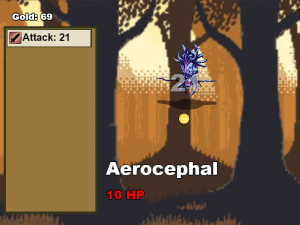
Phaser 3 game with tentacle dragon enemy in scene

Clicking For Great Justice

Obviously just clicking to cycle through the monsters isn’t much of a gameplay element. Instead we need to simulate RPG combat by clicking and dealing damage to the monsters. In order to deal damage, we need to know something about our player. The main hero of this game isn’t directly represented by a sprite on the screen, so we will just create a plain javascript object to hold useful information about them. Add this to the bottom of the

create
phase:
// the main player
this.player = {
    clickDmg: 1,
    gold: 0
};

Also in order to be able to kill the monsters, they need to have some health to damage. Let’s go back to our monster database from before, and add a maxHealth attribute to each one. For now, for the values of maxHealth, I’ve just chosen somewhat arbitrary numbers, by looking at the sprite and just making a few tougher than the others. Later we can get deeper into gameplay and balance out the toughness of the monsters. I also adjusted the spacing so that it looks a little more like a table and is easier to edit.

var monsterData = [
    {name: 'Aerocephal',        image: 'aerocephal',        maxHealth: 10},
    {name: 'Arcana Drake',      image: 'arcana_drake',      maxHealth: 20},
    {name: 'Aurum Drakueli',    image: 'aurum-drakueli',    maxHealth: 30},
    {name: 'Bat',               image: 'bat',               maxHealth: 5},
    {name: 'Daemarbora',        image: 'daemarbora',        maxHealth: 10},
    {name: 'Deceleon',          image: 'deceleon',          maxHealth: 10},
    {name: 'Demonic Essence',   image: 'demonic_essence',   maxHealth: 15},
    {name: 'Dune Crawler',      image: 'dune_crawler',      maxHealth: 8},
    {name: 'Green Slime',       image: 'green_slime',       maxHealth: 3},
    {name: 'Nagaruda',          image: 'nagaruda',          maxHealth: 13},
    {name: 'Rat',               image: 'rat',               maxHealth: 2},
    {name: 'Scorpion',          image: 'scorpion',          maxHealth: 2},
    {name: 'Skeleton',          image: 'skeleton',          maxHealth: 6},
    {name: 'Snake',             image: 'snake',             maxHealth: 4},
    {name: 'Spider',            image: 'spider',            maxHealth: 4},
    {name: 'Stygian Lizard',    image: 'stygian_lizard',    maxHealth: 20}
];

Phaser sprites come with both Health and LifeSpan components built in that provide all of the features that we need in order to get combat working. They provide us with a 

damage()
  and
heal()
  method and take into account health and maxHealth in those methods. When you apply damage and the health drops to 0 (or below) it will automatically call
kill()
  and fire the
onKilled
  event. Similarly, there is a  
revive()
  method that allows you to bring a monster back from the dead fully healed. When a monster is revived, it fires the onRevived event. We will hook into those events to drop loot and change monsters. Inside the loop that creates the monster sprites, let’s set the health component based on the value in our data array.
// use the built in health component
monster.health = monster.maxHealth = data.maxHealth;

// hook into health and lifecycle events
monster.events.onKilled.add(state.onKilledMonster, state);
monster.events.onRevived.add(state.onRevivedMonster, state);

Next update the

onClickMonster
  method to deal damage to the monster based on the player’s
clickDmg
  attribute. When the monster’s health reaches 0, it will be killed.
onClickMonster: function(monster, pointer) {
    // apply click damage to monster
    this.currentMonster.damage(this.player.clickDmg);
}

Clicking on a monster will do damage, but it’s important to provide feedback to the player that this is happening. No one likes to click things and see nothing happen, it feels broken. Also, I think it’s time to get rid of the debug text and use an actual text object to display the monster’s name and health. Add these 2 Text objects to your create method. Again we’ll create another group so that moving the monster information around is easy. Creating Text objects is relatively straight forward, like most display objects you provide it the position on the screen (or relative to its parent), but instead of an image key, you pass it the string that you want to display. Optionally you can send in font styling data to change how it’s displayed. This font style information is very similar to standard HTML Canvas fonts.

this.monsterInfoUI = this.game.add.group();
this.monsterInfoUI.position.setTo(this.currentMonster.x - 220, this.currentMonster.y + 120);
this.monsterNameText = this.monsterInfoUI.addChild(this.game.add.text(0, 0, this.currentMonster.details.name, {
    font: '48px Arial Black',
    fill: '#fff',
    strokeThickness: 4
}));
this.monsterHealthText = this.monsterInfoUI.addChild(this.game.add.text(0, 80, this.currentMonster.health + ' HP', {
    font: '32px Arial Black',
    fill: '#ff0000',
    strokeThickness: 4
}));

Back in our

onClickMonster
  event, we want to update the text now to reflect the monster’s new health.
// update the health text
this.monsterHealthText.text = this.currentMonster.alive ? this.currentMonster.health + ' HP' : 'DEAD';

When a monster is killed it fires the

onKilled
  event, we want to push it back off screen and then select a new monster and revive them. The revive method optionally takes a health parameter that will set the health of the monster to the value provided. It then sets alive, visible, and exists to true, and then fires the onRevived event. Add the
onKilledMonster
  method to our state now.
onKilledMonster: function(monster) {
    // move the monster off screen again
    monster.position.set(1000, this.game.world.centerY);

    // pick a new monster
    this.currentMonster = this.monsters.getRandom();
    // make sure they are fully healed
    this.currentMonster.revive(this.currentMonster.maxHealth);
},

When a monster is revived, we want to get them into position on the screen, and reset the monster display text to reflect the new monster. After the kill handler, let’s add the

onRevivedMonster
  event handler to our state as well. Here we move the monster to the center area of the screen and update our text objects to reflect the new information.
onRevivedMonster: function(monster) {
    monster.position.set(this.game.world.centerX + 100, this.game.world.centerY);
    // update the text display
    this.monsterNameText.text = monster.details.name;
    this.monsterHealthText.text = monster.health + 'HP';
},

Ok, now we can see what is happening, and that is good. It still doesn’t quite feel exciting enough though, I think we can add more. For every click, let’s display the damage that we’re doing. For that, we’ll want to create a pool of text objects. Each click we need to display the damage number for a short period and then it should disappear. Instead of creating a new text object for each click (which we could do), it’s better to create a bunch up front and just change the properties. The reason is that in almost all programming situations, especially in JavaScript, creating new objects is an expensive operation. Not something that you want to be doing a lot of every frame. Let’s create a pool of about 50 text objects (I think I can do 30 clicks / second so that’s a decent buffer). The following should go in your

create
  method.
this.dmgTextPool = this.add.group();
var dmgText;
for (var d=0; d<50; d++) {
    dmgText = this.add.text(0, 0, '1', {
        font: '64px Arial Black',
        fill: '#fff',
        strokeThickness: 4
    });
    // start out not existing, so we don't draw it yet
    dmgText.exists = false;
    dmgText.tween = game.add.tween(dmgText)
        .to({
            alpha: 0,
            y: 100,
            x: this.game.rnd.integerInRange(100, 700)
        }, 1000, Phaser.Easing.Cubic.Out);

    dmgText.tween.onComplete.add(function(text, tween) {
        text.kill();
    });
    this.dmgTextPool.add(dmgText);
}

As you can see in order to create a pool of damage text objects to use we didn’t have to do anything special. We used the groups that we already know and love. A standard for loop will help us create 50 of them, and we’ll set them all to

exists = false
  so that they don’t render on the screen until we tell them to. Next, we’re going to add another super powerful tool in Phaser’s arsenal, a Tween. A tween allows you to modify various properties of an object over time. It uses one of several mathematical equations to “ease” these values from start to finish and create animation effects. For the damage text, we want it to fly out from where it was clicked in a random direction and also fade out so that by the time that it reaches its destination, it can no longer be seen. In the
to
  method of the tween, we set the final values that we want the alpha, y and x properties of the object to be, the starting values will be the values of the object when the tween begins. The second parameter is the time that it should take to complete the tween, we’ll set it to 1000 (the value is in milliseconds, so 1 second). The final parameter is the Easing equation that we want to use. When a tween animation is completed, an event is fired, we can hook into there and
kill()
  the text object (effectively setting it back to
exists = false
 ).

Now we’ll turn these on so that clicking to do damage is really exciting. Every time we click, we’ll grab the first available dmgText object (i.e. not killed) from the group using

getFirstExists(false)
 , the false tells the group that we want one that doesn’t exist. Then update the text to reflect the current click damage. We need to reset the alpha property from when the tween had adjusted it, and we want to start this one at the spot where the player clicked. Then we’ll start the tween again, and get our animation.
// grab a damage text from the pool to display what happened
var dmgText = this.dmgTextPool.getFirstExists(false);
if (dmgText) {
    dmgText.text = this.player.clickDmg;
    dmgText.reset(pointer.positionDown.x, pointer.positionDown.y);
    dmgText.alpha = 1;
    dmgText.tween.start();
}

Reminder: commit that code!

Demonic Essence enemy with damage displayed from attack

Phat Lootz

Killing monsters isn’t something that the player does just for sport, they’re in it for the rewards of gold and treasure. We need to drop some loot when the monster dies, let’s add a gold coin to our images loading in the

preload
method.
this.game.load.image('gold_coin', 'assets/496_RPG_icons/I_GoldCoin.png');

To start with, every monster will drop a single gold coin when it dies. The player will need to click on them to collect them, and so there could be quite a few laying around before they decide to do that. To create a pool of gold coins, again we’ll utilize the group. This time, since we’re creating a pool of sprites, we can use a special method called createMultiple. This method is very similar to the

create
  method in that it only creates sprites, for this one, it takes a new parameter, the number that you want to create. Since we’re not using a for loop this time to create them, we need a way to setup some defaults without having to loop through our newly created group, for that, we have another method called setAll. It takes the property and value and applies that to each object in the group. We also want to register the onInputDown handler, since adding a handler to an event is a method, we use callAll to execute the
events.onInputDown.add
  method on each child of the group.
// create a pool of gold coins
this.coins = this.add.group();
this.coins.createMultiple(50, 'gold_coin', '', false);
this.coins.setAll('inputEnabled', true);
this.coins.setAll('goldValue', 1);
this.coins.callAll('events.onInputDown.add', 'events.onInputDown', this.onClickCoin, this);

Again we need feedback in the UI so that we know that we are collecting gold. Add this text object to the

create
  method.
this.playerGoldText = this.add.text(30, 30, 'Gold: ' + this.player.gold, {
    font: '24px Arial Black',
    fill: '#fff',
    strokeThickness: 4
});

Now we can add our click handler for the coins. When a coin is clicked, the

goldValue
  of the coin is added to the player’s gold. We also have to update the UI so that we can see the change. Finally, we kill the coin so that it disappears back into our pool for reuse.
onClickCoin: function(coin) {
    // give the player gold
    this.player.gold += coin.goldValue;
    // update UI
    this.playerGoldText.text = 'Gold: ' + this.player.gold;
    // remove the coin
    coin.kill();
}

Next we need to add to the

onKilledMonster
  event so that we can actually drop these coins. Much like the dmgText objects, we’ll grab the first available coin and bring it to life positioning it somewhere randomly in the center-ish of the screen. We update the goldValue (even though we’re just setting it to 1 now) so that in the future we can drop different amounts of gold as we progress.
var coin;
// spawn a coin on the ground
coin = this.coins.getFirstExists(false);
coin.reset(this.game.world.centerX + this.game.rnd.integerInRange(-100, 100), this.game.world.centerY);
coin.goldValue = 1;

Dune Crawler enemy with Gold amount displayed in the upper left corner

As I mentioned earlier, the player has to click on the coins in order to collect them. After a few kills, if they don’t do that, the floor will become quite littered with gold. While piles of cash is always fun, eventually we might run out of new coins to spawn from our pool. What we need to do is automatically collect gold for the player after a short time so that the world doesn’t become cluttered.

To accomplish this, Phaser has a Timer object that we can use to create our own custom timed events. If the coin sits there not being clicked for 3 seconds, then we’ll “click” it for them, by firing the same

onClickCoin
  method that we use when they do click it. The timer event takes the duration, the handler, the context that the handler should fire in, and any other additional parameters that should be passed to the handler.
this.game.time.events.add(Phaser.Timer.SECOND * 3, this.onClickCoin, this, coin);

Since we are going to be calling the

onClickCoin
  method when the timer completes in addition to when the coin is clicked, we need to test and make sure that we don’t call it twice. If the player clicks the coin before the timeout, the timeout will still fire, but the gold will already be collected, and the coin already killed. We can add a simple test at the top of the function to make sure that when we collect this coin it is still alive.
if (!coin.alive) {
    return;
}

Reminder: commit the source, save your work!

Upgrades

I’m sure by now you’re tired of doing just 1 point of damage every click, and we’ve got nothing to spend our precious gold on! Time to create some upgrades. The upgrades menu is going to be a box, with some buttons inside that you can click on to buy things. For the background of the upgrades menu, we could use more art from the web, or create an image ourselves in a paint program, but instead we can utilize the HTML5 Canvas to build it for us. Instead of loading an image, Phaser has an object called BitmapData that creates a canvas for us. The result of the canvas can then be used in place of an image on a sprite. Instead of setting the key when it is loaded like with an image, instead we need to manually add it to Phaser’s asset cache. In the

preload
  method we will generate images (colored rectangles) for the background of the upgrades menu and also the buttons.
// build panel for upgrades
var bmd = this.game.add.bitmapData(250, 500);
bmd.ctx.fillStyle = '#9a783d';
bmd.ctx.strokeStyle = '#35371c';
bmd.ctx.lineWidth = 12;
bmd.ctx.fillRect(0, 0, 250, 500);
bmd.ctx.strokeRect(0, 0, 250, 500);
this.game.cache.addBitmapData('upgradePanel', bmd);

var buttonImage = this.game.add.bitmapData(476, 48);
buttonImage.ctx.fillStyle = '#e6dec7';
buttonImage.ctx.strokeStyle = '#35371c';
buttonImage.ctx.lineWidth = 4;
buttonImage.ctx.fillRect(0, 0, 225, 48);
buttonImage.ctx.strokeRect(0, 0, 225, 48);
this.game.cache.addBitmapData('button', buttonImage);

For the upgrades menu, we don’t need something as heavy as a sprite (with all the health and other stuff). Instead for things that are going to be purely user interface objects, it is better to use a Image. An Image object has the same transform information (position, scale, rotation) just not all the extra things that a sprite does. Instead of passing in an image key, we’ll pull the image out of the cache that we put it into earlier. The menu panel will also contain a group for the buttons, that way all of the buttons can follow the menu and be relative to its transforms. Because of the border on the background image, we’ll move the button group in a little bit.

this.upgradePanel = this.game.add.image(10, 70, this.game.cache.getBitmapData('upgradePanel'));
var upgradeButtons = this.upgradePanel.addChild(this.game.add.group());
upgradeButtons.position.setTo(8, 8);

Stygian Lizard enemy with newly added upgrade frame

Our first upgrade will be to the click damage so we can start killing faster. Let’s pick an icon from our library and add that to our image load.

this.game.load.image('dagger', 'assets/496_RPG_icons/W_Dagger002.png');

Phaser has another object in its bag of tricks, the Button object. A button is a subclass of an Image object that is designed to handle being clicked out of the box. It supports 4 different button states: Out, Over, Down, and Up. You can provide a spritesheet image with different looks for each of these states, it can make the button appear to actually be “pressed” for example, or change color when you hover over top of it. I’ve only generated a single background frame for our buttons for now, it still works fine without the other images. For the button we are going to add the icon, a label for what the upgrade is, and another text to display the gold cost for upgrading.

var button;
button = this.game.add.button(0, 0, this.game.cache.getBitmapData('button'));
button.icon = button.addChild(this.game.add.image(6, 6, 'dagger'));
button.text = button.addChild(this.game.add.text(42, 6, 'Attack: ' + this.player.clickDmg, {font: '16px Arial Black'}));
button.details = {cost: 5};
button.costText = button.addChild(this.game.add.text(42, 24, 'Cost: ' + button.details.cost, {font: '16px Arial Black'}));
button.events.onInputDown.add(this.onUpgradeButtonClick, this);

After creating the button, then add it to the buttons group.

upgradeButtons.addChild(button);

For now our button handler simply needs to test the one button that we have. First we’ll check that we can afford to purchase the upgrade, if we can then we’ll go through with it. We need to adjust the player’s gold from the cost, and update the UI to reflect that change. We also need to improve the player’s clickDmg attribute, and update the text on the button. Now we can spend our hard earned loot to get stronger!

onUpgradeButtonClick: function(button, pointer) {
    if (this.player.gold - button.details.cost >= 0) {
        this.player.gold -= button.details.cost;
        this.playerGoldText.text = 'Gold: ' + this.player.gold;
        this.player.clickDmg++;
        button.text.text = 'Attack: ' + this.player.clickDmg;
    }
}

Aerocephal enemy with Attack 21 as an upgrade

Now it’s time to add the second type of upgrade, the DPS upgrade. Until now the only way to deal damage to monsters is by directly clicking on them. While this is an important mechanic in our game, it can get tedious after a while. This is the part that makes this type of game fall into the “idle” genre. Players will continue to progress and deal damage to monsters even when they are not actively clicking them.

In order to add a new button, we need to repeat what we have, and change the effect of purchasing the upgrade. Doing this one button at a time will get unruly after a bit, so we want to create a database array of upgrades, just like we have for monsters. We’ll need the icon to display, the name of the upgrade, the level for the number of times that it has been upgraded, the cost in gold to upgrade, and a callback function that we can fire to provide a different effect for each upgrade.

var upgradeButtonsData = [
    {icon: 'dagger', name: 'Attack', level: 1, cost: 5, purchaseHandler: function(button, player) {
        player.clickDmg += 1;
    }},
    {icon: 'swordIcon1', name: 'Auto-Attack', level: 0, cost: 25, purchaseHandler: function(button, player) {
        player.dps += 5;
    }}
];

We need to add the dps property to our player, so that our purchase handler can take effect.

this.player = {
    clickDmg: 1,
    gold: 0,
    dps: 0
};

Now we can loop through our data and create all of our upgrade buttons in bulk. Because the buttons are about 48 pixels high, we’ll separate each one by 50. Instead of hard coding the text strings and icon, they will be populated from the data.

var button;
upgradeButtonsData.forEach(function(buttonData, index) {
    button = state.game.add.button(0, (50 * index), state.game.cache.getBitmapData('button'));
    button.icon = button.addChild(state.game.add.image(6, 6, buttonData.icon));
    button.text = button.addChild(state.game.add.text(42, 6, buttonData.name + ': ' + buttonData.level, {font: '16px Arial Black'}));
    button.details = buttonData;
    button.costText = button.addChild(state.game.add.text(42, 24, 'Cost: ' + buttonData.cost, {font: '16px Arial Black'}));
    button.events.onInputDown.add(state.onUpgradeButtonClick, state);

    upgradeButtons.addChild(button);
});

When we click an upgrade button now we need to increase its level and update the text to reflect the change. Then we’ll execute the purchaseHandler callback in the context of the state, passing the button and player along to the handler.

onUpgradeButtonClick: function(button, pointer) {
    if (this.player.gold - button.details.cost >= 0) {
        this.player.gold -= button.details.cost;
        this.playerGoldText.text = 'Gold: ' + this.player.gold;
        button.details.level++;
        button.text.text = button.details.name + ': ' + button.details.level;
        button.details.purchaseHandler.call(this, button, this.player);
    }
}

Ok, so we’re increasing both attack and dps (damage per second), but we haven’t setup dps to do anything yet. For dps to make sense, if we have 1 dps then after 1 second has passed we do 1 damage. Waiting the full second to apply any damage at all though is too choppy and slow. Instead we’ll update at 100ms (10 times a second). So, in order to apply 1 damage after 1 second, then we need to apply 0.10 damage every 100ms. Similar to the timer event that we used for the gold coins, there are also loop events that will repeat and call the handler at the duration over and over.

// 100ms 10x a second
this.dpsTimer = this.game.time.events.loop(100, this.onDPS, this);

Our dps handler is going to get called every 100ms whether we have upgraded or not. So we check if we have something to do first, if so, then make sure the monster is still alive to apply the damage. Then we’ll damage the monster and update the text to reflect the monster’s health. I don’t really want to display the decimals that might occur on the monster health from doing 10% damage, so we’ll round it for the display (not the actual health).

onDPS: function() {
    if (this.player.dps > 0) {
        if (this.currentMonster && this.currentMonster.alive) {
            var dmg = this.player.dps / 10;
            this.currentMonster.damage(dmg);
            // update the health text
            this.monsterHealthText.text = this.currentMonster.alive ? Math.round(this.currentMonster.health) + ' HP' : 'DEAD';
        }
    }
}

Reminder: don’t forget to commit!

Progression

Killing the same monsters over and over is boring. We need to keep increasing the difficulty so that the players can face a challenge and progress. Let’s add some world level stats to the

preload
  section.
// world progression
this.level = 1;
// how many monsters have we killed during this level
this.levelKills = 0;
// how many monsters are required to advance a level
this.levelKillsRequired = 10;

Each time we kill a monster now, we need to increase the kills stat. We also need to upgrade the monster’s health based on the level. With increased risk, comes increased reward, and we’ll also modify the coin value based on the world level as well. After 10 monsters have been killed, then we can progress to the next level.

onKilledMonster: function(monster) {
    // move the monster off screen again
    monster.position.set(1000, this.game.world.centerY);

    var coin;
    // spawn a coin on the ground
    coin = this.coins.getFirstExists(false);
    coin.reset(this.game.world.centerX + this.game.rnd.integerInRange(-100, 100), this.game.world.centerY);
    coin.goldValue = Math.round(this.level * 1.33);
    this.game.time.events.add(Phaser.Timer.SECOND * 3, this.onClickCoin, this, coin);

    this.levelKills++;

    if (this.levelKills >= this.levelKillsRequired) {
        this.level++;
        this.levelKills = 0;
    }

    // pick a new monster
    this.currentMonster = this.monsters.getRandom();
    // upgrade the monster based on level
    this.currentMonster.maxHealth = Math.ceil(this.currentMonster.details.maxHealth + ((this.level - 1) * 10.6));
    // make sure they are fully healed
    this.currentMonster.revive(this.currentMonster.maxHealth);
}

Since we’ll be getting a lot more money now, we also need to adjust the upgrade prices.

onUpgradeButtonClick: function(button, pointer) {
    // make this a function so that it updates after we buy
    function getAdjustedCost() {
        return Math.ceil(button.details.cost + (button.details.level * 1.46));
    }

    if (this.player.gold - getAdjustedCost() >= 0) {
        this.player.gold -= getAdjustedCost();
        this.playerGoldText.text = 'Gold: ' + this.player.gold;
        button.details.level++;
        button.text.text = button.details.name + ': ' + button.details.level;
        button.costText.text = 'Cost: ' + getAdjustedCost();
        button.details.purchaseHandler.call(this, button, this.player);
    }
}

Finally, we’ll add the level information to the UI so that the player knows how they are doing. By now adding text objects to reflect this information should be old hat to you!

// setup the world progression display
this.levelUI = this.game.add.group();
this.levelUI.position.setTo(this.game.world.centerX, 30);
this.levelText = this.levelUI.addChild(this.game.add.text(0, 0, 'Level: ' + this.level, {
    font: '24px Arial Black',
    fill: '#fff',
    strokeThickness: 4
}));
this.levelKillsText = this.levelUI.addChild(this.game.add.text(0, 30, 'Kills: ' + this.levelKills + '/' + this.levelKillsRequired, {
    font: '24px Arial Black',
    fill: '#fff',
    strokeThickness: 4
}));

We also need to update the level text when it changes inside the  

onKilledMonster
  method.
this.levelText.text = 'Level: ' + this.level;
this.levelKillsText.text = 'Kills: ' + this.levelKills + '/' + this.levelKillsRequired;

Spider enemy with various upgrades in Phaser 3 game

Reminder: commit commit commit

Finished the basics, what’s next?

What we’ve created here is a complete idle clicker RPG. Well, complete as in it’s playable. There’s still tons left to do in order to get this game turned into something that is really fun. In game development, they say that the last 10% of the work is the last 90% of your time. We’re pretty much 90% done I think 🙂

Here’s a list of things that would be great to add: (possibly in future tutorials)

  • monsters with animation
  • sounds & music!
  • more upgrades
  • critical hits
  • boss monsters
  • timed boost powers
  • different world backgrounds
  • achievements
  • leader boards

I hope that you have enjoyed this tutorial and making this game!

Please leave comments and questions below, I welcome any feedback and would love to see your games too!

Web Class: A Bite-Sized Guide to Unity

$
0
0

Transcript 1

Hey guys, my name is Austin Gregory, and in this course we’re gonna learn Unity from scratch.

The goals of this course are gonna be to learn Unity’s tools and interfaces, learn how to manipulate objects with transformations, like moving them, scaling them, rotating them. We’re going to learn how to snap them together using vertex and surface snapping. We’re gonna learn how to create materials to apply colors and textures and shaders to objects. We’re gonna learn the very basics of programming and the concepts of programming. And I’m gonna take that knowledge and learn some object-oriented programming, just the basics though, just to get the idea of what it is. And I’m gonna talk about some vectors.

We got a lot more as well, but that’s just the gist of it. And it’s completely for beginners, no experience required. Don’t have to know anything about Unity. We’re even gonna walk through installing the editor and Unity Hub and all that. That’s coming up in this course, guys. My name is Austin, and I will see you in the first lesson.

Transcript 2

So let’s get started by downloading Unity Hub. So what I’m gonna do, is I’m gonna go over to unity3d.com. And there’s a lot of information on the homepage here, that will teach you a bit about what Unity can do. So for now, though, all we care about is this Get Unity button, right here. I wanna click on that and that link’s gonna take me to the Store page, store at unity.com.

So we wanna click on Try Personal, and I’m gonna go ahead and check that I confirm all this stuff here, of course. And what I’m gonna do, is I’m gonna download the Hub. Now like I said, you could download the Installer for the editor, directly, but I don’t wanna do that. I want the Hub. So I’m gonna download Unity Hub, and I’m gonna run this Installer. And when you do, you’re gonna see a simple agreement to the terms of service. We know how to do that, just gonna agree to that. And if you wanna read it, go ahead. And then we’re gonna slide through one and install it. In my case, I just keep it right inside the program files there.

And now this shouldn’t take too long to install, simply because you’re only installing the Hub itself, you’re not installing Unity itself, at this point. So once this finishes, though, we’re gonna jump in there, and we’re gonna actually start installing the editor.

What we’re gonna do here, is once Hub is open, we’re gonna go to the installation tab; we’re gonna go down to Official Releases and we’re gonna find their latest version that’s available. To me, it 2018.2.10f1. We’re gonna download that and then let it install.

Now, whenever I click download, it’s going to open up this window here that’s going to allow us to select some components. There’s a lot of stuff here, but the important thing to remember, you can always come back later and install what you do not have, if you need it. In my case, I don’t need Android Build, or iOS Build, or Linux, or all that stuff down here. There’s gonna be a lot of options. But in my case, I just want the Documentation and the latest version. And then we’re gonna click done. And when we do that, it’s gonna start installing that version of Unity, with those settings. And again, you can always come back and add the components you need.

And that’s gonna be all we have to do to install Unity on our systems.

Transcript 3

Hey, guys, welcome back. In this lesson, we’re going to look at positioning objects in our Scenes.

So in our current Scene, we have a cube object. And if I look up here, now, (we touched on this a second ago), but if I look up here now, I have a Transform with a Position, Rotation, and Scale. And I see X, Y, and Z values, and they’re pretty crazy values; and we’ll change those here in a second. And now, what’s important about this is that’s how we position things in our world. We decide at what X, Y, and Z coordinates the object is. So if I were to take this and say X, Y, and Z is zero, that’s gonna be directly in the center of our game world.

I can also have a more freeform control of this by just grabbing the Move tool that we have selected here. I can just move it on the x-axis just like this. It will only move on the x-axis if I do that. And the same goes for the Z and the Y. Now maybe I wanna move it on the Z and the X at the same time. Well, I’ll grab green, there we go. And the same goes for the red here. And then blue: move it on the X and Y.

Let’s create another cube here. I’ll just select this cube, and I’ll hit Control and D on the keyboard. I have it selected, so what I can do is I can just move it out. Now, one thing that’s important is what if I wanted to place this cube directly up against this cube. I can hold down Control and Shift, and doing this is going to enable the surface snap option for the Move tool. Now, if I were to click and drag, notice once the mouse is over another surface, the object snaps to that surface. So I can just snap these vertices together by holding down V, hovering over the vertex that I want, and I just drag it, and it will snap to the nearest vertex available to it. Boom, there we go. Now, we are right up against each other just like we need to be.

Now, just a tip, what if I’m moving some stuff around here and this just gets way off screen somehow and I don’t where it’s at. I’m trying to find it, I can’t find it. So, I can double-click on Cube 1 here, it will frame it right in the center for me. Or I can have an object selected, and I just hit the F key and that will frame it.

Now, let’s position this back as zero, zero, zero, because what I wanna do is talk about some snap settings. Now, we snapped surfaces together, we snapped vertices together, but now, I wanna simply snap to a coordinate grid. One way I can do that is I can hold down the Control key as I’m moving the object, and it’s gonna snap to the grid. But what if I don’t want it to move one at a time? Well, I can fix that by going up to Edit, down to Snap Settings, and I can change this right here. It can change them on the individual axes as well and also, scale and rotation snapping (which we don’t need that). Let’s say I have this off position here, and I wanna snap it to be one unit each; I could just have it selected and say Snap All Axes, and it snaps them all to the nearest unit that matches our snap settings. Or I could just say, well, I wanna snap just the X, I wanna snap just the Z, and then just the Y. But the Y’s already there, so then just the Y. Pretty cool.

So, that’s a good way to start moving stuff around if you need a uniform type of layout for your level.


Web Class: Creating a 2D Toads and Fireflies Game

$
0
0

Transcript 1

Hey guys, my name is Austin Gregory. And in this course, I’m gonna teach you how to create a pretty cool little game.

I’m gonna be creating Toads and Fireflies. It’s based on another game with a similar name. There’s gonna be two little frogs. It’s a two-player game, a local two-player game, where you can play with a friend and compete. You’re gonna jump and you’re gonna try and attack these fireflies. And each firefly has a unique speed and a unique point value. They can be different sizes, different colors, all kind of fun things. And the frogs – you can have as many frogs as you would like, as many players as you like. But we’re gonna go with two players.

You’re gonna jump from pad to pad. You’re gonna follow a nice little jump path. Each frog has their own jump path. And while you’re in the air, if you try to jump again, if you use the action button again, you’re going to attack these fireflies. And the level, the competition takes place over a set amount of time, so you’ve got 30 seconds or a minute or two minutes (or however long you want your game to be). And at the end, whenever the time runs out, whoever has the most points wins the game.
It’s going to be pretty simple to do. And we’re gonna learn quite a few fun things, a few fun things that you can take and apply to this game and extend it into something fun, something a bit more. And also things you can take and apply to whatever kind of project you want to work on, because these are gonna be very general topics that we’re going to cover.

So again my name is Austin Gregory. And I will see you in the first lesson of Toads and Fireflies.

Transcript 2

Hey guys, in this first lesson, we are going to set up our level. We’re gonna simply import some sprites, so we need to build our very simple level. We are gonna create our Toad objects, which are not just going to be objects with a sprite renderer on them. Someone can add our Toads sprites to them. And then we are going to set up our level sprite. Just one big sprite as a couple of lily pads that we can jump from and catch those flies in the sky.

So, first thing I want to do is create a new project in Unity Hub, call it Toads and Fireflies. And I want to use the latest version available to me, which is 2019.2Alpha11, and I want to select 2D as my default template and click create project. And then to make sure we’re on the same page, I want to go up to layout and I want to select default, so we all have the exact same layout going into this.

And I want to create a folder for my sprites, I’m gonna call it Sprites. And then what I wanna do is- I wanna go into my Assets folder that is included in the project, and I’m just gonna grab these three sprites: we have our toads sprites, the idle, the jump, and our little tongue is gonna be shooting out and catching these fireflies, and then our background image. So, let’s take these and drag them into our Sprites folder. Now with them all selected, make sure we have it set to 2D and UI sprite. If you have your template set to 2D, this should be the default, so that should be okay.

Then for our toads, we have three sprites in one, so what I want to do is set this sprite mode to be multiple then I want to go to Sprite Editor and apply my changes for the multiple there. And what I want to do, is split this up into my three sprites. So, I know I have three columns here, so the easiest way to do this is to go to slice, type, and I want to do grid by cell count; and I know I have three columns and click slice. There we go, so we have one, two, three. Now to keep this organized, I could name this idle toad, jump toad, and tongue, and apply those changes. Now we should have three sprites that we can work with right here all from one sprite sheet.

Now, I know I’m going to be building my game based on a 16×9 screen. If you have more time and you want to put a bit more work in you can obviously do this where it’s dynamic and resizes and all that fun stuff, but I’m gonna keep mine very simple and just restrict it to now by a 16×9 aspect ratio. And the first thing I want to do with our scene is add a background. Now if I take this and drag it out, this is what we get, and all I simply have to do is just resize this to kind of match, holding down shift. So we get, we lock in the aspect ratio to kind of match our size of the screen here. Zero, zero. And there we go, so there is our game world. Very simple.

Let’s select these, and I want to change the filter mode, these are, this is a pixel art sprite, all of these are. And we’re getting this weird blur from when it’s trying to scale up these sprites. So, what I want to do is set the filter mode to be .nofilter, which when I add any anti-aliasing to our pixels as we scale it up. So, there we go, and now let’s create a 2D object sprite for our Toad. And this is gonna be by default, just our little idle sprite. And we can add color to this, so one of our frogs, or one of our toads, sorry, will obviously, probably be a green color. So, we can just place him in the back where he would be. And then we’d have another toad that we can make a different color for player two. But we will do that in a bit.

Then I’m gonna create a folder for our prefab objects. The objects that we’ve already fabricated that way we can just create new versions of that. So, I know I’m gonna have two frogs, and they’re all going to have the same settings, except for, one’s gonna be player one, one’s gonna be player two, and they’re gonna have two different colors. So, other then that, they’re the same thing. So, I’m just gonna create a prefab from that frog. That way all I’ll have to do is drag it out and then have another frog that is set up the same way. And I can change the color on that frog. So that’s what we’re doing eventually.

And then the next thing I want to do for now is create a firefly. And the sprite for firefly will be our firefly sprite. Here we go, so this is what we look like at the moment.

So if we have these all on the exact same Z, that means they’re going to be fighting to see which one is displayed. So the simple way to fix that is by using sorting layers for our sprites. So, if I want to go to sorting layer, I don’t have any set defaults, I’m gonna add a sorting layer and I’m gonna add a sorting layer for background. So what’s going to be drawing on the background. I’m gonna add a layer for player, so what things are drawn on the player level, so our frog, our fireflies, our tongue, or again, our toad. And we’re gonna have foreground if we’re gonna have something floating in our foreground. Not sure we will though. And then I just set this to be a player, and set the toad to be player and set the background to be background. Then we have some nice organization so we know easily how to place things in our game world so they are displayed correctly.

And that’s gonna be it for this first lesson guys. In the next lesson, we are going to work on our toad. Which is gonna be the most complex thing we do, because he has to jump, he has to attack, and all these fun things. So, it’s going to take a couple of lessons to get it done, but we are gonna get started on that in the next lesson. My name is Austin, and I will see you there.

Transcript 3

Hey guys, welcome back. In this lesson, we’re going to set up our toad, which means we have to create a new script for our toad object. It’s gonna control everything the toad can do. We’re gonna also have to set up a path.

So there’s a bunch of ways we could do the jump for our toad, because they have to jump from one pad to another. Now, I need to know exactly where my toad’s going, and I need to be able to control it very precisely, because it has to jump from an exact point on one pad to an exact point on another. There’s a bunch of ways we can do this. We could calculate the exact amount of velocity that we have to have to get from one point to another, but that’s going to lose precision over time the more that we do that. Just a couple of points here and there, but it will make a difference. Also, we could do it with a parabola. We could just calculate the type of- or the parabola that we’ll need to get from one point to the next. And that’s a lot of math that we’ll have to walk through and talk about. That’s just not absolutely necessary to make simple, little game like this.

So what we’re gonna end up doing is just placing a couple of points along the path that the toad has to jump. Then we’re gonna go from one point to the next whenever we jump. If we’re on the left side, we’ll jump and follow to the right. If we’re on the right side, we’ll jump and follow to the left. That should cover what we need to do for such a simple game. And our toad also has to have the ability to strike or to attack, using its tongue, which we’ll set up the method for this for now. But we will not have the tongue action until a couple of lesson for now, because we have to animate it, and we have to set up collisions, and we have to have flies to test it with. Just a bunch of stuff we have to do for that. So over the next couple of lessons, we’re gonna be working on our toad and getting it do all of these things.

The first thing I’m gonna do for my toad is set up those jumping points, so that it can jump from here to here. The way we’ll do this is we’ll have two toads, and the toad that’s on the left side here can jump from this point, up here, try to grab some flies, and fall down right here. We’re not gonna share a point because they’re gonna have to be next to each other while they’re on the pad. The other frog can be standing right here. It’ll jump, do the same thing, but it will land in the back. So they move the same distance. They have the same amount of ability and potential to catch these flies, but they’re at a slightly different position.

What I’ll do first of all is create an empty object, and we’re gonna be using empty objects to define the points for our pad. So all I have to do is take this object. If I just grab this, I can just move it to wherever I want it to be and say, okay, this where it’s gonna jump to. From here, to here, and then down to here. So I can place this at maybe 1.5. Maybe something like two, however high you want your frog to jump. And, again, place it at zero on the Z there. And I’ll call it Path Point.

Then I have to have two points on each of these pads to show where the frogs start and where they can end up. To do that, I’ll create an empty object, and I will call it Left Pad. And, again, I’ll just center this. Inside of left pad, I’ll have a couple of empty objects, and I can place where I want them to be. So I’m thinking this is about -4 and -2.75, or maybe -2.8, maybe -3. I have to see how that looks whenever we set this to be at that point. If we look at our toad, we can see negative -2.75 is right on the pad, so we’ll do that for this Path Point. Then I’ll duplicate that, and I’ll put this one at about -5.5, where that frog is going to be. Then we have those two points there.

Then all I have to do is duplicate the Left Pad, and then move these over. I’ll rename it Right Pad. And move these over to the right, so instead of being negative, zero is right here. We’re off -4 and -5.5, so I wanna go positive four and positive 5.5. Basic math there, so four and then 5.5. And there we go. That’s our path. So we can jump from here, up to there, and then down to this point, and then jump from here, up to there, and down to this point. Just keep going back and forth for both toads.

That’s gonna be it for this short lesson. In the next lesson, we’re gonna start using these path points to control our toad. My name is Austin, and I will see you there.

Web Class: Learn Computer Vision with Unity and Azure

$
0
0

You can access the full course here: Applied Computer Vision with Unity and Azure

Transcript 1

Hey everyone, my name’s Daniel Buckley, and I’ll be instructor for this course. We’ll be making an app that will allow you to take a picture through your camera and then have that picture sent up to an API, where the text of that picture will be extracted, sent back down, and then converted from text to text to speech through another API.

The first thing we’re going to be learning about is Microsoft Azure’s cloud computing, and we’ll be setting up an account and creating two API’s on this. We’ll first of all be creating Computer Vision API, which will allow us to send in an image and return to us the extracted text from that image. Then, we’ll create a Speech API, and this will allow us to send text up to the API and return to us a text to speech audio file.

We’ll also be using JSON files. This is the file format that we’ll get in return when we send a request to the Computer Vision API. It will return to us a JSON file, including all the text that is displayed on the screen. We’ll learn how to go through it, how to understand it, what it is, and how to extract the text that we need from it.

Unity Web Requests are something else that we’ll be using. This is Unity’s form of sending and receiving server web requests over the network. C# has their own built-in system for this already, but Unity’s is much simpler, much easier to use, and in many ways more versatile, as we have to enter in less code. It’s much more concise and good for what we need to use.

To tie this all together, and display it on the screen, we’ll be using Unity’s UI System, allowing us to project the camera view onto an image on the screen, and have text displayed at the bottom. In order to project the camera view onto the image, we’ll be using Webcam Textures. These are textures that Unity creates that allows us to render whatever our camera sees, that being a webcam or a device camera, onto a texture that we can apply to anything really. We can apply it to images on the UI, like in our example. We can even apply it as a normal texture onto cubes, 3D models, etcetera.

ZENVA is an online learning academy with over 400,000 students. We feature a wide range of courses, for people who are just starting out, or for people who are just wanting to learn something new. The courses are also very versatile, and you can learn many different ways. If you want to follow along with the tutorial videos, we have included course project files that you can use. Or you can just watch the videos along at your own pace. So that all said, let’s get started on our project.

Transcript 2

Alright, the first thing you wanna do is go to the Microsoft Azure website here. It’s just azure.microsoft.com, and it should take you to the homepage right here. Now, we then need to log in. So, we just click on the sign in button up here. And then you can choose if you want to log in with an existing account, or create a new Microsoft account. If you have a Microsoft account, just log in with that, as any sort of Microsoft account will work. So, I’ll just log in.

So, Microsoft Azure is a Cloud computing service provided to us by Microsoft. It has many different apps and functions that we can use inside of applications. For us specifically, though, we’re gonna be using the Computer Vision and the Text-to-Speech services. These are part of the Cognitive Services pack. So we can go here up to Products, and inside here we can then click on where we see AI + Machine Learning and Cognitive Services.

Now, Cognitive Services are basically machine learning sort of APIs and SDKs we can connect to. If we scroll down, we can see a bunch of the different ones here. We have Vision, which is the one we’re gonna be connecting to. We’ll send over an image to the API, and then it will analyze the text, and return that to us. We also have the Speech here. There’s also many other smaller functions inside each of these large categories.

So what we’re going to do now is actually sign up for Azure, and make it so that we can start creating some of these resources. Now, what we can do, is we can then click on the Portal button up here. This will take us to our Portal, which basically just has a list of all our different resources. All the ones we can make and allows us to manage those resources and our apps. So, we’ll click on the Portal button here.

Okay, when we’re at the Portal now, what we want to do is first of all, click on the Create a resource button here. Because what we need to do is actually set up our free account, that will allow us to use these resources. So, it doesn’t really matter which one you click on. We’ll just click on the Windows Server 2016. We’re not gonna get this, but it will require us to create a free account. This is what we’ll need to be able to actually use and create resources.

Now, with the free account you may see here that- you may see at the $200 price mark, but that just means we get $200 credit for 30 days. This is basically like a free trial. You will need to sign up with your credit card and phone number, but you won’t be charged unless you go past 30 days, or you choose one of the actual pricing tiers when we create a resource.

So, we can just click on the Start Free button here, and then it will take us to this page here. We can click on Start Free again. And then you just want to go through and fill out all of this information here. It will ask you to just enter in your name, your phone number. You don’t have to enter in your ABN. You’ll then have to verify by adding in your credit card, or bank card, or debit card. It won’t do any charges. I’m fairly certain, but it’s just there to verify you. And if you do want to then sign up further, you can then just do it much quicker then.

Alright, so when that’s complete, you should be taken back to this page now. It shouldn’t look too different, but what we can do now is start creating resources and that’s what we’re going to be doing in the next video. You might also see up here that it says, you got your free trial, and it has remaining credit. So, that you know that you are in the free trial. And yeah, then we were good to go.

So, I’ll see you next lesson where we’ll start creating an actual computer vision resource.

Transcript 3

All right, welcome back. In the last lesson, we created our Microsoft Azure account and ended up here on the portal. In this lesson, we’re gonna be creating our Computer Vision Resource, which will allow us to connect to the Computer Vision Resource API, sending an image, and then the API will extract the text from the image and then return that to us as JSON file.

Now before we continue, let’s go over what a JSON file is. Here’s an example of it. It’s basically a text file that contains objects and properties. So here we have, basically a list of users here and then we have an object for each user. You can tell an object by it having these squiggly brackets and a list or an array by having square brackets here. So each object here in this example has a name and an age. The name is a string and the age is 25.

So this is basically a way of- so this is the format that we are going to receive our text as. It will have multiple objects as well, as string containing information that just comes with the cognate service, but we’ll be looking specifically for very specific objects, lists and going down the hierarchy until we find the text that we actually want. We’ll go over more of what the actual JSON file for our computer vision API looks like once we got to scripting it, as we need to know when we are doing that.

All right, so let’s return to the portal here, and what we wanna do first of all is click on the Create Resource button at the top left. This will take us to a list where we can select something or search. What we’re gonna do is we’re gonna be searching for computer vision, select this and we want to create a new Computer Vision Resource. So we click on the create button And then this will take us to here. What we wanna do here is fill in some information.

The first thing we need to do, actually, is create a resource group. Now a resource group- it’s not that important that we do as it’s not required for when we start scripting in unity. But it is just good to pair the services that you going to be using together basically in one group. So, create a new group here, and let’s just call this ImageReaderApp- and we click okay.

And now this about the image reader app. For the name, we can call this ImageReaderComputerVision. Like so, and the subscription we wanna set to free trial. Location, you can choose whatever location you are in- whatever location here you see is close to you. I am from Eastern Australia so I’ll have it on Australia East, and for the pricing tier what we wanna do is select the F0 pricing tier. I have already created a Computer Visionary Resource before to actually test out the app, but you should have an F0 option here.

And then what we can do is click on create, and I have already created one so I’m gonna go to mine right now. But just click the create button, and it should then take you back to the actual portal home here. And in the top right if we click on the bell, you should see there’ll be a notification here. It should say something about the resource is deploying. So it will have a loading bar here showing you that it’s deployed. And once that’s complete there should be a button that says go to resource and when you click on that, it will take you to this page here.

We don’t really need to be on this page here by default, so what we what we gonna do is we gonna click on the overview button up here and this will take us to the overview page. Now there’re a few things, there are actually two things that we need in order to connect to the API once we’re in Unity.

And that is Endpoint URL here. So we need the Endpoint URL here, so just copy that and paste it to a Notepad document- just have this page opened for when we get up to scripting point. And then we need to click on short access keys, because in order to connect to your specific resource of the API, we need a specific access key. So you can click on that and it will show us we have two access keys here. Now we only need the key one, you can use the key two. It doesn’t really matter which one you use, but we’ll just use key one here. So just copy that and again keep it in a Notepad document (or just have this page opened, ready for scripting).

In the next lesson we’ll be setting up a second resource which is going to be, text to speech using the speech services and there are a few different things we need to get from that one. So, stay tuned for that.

Interested in continuing? Check out the full Applied Computer Vision with Unity and Azure course, which is part of our EdTech Mini-Degree.

Zenva vs Udemy – 2019 Complete Comparison

$
0
0

Ready to learn, but aren’t sure whether Udemy or Zenva is right for you? While both platforms offer a wide variety of courses in programming, there are some notable differences between them that can make or break your learning experience.

Today, we’re going to explore the pros and cons of each service in a number of categories. In the end, you should be able to make a more informed decision about whether Udemy or Zenva is right for you.

Instructors and Quality Standards

It’s important that lessons are taught by knowledgeable instructors with good video production quality. Let’s delve into how Udemy and Zenva stack up when it comes to who teaches their courses.

Udemy:

On Udemy, anybody can become an instructor. Free courses have virtually no vetting, while premium courses involve only a slightly more stringent process. While this is great news for aspiring instructors, this has a downside for students.

Each instructor has their own quality standard, and, consequently, video production quality can be as variable as free videos on YouTube. This can especially be the case with audio quality, which can be terrible even on paid courses.

Ultimately, what Udemy gains in instructor choice, it sacrifices with video quality.

Instructors and Quality Standards - Udemy

Zenva:

Zenva only has a few handfuls of instructors producing the lessons. Thus, if there is an instructor you don’t like, this can be problematic.

What Zenva does offer, however, is a better vetting process. Instructors are hand chosen to create courses, and each course is run through a variety of quality standard checks both before and after it’s published. As such, video lessons are mostly free of issues that bring down the quality. To boot, the instructors are offered assistance at every step, ensuring that their work is the best it can be.

Instructors and Quality Standards - Zenva

Verdict:

Though Udemy wins in terms of instructor variety, Zenva stands taller with higher quality production focus and more experienced instructors.

Course Relevance

For educational programming platforms, it’s important to keep relevant with new frameworks and programming practices. In this section, we will see how up-to-date courses are on Udemy and Zenva.

Udemy:

Udemy’s instructors have a good amount of control over their courses. Once again, while this is great for instructors, this means students are left at their mercy as to whether the courses are up-to-date.

In fact, many courses on Udemy are now behind the times (for programming, at least). As a consequence, if you’re a beginner, you might wind up buying a course using an older framework or similar. This is not to mention instances where an instructor may have given misinformation. There is no guarantee this information will be fixed, so students may be out of luck with bugs.

Course Relevance - Udemy

Zenva:

Overall, Zenva makes an immense effort to update any courses barring major changes. This can include both remaking older courses or creating entirely new courses.

When it comes to Zenva’s Mini-Degrees and Academies, Zenva also pushes course updates to students for free. Thus, students can continue to learn even as programming practices change. Additionally, course issues are addressed as quickly as possible, so there’s no worry if the instructor made a mistake somewhere.

Course Relevance - Zenva

Verdict:

Though you can find updated courses on Udemy, Zenva’s guarantee and dedication to update all their courses makes them the better investment for the long term.

Course Variety

Of course, your choice of platform may come down simply to the topics Udemy and Zenva cover. Thus, the next thing we’ll take a look at is the course variety they both offer.

Udemy:

When it comes to variety, Udemy is the clear leader. Whether you want to learn programming, photography, or something else, Udemy probably has a course for it. As such, you can always find some new skill to learn.

That being said, the fact instructors have more control over the courses can present some uneven distribution on subject matter. For example, if I want to learn Herbalism, I have three pages worth of courses to choose from. On the other hand, if I want to learn Python, I get 94 pages worth.

This bias for certain subjects can also make it hard to pick, as most of the courses cover the same topic simply with a different instructor. Thus, without extensive research, it can be confusing as to which course should be picked.

Course Variety - Udemy

Zenva:

Zenva definitely does not have the variety that Udemy does. The platform focuses mostly on development and data science, so you can’t exactly go to Zenva to learn how to bandage someone’s arm.

By contrast to Udemy, though, this specialization can make it much more authoritative on the subject matters it does cover. Further, the Mini-Degrees are specifically tailored to build a guided experience. Whether you want to learn web development or game development, Zenva helps you learn the skills you need in an intuitive manner. Even for courses covering similar topics, Zenva uses different projects to illustrate the skills in a way that is new.

Course Variety - Zenva

Verdict:

For the most part, it’s a tie and depends on what you want to learn. If you need to learn non-programming related subjects, Udemy is the platform to choose. For programming matters, however, Zenva’s focus allows it to provide a friendlier, more guided experience for beginners.

Accessibility

Both platforms deliver their content through video, but Udemy and Zenva do differ in terms of how accessible those videos are, whether in terms of disability or learning styles. So next, we will look at how welcoming both platforms are.

Udemy:

Whether you speak English, German, or something else, you have a high chance of finding something in your native language on Udemy. Thus, in terms of an international audience, this is a great boon.

Unfortunately, that’s where the accessibility stops. Most of the videos on Udemy do not feature Closed Captions, and many of those that do are inferior, auto-generated ones. Furthermore, if your learning style doesn’t suit videos, you don’t have many other options on Udemy for learning.

Accessibility - Udemy

Zenva:

When it comes to languages, Zenva courses are almost exclusively delivered in English, so you won’t find anything in your native tongue if you struggle with listening to English.

Fortunately, Zenva makes this up in other areas of accessibility. Not only do all the videos featured Closed Captions, but they are also manually generated to ensure high quality. Additionally, Zenva’s lessons come with written summaries, so if you learn better by reading, you have the option to do so.

Accessibility - Zenva

Verdict:

While multiple languages are nice, Zenva offers more accessibility options no matter how a student needs or prefers to learn.

Mobile Usability

Since more than half of internet usage comes from mobile devices, it’s always good to examine what the mobile experience is like. So, how do and Udemy and Zenva stack up against each other?

Udemy:

As expected, Udemy’s website is fairly mobile friendly, with only a few layout issues that don’t really hinder the mobile experience.

Where Udemy shines, though, is with its app. Not only is the app well-made, but it allows for offline video playback for any of the courses you’ve purchased. This makes it very easy to learn on the go regardless of your schedule, so it’s well-suited for anybody.

Mobile Usability - Udemy

Zenva:

For the most part, Zenva’s site is perfectly responsive, and there is quality assurance in place to make sure you can watch videos easily from any device.

However, Zenva does lack a mobile app, so you won’t get the same experience you can with Udemy. That being said, Zenva is in the process of developing a competing app, which will greatly change how they stack up here.

Mobile Usability - Zenva

Verdict:

For now, Udemy’s mobile app makes a worthwhile experience for those who need to learn on the go. However, this section will be updated at a later date when Zenva’s own mobile app comes out.

User Testimonies

The last category we’re going to take a look at is the availability and abundance of user testimonies on Udemy and Zenva.

Udemy:

Udemy’s focus seems to be on their individual product pages, where you can find collections of reviews from anybody who bought the course. Much like other large online stores, these give you power as a consumer to decide a product’s value.

Yet, there seems to be no clear indication Udemy does anything with a course that receives numerous bad reviews (besides hide it). This is not to mention that like many reviews on larger online stores, it is up to the consumer to determine whether the review is legitimate or angry spam.

User Testimonies - Udemy

Zenva:

While Zenva lacks the public reviews on product pages, they do accept private reviews. Further, any course averaging below a 4 is replaced by a new course with higher quality. Thus, there is more clear evidence reviews matter on the platform.

Something that we immediately found on Zenva – and that we were unable to find on Udemy – was a section for success stories. These success stories feature in-depth interviews from people in multiple industries who used Zenva’s course to further their careers and goals. Ultimately, this adds a good sense of professional legitimacy.

Of a note, Zenva does have public reviews available on its Facebook page, which offer at least some record of what customers are thinking.

User Testimonies - Zenva

Verdict:

Udemy comes out a little bit ahead in terms of showcasing their consumer’s opinions. That being said, Zenva’s willingness to act on reviews and showcase successful individuals offers a professional legitimacy that Udemy is missing.

Overview:

Ultimately, your platform choice will depend on your learning needs. If what you want to learn is skills like crafting, DIY, or something akin to that, then Udemy is the better choice due to its course variety and ability to choose a course based on consumer backing.

However, if you’re interested in web development, game development, or data science, Zenva’s focus on quality beats Udemy by a lot. Though Udemy’s prices might be more tempting, their quality is equally variable. Zenva’s courses easily outlast those on Udemy, and with free updates for Mini-Degrees and Academies, this makes the products a good long term investment for a professional career.

If you’re ready to experience Udemy’s variety, you can check out their class offerings here.

Alternatively, you can aim for the more focused coding route and check out Zenva’s courses here.


Web Class: Developing Multiplayer Games with Unity

$
0
0

You can access the full course here: Intro to Multiplayer Game Development

Transcript 1

Hey, everyone, my name’s Daniel Buckley, and I will be instructor for this course. So this is what we’re going to be making. We are going to be making a 3D multiplayer game in Unity using Photon. Photon is a networking tool for Unity, and it’s one of the most popular ones currently in the world for the platform.

So the aim of our game is to hold the hat for a certain amount of time. This is going to be a multiplayer game where you can have as many players as you want really, but the aim of the game is to hold on to this hat, or any various object, for a certain amount of time. Once you hold on for that amount of time, you win the game. As you can see here, the players can also steal the hat from each other by running into each other, and this is just going to be a game that we can use to demonstrate many of the different features of Photon and networking inside of Unity.
We’re going to be creating a menu and lobby system which will allow players to join games and lobby up before jumping into the actual game. As you can see here, we have a lobby and there’s three players in it, and as the host, you will be able to start the game. We’ll also be working on a player controller. This player controller will be able to move, jump, and steal the hat from other players. When they hold on to the hat, their timer will increase, and if that timer reaches the maximum amount of time needed, then they will win the game.

All this stuff will also be done through networking, so we’ll be syncing the movement, the jumping, the stealing of the hat, through the network so that it appears on all other player screens at the same time. For all of this, we’ll be using Unity’s UI system, canvases, text, buttons, input fields, sliders, and more. These will be used on the menu to enter in the player name, the room name that you wanna join, as well as the buttons. In the game view here we have the sliders and the text to display the players and their current time, as well as who wins the game.

This is what our game loop is gonna look like. We’re gonna start on the menu, and then a player can either join or create a game, and that will place them inside the lobby. Once in the lobby, the host can start the game and that will load up the game scene, where they’ll begin to play the game. When a player who’s holding the hat reaches the winning time, that player wins the game, and all the players then go back to the menu.

ZENVA is an online learning academy with over 400,000 students. We feature a wide range of courses for people who are just starting out, or for people who just want to learn something new. The courses are also very versatile, allowing you to watch them whenever you want and however you want. There are included course project files that you can follow along to see the project and work along with it, and there’s also lesson summaries, so you can choose to read the course as well. With that all said, let’s get started on our project.

Transcript 2

Hey everyone. In this lesson, we’re gonna be talking about multiplayer in Unity and Photon, and actually work in all the different things that you really need before we actually get started.

So the first thing is what sort of multiplayer is there in Unity? Well, Unity used to have their own multiplayer network. If you’re watching this course sometime around early 2019, then you have UNet which is Unity’s old Unity Networking framework (it is now deprecated). So we won’t be able to use that. Instead, we’re gonna be using Photon. And Photon is the most popular Unity multiplayer framework. There are many popular games that use it, and it’s easy to use. If you’ve ever used UNet before, it’s basically the exact same thing, but with added features.

Alright. So, how does multiplayer work? Or what it is is we have multiple players connected together, and what they do is at its core, a multiplayer is basically just sending messages between computers. So, let’s just say player one here moves forward one unit, then that command or that actual new position of the player will be sent from the player- from the player over through the server to player two. So, on player two’s screen, player one is not one unit or at their new position.

And so, that’s how it works. You’ll be sending various amounts and messages every second. By default, I believe that Photon sends about 20 messages per second. You can, of course, tweak that, but it’s set at 20 to be nice, so it doesn’t have too much lag or too much problems with that. So yeah, that is at its core, is sending messages between computers.

Let’s just say you wanna do an attack. You cast the attack on your computer, and then you send that message over to player two’s computer, so if there are any visuals that go with that attack, those visuals can be displayed on their computer. And that is how you sync between computers, sync between states, positions, rotations, everything that you want to appear on other people’s computers, that is how you do it, through messages. And we’ll be going to some more detail on how to actually do this in code and in script, and also with Unity’s components, what stuff you need to set up, and all of that stuff in later lessons.

So the first concept we need to go over is a master server. What is a master server? Well, in Photon and even in Unity networking, a master server is basically the connection of rooms. I’ll go over rooms in a second. Players can connect to rooms, and there you can see a list of all the rooms. It’s basically like a sort of hub for your game. And each game has their own specific master sever, and even different versions of your game. You can specify it to have different master servers. So, if you’re on version one of your game, you can’t play with people who are on version two, for example. And of course, if you have your game, you can’t play with people who are in other games. You can only play with people on your game in your specific version of that game.

And the good thing about Photon is they have their own dedicated hosted servers all around the world. As you can see to the right, there are many locations around the world where you can basically connect your master server and your game to. In Photon, you can also do it so that for players it connects to the master server with the lowest ping. So you can try and always have the lowest ping possible, or you can just hard code it, so that you connect to a specific master server. Players on different master servers cannot play with each other. So you do need to keep that in mind when making your game.

And of course, with Photon, it is a service that you can choose to pay more to increase the capacity of the server. By default, your game can have up to 20 players at once with the free version of Photon, but you can of course pay for more, and yeah. Of course, you can also host your own server if you wish. That will, of course, require you to have your own server hardware setup and have all of the networking capabilities available. So, if you’re just starting out with networking, I recommend just keeping with the free Photon version as you can test it out. You test it out with your friends, with other people, with testers, and just to see if that is what you want. And if you do, you can wish to pay more further on later on in the future.

So this is what sort of the framework looks like. You have the master server and all the different rooms that players can create connect to that. And within those rooms, you have your own players. So these are very secluded areas away from each other. If one player and one room shoots their gun, then a player in another room won’t see that on their screen. Pretty much, if you’re in a room and all the messages you sent within that room only goes to the players in that room.

So let’s go over more about what a room is. Think of a room as a match or a lobby. These are groups of players who can send messages to each other and by sending messages to teach other, syncing values, positions, rotations, animations, et cetera. So yeah, think of your favorite game where you have your own lobby- you’re in match of 10, 20 players. It’s a self-contained version of the game where you are only communicating with each other and not other players in other matches on different apps, for example.

And in Photon and many multiplayer networks, players are also known as clients. The client is a computer that is connected to the network, and each room has a master client. You might know what a master client is by its other name- which is host. In Photon, a host by default is the player who created the room. And what it means to be a host is you can allow the host to do specific things. In our game, for example, when waiting in the lobby, only the host will be able to stop the game. And using the host for many other things is also a good idea.

If you have a first-person shooter for example or a game where you want to collect pickups, you won’t want players to detect picking up pickups on their own, on their own client. Because what that could do is if two players run into the same pickup at the same time, on their computer they will see that they’re the only one picking it up at that frame, whereas for the other person, that’ll be the same thing.

So what you wanna do is put these sort of processes through the host, so the host will check it. So when the player runs into a pickup, you check with the host. Am I in the pickup? If so, the player picks it up. And if not, you don’t. So there are only one ever person can pick up the pickup at a time. There are many different things, but we’ll go over these later on. But for now, this is just what a host is.

All right. So in the next lesson, we’ll be going over actually setting up our Photon app, connecting Photon and downloading the Photon assets inside of Unity to be able to use it. Alright. So see you all then.

Transcript 3

Hey everyone. In this lesson, we’re gonna be setting up our Photon app and importing the Photon assets we need inside of Unity. So the first thing that we need to do is go to photonengine.com, which will take us to Photon’s main website. And then what we wanna do is sign in or sign up. It’s pretty easy to make an account and you can easily register here, but I’ve already got one so I’m just gonna log in.

Alright, once you make your account or sign in you should be taken to the public cloud screen where you have your applications. If you are not on this screen you can just click on this icon up here and then click on your applications. I’ve already got two Photon applications here already set up, but what we need to do is create a new app. So we will click on the create a new app button right here. And this will take you over to the page where we can fill any information. The only things we need to add to here is the Photon type and the name.

For the Photon type we want to change this to Photon PUN. And Photon PUN is its Unity specific framework, which stands for Photon Unity Networking. And for the name, we can call it whatever we want. I am just going to call this, MyPhotonApp. You can also enter in a description and a website here if have- that you want to connect to your website. But I don’t so I am just going to click on the create button and this will take us back to our applications page where we now have our new Photon app ready to use pretty much.

As you can see we can have up to 20 concurrent players at once. This, of course, is upgradable and you can pay Photon to increase this number or you can choose to host your own server. But for now this is all we need. And the only actual piece of information we need here before opening it to Unity is the Photon App ID right here. So we can just click on that and copy that and pretty much get ready to use that inside of Unity, as we will need this. And that is about it for the Photon website.

So now let’s hop into Unity and begin pulling the Photon 2 assets. Alright, when you are inside of Unity the first thing you wanna do is go to the asset store window. If you don’t have this open you can go up here to Window, then Asset Store, and this will open up this window here. And the asset we want to download is going to be Photon 2. Then when you search for that, we just want to scroll down and find Photon 2 multiplayer free. So you can click on the import button or update if you’ve already downloaded before. And then we can just wait for that to download.

Now when we get to the import package window, we don’t actually need all of the assets that it comes with, so we are only going to choose the ones that we need. So, first of all, we can untick Photon chat, as we won’t be needing that. We need Photon libraries. And inside of Photon real-time, let’s not include the demos. And then inside of Photon Unity Networking, let’s also not include the demos, as we won’t be needing them. And everything else we need. So we can just click on import. And so pretty much the only things we’re not importing are the demos and Photon chat.

Once it’s done you should have a little window here called PUN Setup that pops up. And this will just ask for your App ID or email. We previously copied the App ID, so we will just paste that in like so and click on the setup project button. It will say we are done and we can click on close. And to the right here, we see it has the Photon service settings selected. We don’t need to go into this too much, but what we do now have is our Photon assets included in the project. So now in future lessons we can start to work on Photon.

And actually in the next lesson, we’re going to be setting up our project, setting up the folder structure, and creating an actual game level. So I will see you all then.

Interested in continuing? Check out the full Intro to Multiplayer Game Development course, which is part of our Multiplayer Game Development Mini-Degree.

Web Class: Construct a Multiplayer Battle Royale

$
0
0

You can access the full course here: Battle Royale – Multiplayer Projects

Transcript 1

Hey everybody and welcome to the course. My name’s Daniel Buckley and I’ll be instructor. Let’s have a look at what we’ll be making.

We are going to be creating a multiplayer, 3D, battle royale game. Here’s an example of two players who are playing the game. The player on the right, you can see, can kill the player on the left, and once he does that, he is the last player alive and wins the game. This can feature as many players as you want. We are just going to be testing it out with around two or three, but as you can see, we have a level here and we also have a force field in the background that closes in.

For this project, we will be using Photon Unity Networking. This is a free networking framework that is very useful and very popular within Unity. It’ll allow us to connect servers, create rooms, have lobby browsers, and send each other messages to create a fully working multiplayer game.

So one of the first things we’ll create is the player controller. This is what you will control. You’ll be able to move, jump, shoot, heal when you pick up a health pack, and add ammo when you pick up an ammo pack. When a player gets hit by a bullet, they take on damage; and when their health reaches zero, they will die and the camera will actually become a spectator camera so you’ll then be able to fly around the map and look at the remaining players while they play the game.

We’ll also have pickups, health and ammo packs, that the player can find around the map, and just like any battle royale game, we have a force field that will encapsulate the players and force them into smaller and smaller areas on the map. This will damage the player every second or so while they’re outside the force field, and it will shrink every so meters every so and so seconds. This is a very customizable force field that we’ll be creating.

One of the things we’ll also create is a lobby and menu system. Players can join a game and wait in a lobby before starting. On the left is our lobby browser. When a player creates a game, the players will be able to find it in the lobby browser. As you can see, it has the room name, as well as how many players are currently in it, and then on the right we have the actual lobby. This will display all the list of players who are in the room, as well as the name of the room, and it’ll allow the host to begin the game whenever they want.

To do this, we’ll be using Unity’s UI system. On the left is what the game UI will look like. We’ll use sliders for the health bar, text for all the stats and even an image for crosshair. On the right we have the same thing. We have, this time, also a scroll bar. We’ll be learning how to use the scroll racks and setting all that up to create a dynamic server browser as well so that you can update constantly when you click the refresh button.

So, ZENVA is an online learning academy with over 400,000 students. We feature a wide range of courses for people who are just starting out or for people who just want to learn something new. Our courses are also very versatile. You can view them wherever you are and whenever you want. There’s also lesson summaries so you can choose to follow along and watch the videos or even read the courses and we’ve included project files. You can create the project however you want. Now with all that said, let’s get started on our project.

Transcript 2

Welcome back, everyone! In this lesson, we’re gonna be setting up our project, and first of all, our project file structure. Then we’re gonna move on and set up each of our scenes.

So, to begin, let’s create our folders. We’ve already got our Photon and Scenes folder right here. So let’s create another folder, and this one is gonna be called Prefabs. Now, this is where we’re gonna be storing all of our different Prefabs that we’re gonna be using. Let’s also make a folder called Materials, to store our materials in, and then another folder for our models.

This project also comes with some included files and some of those are models that we’re gonna be using. So, these models are the AmmoBox, Barrier, Building, Force Field, Health Pack, Platform and Terrain. So, I’m just gonna drag those in right here.

Apart from that, we also then want to create another folder here. This folder is gonna be called our Scripts and this is where we’re gonna be storing all of our different scripts we’re gonna be creating and then another folder for the resources. And in the Resource folder, I’ll get into more detail about this later, but, this is where we need to put Prefabs that we want to instantiate over the network with Photon. I’ll go into this in more detail later on, when we actually start instantiating those, but for now, let’s create our next folder, and this folder is going to be called Textures.

Now, the only texture we’re really gonna be having is going to be our CrossHair, which is another included asset in the project files, so you can just drag that in. And by default, let’s actually just set this up right now, let’s click on this crosshair right here, and we have to change the texture type from default to Sprite, 2D and UI. And just click on apply, like so. And that’s all we have to do. And that’s it for the folders.

Now, let’s go into our scenes folder, and we want to create two new scenes. The first scene we want to create is going to be our menu scene, which is going to be where we can create lobbies, join rooms, and then start the game. And then we want our next scene to be the actual game. And this is where all the action is going to be taking place.

And let’s actually open up the menu scene right now and inside of here, we can go into the game view, have a look. Let’s actually set up the camera as well right now. So let’s click on the main camera, and we want to change its projection from Perspective to Orthographic. The reason for that is because since we’re working with UI and 2D aspects in this scene, we don’t really need depth, because we’re not trying capture distance of 3D objects. So we can set it to Orthographic to make it much easier, and we’ll actually change the background, because we don’t really want this skybox background for a menu. So what we can do is click on Clear Flags up here and change that from SkyBox to Solid Color. And this color can then be changed here, and let’s change this to a sort-of greeny-blue color. Something like this.

All right, and with that done, let’s now save that and go into a game scene where we are gonna create our level. So, first thing, let’s go our models folder, and we want to drag in the terrain model right here into the scene. Now, it doesn’t have texture on it just yet, but before we do that, let’s actually set-up the hierarchy here a bit.

Let’s right-click and go Create Empty and we’re gonna call this one, let’s zero this out, we’re gonna call this one _Map. Now, this is just gonna be an empty game object that’s gonna be holding all of our, all of the objects that are related to the map. All of the structures and stuff like that. Just so it’s a lot neater here in the hierarchy and we can look through it and understand what object is for what thing.

So, let’s drag our terrain into the map object right here and let’s actually make a texture for this terrain. So, let’s go to our materials folder that we just created we’ll right-click here, go Create, Material and let’s call this Terrain. To apply a material, we can simply drag this on like so and let’s change this material over here, let’s set the smoothness all the way down and let’s change the albedo color to a green. So, we’ll go green here. Yeah, something like that.

You may notice though that the shadows look quite dark and not really that good. This is just how it is by default, but what we can do to easily fix this is go over to the Lighting Panel. If you don’t have the Lighting Panel, you can go up to Window here, go Rendering, and then Lighting Settings. And once we’re on here, all we need to do is just click on the Generate Lighting button down here at the bottom right. Just click that, it should take barely any time and there we go, it’s done. We have our shadows and everything and it looks so good now. Since we’re using real-time lighting, we don’t really have to do that again, unless you want optimize it. But, for us, we’re fine just like this.

So, with our terrain, we can now, and it might look a bit too bright, that green. So, let’s change this to something a bit more green like that, I reckon. That green looks good. So we’ll keep it like that. Now, the thing with our terrain right now is that it looks pretty good, it looks pretty much the size, but the problem is, we want to be using Unity units. We want to be scaling everything within the units inside of Unity. And that just makes it a lot easier for the physics to work as we want and just makes things, everything to scale.

So, what we can do now is just right-click here, just do for reference, go to 3D object, Cube and this cube here, if we zero this out, is one by one meter. Now, if we compare that to the rest of the terrain, it makes the terrain look quite small in comparison to that one meter cube. So, let’s get our terrain here, and let’s scale it up a bit. Let’s set the scale here to maybe 10 by 10 by 10. With that done, we can actually delete that cube, and let’s start on actually adding in our buildings and all about that.

So, let’s go to our models folder again, and we actually drag in the building asset right here. Just like that. Let’s create a texture for it, by going back to our materials folder. We’ll create a new material and we’ll call this one Building. Let’s apply it to the building here, and we’ll set the smoothness back down to zero again. And for the albedo, let’s set this to maybe a sort of dark brown sort of color like that. Yeah, something like that, there we go.

At the moment though, if we click on a building, we’ll see that we can actually, we actually don’t have a collider on it. So, people can walk through the walls, they can shoot through the walls, but we don’t want that. So, we’re gonna be adding a component here, and the component we want to add is going to be a mesh collider. And what this does is this makes it so that basically the mesh is a collider. It’s not necessarily a box collider or sphere collider; it just has it so you can’t walk into the actual object itself. So, the collider covers the entire object. There we go.

For this building, let’s actually go to our Assets window, into our Prefabs and let’s actually save this as a Prefab, so we can easily use it later on. We’ll just keep it, call it Building, and let’s drag it into here. We’ll go original Prefab and there we go, with our building asset. Our building Prefab saved, so let’s actually drag this into our map object, as that’s where it belongs.

Let’s add in our next environment model, which is gonna be the barrier. And this is just gonna be a sort-of shield of protection that the players can hide behind. Let’s again add a mesh collider to cover that. And let’s actually change this default white material to something else. So, we’ll create a new material in our materials folder and we’ll call this one Barrier. We’ll apply that, set the smoothness down to zero, and for the albedo, let’s make this say, sort of dark, dark gray like that. Yeah, something like that. Okay, that barrier is done, so let’s drag that into our Prefabs folder as well. We’ll make a Prefab of that, original Prefab.

And, the last thing we need to make is going to be our platform. This is just gonna be another structure that the players can climb up on top, look out from the top of, and shoot other players from. So, let’s actually re-use some of our materials, because what we can do is, for this platform here, we can set this as the building material there, and for the centerpiece, we can just do that as the barrier. So, there we go, we can reuse material like that, we can create new materials, if you want, for this, but I reckon we’ll just keep it with this sort of theme like that. It just looks pretty nice.

So, yeah, with these three things here, let’s actually first of all, go to Prefabs and save this platform as a Prefab, like so. And actually, we need to add in our colliders for this as well, so inside of here, we can select the cube and the other cube here, for both the different models, go Add Component, Mesh Collider. Click on the platform here, we can drag that back into the Prefabs folder, save it as a Prefab and there we go.

Now, what I’m gonna do is, I’m just gonna go around, I’m going to design the map. You can choose where you want to place them how many different objects you want, but just customize your map. Put things where you want and yeah, so I’ll be back once my map is finished.

So, there we go. I’ve got my map complete. I just put the houses, I’ve put the buildings around the different areas here up on this little hill here in different little areas and mixed around that with the towers, as well as the barriers. Something we also have to do, that I just remembered, is actually add a collider to our terrain, because otherwise, we’ll just fall right through the floor. So selecting the terrain, let’s just add a component, and add a mesh component, just, add a mesh collider, just like all the other ones. And that’s all we needed to do.

In the next lesson, we’re gonna be starting on our network manager, which is gonna be actually connecting us to the Photon Servers and allowing us to create rooms, join rooms, and all the rest. So, I’ll see you all then.

Transcript 3

All right, welcome back everyone. In this lesson, we’re gonna be starting to create our camera controller script.

At the moment, I’m in the game scene right now, and let’s actually create a new script here in our scripts folder. And we’re gonna be calling this one CameraController. Now with our camera controller script, let’s actually attach this to our camera by just dragging that on like so and opening it up in Visual Studio.

Now there are gonna be two different modes for this camera. There’s gonna be the first one where it’s actually attached to the player, and they’ll be able to look around, they’ll be able to look horizontally and look vertically. And then when the player dies the player will go into spectator mode, which will allow them to fly around the map using WASD or the arrow keys, and they will still be able to look around. So it’ll allow them to view the battle even after death.

So let’s remove the Start and Update functions here, as we won’t be needing them, and begin with our variables. Now we’ll be needing a few variables to keep track of the different sensitivities and positions and rotations. So I’m gonna separate these by headers, which is an attribute like so. And this just has a bold text in the inspector, so we can easily differentiate these.

And the first one we’re gonna do is going to be Look Sensitivity. And for this we’re gonna have a public float senseX for our X-axis sensitivity. And another one for a float for our senseY for our Y-axis sensitivity when we move the mouse. Then we also want to clamp our rotation, so got clamping and this is going to be our public float, minY, so what’s the lowest Y rotation we can look at. And then for the max, which is going to be maxY and what is the most vertical we can look – so how high up can we look before it clamps.

And then after that we then want to know for spectator, so we’ll go Header Spectator but then want to know how fast the spectator can move. So spectator or just go spectatormovespeed here. And after that we’re gonna go into our private variables. And first of all we then want to know our private float rotX, so what’s our current X rotation and the same for the Y, so what’s our current Y rotation. And that’s it for all the variables.

Now what we want to do first of all is – in many games you may notice that once you hop in it you can no longer see the mouse and the mouse actually doesn’t go off the screen. And that is because the mouse cursor is locked, and to do that inside of UNC we will do this in the Start function here. We will lock the cursor, so we can actually access the curse by going cursor and then lockstate and this is equal to CursorLockMode.Locked. So the cursor will be stuck in the middle of the screen, and it will be invisible. So it’ll feel just like all those other FPS’es.

Now let’s get on to working on in the main part of this script which is gonna be actually rotating and moving the camera. And to do this we’re gonna not do it in the update function, but we’re gonna be doing it in the Late Update function. Now what the Late Update function is, is this is basically just like the Update function, but this runs at the end of the frame. So this runs after everything in the other update functions has already run.

And the reason for doing this, is because when the camera is attached to the player and we’re doing the rotations and all that, there can be some interference with how the player rotates compared to how the camera then rotates. So it can have some sort of jittering if we have this in the Update function. But having it in a Late Update function solves those issues.

So first thing we’re gonna do is we wanna get the mouse movement inputs. And to do that we can go rotX, so we’re gonna add to our X rotation, that is going to be done by plus equals input.GetAxis. And the axis we want to get is going to be Mouse X like so. And then, of course, we want to multiply that by our X sensitivity. And again for the Y we can go rotY plus equals input.GetAxis mouse Y and multiply that by our senseY just like that.

Okay, now what you want to do is you want to clamp the vertical rotation so that we can’t look all the way up, and then wrap back around as that can cause some issues with the rotation and cause the controls to actually flip. So we’re gonna be clamping the rotation so that it doesn’t do that, and we can only look so far vertically and so far down. So to do that we can go to rotY as Y is gonna be the up-and-down rotation and that is gonna be equal to the mathf.clamp. And we wanna send in the value where we want to clamp – that is rotY. The min, which is going to be minY, and Max, which is going to be the maxY, like so. Great,

With that done we can then check are we spectating or are we not spectating – or so are we alive or are we dead. So are we spectating? And for that we can just go if isSpectating, if isSpectator then we’ll do whatever’s in here. Otherwise, if we attach the player will do this, and the reason for this is because as well as having the movement when we’re a spectator, when we attach the player to our X rotate, we don’t actually rotate the camera horizontally. So we won’t be looking left and right, instead we’ll be rotating the player left and right. And the reason for that is so that we can easily have the player point in the forward direction that we’re looking (so we don’t have to do some other calculations later on in the player controller).

So let’s work here in the isSpectator first, as that’s what we’ll be setting up this lesson. So first of all we want to rotate the camera vertically, and to do that we’ll just go transform.rotation equals Quaternion.Euler. And we just wanna pass in our negative rotY and our rotX. We’re doing negative rotY because it is flips, if you do wish to have inverted Y controls, then you can just have that as rotY. Okay, and then for the Z rotation, we just want zero as we don’t want the camera tilting left and right.

And now for the movement, we can go here, and we can just go for our X input. We can go input.GetAxis horizontal, so this is going to be our horizontal input, and then we can go for our forward input. So when we’re in forward and backwards they can go equal to input.GetAxis vertical, so the up and down keys compared to the horizontal which is the left and right keys. And for the Y this can be equal to zero for now as we’re gonna be changing it down here.

Now for the Y we’re also gonna make it so that the player can move up and down and that’s gonna be done with the E and Q keys. So if input.GetKey, KeyCode.E then Y is gonna be equal to one else if input.GetKey, KeyCode.Q then we’re gonna be setting y to equal to negative one so they’ll move down. N

ow to apply that, we need to do a calculation right now to make it so that when we move, we’re moving in the direction that we’re looking. Because if we just applied these X, Z and Y directions to our transform at the moment, that would move us based on the global positions and rotations. So if we’re looking to the left we might instead move forward if we try and move left for example. So what we’re trying to do is we wanna make it so that no matter where we’re looking we will move forward, left, right and backwards relative to our rotation.

And for that we’ll create a Vector3, call that dir for direction and that will be equal to transform.right, so our right transform direction. So the direction that is to our right, multiply that by X plus transform.up, multiply by Y plus transform.forward, multiply it by Z. And with that, we can then apply that to our local position we’re going. Transform.position plus equals dir at the direction we want to travel times SpectatorMoveSpeed times Time.deltaTime (so it is independent of framerate), and we move at the exact same time no matter what framerate we have.

And that’s that, let’s actually hop now back into the editor here and test it out. Let’s actually go back in here and just set isSpectator to true for now manually, so that we can test it out. And for our X sensitivity, I will zoom in here. For our X sensitivity, we can set this to – and I’ll say 10 for now, Y is 10, min Y will set this to negative 90, Max Y 90. Spectator Move Speed will go 10. Okay and let’s press play and see if this works. See if we can look around. As you can see I can look around with the mouse, and with the arrow keys I can move like so. I can press E to go up, Q to go down.

In the next lesson, we’re gonna be starting on our player controller. Connecting up the rest of the camera to the player and finishing off the camera script when it’s actually attached to the player so that we rotate not only the camera, but the player as well to face the direction. Also when you’re in this mode you can’t really press the play button. So what you can do is you can either go press Escape to get the mouse like so and click it or you can just go control + P to toggle the plane like so. So yeah I’ll see you all in the next lesson.

Interested in continuing? Check out the full Battle Royale – Multiplayer Projects course, which is part of our Multiplayer Game Development Mini-Degree.

Rig a 2D Animated Character in Unity

$
0
0

Introduction

2D animation has been around for over 100 years. Since its inception, this entertainment type has gone through quite a few different evolutions, each time becoming more and more complex. Now, in the latter part of the 20th-century to the present time, 2D animation is a huge part of video games – with thousands of games using characters and environments solely constrained to two dimensions. I personally like the look of a 2D game more than its 3D counterpart.

In this tutorial, you will learn how to take a 2D character, rig it, and use it in your own 2D game. You will learn Unity’s sprite rigging system, along with how to use the Unity Animator for 2D characters. No previous knowledge of the Unity Animator will be necessary, however, I suggest you check out our Unity Animator Tutorial – Comprehensive Guide tutorial, which goes more in-depth with the Unity Animator. Some experience of Unity itself (how to navigate, how to toggle the 2D and 3D view, how to import assets, etc.) is going to be necessary, however.

Assets

You can get the assets for this project here: 2D Adventurer. This is a character from kenney.nl. I separated the limbs and head in photoshop as separate layers, then I exported it as a .PSB file. You can do the same thing to characters you want to use.

Importing the packages

Create a new Unity 2D project and then go to Window -> Package Manager.

Unity Window menu with Package Manager selected

Here we need to import the “2D Animation,” “2D IK,” and “2D PSD Importer” packages.

2D Animation package for Unity

If you cannot see these packages, then you need to click “Advanced” and then “Show Preview Packages.”

Packages with Show previous packages highlighted

The 2D Animation package is where we will get the sprite rigging tools, 2D IK will help us in animation, and 2D PSD Importer will recognize our .PSB file and each individual character layer. Once these are done downloading, we are now ready to import our character!

Importing the Character

Open up the assets folder and drag the “Adventurer” folder into the project tab.

Adventurer character being dragged to Unity

Once it is done importing, you will notice the .PSB file has been imported with the PSD Importer Package.

Unity PSD Importer Editor information

Now, we need to configure a few things in the import settings.

Unity Inspector with Sprite Mode set to Multiple

Change the Sprite Mode to “Multiple”; this will tell the Unity Editor that there is more than one sprite in this file and that we would like to use them. It will also recognize each limb layer in the .PSB file. The final thing we need to do here is to check “Character Rig.” This simply tells the Unity Editor that we are going to be rigging this sprite. Now, let’s hit apply and click “Sprite Editor.” This will open up the Sprite Editor and, as you can see, it has taken each layer in the .PSB file and sliced it into its own box.

Adventurer character spite in Unity Sprite Editor

Here we can tweak the sliced sprites if we see anything that isn’t quite right. It all looks good, however, so we can move onto rigging our sprite!

Rigging the Character

Go from the Sprite Editor to the Skinning Editor.

Unity Sprite Editor options with Skinning Editor selected

Adventurer character put together in Unity

Here, we will create the armature that we will use to pose our character. On the left side of the editor, you will see a list of buttons. “Preview Pose” simply is for when we want to test our rig by posing the character. “Edit Joints” allows us to change the position of the bones without affecting the mesh. This is useful if we find that, for instance, an arm bone isn’t quite in line with the arm sprite. “Create Bone” is self-explanatory, let’s go ahead and use this right now.

Adventurer character in Unity with center bone

You will see that you can click once to place a bone point, and then again to place the final bone point. Let’s go ahead and add one bone near the lower portion of the torso,

Adventurer character in Unity with bone added

then another halfway up right before the head,

Adventurer character in Unity with chest bone

and finally, one that will serve as the head bone.

Adventurer character in Unity with head bone

Now, we need to create the arm bones. We could have made all the bones connected, however, because of the way the layers are separated, it’s best to give each layer it’s own independent armature. Right-click, and you will see that we are free from the created bone chain. Before we create the bone armature, however, we need to parent our new bones to the torso bones. Hover over the origin of the second torso bone, and left-click.

Bone options for adventurer sprite in Unity

This will create a semi-transparent line from the torso bone to our bone point. Now, create two bones for one arm then repeat the process for the other.

Arm bones for Adventurer character in Unity

Next, we need to create the leg bones. These need to be parented to the origin of the lower torso bone and this will have a bone for the toe.

Leg and feet bones for character in Unity

Repeat the process done on the arm bones.

Now that the armature is complete, let’s have a further look at the tools in the toolbar.

Bone options for Unity sprite editing

“Split Bone” will split (or subdivide) a single bone into two bones. “Reparent Bone” allows you to see exactly how bones are parented to each other reparent if necessary. “Auto Geometry” will automatically create the geometry that will be used by the armature. If you select this,

Full bone rig for character in Unity

you will see that it brings up a window in the lower right corner. “Outline Detail” determines how accurately the mesh will stick to the edge of the sprite. I found that a value of about 100 works best for this project. “Alpha Tolerance” means that a pixel will be counted transparent if it’s alpha value is less than this slider. We don’t have any alpha on our character so leave this set to default. “Subdivide” is how many vertices will be generated within the mesh. I found that we need a fairly high value of 92 in order to get the best results. And finally, “Weights” will automatically assign parts of the mesh to a bone if we have created one already. Go ahead and leave this checked and hit “Generate For All Visible.”

Geometry window in Unity Sprite Editor

You will see that Unity generates a mesh with lots of colors.

Weight gradients for rigging in sprite editor in Unity

The colors on the mesh signify which bones are going to affect that portion of the mesh. If you select a bone and try moving it, you’ll see a couple of things that should be fixed. An obvious one is in the arm and leg bones. If you test the arm and leg bones,

Distorted animation weighting test in Unity

the left arm (relative to the character) is moving a portion of the torso. This doesn’t look right so let’s fix this. Under the “Weights” toolset,

Weight options in Unity with Weight Brush selected

the “Auto Weights” does essentially what “Auto Geometry” did for us, “Weight Slider” allows you to use a slider to define which part of mesh a bone will influence, and “Weight Brush” uses a brush tool to edit how the bone affects the mesh. We are going to use Weight Brush to correct the arm and leg problem. Select this tool and double click on the torso.

Sprite character in Unity with arm stretched

As you can see, the color of the left corner of the torso is the same color as the shoulder bone on the left arm. This means that the arm bone is influencing part of the mesh. To get rid of this, click on the top torso bone and paint out the arm portion on the torso.

Weight painting example for adventurer character in Unity

If you increase the hardness, the brush will paint one color faster and stronger. You can select the arm bone and rotate it to see if we are close to removing its influence.

Weight painted torso for 2D character in Unity

Select the lower torso bone and paint out the leg bone’s influence on the torso.

2D character in Unity with bottom half weight painted

Now that we have corrected our bone influence problem, there is one thing we need to do to the torso in order for this to look right. You’ll notice that portions of the torso bend properly while others look too rigid and strange.

2D character bending via center bones in Unity

A really easy way to fix this is to rotate the top bone, bring the hardness down to 1, set the size to 5,

Weight brush settings window in Unity

and then paint on the problematic side. It may take a couple of tweaks to get the right influence painted, but this is how we correct any strange looking armature problems.

2D character in Unity bending backwards

Alright! Now, let’s go into Preview pose and give our character a final look over.

Bone and weight testing for 2D character in Unity

Move every single bone to see if there is anything that looks strange. I noticed that the head was influencing portions of the torso,

Distorted neck for 2D character in Unity

this looked wrong so I corrected it by using the Weight Brush to assign that portion to the top torso bone.

2D character in Unity with Reparent Tool applied

I also had to use the Reparent Bone tool to fix my arms that were parented to the head bone.

Reparent Bones window in Unity

before

Fixed bone parents and children for Unity rigging

after

Okay, everything looks good so hit apply.

Sprite Editor with Apply button highlighted

Setting up IKs

Arm IKs

Drag the Adventurer character into the scene.

2D Adventurer character dragged into Unity Hierarchy

You’ll see that the bones show up and we can rotate and manipulate them. We are now animation ready but we are not animation optimized. Our rig needs “Inverse Kinematics.” Inverse Kinematics is when the computer predicts the position and rotation of a series of bones based on the position and rotation of a single “target” bone. This is useful for creating a realistic arm and leg rig. Click on the Adventurer character and add an “IK Manager 2D” component.

IK Manager 2D Component in Unity

Hit plus icon and you’ll see that it gives us three options;

IK Manager 2D with IK Solvers options

“Limb” is for any bone that has two bones in its chain. The other two, “Chain (CCD)” and “Chain (Fabrik),” are for any bone chain with more than just two. For the arm, we will be using simply “Limb” so go ahead and create it. When you do that, you’ll see that it created a new object within the Adventurer game object. This will be our right arm IK so rename it “RightArmIK.” Limb Solver 2D Component in Unity

Now, as you can see, we need an effector and a target in the Limb Solver 2D. Click on the right arm forearm bone and create a new empty game object called “RightArmEffector.”

Unity Hierarchy with Create Empty selected

2D character in Unity with arm close-up

Drag this to about the position of the hand and then drag this into the “Effector” in the Limb Solver 2D on the RightArmIK.

2D character object part being dragged to Unity Inspector component

Now, hit “Create Target.” You’ll notice that when you drag the RightArmIK around (that’s the little circle at the end of the arm bones), the elbow is in the wrong position.

Unity 2D character being animated

We can fix this by simply hitting “flip” in the Limb Solver 2D.

Unity Limb Solver 2D Component with Flip option checked

As you can see, this fixed our problem! The other settings here do not really affect our project.Unity Limb Solver 2D component options You can tweak the “Weight” slider which will change how much the IK will influence the other bones. “Solve from Default Pose” will calculate IKs from the default pose of the character and not what the current pose is. Leaving this checked or uncheck doesn’t seem to affect anything in our project. “Constrain Rotation” is speaking of the rotation on the IK. Leave this checked even though we aren’t using the rotation of the IK for anything. Now, we can do the exact same process for the Left Arm. Create a Limb IK, name it LeftArmIK,

Unity Inspector for Left arm IK bone

create an effector at the left-hand position,

2D character with left arm IK bone tested

drag it in on the LeftArmIK, hit “Create Target,”
Unity with LeftARM IK bone dragged to Inspector

and enable “flip” if it is necessary.Unity Limb Solver 2D Comonent with Flip option selected

Leg IKs

The final thing we need to do for our character rig is to create the Leg IKs. In this case, we are going to have one IK control the entire leg rig. Because this is more than two bones, we cannot us the Limb solver method. Instead, go to your IK Manager 2D script and create a Chain (CCD) solver.
IK Manager 2D Unity Component with IK Solvers applied

Rename this to “RightLegIK” and then select the toe bone on the right leg. Create an empty game object called “RightLegEffector” and place it at the end of the toe bone.

Right Leg IK Bone object in Unity Hierarchy

Drag this into the Effector field in CCD Solver 2D on the RightLegIK.

CCD Solver 2D Component in Unity

Now, we need to specify a chain length, basically, how many bones are going to be involved in the IK calculation. As you can see, if you drag the “Chain Length” slider up,

Unity CCD Solver 2D Component with Chain Length adjusted

the active bones turn yellow. Therefore, a chain length of 4 is what we need. Let’s have a look at the other settings before we press “Create Target.” “Iterations” is the number of times per frame the IK algorithm will be run. Because our rig isn’t that complicated, a value of 10 is fine. “Tolerance” is basically how precise the IK calculation will be. A lower value will be more precise. And finally, “Velocity” is basically how fast the bones will move to the effector. We don’t need to change this value much because it is just a four bone chain. Now that we’ve had a look at the settings, hit “Create Target” and we’ll see what we’ve got.

2D Unity character with leg close up

As you can see, we are now able to control the entire leg from this one IK. This is important, as you will see later when it comes to animating a run or walk cycle. We now have toe and knee control all in one effector! Now, just duplicate this process for the left leg.

2D Unity character with animated feet

Conclusion

Congratulations! You now know how to rig a 2D sprite, plus how to optimize that rig for animating by setting up IKs. This is a very important thing to know when it comes to 2D games. As I mentioned before, if you would like to do this to your own character, simply separate the limbs in Photoshop as different layers, and then export it as a PSB file. And now that we have a rigged character, we can animate it and script its controllers. All of this we will cover in a separate tutorial.

Keep making great games!

Web Class: Develop a Multiplayer RPG

$
0
0

You can access the full course here: RPG – Multiplayer Projects

Transcript 1

Hello, everyone. My name is Daniel Buckley, and I’ll be your instructor for this course. Let’s have a look at what we’ll be making.

We are gonna be making a multiplayer RPG game inside of Unity. As you can see, we have a lobby system, and then when the two players spawn inside the game, you can see that they both sync their positions up. We also have a chat box that the two players are typing in right now. And outside here, there are enemies that do spawn by spawners. You can defeat them, and there is gold to pick up after defeating them. So, let’s see all the different types of things that we are gonna learn in order to create this game.

First of all, we are gonna be using the Photon Unity Networking Multiplayer framework. This is a free multiplayer framework available from Unity. And since the deprecation of Unit, this is pretty much the most popular and main networking solution that most people use inside of Unity.

We’re gonna be creating a player controller. The player will be able to move, attack, pick up gold, heal, and, when they die, will wait a few seconds and then they’ll respawn at a random spawn point. As you can see, the player can also attack enemies with a little attack animation, and they have health bars above their head with their names, as well, which that’ll all be done, as well. We’ll go through how to do that – how to set up the UI for that.

There are also pickups. These pickups will be both dropped when enemies die, and they will also be positioned around the world, if you want. These can be really whatever you want. We’re gonna be designing them around health pickups and gold pickups.

And another feature we’re gonna be creating is a chat box. This will allow players to chat to each other in the game. When they type in a message, it will be synced across the entire network. So all players will see that message pop up instantly, along with the player name and their message.

For the menu, we’re gonna be creating a lobby system. This will allow the players to enter in a PlayerName, then either create or find a room. If you create a room, you’ll be sent to the lobby where you can wait for more players to join. And if you go to Find a Room, you’ll be taken to the lobby browser, where there will be a large list of all the different rooms that you can join, showing the room name, as well as how many players are currently in there. And then when all the players are in the lobby, you can see who is in there and then you can start the game. We’ll be doing all this with Unity’s UI system. Unity has a very good built-in UI system that we’ll be using. We’ll be talking about canvases, text, buttons, input fields, sliders, all the different sorts of UI elements. We’ll be using a wide range of different ones.

So yeah, Zenva is an online learning academy with over 400,000 students. We feature a wide range of courses for people who are just starting out, or for someone who just wants to learn something new. The courses are also very versatile, with video course that you can follow along with the included project files. There are also lesson summaries that you can choose to read through, if you wish. So, with all that said, let’s get started on our project.

Transcript 2

Hey everyone and welcome back. In this lesson we’re gonna be setting up our project. We’ll be setting the folder structure and importing some assets that we need.

First of all, let’s go down to our folders here. At the moment we’ve got out Photon folder and the default scenes folder that you get when you create a new Unity project. Let’s start with our scenes folder. Let’s go inside there, and we’ll just delete this sample scene here. Let’s create two new scenes, we want to create a new scene called Menu for the menu. And then another scene called game, where the actual gameplay will take place.

While we’re here actually, let’s add these to our Build Settings. Let’s go up to File, Build Settings, and let’s add these scenes in the build. Layout our idea, just so that we don’t have to do that later on and if we forget to. Put the game in and then we will put the menu above since we do want to launch into the menu scene.

Once we’ve got that done, let’s now go back to our assets folder and create the rest of our folders. Let’s create a new folder here and we’ll just call this one animations. As we do need to have an animation for the actual attack when the player attacks. If you do want to make anymore custom animations, you can just put them in here.

Okay, the next folder we want is Prefabs. This is going to be stuff like all of the non-network required Prefabs. I’ll explain that a bit later. Along with the Prefabs folder we need the Resources folder, and this is where we’re gonna be putting in all of the Prefabs that we need that are going to be spawned over the network. Again, I will explain this later once we actually get into creating these prefabs. Okay, we got that. Now we need a Scripts folder to store all of our scripts.

And finally we need a folder called Sprites. Sprites and let’s actually open the sprites folder because we need to import a few different sprite sheets while we’re here. We’ll open this up. There is going to be three included sprites, three included different files. In the project files that you can download – or you can choose to use your own. Actually, there is four, but we’re only going to import three; and we’re going to be using the other one later on, once we actually do our tilemap.

The first one we’re adding in is just a white square. The reason we need a white square here is for when we have the health bars. We’re not going to be using a slider, instead we’re just going to be using a image with a specific fill amount. In order to do that you need to have an actual sprite, you can’t just set it to none. We’ve got this here, let’s go up to our texture type. Change that from default to 2D and UI. Then click on apply. Just like that.

A second we need is the characters sprite sheet. These two sprite sheets we are going to be implementing in next are all free assets. They’re public domain sprites that you can use. With this we just want to go up here and change the texture type again to 2D and UI here, click on apply. And actually we also want to change it from the sprite mode from single to multiple. Then what we can click apply again.

Then open up the sprite editor here, and inside of the sprite editor we can actually individually cut these out. Now we can do that by hand but it will take some time. So what we can do is click on slice up here. Make sure it is on automatic. And then click on slice, just like that. As you can see they’re all automatically sliced up, now like so. We can click on apply. Wait for that to go, it might take a while since there is quite a lot of different sprites here. So it might take some time, there we go. Then we can click on the X.

What we want to do now is actually change the pixels per unit, because at the moment it’s 100. If we were to drag this into our project, for example, once we set it up with all the character and all that. We’ll see that this is a very small sprite, and the reason for that is because we need to set the pixels per unit to however many pixels we want in one Unity unit. These characters here are about 16 by 16. And since we want the character to fill up the whole tile. We’ll set the pixels per unit to 16, then click on apply.

Okay, with that done, we can drag in our next sprite sheet which is items. In here we can go click on that. We can change it from default to 2D and UI. We can click on apply. We can the change single to multiple, apply that again. Then click on sprite editor and do the exact same thing. We can go slice, set that to automatic, click on slice. Wait for it, yep there we go, got all our sprites here.

We’re not going to be using all these, really we’re just going to be using the heart and a couple of these gems to have as treasure. Again you can choose what sort of sprite that you want. We’re just going to be using those though so we can click on apply. Takes some time since there are quite a lot of sprites in this sheet. There we go, we can click on the X now. And we have all of our sprites in the game – actually no, first thing we need to do is click on the items here and change the pixels per unit from 10 to 21, as that is how many pixels there are per tile on this sprite sheet. So can click apply. Wait for that to do it’s thing and there we are, we are finished.

Now what we need to do is, we’ll just set up the cameras and that for the different scenes. If we go to our scenes folder, we will open up the game scene first of all. Don’t save the sample scene. Inside of here, we want to change our main camera from perspective to orthographic since we are working with 2D. Orthographic is what you would use as it doesn’t capture depth, where as perspective objects that are further away are smaller and closer up they are larger. Where as orthographic – it doesn’t matter the distance between objects, they are all the same size.

Here we can change the size of the camera here, but we will just keep that at five for now. We can also change the background since we don’t really want a skybox since it is going to be a side-on view. And it might look a bit weird. So we can click on here and go solid color instead, and I reckon we can just keep it like this for now. We can change this color to something else later on, but we will just have this for now.

Now we can go to our menu scene, we’ll save the game scene. And do the exact same thing: change the camera from perspective to orthographic, and we’ll change skybox to solid color – and for this we can actually set a color that we want for the menu. So whatever you sorta want for your menu scene, we can maybe have a green like that. There we go.

Now something else we want to do is also add in our tags and sorting layers that we’ll be using. To do that, we can go up here to the layers button here and just click on edit layers. In here will pop up with a list of what we can select, so let’s open up our tags and let’s add in a new tag. Click on the plus here. The tag we want to enter in is enemy. Now we already have a player tag, Unity already has the player tag pre-built into the editor. So we just need to add the enemy tag there and that’s, of course, is gonna be on our enemies tagged as them.

Then we can go on to our sorting layers here. What we want to do is we wanna create a bunch of short sorting layers. What these are, these basically decide which sprites get rendered on top of other sprites. Of course, we want the background to spawn right at the back, we want the UI to be spawned right at the front. We want the players to be spawned on top of the terrain but behind the UI. We will create a few of those.

First one, let’s create is going to be BG for background element. Then we will create another one here, this is going to be pickup for all of our pickups. Then we will create another and this is going to be called Enemy. The next is going to be our Player and then finally we have our UI. This is the order of how the sprites are going to be rendered.

Save that and that is our project set up pretty much done. In the next lesson, we will start to actually set up our tilemap using Tiled and then import it into Unity using Tile TNT! See ya!

Transcript 3

Welcome back everyone. In this lesson, we are going to be creating an actual map using Tiled. And Tiled is a free software which is pretty popular among many of the 2D map makers, and what it allows us to do is set up a tileset and pretty much just paint in the tilemap. And along with Tiled, Tiled Map Editor, we’re also going to be using Tiled2Unity – actually SuperTiled2Unity – which is able to then take this tilemap and convert it into something that can be used inside of Unity. So yeah.

We just wanna go on itch.io and download these both. So, we can then click on download for the Tiled Map Editor. No thanks, just take me to downloads. And you just wanna then download the version for your specific version of Windows pretty much. So once that finishes downloading, you will have a setup window pop up. We’ll just go through these things here and just set it up and yeah. So when it’s done, we’ll be back and we’ll be ready to create our tilemap.

Okay, so when that’s finished you should see that Tiled has now opened, and what we can do is we can choose to create a new map, a new tileset, or open a file. So for this one, we are just going to create a new map. We’ll keep all these settings the same, for now, since we’re just focusing on a tutorial right now, I’m just gonna accept the map width to about 30 by 30. You can, of course, set this to much more if you want, but we’ll just set it 30 by 30 for now. And the tileset we are going to use is going to be 32 by 32 pixels per tile. So that’s all good. We can click save as and we’ll just save this inside of a folder on our desktop for now.

And here we are in our map. Now, to move around in Tiled you can use the middle mouse button to drag. You can use scroll wheel to go up and down, and then Control and scroll wheel to zoom in and out. Oh, and scroll wheel to scroll horizontally.

So, with our map here, we want to start adding in some tiles. So what we’re gonna do is we’re gonna click on the bottom right here where it says new tileset, and we’re just gonna enter in a name for our tileset. We’ll just call this Tiles for now. So we can click on browse and find that asset. Here we are, I got it loaded up. Everything’s all good here. We can click save as now and here we go. We got our tilemap here. Everything’s set up. There are quite a few tiles in here for us to use.

So back in our actual tilemap here – not our tilemap but our actual map where we can start to create our tiles. What we want to do is, we want to divide this up into two separate layers. The first layer is going to be the background tiles, the tiles, of course, that we’re gonna be able to walk along. And the second tiles is going to be the collision tiles, and these are gonna be tiles that the player’s gonna be able to collide in. So this can be walls, mountains, tree, water, all the sort of things that you don’t want the player to be able to walk over.

So up here in our layers window, we’re gonna rename by double-clicking on the tile layer one. We’re just gonna call this background and then down here, we’ll click on this icon, open it up and click tile layer to create a new tile layer, and we’ll just call this one collision. Now, there’s also a rendering – rendering sorting as well so the collision tiles will render on top of the background tiles since that is now on top.

So yeah, we can now go in here, choose our tiles. Select the tile that you want. You can click to draw. You can also then go up here to the eraser to rub it out. Click on the stamp to go again. Select tile and then draw again. So yeah, it’s pretty intuitive up here. There are various other things as well. You click on here to draw a large box. So yeah, just use these tools. Create whatever sort of map you want. Make sure that if you do want the player to be able to collide with something that you do select the collision layer and then draw on that. But if you want something for the players to walk on top of, then draw that, of course, on the background layer.

So here we go. I’ve created my tilemap, and now what we can do is go back into Unity and, basically, import this. Now what we can do is download SuperTiled2Unity. The link for this will be in the lesson summary down below and what this is, is basically a tool for Unity that allows us to drag in a Tiled tilemap and then easily convert it to something that we can use inside of Unity.

So, with this here, we can just click on download again and what we want to do is just download the latest Unity package here. There’s one from two days ago, so we’ll download that and with this download, what we want to do now is actually drag this into our Unity project. So just drag that in like so. Wait for this to download. It’s just gonna be like when we imported Photon. We have all of this stuff here. We’ll keep all that. So, actually, we’ll just remove the examples folder here, since we don’t need that, and then we’ll just click on the import button.

So back here in Unity, what we want to do is create a new folder, and we’ll just call this one Tilemap and inside of that we want to drag in the three files that we’ll be using and that is going to be our background, our png file which has all the different tiles on it, the tileset as well, the .tmx, and the Tiled Map file which is our actual tilemap. So we just drag those three files in, wait for them to import, and once again, you should see that they each have their own little icons. The tileset has its icon and the tmx has its own icon.

So, first thing you want to do is click on our tiled.tmx, and we want to change the pixels per unit from 100 to 32, as that is how large each of our tiles are. We can just click apply then and after that we also want to do one more thing on here. We want to click tiles as object and then click apply. And what this will do is actually make it so that each tile is its own object that we can apply a collider to. So after that, you should see that the icon has changed. The tileset here, we also want to change the pixels per unit from 100 to 32. Click on apply. And after that it’s just converting all the tiles to the new pixels per unit and now what we can do is actually drag in our map.

So we can just drag it into the scene like so, and if we click on the scene view, you can see if you’re in 2D mode. Just click on this button to toggle 2D mode. You can see that we have our map. It’s all here. We have all our tiles. We can click on the individual tiles, move them around if we wish. Now, the anchor point for this map is in the top left corner. So what we do want to do is make sure that we have it in the center. Now my map is 30 by 30, so that means that 15 to 15 is gonna be the middle. So we’ll set X here to negative 15 and Y to 15 so that it is nice in the middle here and zero, zero is directly into the center of the map.

Okay, now inside of here we want to add our colliders. So if you remember, we have the background and collision layers, and so what we do want to do is only add colliders onto the collision layer. So, we can open up collision here, select all the tiles inside of collision, and then what we’re going to do is, in the inspector, add a box collider 2D component to that. So as you can see now, all of our collider tiles has its own box collider on it. So we won’t be able to walk on the water. We won’t be able to walk through trees or walls and it should be blocking us just fine.

So yeah, I’ll see you all then in the next lesson.

Interested in continuing? Check out the full RPG – Multiplayer Projects course, which is part of our Multiplayer Game Development Mini-Degree.

Develop a Smart Text Reader App with Unity

$
0
0

Introduction

In this tutorial, we’re going to create an app that allows you to analyze text through your phone camera and speak it out to you.

Learn, Code, Develop banner from Zenva

If you want to follow along with the tutorial, all you need is Unity and an internet connection.

You can download the complete project from here.

Setting up Computer Vision

For this tutorial, we’re going to be using Microsoft’s Azure Cognitive Services. These are machine learning services provided to us by Microsoft. The first one we’ll be getting is Computer Vision. This allows us to send images to the API and return a JSON file containing the text in the image.

I do want to inform you before we continue – using this service will require a credit/debit/bank card. The first 30 days are free and you can choose to cancel or continue afterwards.

To begin, go to the Azure sign up page and click on Start free.

Microsoft Azure homepage

Fill in the sign up form. You’ll need to verify your account with a phone number and card information (you won’t be charged unless you upgrade your account).

Microsoft Azure sign-up page

Once that’s done, you can navigate to the portal. Click on the Create a resource button.

Microsoft Azure dashboard for creating a service

Search for Computer Vision, then click Create.

Microsoft Azure service page for Computer Vision

Here, we can fill in the info for our Computer Vision service.

    • Set the Location where you want
    • Set the Pricing tier to F0 (free)
    • Create a new Resource group

Once that’s done, we can click the Create button.

Computer Vision Create service options in Microsoft Azure

The resource will now begin to deploy. When it’s complete, you should be able to click on the Go to resource button.

Deployment in progress message for Microsoft Azure service

When you get to the resource, go to the Overview tab and copy the Endpoint. This is the URL we’ll use to connect to the API. Then click on the Show access keys… link to see our keys.

Microsoft Azure Image Analyzer page

Here, we want to copy the Key 1 key. This will identify us when calling the API.

ImageAnalyzer Keys page for Microsoft Azure

Setting up Text to Speech

Still in the Azure portal, let’s setup our text to speech service. This is done through the Speech cognitive service.

Microsoft Azure Speech service page

Since we’re using the free licence, we’re restricted on this resource to only use the West US location. With that selected though, choose the F0 pricing tier (the free one). Make sure also to set the Resource group to be the same as the Computer Vision one.

Speech service creation options for Microsoft Azure

Like before, wait for the resource to deploy, then click on the Go to resource button. On this page, go to the Overview tab. Here, we want to copy the Endpoint, then click on the Show access keys… link.

Microsoft Azure ImageTextToSpeech service page

Here, we want to copy the Name (this is our resource name) and Key 1.

Microsoft Azure ImageTextToSpeech keys

Project Setup

There’s one asset we need in order for this project to work, and that’s SimpleJSON. SimpleJSON allows us to easily convert a raw JSON file to an object structure we can easily use in a script.

Download SimpleJSON from GitHub.

Simple JSON github page

In Unity, create a new 2D project and make sure the camera’s Projection is set to Orthographic. Since we’re using 3D, rendering depth is not required.

Unity Main Camera in the Inspector window

Let’s also make the camera’s Background color black so if there’s a problem with the device camera, we’ll just see black.

Unity with Camera background set to black

UI

Now we can work on the UI. Let’s start by creating a canvas (right click Hierarchy > UI > Canvas).

Unity project with UI Canvas added

As a child of the canvas, create a new TextMeshPro – Text object (you may need to import some TMP essentials). This is going to display the text we extract from the image.

    • Set the Anchoring to bottom-stretch
    • Set Height to 200

Unity project with TextMeshPro text added

To make our text easily readable on a mobile display, let’s change some properties:

    • Set Font Style to Bold
    • Set Font Size to 60
    • Set Alignment to center, middle

We can also remove the “New Text” text, since we want nothing there by default.

Unity TextMeshPro text settings in Inspector window

Now we need to add a Raw Image object to the canvas (call it CameraProjection). This is going to be what we apply our WebCamTexture onto (the texture that renders what our device camera sees). Make sure that it’s on-top of the text in the Hierarchy (this makes the text render in-front).

Unity Rect Transform component for UI element

That’s all for our UI! Let’s move onto the scripting now.

CameraController Script

Before we make a script, let’s create a new GameObject (right click Hierarchy > Create Empty) and call it _AppManager. This will hold all our scripts.

_AppManager object as seen in the Hierarchy and Unity Inspector

Create a new C# script (right click Project > Create > C# Script) called CameraController and drag it onto the _AppManager object. This script will render what the device camera sees to a WebCamTexture, then onto the UI.

We need to add Unity’s UI library to our using namespaces.

using UnityEngine.UI;

Next, let’s add our variables.

// UI RawImage we're applying the web cam texture to
public RawImage cameraProjection;

// texture which displays what our camera is seeing
private WebCamTexture camText;

In the Start function, we’ll create a new WebCamTexture, assign it to the UI and start playing.

void Start ()
{
    // create the camera texture
    camTex = new WebCamTexture(Screen.width, Screen.height);
    cameraProjection.texture = camTex;
    camTex.Play();
}

The main function is going to be TakePicture. This will be a co-routine, because we need to wait a frame at the beginning. The function converts the pixels of the camTex to a byte array – which we’ll be sending to the Computer Vision API.

// takes a picture and converts the data to a byte array
IEnumerator TakePicture ()
{
    yield return new WaitForEndOfFrame();

    // create a new texture the size of the web cam texture
    Texture2D screenTex = new Texture2D(camTex.width, camTex.height);

    // read the pixels on the web cam texture and apply them
    screenTex.SetPixels(camTex.GetPixels());
    screenTex.Apply();

    // convert the texture to PNG, then get the data as a byte array
    byte[] byteData = screenTex.EncodeToPNG();

    // send the image data off to the Computer Vision API
    // ... we'll call this function in another script soon
}

Then in the Update function, we can trigger this co-routine by either a mouse press (for testing in the editor), or a touch on the screen.

void Update ()
{
    // click / touch input to take a picture
    if(Input.GetMouseButtonDown(0))
        StartCoroutine(TakePicture());
    else if(Input.touchCount > 0 && Input.touches[0].phase == TouchPhase.Began)
        StartCoroutine(TakePicture());
}

We can now go back to the Editor, and drag in the CameraProjection object to the script.

Unity CameraProjection object added to Camera Controller

AppManager Script

Create a new C# script called AppManager and attach it to the object too. This script sends the image data to the Computer Vision API and receives a JSON file which we then extract the text from.

We’ll begin by adding in our using namespaces.

using UnityEngine.Networking;
using SimpleJSON;
using TMPro;

Our first variables are what we need to connect to the API.

// Computer Vision subscription key
public string subKey;

// Computer Vision API url
public string url;

Then we need the UI text element we made before.

// on-screen text which shows the text we've analyzed
public TextMeshProUGUI uiText;

Since this script will need to be accessed by the text-to-speech one (we’ll make that next), we’re going to create an instance of it.

// instance
public static AppManager instance;

void Awake ()
{
    // set the instance
    instance = this;
}

The main function is a co-routine which will do what I mentioned above.

// sends the image to the Computer Vision API and returns a JSON file
public IEnumerator GetImageData (byte[] imageData)
{

}

First, let’s make the text show that we’re calculating.

uiText.text = "<i>[Calculating...]</i>";

Then we need to create a web request (using Unity’s system). Setting the method to POST, means that we’re going to be sending data to the server.

// create a web request and set the method to POST
UnityWebRequest webReq = new UnityWebRequest(url);
webReq.method = UnityWebRequest.khttpVerbPOST;

A download handler is how we’re going to access the JSON file once, the image has been analyzed and we get a result.

// create a download handler to receive the JSON file
webReq.downloadHandler = new DownloadHandlerBuffer();

Let’s then setup the upload handler.

// upload the image data
webReq.uploadHandler = new UploadHandlerRaw(imageData);
webReq.uploadHandler.contentType = "application/octet-stream";

We also need to add our subscription key to the headers.

// set the header
webReq.SetRequestHeader("Ocp-Apim-Subscription-Key", subKey);

With that all done, let’s send the web request and wait for a result.

// send the content to the API and wait for a response
yield return webReq.SendWebRequest();

Now that we have our data, let’s convert it to a JSON object using SimpleJSON.

// convert the content string to a JSON file
JSONNode jsonData = JSON.Parse(webReq.downloadHandler.text);

With this, we want to extract just the readable text (a function we’ll make next), then display the text on screen.

// get just the text from the JSON file and display on-screen
string imageText = GetTextFromJSON(jsonData);
uiText.text = imageText;

// send the text to the text to speech API
// ... called in another script we'll make soon

The GetTextFromJSON function, takes in a JSON object and extracts just the text that’s been analyzed in the image and returns it as a string.

// returns the text from the JSON data
string GetTextFromJSON (JSONNode jsonData)
{
    string text = "";
    JSONNode lines = jsonData["regions"][0]["lines"];

    // loop through each line
    foreach(JSONNode line in lines.Children)
    {
        // loop through each word in the line
        foreach(JSONNode word in line["words"].Children)
        {
            // add the text
            text += word["text"] + " ";
        }
    }

    return text;
}

Let’s now go back to the CameraController script and down to the bottom of the TakePicture function. Here, we’re going to send the image data over to the AppManager script to be analyzed.

...
    // send the image data off to the Computer Vision API
    AppManager.instance.StartCoroutine("GetImageData", byteData);
}

Back in the Editor, add your Computer Vision subscription key and endpoint url with /v2.0/ocr at the end. Mine is: https://australiaeast.api.cognitive.microsoft.com/vision/v2.0/ocr

Unity Text Mesh Pro object added to App Manager component

TextToSpeech Script

Create a new C# script called TextToSpeech and attach this to the _AppManager object. This script will take in text, send it to the Speech API and play the TTS voice.

We’ll only be needing the networking namespace for this script.

using UnityEngine.Networking;

Since we’re playing an audio clip through this script, we’ll need to make sure there’s an AudioSource attached.

[RequireComponent(typeof(AudioSource))]
public class TextToSpeech : MonoBehaviour
{

For our first variables, we’re going to keep track of the info we need to connect to the API.

// TTS subscription key
public string subKey;

// TTS service region
public string region;

// TTS resource name
public string resourceName;

Then we need to keep track of our access token and audio source.

// token needed to access the TTS API
private string accessToken;

// audio source to play the TTS voice
private AudioSource ttsSource;

Finally, let’s create an instance and set it in the Awake function.

// instance
public static TextToSpeech instance;

void Awake ()
{
    // set the instance
    instance = this;

    // get the audio source
    ttsSource = GetComponent<AudioSource>();
}

The first thing we’ll need to do is create a function to get an access token. This token is needed in order to use the API.

// we need an access token before making any calls to the Speech API
IEnumerator GetAccessToken ()
{

}

Step 1, is to create a new web request and set the url to be the endpoint with our region included.

// create a web request and set the method to POST
UnityWebRequest webReq = new UnityWebRequest(string.Format("https://{0}.api.cognitive.microsoft.com/sts/v1.0/issuetoken", region));
webReq.method = UnityWebRequest.khttpVerbPOST;

// create a download handler to receive the access token
webReq.downloadHandler = new DownloadHandlerBuffer();

Then we can set the request header to contain our sub key and send it off.

// set the header
webReq.SetRequestHeader("Ocp-Apim-Subscription-Key", subKey);

// send the request and wait for a response
yield return webReq.SendWebRequest();

When we get a result, check for an error and log it if so. Otherwise, set our access token.

// if we got an error - log it and return
if(webReq.isHttpError)
{  
    Debug.Log(webReq.error);
    yield break;
}

// otherwise set the access token
accessToken = webReq.downloadHandler.text;

With this done, we can call the co-routine in the Start function.

void Start ()
{
    // before we can do anything, we need an access token
    StartCoroutine(GetAccessToken());
}

Let’s now work on the GetSpeech function (co-routine), which will send the text to the API and return a voice clip.

// sends the text to the Speech API and returns audio data
public IEnumerator GetSpeech (string text)
{
    
}

The first thing we need to do, is create the body. This is where we’ll store the info for the API to read.

// create the body - specifying the text, voice, language, etc
string body = @"<speak version='1.0' xmlns='https://www.w3.org/2001/10/synthesis' xml:lang='en-US'>
    <voice name='Microsoft Server Speech Text to Speech Voice (en-US, ZiraRUS)'>" + text + "</voice></speak>";

Then like before, we can create a new web request.

// create a web request and set the method to POST
UnityWebRequest webReq = new UnityWebRequest(string.Format("https://{0}.tts.speech.microsoft.com/cognitiveservices/v1", region));
webReq.method = UnityWebRequest.kHttpVerbPOST;

// create a download handler to receive the audio data
webReq.downloadHandler = new DownloadHandlerBuffer();

Next, we want to upload the body to the request.

// set the body to be uploaded
webReq.uploadHandler = new UploadHandlerRaw(System.Text.Encoding.UTF8.GetBytes(body));
webReq.uploadHandler.contentType = "application/ssml+xml";

Then we’ll set the headers, which will identify us and also include some info for the returning audio.

// set the headers
webReq.SetRequestHeader("Authorization", "Bearer " + accessToken);
webReq.SetRequestHeader("User-Agent", resourceName);
webReq.SetRequestHeader("X-Microsoft-OutputFormat", "rif-24khz-16bit-mono-pcm");

Now we can send the request and wait for a result. If we get an error, return.

// send the request and wait for a response
yield return webReq.SendWebRequest();

// if there's a problem - return
if(webReq.isHttpError)
    yield break;

// play the audio
StartCoroutine(PlayTTS(webReq.downloadHandler.data));

The PlayTTS function (co-routine) takes in the audio data as a byte array and saves it temporarily as a .wav file. Then we load that in, convert it to an audio clip and play it through the audio source.

// converts the audio data and plays the clip
IEnumerator PlayTTS (byte[] audioData)
{
    // save the audio data temporarily as a .wav file
    string tempPath = Application.persistentDataPath + "/tts.wav";
    System.IO.Fil.WriteAllBytes(tempPath, audioData);

    // load that file in
    UnityWebRequest loader = UnityWebRequestMultimedia.GetAudioClip(tempPath, AudioType.WAV);
    yield return loader.SendWebRequest();

    // convert it to an audio clip
    AudioClip ttsClip = DownloadHandlerAudioClip.GetContent(loader);

    // play it
    ttsSource.PlayOneShot(ttsClip);
}

Back in the Editor, we can fill in the component’s properties.

Unity Text To Speech component settings

That’s it for the scripting! If you have a webcam, you can try it out right now in the Editor. Otherwise, you can build the app to your device and try it on there.

Conclusion

Congratulations on finishing the tutorial! If you followed along, you now have a complete app with text to speech capabilities. If you wish to make additions, or just have the project ready to use, you can download the project files here.

Web Class: Create a Rocket Defender Game

$
0
0

You can access the full course here: Unity 2D Projects – Rocket Defender

Transcript 1

Hey guys, my name is Austin Gregory and in this course, I’m gonna teach you how to create the classic Rocket Defender game where you’re gonna have these baddies, these enemies falling from the sky, targeting your bases, and you have to shoot them with rockets.

So if I were to click play here, you can see my timer counting down. I’m shooting these, we can just imagine they’re rockets and these enemy things are falling from the sky and they’re targeting my bases and, if they hit them, they’ll damage my bases.

And I get points depending on how many bases I have every single round. And my rounds are based on 10 seconds, but yours can be based on anything from number of enemies per level or a random set of time between values, depending on whatever you’d like to do for your game. And every single round, it accumulates the score and it keeps adding to it so you just keep playing until you lose and once you lose, you start all over.

My name is Austin Gregory and I will see you in the first lesson.

Transcript 2

Hey guys. My name is Austin Gregory, and in this course we’re going to build a cool little rocket defender game. Where we’re going to have to defend our bases against falling enemies by shooting rockets at them from our armed base right in the center.

We are going to spawn enemies randomly at the top of the screen. Off the top of the screen a bit with a width that they can spawn at off the top. They’re gonna target a single base individually. We gonna choose that randomly, and they’re going to drive straight for that base. Trying to damage the base. Takes three hits to kill a base. At the end of a round you get points for each base you have still alive. And you keep doing this for as long as you can, to see what kind of score you can get. Each round will last for a set number of seconds or a random set number of seconds depending on how you want to do it. And we just keep going until you die.

So, in this lesson we’re going to lay out the level using some tiles that I have. And we’re going to just build a nice little level, and in the next level, or in the next lesson, we will set up our bases on this level.

So, we’re going to use a Sprite Atlas for our tiles. And we’re going to use a tilemap to allow us to paint tiles in unity. And we’re going to just lay out a nice little level. The Sprite Atlas is going to allow us to be more efficient with the way our tiles and our sprites are handled. It’s very easy to do. So I’m gonna jump up into Unity Hub here – it’s gonna open up Unity Hub. I’m gonna create a new project.

So new project, it’s going to call this rocket defender, and we gonna use the latest version available – which is actually in beta at the moment 2019 point 2.0 a 4. And this is gonna be a 2d template project and just create project . Now in a folder here, I have all the tiles were gonna be using and a couple of sound effects. We gonna use these tiles to lay out the level. We gonna use this golden gem here as our rocket.

And we have some buttons down here that will act as our basis, if I can find them here. Here we go. It’s gonna be our regular basis and it’s gonna be our armed base that we’re gonna be shooting from. So here we are in the default layout. If you do not see what I’m seeing right now go up to the top right go to default and this is the layout you will get.

We want to start by creating our tilemap and our tile atlas. So I’m going to create a new folder. It’s gonna hold all of our tiles it’s gonna call it tiles. And inside of this, I’m just gonna drag the tiles we’re gonna use right into it. We’re gonna use these to add some flowers to our level and then we’re going to use let’s just find the tiles here. So when I create a platform on the ground using these tiles. We gonna want this as the rocket and it will grab these buttons. Just drag these into that folder there, and I selected those holding down control.

And I also wanna add this just plain brown so we can actually add a little depth to our platform’s off the bottom there. And now I wanna create a tilemap using these sprites, so I’ll go to game object 2d object, and I want to create a tilemap. And that’s going to add a grid to our scene with a tilemap just like that.

Now I wanna open up another window that’s going to be the tile palette – to the place where we can put our tilemap tiles and allow us to paint the tiles in our world so it’s going to be under 2D tile palette. Now I’m going to just dock this right next to my Inspector so I can just switch between the two there. Just like that. And I want to create a new tile palette, and I will call it main and all this stuff will keep default for now. I just want to use all the default stuff just get this going pretty quickly.

And I wanna put this tilemap in the tiles folder, so select that folder and there we go. Now I need to drag tile sprite or sprite texture assets to create the tilemap. So I’ll have to do this take these tiles. These are individual tiles. You could use a tilemap for this it’s already put together. But I have individual tiles, I’ll just drag this over into my tilemap. And again select a folder what’s going to generate the tiles. I’m gonna generate it right in the same folder. Just like that.

Now I have these tiles – you can rearrange them if you want by going to edit clicking them and dragging them around. If you were to actually select it and then move it, but it’s fine where they are I don’t really care. Now turn off edit, let’s select our town map, and we will have the brush selected here. And I’ll just select a tile and I will start painting.

Now one thing you’re seeing is it has these edges extruded over the actual tile size. So we haven’t set up a size for our tiles, and we haven’t actually set up our individual sprites. So if I were to come and look and inspect here with these selected, if I select, our sprites should end this before here about just control.

Select all of these all the individual sprites – not the tiles themselves. And what I want to do is set the pixels per unit. I know my sprites are 128 by 128, so I’ll just say 128 pixels per unit. That means now our sprites will be 1 by 1 unit to unit by default, which is exactly what we want. So now that just fits snuggly inside of our tile barriers, there our tile grid.

And I’ll add some edges here just round it off – you won’t even see these are off the camera. But just in case we’ll have that there and then just add the ground below that. And we can also add some flowers here, some plants just to give it a little life. And what we gonna do is put our base, our main armed base in the middle, and then we’re going to have the four defending the four bases that will be targeted off to the left here and off to the right.

So I wanna jump in really quickly and say that I forgot to set up the Sprite Atlas like we were supposed to in this lesson. So I wanna go and show you how to do that right now. If I go to right-click, go to create, I can create a new Sprite Atlas just like that. And I’ll call this main as well.

So when the atlas is gonna do for us is we’re going to be able to add our individual sprites to it, and it’s gonna create one single object that they can get all of these images from. And it’s going to do that using a coordinate system. It’s really fancy, but all we care about is it makes our game more efficient and it just simply makes it work better. So what I’m gonna do then is just drag these over and add it to objects for packing. One at a time – or what we can do is we can lock the Inspector so this doesn’t go away when I select another object. And I can just select them all holding down control and then just drag them over and drop it on objects for packing.

And if I click pack preview, we can see what it looks like in the end. This is what it creates. And right now it’s on tight packing with for padding. You can also not allow rotation and make it not tight packing. You can see what that looks like. There you go. Completely up to you anyway how you do that how efficient you want to be. But in my case this is great. And what’s cool about this is it doesn’t force automatically. Now if it tries to get a sprite that we have referenced by one of these instead of doing that it’ll simply go to the sprite atlas. Unity handles that for us. If it’s in a sprite atlas it does it, very simple.

Now back to what we were doing.

So that looks pretty good. I want to take my camera and change the background color So we can actually match – let’s actually do a blue in the back like a dark blue, something like that looks pretty good And our enemies are gonna come down from the top and just target these bases.

So in the next lesson, guys, we’re going to set up our bases. We’re gonna build the object itself and write a simple script that will tell the base what it’s supposed to do. That’s in the next lesson. My name is Austin, and I will see you there.

Transcript 3

Hey guys. In this lesson, we’re going to build our bases. It will be the targets of our falling enemies. So we have to decide where we’re gonna place our bases. We’re just gonna create some sprites in our game world. Then we’re gonna create a base script that’s going to just give the object some health and the ability to be damaged. And then we’re going to, later on, have a collection of all of these bases.

So we have the four regular bases, the one armed base, and we’re going to be able to get a random base as a target for an enemy, and also check to see if the base is alive or not. If the base is dead, don’t target that base. So if you come down to the point where you only have one base left, every enemy will target that base, making it a bit more difficult for you as you progress through a round.

So now to keep things simple, we are not going to necessarily use the tiles of our buttons here, of these bases. We’re just going to create objects in our scene just like we normally would, and we’re gonna use those as our bases. So first of all, let’s create our armed base. I’ll create a 2D object that is a sprite, and I’ll call it armed base, just like that. And I want to see where this is here. Let’s place this, zero, zero, zero. And the sprite I wanna use for the armed base is going to be that button right there, and we can see it right there.

So if I were to drag this down to the dead center, right on top of the ground, that’s what you get. Now, the size, it’s up to you how you want to do this depending on the scale of your game. But maybe I wanna do like 1.25, 1.25 on the X, and the Y, just drop where it is there; maybe 1.25 on the Y as well and just place it right on top there. About -1.24 on the Y looks like a good position, and our other buttons, our other bases here, are gonna be the same thing, except we’re gonna place them off to the left and the right. So I’m gonna duplicate armed base. I’ma call it base. And I’m going to use this sprite for the base, and we’re gonna move it off to the left on the X, -2, maybe -3. 3.5 looks pretty good. And we’ll just duplicate it again and then do -7.

And we can obviously move these plants around if we want to. And then we’re gonna do the same thing in the other direction. So take both of these bases, duplicate those, move them off to the right three, and then move the other one off to the right, actually 3.5, and then seven. So there we go. Now they’re nice and centered. They are evenly distributed between the left and the right of the armed base, and that looks pretty good.

So now let’s create a scripts folder to hold all of our scripts we’re gonna be writing here. Just gonna call it scripts, and inside of this we’ll create a new C# script called base. Now this will be on all of our bases, so I can add this to base, just like this, or we can select them all at once, do it all at once. Now armed base will have a derived class of base that allows it to fire. So it’s going to be a base, but it’s going to be a child class of base, as opposed to the parent class which we’re writing right now.

So open this up in Visual Studio. The base base class is going to be really simple: it’s gonna have a health property that is gonna start at like three or so. If it gets down to zero, that base is dead, and it’s going to have a method for damaging the base if it were to collide with an enemy. So what I wanna do is have a public float health, maybe an integer as well depending on how you want to calculate your health, but I’ll just use a float for now.

And we don’t need either of these methods. What I wanna do is I wanna have a public void – returns nothing – and it’s gonna just be called damage. Now damage is gonna be the method we call whenever the enemy collides with the base. The enemy’s gonna be responsible for calling this method from itself. So it’s gonna pass in the amount of damage it should do, or you can just always say one enemy hitting this base means one damage.

Now I could add this simply by saying amount, and then we could just use this amount so you could have different sized enemies, maybe a big enemy does more damage, a smaller enemy does less damage, and so on. Or you could just keep it with simply -1 per damage.

So what this will do is do health-amount, right? So you could say health minus one, or health minus minus to subtract just the one. Or you could say health-=amount. And that will subtract from health the amount that we passed in, and it will then store that amount back in health. So health will be equal to whatever health minus amount is. And then simply have to check if health = 0, that means this base is dead, so I can just say died.

Now we’re not going to do anything directly if the base dies, because all we care about is if the base is alive whenever we’re trying to get a target for an enemy. Whenever we spawn an enemy, it’s going to check to see what bases are alive and give me a random one of those alive bases. So the base dying doesn’t necessarily matter to me in this simple form of the game, but I would expect you would wanna do something with it. Maybe play a sound effect when it dies or maybe change the sprite to a different sprite if it’s dead. Very simple thing to do, but we’re keeping it really simple here. I’m just adding this in just in case you want to do that.

So I can add then a private void, I’ll just call it die. And we’ll just call this whenever we die, so we’ll just say die. Now anything you wanna do when a base dies, you just do it right here in this method. For now, I’ll just log out a message that says a base died. And now back in Unity, all I have to do is I can add health directly in the Inspector like this, or I could go back in and say whenever this base is created, we wanna add three health to it.

So we could say void Awake, and we’ll just say health = 3. Just as simple as that. So now whenever we start the game, health is equal to three on all of our bases. Very cool.

That’s gonna be it for this lesson, guys. In the next lesson, we’re going to write our rocket script. That’s going to be what our armed base fires. Whenever we click, it’s going to grab a direction and move in that direction based on the mouse position. That’s in the next lesson, guys. My name is Austin, and I will see ya there.

Interested in continuing? Check out the full Unity 2D Projects – Rocket Defender course, which is part of our Unity Game Development Mini-Degree.

How to Connect to an API with Unity

$
0
0

Introduction

In this tutorial, we’re going to be building an app in Unity which will connect to an API, send a query, and return a JSON file of results to display on the screen. For this case, we’re going to be making an app that will display upcoming firework displays.

Firework displays app made with Unity

Project Files

This project will feature a prefab that is already pre-made. Along with that, you can download the included project files here.

The API

With our app, we’re going to be displaying data on our screen. This data is going to be a list of upcoming firework displays. The Queensland Government has a good website with a lot of different data sets to connect to.

Upcoming fireworks displays dataset.

Queensland Government data website page


When on the website, click on the Data API button. This is a list of example queries. What we want is the query which returns results containing a certain string.

https://data.qld.gov.au/api/action/datastore_search?resource_id=346d58fc-b7c1-4c38-bf4d-c9d5fb43ce7b&q=

CKAN Data API Query examples strings

Setting up the Project

Create a new 2D Unity project. The first thing we need to do is change our aspect ratio. Since we’re designing a mobile app, let’s go to the Game tab and add a new aspect ratio of 9:16. It will be scalable for any aspect ratio, we’re just going to design is for portrait displays.

Unity Game screen aspect ratio options

Let’s also change the background color. Select the camera and set the Background to a dark blue – I used the color 32323C.

Unity color wheel with blue chosen

For accessing and converting the data, we’re going to be using an asset called SimpleJSON. You can download it from GitHub here.

Creating the UI

Right click the Hierarchy and select UI > Canvas. Now we can begin with our UI!

Unity UI Canvas object

Create two empty GameObjects (right click Canvas > Empty GameObject) and call them Header and FireworkList. The header will hold our search bar and filter buttons.

    • Set the Height to 100
    • Set the Anchor to top-stretch
    • Position this on the top of the canvas like below

For the firework list, just make that fill in the rest of the space and anchor to stretch-stretch. This is where we’ll be listing out our data.

Unity Transform Component for Header

For the search bar, create a new TextMeshPro – Input Field as a child of the header (you might need to import a few assets). Call it SearchSuburb.

    • Set the Sprite to none (makes it a colored rectangle)
    • Set the Anchor to stretch-stretch
    • Set the Offsets to 5, 5, 5, 52.5
      • We’ll be giving everything a padding of 5

Unity input object settings

    • Set the search bar’s color to black with the opacity at half
    • For the placeholder and text…
      • Set the Color to white (half opacity for the placeholder)
      • Set the Font Size to 20
      • Set the Alignment to Middle

Unity text object settings for fireworks app

Let’s now work on our filter buttons. Create an empty GameObject and call it FilterButtons. Set the anchor and positions to the same as the search bar but below it.

Then add a Horizontal Layout Group component. Enable all of the tick boxes and set the Spacing to 5. This is used to evenly position and scale our buttons automatically.

Unity text component with Horizontal Layout Group added

As a child of the FilterButtons, create a new button, remove the text child and set the color to the same as the search bar.

Unity Button component settings

Now, create a new TextMeshPro – Text object as a child of the button.

    • Set the anchor to be the bounds of the button
    • Set the Font Size to 20
    • For our first button, let’s set the text to Today

Unity text object with Today written

Duplicate the button 3 times for a total of 4 buttons: Today, Week, Month and All.

Unity UI with day selection options

Let’s now work on the list of fireworks. First, create an empty GameObject as the child of FireworkList and call it Container.

    • Set the Anchor to top-stretch
    • Set the Offsets to 5, 0, 5, anything
    • Set the Pivot to 0.5, 1
      • This will allow us to increase the height of the container to clamp to the data easily
    • Finally, add a Vertical Layout Group component
      • Set the Spacing to 5
      • Enable Child Controls Size – Width
      • * Disable Child Force Expand – Height (not seen in image)

Vertical Layout Group and Transform Components in Unity

On the FireworkList object, add Scroll Rect and Rect Mask 2D components. This will allow us to scroll up and down the list. Make sure you copy the properties as seen below:

FireworkList object as seen in Unity Inspector

Create a new button (call it FireworkSegment), like with the others – remove the text child and add a TextMeshPro one (two in this case).

    • Set the Height of the segment to 50

Template for fireworks display app in Unity

To finish this off, create a folder called Prefabs and drag the firework segment into it. Delete the one in the scene as we’ll be spawning them in later.

Object added to Prefabs folder in Unity

Firework Visuals

To make the app a little more interesting, we’re going to add in some firework visuals to the UI. Create a new Render Texture right click Project window > Create > Render Texture and call it FireworkRenderTexture. All we need to do here, is set the Size to 500 x 500.

FireworkRenderTexture options with Size adjusted

Then go to the Tags & Layers screen (Edit > Project Settings > Tags & Layers) and add a new layer called Firework. This is for the camera to render only the fireworks.

Tags & Layers window in Unity


Next, create a new camera and drag it away from the other. Attach the render texture to it and the other properties as seen below:

Unity Camera options with setting adjusted

Now in the Prefabs folder, there should be two particle prefabs. Drag those in and position them in-front of the camera. We’ll be adjusting these later.

Firework particle setup made with Unity

Last Part of the UI

The last part of the UI is the drop down info box. This will display more information about an event when you select it. Create a new Image object as the child of the container (call it InfoDropdown).

    • Set the Height to 160
    • Set the Color to a dark blue with half opacity

Unity UI Panel object for Firework Display app

Then add two TextMeshPro texts for the info and address, and a Raw Image for the render texture of the fireworks.

Text information for Unity Fireworks Display app

In the Game view, you should be able to see the fireworks on the UI!

App Manager Script

Now it’s time to start scripting. Create a new folder called Scripts and create a new C# script called AppManager. To hold this script, create a new GameObject called _AppManager and attach the script to it.

AppManager object in the Unity Hierarchy

Inside of our script, we’ll first add the namespaces we’re going to use.

using UnityEngine.Networking;
using System.Text;
using System;
using System.Linq;
using SimpleJSON;

Inside of our class, let’s first define the Duration enumerator. This is a list of all the types of duration filters we can use.

public enum Duration
{
    Today = 0,
    Week = 1,
    Month = 2,
    All = 3
}

Our first two variables are the url, which is what’s going to connect to the API, and the jsonResult which will be a list of the data.

// API url
public string url;

// resulting JSON from an API request
public JSONNode jsonResult;

Finally, let’s create a singleton / instance for the script. This will allow us to easily access it whenever we want.

// instance
public static AppManager instance;

void Awake ()
{
    // set the instance to be this script
    instance = this;
}

So how are we going to get the data? Let’s create a co-routine called GetData. This will take in a string for the location and add that to the query. If the location string is empty, it will request for all the data. We’re using a co-routine because we need to pause the function midway to send/receive the data.

// sends an API request - returns a JSON file
IEnumerator GetData (string location)
{

}

First up, let’s create the web request and download handler, building the url also, including the query.

// create the web request and download handler
UnityWebRequest webReq = new UnityWebRequest();
webReq.downloadHandler = new DownloadHandlerBuffer();

// build the url and query
webReq.url = string.Format("{0}&q={1}", url, location);

Next, we’ll send the web request. This will pause the function and wait for a result before continuing.

// send the web request and wait for a returning result
yield return webReq.SendWebRequest();

With our result, let’s convert it from a byte array to a string, then parse that into a JSONNode object.

// convert the byte array and wait for a returning result
string rawJson = Encoding.Default.GetString(webReq.downloadHandler.data);

// parse the raw string into a json result we can easily read
jsonResult = JSON.Parse(rawJson);

We haven’t made the UI script yet, but this is what we’re going to call. We’re sending over the records of the JSON file to make them appear on-screen.

// display the results on screen
UI.instance.SetSegments(jsonResult["result"]["records"]);

Now let’s work on the FilterByDuration function. This gets called when one of the filter buttons gets pressed.

// called when a duration button is pressed
// filters the list based on the max time length given
public void FilterByDuration (int durIndex)
{

}

First, let’s convert the durIndex to a selection of the Duration enumerator. Then we’ll get an array of the records so we can sort through them.

// get the duration enum from the index
Duration dur = (Duration)durIndex;

// get an array of the records
JSONArray records = jsonResult["result"]["records"].AsArray;

Next, we’ll get the max date depending on the filter duration.

// create the max date
DateTime maxDate = new DateTime();

// set the max date depending on the duration
switch(dur)
{
    case Duration.Today:
        maxDate = DateTime.Now.AddDays(1);
        break;
    case Duration.Week:
        maxDate = DateTime.Now.AddDays(7);
        break;
    case Duration.Month:
        maxDate = DateTime.Now.AddMonths(1);
        break;
    case Duration.All:
        maxDate = DateTime.MaxValue;
        break;
}

Then we’ll loop through all the records and add the ones before the max date to filteredRecords.

// create a new JSONArray to hold all the filtered records
JSONArray filteredRecords = new JSONArray();

// loop through all the records and add the ones within the duration, to the filtered records
for(int x = 0; x < records.Count; ++x)
{
    // get the record's display date
    DateTime recordDate = DateTime.Parse(records[x]["Display Date"]);

    // if the record's display date is before the max date, add it to the filtered records
    if(recordDate.Ticks < maxDate.Ticks)
        filteredRecords.Add(records[x]);
}

Finally, like in the last function, we’ll call the UI function.

// display the results on screen
UI.instance.SetSegments(filteredRecords);

UI Script

Create a new C# script called UI and attach it to the _AppManager object.

We’re going to need these namespaces.

using UnityEngine.UI;
using TMPro;
using SimpleJSON;
using System;

First, we have our variables to hold our container, segment prefab and list of all segments.

// holds all the segments in a vertical layout
public RectTransform container;

// segment prefab to instantiate
public GameObject segmentPrefab;

// list of all available segments
private List<GameObject> segments = new List<GameObject>();

Then we have the variables for the drop down.

[Header("Info Dropdown")]

// info dropdown object
public RectTransform infoDropdown;

// text showing time, event type, etc
public TextMeshProUGUI infoDropdownText;

// text showing the event address
public TextMeshProUGUI infoDropdownAddressText;

And finally an instance for this script.

// instance
public static UI instance;

void Awake ()
{
    // set the instance to this script
    instance = this;
}

The CreateNewSegment function, creates a new segment and returns it.

// creates a new segment and returns it
GameObject CreateNewSegment ()
{
    // instantiate and setup the segment
    GameObject segment = Instantiate(segmentPrefab);
    segment.transform.parent = container.transform;
    segments.Add(segment);

    // add OnClick event listener to the button
    segment.GetComponent<Button>().onClick.AddListener(() => { OnShowMoreInfo(segment); });
    
    // deactivate it by default
    segment.SetActive(false);

    return segment;
}

The PreLoadSegments function pre-loads / spawns a set number of segments.

// instantiates a set number of segments to use later on
void PreLoadSegments (int amount)
{
    // instantiate 'amount' number of new segments
    for(int x = 0; x < amount; ++x)
        CreateNewSegment();
}

We’ll call this in the Start function.

void Start ()
{
    // preload 10 segments
    PreLoadSegments(10);
}

The SetSegments function gets called when we either search for a suburb or filter the results. This takes in the records and displays them on screen.

// gets the JSON result and displays them on the screen with their respective segments
public void SetSegments (JSONNode records)
{
    DeactivateAllSegments();

    // loop through all records
    for(int x = 0; x < records.Count; ++x)
    {
        // create a new segment if we don't have enough
        GameObject segment = x < segments.Count ? segments[x] : CreateNewSegment();
        segment.SetActive(true);

        // get the location and date texts
        TextMeshProUGUI locationText = segment.transform.Find("LocationText").GetComponent<TextMeshProUGUI>();
        TextMeshProUGUI dateText = segment.transform.Find("DateText").GetComponent<TextMeshProUGUI>();

        // set them
        locationText.text = records[x]["Suburb"];
        dateText.text = GetFormattedDate(records[x]["Display Date"]);
    }

    // set the container size to clamp to the segments
    container.sizeDelta = new Vector2(container.sizeDelta.x, GetContainerHeight(records.Count));
}

DeactivateAllSegments deactivates all of the segments. This gets called at the start of SetSegments.

// deactivate all of the segment objects
void DeactivateAllSegments ()
{
    // loop through all segments and deactivate them
    foreach(GameObject segment in segments)
        segment.SetActive(false);
}

GetFormattedDate returns a date in the day / month / year format from a raw date.

// returns a date that is formatted from the raw json data
string GetFormattedDate (string rawDate)
{
    // convert the raw date to a DateTime object
    DateTime date = DateTime.Parse(rawDate);

    // build a "[day]/[month]/[year]" formatted date and return it
    return string.Format("{0}/{1}/{2}", date.Day, date.Month, date.Year);
}

GetContainerHeight returns a height to set the container to. This makes it so the container clamps to the active segments.

// returns a height to make the container so it clamps to the size of all segments
float GetContainerHeight (int count)
{
    float height = 0.0f;

    // include all segment heights
    height += count * (segmentPrefabs.GetComponent<RectTransform>().sizeDelta.y + 1);

    // include the spacing between segments
    height += count * container.GetComponent<VerticalLayoutGroup>().spacing;

    // include the info dropdown height
    height += infoDropdown.sizeDelta.y;

    return height;
}

OnShowMoreInfo gets called when the user clicks on a segment button. This opens up the drop down with more info about the event.

// called when the user selects a segment - toggles the dropdown
public void OnShowMoreInfo (GameObject segmentObject)
{
    // get the index of the segment
    int index = segments.IndexOf(segmentObject);

    // if we're pressing the segment that's already open, close the dropdown
    if(infoDropdown.transform.GetSiblingIndex() == index + 1 && infoDropdown.gameObject.activeInHierarchy)
    {
        infoDropdown.gameObject.SetActive(false);
        return;
    }

    infoDropdown.gameObject.SetActive(true);

    // get only the records
    JSONNode records = AppManager.instance.jsonResult["result"]["records"];

    // set the dropdown to appear below the selected segment
    infoDropdown.transform.SetSiblingIndex(index + 1);

    // set dropdown info text
    infoDropdownText.text += "Starts at " + GetFormattedTime(records[index]["Times(s)"]);
    infoDropdownText.text += "\n" + records[index]["Event Type"] + " Event";
    infoDropdownText.text += "\n" + records[index]["Display Type"];

    // set dropdown address text
    if(records[index]["Display Address"].ToString().Length > 2)
        infoDropdownAddressText.text = records[index]["Display Address"];
    else
        infoDropdownAddressText.text = "Address not specified";
}

GetFormattedTime returns a time as a string from a raw time.

// converts 24 hour time to 12 hour time
// e.g. 19:30 = 7:30 PM
string GetFormattedTime (string rawTime)
{
    // get the hours and minutes from the raw time
    string[] split = rawTime.Split(":"[0]);
    int hours = int.Parse(split[0]);

    // converts it to "[hours]:[mins] (AM / PM)"
    return string.Format("{0}:{1} {2}", hours > 12 ? hours - 12 : hours, split[1], hours > 12 ? "PM" : "AM");
}

OnSearchBySuburb gets called when the user finished typing in the suburb input field. This calls the GetData function in the AppManager script.

// called when the input field has been submitted
public void OnSearchBySuburb (TextMeshProUGUI input)
{
    // get and set the data
    AppManager.instance.StartCoroutine("GetData", input.text);

    // disable the info dropdown
    infoDropdown.gameObject.SetActive(false);
}

Back in the editor, let’s fill in both scripts. The url is: https://data.qld.gov.au/api/action/datastore_search?resource_id=346d58fc-b7c1-4c38-bf4d-c9d5fb43ce7b

AppManager Inspector window within Unity

Let’s connect the filter buttons up to the AppManager script.

Highlighting of the On Click options for Unity buttons

For the SearchSuburb input field, let’s add the OnSearchBySuburb event to On End Edit. This will get the data when we finish typing.

SearchSuburb object added to On End Edit function in Unity

Firework Randomizer

Right now, our app works! Let’s add another script so the fireworks can change to a random color each time they emit. Create a new C# script called FireworkRandomizer and attach it to both firework particles.

We just need one namespace for this script.

using System.Linq;

Our variables are just an array of available colors and the particle system. We get that in the Start function and start invoke repeating the SetRandomColors function every time the particle emits.

// array of all available colors for the particles
public Color[] particleColors;

// particle system of the firework
private ParticleSystem particle;

void Start ()
{
    // get the particle system component
    particle = GetComponent<ParticleSystem>();

    // call the 'SetRandomColors' everytime the particle emits
    InvokeRepeating("SetRandomColors", 0.0f, particle.main.duration);
}

SetRandomColors sets the particle’s color gradient to 2 random colors.

// sets the particle to be a random color gradient
public void SetRandomColors ()
{
    // create a list to keep track of colors we've got left to use
    List<Color> availableColors = particleColors.ToList();
    Color[] colors = new Color[2];

    for(int x = 0; x < colors.Length; ++x)
    {
        // get a random color
        colors[x] = availableColors[Random.Range(0, availableColors.Count)];
        availableColors.Remove(colors[x]);
    }

    // get the particle's main module and set the start color
    ParticleSystem.MainModule main = particle.main;
    main.startColor = new ParticleSystem.MinMaxGradient(colors[0], colors[1]);
}

In the editor, let’s add some colors.

Firework Randomizer Script component in Unity

Conclusion

The app’s now finished! Give it a go and see if you can even more features. Try connecting to a different API or displaying the information in a different way.

Full Fireworks Display App made with Unity

Even though we designed it for a portrait display, it can easily work for landscape due to us setting up the right UI anchors.

Widescreen version of fireworks display app made with Unity

You can download the project files here.


Web Class: Develop a Super Jumpy Plumbers Platformer

$
0
0

You can access the full course here: Unity 2D Projects – Super Plumbers

Transcript 1

Hey guys, my name is Austin Gregory and in this course, I’m gonna teach you how to create a classic arcade-inspired game of Super Jumpy Plumbers.

We’re gonna be able to hop and jump our way to high scores, killing enemies and collecting coins along the way. So, these guys will fall off the bottom of the screen here, and they’ll warp to the top, just like that. I can jump on their heads and kill them, and if I kill all the enemies and all the enemies have been spawning, then we’ll go to the next level. I have a one-up here I can collect, pretty cool. And the enemies hit each other and they go the opposite direction, just to make it where they can just kind of go crazy. Notice, no matter where they warp, they will come out the other side.

If I collect these coins here, I get extra points, just like that. And there we go, and back to the beginning. However many levels you would like to have. I just have a couple of levels in the demo, but of course, that’s completely up to you. And also, you can warp across the screen, not just the enemies, anything that you want to add the component to that we write, you can do.

If I die, I have a little spawn point set up right here that’s gonna spawn me back in. We’re gonna learn a lot of cool, simple stuff. And this is all gonna be very basic C#, nothing too advanced, and I’m gonna talk you through most of everything. As long as you have a basic understanding of C#, you’ll be doing all right.

So again, my name is Austin Gregory, and I will see you in the first lesson.

Transcript 2

Hey guys, welcome back. In this first lesson, we’re going to start by laying out our very first level for our Super Jumpy Plumbers. We are going to create a Sprite Atlas, that’s going to keep all of our sprites we’re gonna be using in one simple little atlas. Then we’re gonna reference those sprites in that atlas to create tiles, and we’re going to build a tilemap with. Then we’re gonna use that tilemap to paint our levels, at least one level in this lesson.

So what I want to do is create a brand new project from Unity Hub here. I am going to click on new. I wanna call this Super Jumpy Plumbers. I am going to use the latest version available to me, which is 2019.2.0 a4. This is still in beta, but it works pretty good. And we’re gonna make sure that we select 2D as the default template. And create project.

Now inside of this folder, we have some sprites we’re gonna be using to lay out our levels. There’s a few different styles in here that we can choose from, but I am going to be going with these blue ones I think will work pretty good for this. And then we’ll also use our little red guy here as our enemy. And we’ll just find something in here that will work pretty good for our spawners. Maybe these style tiles like that.

So the first thing I wanna make sure I do is go up to layout and go to default. So we all have this exact same layout here. And I wanna create a new folder that’s going to hold my sprites. That way I can just drag and drop some sprites that I wanna use right into Unity. So I wanna use some floating platforms, these right here will work pretty good. So holding down Shift, I’ll just select these three, drag these in into my sprites folder. I also wanna have some non-floating platforms, some just like solid grounded platforms. So I’ll select these right here, and drag those in. Maybe just a single tile platform that has the edges all around it and is also floating could be useful. And maybe the one that’s not floating as well.

Also, we can grab some decorations here. Holding the Control now, just selecting a few of these. This solid blue tile which is going to be the tile that goes under our ground tiles. Also the object for our spawners, the thing is going to spawn our enemies. I’ll use this red sprite right there. I’ll use this as my enemies. And I also wanna have a coin and some kind of gem that can be our life. So it’s gonna be like a bonus point if we get that. And this can be a one-up or like a one man. So we’ll just bring these into our sprites folder.

Now again with Shift, selecting all of these, I wanna make sure that I have the pixels per unit set to 128. And that’s because my sprites I know by default are 128 by 128. So I wanna make sure that in Unity, one sprite is one unit by one unit. That will give us that result.

Now inside the sprites folder, I also wanna create a sprite atlas. And this is going to be a map that we can put all of our sprites into. And whenever a sprite is referenced that is in this atlas, it’ll make it a lot more efficient, because it will have to just simply reference this one asset. And then using a coordinate find the sprite it wants and grab that sprite. Instead of having to reference an individual sprite that is just on its own, you have to bring in each individual sprite. This let’s you just load in the single atlas and then grab the sprite it wants.

So I’m gonna call this main. So now with my atlas selected, I wanna click on the lock here so we’ve actually locked the Inspector. That way, if I select something else, it is still selected. And then I will take all of these except for my atlas and drag and drop it onto the objects for packing. That’ll make sure it adds it to this atlas. Now if I click pack preview, we can see this is what my atlas looks like.

The next thing I want to do is use these sprites for a tilemap. So we can actually start painting tiles in our game. Right now they are just tiles on a sprite atlas. Right now they are just sprites on a sprite atlas, but I wanna make a tilemap from these sprites. So I’ll create a new folder called tiles. And now I want to go to game object, 2D object and I wanna create a tilemap. And this will create a grid object with a tilemap child.

So if I look at this, if I unlock the Inspector here, we can see that the grid object just has a grid component which allows us to easily define a grid with a size and a gap and the type that it is. And the tilemap is actually the tilemap that’s going to render our tiles. It’s where we can paint our tiles onto it.

But we don’t currently have a tile palette of tiles to paint onto our tilemap. So if I go to Window and I go down to 2D tile palette, I’m just going to dock this over next to my Inspector here. I wanna create a new palette in the drop-down above, so I go to create new palette and I’ll call this one main as well just to keep it very simple. And click create. And I wanna create this inside my tiles folder. Select folder, now all I have to do is take the sprites I want to add to my tile palette. So we can paint them onto our tilemap. So I’m just going to select those, holding down Shift and let’s drag and drop them right into my tile palette. And again, I wanna put this in the tiles folder. There we go, very simple.

All I have to do is just take, and I can paint these right into my scene. So to do this, what I wanna do is I wanna paint on a couple of different layers. I want to have my layer that’s going to be the collision layer. So if my player’s walking on the ground, we will have a collision mask on that or just a simple 2D collider on the ground tiles that the player can stand on top of. I then wanna have my decoration layer, which is just going to my plants, so that you don’t interact with them, but they’re still on a tilemap and they’re still rendered the same way. They’re just not on the layer that has the colliders on it.

And then I wanna have another layer that’s going to be for the two-way platforms. They are going to be, they are going to have 2D colliders on them but they’re going to have an effector that says these interact a little differently than a standard collider, because you can’t collide with them if you’re coming from below them. But if you’re coming from above them, you can collide with them. So it’s a little different, so we’re just gonna put that on different layers so we can add the effector to those colliders only.

So I wanna select my paintbrush and I’m gonna be on my main tilemap, I’ll call that main tilemap. And I’m simply gonna paint my ground tiles. So I’ll take this with my paintbrush selected, and I’ll just paint. And in fact we’ll add a little gap in the middle here. Just take that one. And then take that one. And then I’ll just erase this. And perhaps I wanna raise this other bit so we’re gonna add some ground below it. I’ll just select those with the selection tool and then grab my move tool and drag ’em up. And then I can paint below that. Just like that.

And I wanna add a little overlap off the side of the screen here. Just because of the way our screen wrapping is going to work. I don’t want the objects, if they walk off the right side of the screen to start falling right when they get off the side of the screen, because we wanna give them a second to be able to teleport to the next side of the screen. Which we’ll get into that later on, but I just wanna make sure that we have a little, a little ground hanging off the side of the screen here.

And now with this specific tilemap, the one that we painted the ground on, I wanna add a tilemap collider 2D. And what this does is it adds a simple collider that will kind of match the shape of the tile to each individual tile. But I don’t wanna do that because there’s no reason to have all these individual colliders whenever it just all needs to be the same collider. So what I can do is add a composite collider 2D to the same object.

Now this will add a rigid body 2D to it for the way that it actually works and the way it calculates it, but that’s fine. What I do wanna do is make sure that it’s just static, it doesn’t actually fall with gravity or you can’t push it around, it’s just there. And what I wanna do then is take my tilemap collider and say that it is used by composite. That will let the composite collider kind of override the tilemap collider and do its thing with it. Now we see it’s just one big collider. And that’s exactly what we want. It’s on both sides here because of how it works.

So now I wanna create another tilemap for our decorations, so right-click on grid, 2D object tilemap. And I will call this decorations. And I wanna make sure that I select decorations as my active tilemap and, with that selected, and I wanna just grab and paint a few with my paintbrush selected. A few decorations on the ground here. Just like that. Now these do not need colliders on them, they don’t need to be able to interact with the player in any way. They just need to be there in our world as decorations.

And the next tilemap I wanna create is going to be the one-way platforms. Now this is separate from the other ones, like I said, because it has to have an effector that changes the way the colliders work for just these tiles. For instance, the way it’s gonna work is if our player is lower than the platform, if the y-value of the player is lower than the platform, then we’re not really gonna be able to collide if we’re trying to jump through the platform. But if it’s greater than the platform, then we’re gonna be able to collide with the platform. Now it’s a little more complicated than that but luckily for us, Unity handles it with a simple component.

So what I wanna do with this one is I wanna create another composite collider on it, which will add a rigid body once again that we wanna make sure that that’s static. And I wanna add a tilemap collider once again and say this is used by composite.

So now if I wanted to start painting on this one-way platform selected there. Paint on this with this guy here and then we can just draw this out. We can see the collider being generated as we go, which is very cool. That seems uneven, there we go. And the last thing we have to do for this to work is simply add platform effector 2D. And it says it will not function unless there is one enable 2D collider we’ve used by effector. So what that means is our tilemap collider which is used by composite, so it’s letting the composite kind of override its settings, I need to make sure now that the composite collider which is now in control pretty much says, okay this can also be used by something so used by effector. So this handles what this can do.

And this handles what that can do which again handles what this can do. Pretty simple stuff.

And there we have it. We can see the direction that we will collide with and the direction we will not collide with. You can change this by changing the surface arc by saying it’s not one way. Offsetting the rotational value just like that. But for us, a default is exactly what we want.

And that’s gonna be it for our first level and for our first tilemap setup. We’re gonna add more levels later on with some more. Maybe a couple more levels at least with some more tilemap stuff going on. But this should get us started.

So in the next lesson guys, we’re going to start working on our player character controller. We’re gonna use the one provided by Unity and just make some tweaks to make it work for us. That’s the next lesson guys. My name is Austin, and I will see you there.

Transcript 3

Welcome back, guys. In this lesson, we’re going to set up our player character controller using the Unity 2D Platformer Controller from its Standard Assets. We’re going to build a little character using that – we’re gonna pretty much use the standard prefab that comes with the asset. We’re gonna make a couple tweaks to some of the settings for that component, and then we’re gonna have our guy running around in our level.

So let’s jump into Unity. What I wanna do is go to the Assets Store tab, and I wanna search for standard assets. This is the one we want right here. and all I have to do is simply click Import and import this package. Now, this will come with a lot of stuff that we simply do not need, but we’re going to try to break it down to the things that we do need.

So if I were to just take and just minimize everything, just like that, I can see, I don’t want any of the scenes, I don’t even need the setup scenes. I’m gonna want, I’ll just take all of this and collapse it down as well. It’s a lot of stuff. So, I do not want cameras, I do not want effects, I don’t want the environment or fonts or particle systems, so no physic materials, no prototyping, no utility and no vehicles. All I want is a 2D, I don’t want the characters because the 2D character is inside of the 2D folder, and I want the cross-platform input and the editor. Import those packages.

And after we’ve done that, go back to our scene view here, and I wanna simply go to my Standard Assets folder. I wanna go to 2D, go over to prefabs and we have character robotboy.prefab. Drag this guy out into our game world. Now, he’s a little big, I’m gonna make him just like one by one, maybe like 1.3 by 1.3. That might be fine just like that. And we have an error that is something in editor, yeah, we have water, we don’t want water, we should have deleted that import as well. That way, we can actually compile.

And then just by clicking Play, we have a little guy in our scene here that we can run around our level. And notice, so sometimes whenever I’m falling into the ground, I’m falling pretty fast, I seem to get stuck in my platform, which is not what I want to do. A couple things we could do here, but one thing I wanna try is just by taking the collision detection and setting it to be continuous on our character. That way, it’s constantly checking for collisions.

Let’s try this out, see if it can get stuck again. Notice, with that being set that way, when I fall into the ground, it’s a solid oomph. But if I have it set to discreet, fall to the ground, I kind of hit the ground and then rise back up like it’s trying to resolve the collision, but it’s a little late for that sometimes. So I wanna set that to continuous so we don’t have that problem. It’s a simple solution to a simple problem.

And to change the way that our character behaves, we can change some of the settings from the platform character 2D component that we have right here. So hold down Control, you can see that I crouch and walk, which is a pretty cool feature. I can increase the speed at which I can crouch and walk very simply. Crouching may not be the most useful for this, but it’s in there, so that’s fine. Max speed, you can change the maximum speed they can go. Now, those still accelerate up to that point.

Now, one thing I want to do is, if we try to run up against the wall here, like I do this right here, notice how it gets stuck in the wall. Now, that’s not great. It’s not what we want to do. So what I can do to fix that is if we go to our main tilemap, we go to our composite collider 2D and we can change the physics material 2D to be something slippery. Now, this is included in the standard assets, which is gonna just kinda remove the friction from our collider – from the collision that’s happening here. If we click on this material that we have, we can see Friction and Bounciness, they’re just both set to zero.

Now, we have Sticky, which is very frictiony, and then we have bouncy, which is a little bouncy and a little frictiony. So if we try it with the frictiony on, going up against the wall. I just hit it and slide down. That’s exactly what we want. We also don’t wanna get stuck on the side of our one-way platforms, so we can change the physic material for that as well to slippery. Very cool.

So that’s gonna be it for this lesson, guys. In the next lesson, we’re going to start working on our enemies. My name is Austin and I will see you there.

Interested in continuing? Check out the full Unity 2D Projects – Super Plumbers course, which is part of our Unity Game Development Mini-Degree.

Understanding AI and Speech Recognition with Azure Cognitive Services

$
0
0

Introduction

In this tutorial, we’re going create a voice controlled game where you move a landing mars rover. We’ll be using 2 different services from Microsoft’s Azure Cognitive Services: LUIS and Speech to Text.

Voice controlled game made with Unity

You can download the project files here.

Setting up LUIS

LUIS is a Microsoft, machine learning service that can convert phrases and sentences into intents and entities. This allows us to easily talk to a computer and have it understand what we want. In our case, we’re going to be moving an object on the screen.

To setup LUIS, go to www.luis.ai and sign up.

LUIS homepage for Microsoft Cognitive Services

Once you sign up, it should take you to the My Apps page. Here, we want to create a new app.

My Apps page for Azure Cognitive Services

When your app is created you will be taken to the Intents screen. Here, we want to create a new intent called Move. An intent is basically the context of a phrase. Here, we’re creating an intent to move the object.

Intents options for the VoiceControlApp

Then go to the Entities screen and create two new entities. MoveDirection and MoveDistance (both Simple entity types). In a phrase, LUIS will look for these entities.

Entities for Voice Control App

Now let’s go back to the Intents screen and select our Move intent. This will bring us to a screen where we can enter in example phrases. We need to enter in examples so that LUIS can learn about our intent and entities. The more the better.

Make sure that you reference all the types of move directions at least once:

  • forwards
  • backwards
  • back
  • left
  • right

Move elements for LUIS project

Now for each phase, select the direction and attach a MoveDirection entity to it. For the distance (numbers) attach a MoveDistance entity to it. The more phrases you have and the more different they are – the better the final results will be.

Move direction setup for voice controlled app

Once that’s done, click on the Train button to train the app. This shouldn’t take too long.

LUIS app setup with Train button highlighted

When complete, you can click on the Test button to test out the app. Try entering in a phrase and look at the resulting entities. These should be correct.

Once that’s all good to go, click on the Publish button to publish the app – allowing us to use the API.

LUIS app setup with Text button selected

The info we need when using the API, is found by clicking on the Manage button and going to the Keys and Endpoints tab. Here, we need copy the Endpoint url.

Authoring Key for voice control app in LUIS

Testing the API with Postman

Before we jump into Unity, let’s test out the API using Postman. For the url, paste in the Endpoint up until the first question mark (?).

Postman page with GET key highlighted

Then for the parameters, we want to have the following:

  • verbose – if true, will return all intents instead of just the top scoring intent
  • timezoneOffset – the timezone offset for the location of the request in minutes
  • subscription-key – your authoring key (at the end of the Endpoint)
  • q – the question to ask

Postman with Params tab open

Then if we press Send, a JSON file with our results should be sent.

Postman with JSON response shown

Speech Services

LUIS is used for converting a phrase to intents and entities. We still need something to convert our voice to text. For this, we’re going to use Microsoft’s cognitive speech services.

What we need from the dashboard is the Endpoint location (in my case westus) and Key 1.

Endpoint and Key for Microsoft Speech-to-Text services

We then want to download the Speech SDK for Unity here. This is a .unitypackage file we can just drag and drop into the project.

Speech SDK installation instructions

Creating the Unity Project

Create a new Unity project or use the included project files (we’ll be using those). Import the Speech SDK package.

New Unity project with Speech SDK folder highlighted

For the SDK to work, we need to go to our Project Settings (Edit > Project Settings…) and set the Scripting Runtime Version to .Net 4.x Equivalent. This is because the SDK and even us will be using some new C# features.

Project Settings in Unity with Player Configuration adjusted

LUIS Manager Script

Create a new C# script (right click Project > Create > C# Script) and call it LUISManager.

We’re going to need to access a few outside namespaces for this script.

using UnityEngine.Networking;
using System.IO;
using System.Text;

For our variables, we have the url and subscription key. These are used to connect to LUIS.

// url to send request to
public string url;

// LUIS subscription key
public string subscriptionKey;

Our resultTarget will be the object we’re moving. It’s of type Mover, which we haven’t created yet so just comment that out for now.

// target to send the request class to
public Mover resultTarget;

We then have our events. onSendCommand is called when the command is ready to be sent. onStartRecordVoice is called when we start to record our voice and onEndRecordVoice is called when we stop recording our voice.

// event called when a command is ready to be sent
public delegate void SendCommand(string command);
public SendCommand onSendCommand;

// called when the player starts to record their voice
public System.Action onStartRecordVoice;

// called when the player stops recording their voice
public System.Action onEndRecordVoice;

Finally, we have our instance – allowing us to easily access the script.

// instance
public static LUISManager instance;

void Awake ()
{
    // set instance to this script
    instance = this;
}

Let’s subscribe to the onSendCommand event – calling the OnSendCommand function.

void OnEnable ()
{
    // subscribe to onSendCommand event
    onSendCommand += OnSendCommand;
}

void OnDisable()
{
    // un-subscribe from onSendCommand event
    onSendCommand -= OnSendCommand;
}

The OnSendCommand function will simply start the CalculateCommand coroutine, which is the main aspect of this script.

// called when a command is ready to be sent
void OnSendCommand (string command)
{
    StartCoroutine(CalculateCommand(command));
}

Calculating the Command

In the LUISManager script, create a coroutine called CalculateCommand which takes in a string.

// sends the string command to the web API and receives a result as a JSON file
IEnumerator CalculateCommand (string command)
{

}

First thing we do, is check if the command is empty. If so, return.

// if command is nothing, return
if (string.IsNullOrEmpty(command))
    yield return null;

Then we create our web request, download handler, set the url and send the request.

// create our web request
UnityWebRequest webReq = new UnityWebRequest();

webReq.downloadHandler = new DownloadHandlerBuffer();
webReq.url = string.Format("{0}?verbose=false&timezoneOffsset=0&subscription-key={1}&q={2}", url, subscriptionKey, command);
        
// send the web request
yield return webReq.SendWebRequest();

Once we get the web request, we need to convert it from a JSON file to our custom LUISResult class, then inform the mover object.

// convert the JSON so we can read it
LUISResult result = JsonUtility.FromJson<LUISResult>(Encoding.Default.GetString(webReq.downloadHandler.data));

// send the result to the target object
resultTarget.ReadResult(result);

LUIS Result

The LUIS result class is basically a collection of three classes that build up the structure of the LUIS JSON file. Create three new scripts: LUISResultLUISIntent and LUISEntity.

LUISResult:

[System.Serializable]
public class LUISResult
{
    public string query;
    public LUISIntent topScoringIntent;
    public LUISEntity[] entities;
}

LUISIntent:

[System.Serializable]
public class LUISIntent
{
    public string intent;
    public float score;
}

LUISEntity:

[System.Serializable]
public class LUISEntity
{
    public string entity;
    public string type;
    public int startIndex;
    public int endIndex;
    public float score;
}

Back in Unity, let’s create a new game object (right click Hierarchy > Create Empty) and call it LUISManager. Attach the LUISManager script to it and fill in the details.

  • Url – the url endpoint we entered into Postman (endpoint url up to the first question mark)
  • Subscription Key – your authoring key (same one we entered in Postman)

LUISManager object in the Unity Inspector

Recording our Voice

The next step in the project, is to create the script that will listen to our voice and convert it to text. Create a new C# script called VoiceRecorder.

Like with the last one, we need to include the outside namespaces we’re going to access.

using System.Threading.Tasks;
using UnityEngine.Networking;
using Microsoft.CognitiveServices.Speech;

Our first variables the sub key and service region for the speech service.

// Microsoft cognitive speech service info
public string subscriptionKey;
public string serviceRegion;

Then we need to know if we’re currently recording, what our current command is to send and is the command ready to be sent?

// are we currently recording a command through our mic?
private bool recordingCommand;

// current command we're going to send
private string curCommand;

// TRUE when a command has been created
private bool commandReadyToSend;

Finally, we got our completion task. This is a part of the new C# task system which we’re going to use as an alternative to using coroutines, as that’s what the Speech SDK uses.

// task completion source to stop recording mic
private TaskCompletionSource<int> stopRecognition = new TaskCompletionSource<int>();

Let’s start with the RecordAudio function. async is basically an alternative to using coroutines. These allow you to pause functions and wait certain amounts of time before continuing. In our case, we need this to allow the SDK time to convert the audio to text.

// records the microphone and converts audio to text
async void RecordAudio ()
{
    
}

First, let’s say we’re recording and create a config class which holds our data.

recordingCommand = true;

SpeechConfig config = SpeechConfig.FromSubscription(subscriptionKey, serviceRegion);

Then we can create our recognizer. This is what’s going to convert the voice to text.

Inside of the using, we’re going to create an event to set the curCommand when the recognition has completed. Then we’re going to start listening to the voice. When the completion task is triggered, we’ll stop listening and convert the audio – tagging it as ready to be sent.

// create a recognizer
using(SpeechRecognizer recognizer = new SpeechRecognizer(config))
{
    // when the speech has been recognized, set curCommand to the result
    recognizer.Recognized += (s, e) =>
    {
        curCommand = e.Result.Text;
    };

    // start recording the mic
    await recognizer.StartContinuousRecognitionAsync().ConfigureAwait(false);

    Task.WaitAny(new[] { stopRecognition.Task });

    // stop recording the mic
    await recognizer.StopContinuousRecognitionAsync().ConfigureAwait(false);

    commandReadyToSend = true;
    recordingCommand = false;
}

return;

The CommandCompleted function gets called when the command is ready to be sent.

// called when the player has stopped talking and a command is created
// sends the command to the LUISManager ready to be calculated
void CommandCompleted ()
{
    LUISManager.instance.onSendCommand.Invoke(curCommand);
}

In the Update function, we want to check for the keyboard input on the return key. This will toggle the recording.

// frame when ENTER / RETURN key is down
if(Input.GetKeyDown(KeyCode.Return))
{
    // if we're not recording the mic - start recording
    if (!recordingCommand)
    {
        LUISManager.instance.onStartRecordVoice.Invoke();
        stopRecognition = new TaskCompletionSource<int>();
        RecordAudio();
    }
    // otherwise set task completed
    else
    {
        stopRecognition.TrySetResult(0);
        LUISManager.instance.onEndRecordVoice.Invoke();
    }
}

Then underneath that (still in the Update function) we check for when we’re ready to send a command, and do so.

// if the command's ready to go, send it
if(commandReadyToSend)
{
    commandReadyToSend = false;
    CommandCompleted();
}

Attach this script also to the LUISManager object.

  • Subscription Key – Speech service key 1
  • Service Region – Speech service region

Voice Recorder Script component added to LUIS Manager

Mover Script

Create a new C# script called Mover. This is going to control the player.

Our variables are just our move speed, fall speed, default move distance, the position on the floor for the player and target position.

// units per second to move at
public float moveSpeed;

// units per second to fall downwards at
public float fallSpeed;

// distance to move if not specified
public float defaultMoveDist;

// Y position for this object when on the floor
public float floorYPos;

// position to move to
private Vector3 targetPos;

In the Start function, let’s set the target position to be our position.

void Start ()
{
    // set our target position to be our current position
    targetPos = transform.position;
}

In the Update function, we’ll move us towards the target position and fall downwards until we hit the floor Y position.

void Update ()
{
    // if we're not at our target pos, move there over time
    if(transform.position != targetPos)
        transform.position = Vector3.MoveTowards(transform.position, targetPos, moveSpeed * Time.deltaTime);

    if(targetPos.y > floorYPos)
        targetPos.y -= fallSpeed * Time.deltaTime;
}

ReadResult takes in a LUISResult and figures out a move direction and move distance – updating the target position.

// called when a command gets a result back - moves the cube
public void ReadResult (LUISResult result)
{
    // is there even a result and the top scoring intent is "Move"?
    if(result != null && result.topScoringIntent.intent == "Move")
    {
        Vector3 moveDir = Vector3.zero;
        float moveDist = defaultMoveDist;

        // loop through each of the entities
        foreach(LUISEntity entity in result.entities)
        {
            // if the entity is MoveDirection
            if(entity.type == "MoveDirection")
                moveDir = GetEntityDirection(entity.entity);
            // if the entity is MoveDistance
            else if(entity.type == "MoveDistance")
                moveDist = float.Parse(entity.entity);
        }

        // apply the movement
        targetPos += moveDir * moveDist;
    }
}

GetEntityDirection takes in a direction as a string and converts it to a Vector3 direction.

// returns a Vector3 direction based on text sent
Vector3 GetEntityDirection (string directionText)
{
    switch(directionText)
    {
        case "forwards":
            return Vector3.forward;
        case "backwards":
            return Vector3.back;
        case "back":
            return Vector3.back;
        case "left":
            return Vector3.left;
        case "right":
            return Vector3.right;
    }

    return Vector3.zero;
}

Scene Setup

Back in the editor, create a new cube (right click Hierarchy > 3D Object > Cube) and call it Mover. Attach the Mover script and set the properties:

  • Move Speed – 2
  • Fall Speed – 1
  • Default Move Dist – 1
  • Floor Y Pos – 0

Also set the Y position to 15.

Script added to Rover object in Unity

For the ground, let’s create a new empty game object called Environment. Then create a new plane as a child called Ground.

  • Set the scale to 8

White plane created within Unity project

Drag in the MarsMaterial on to the plane (Textures folder). Then parent the camera to the mover.

Camera options in the Unity Inspector

Let’s now rotate the directional light so it’s facing directly downwards. This makes it so we can see where the mover is going to land on the ground – allowing the player to finely position it.

  • Set the Rotation to 90, -30, 0

Unity Light rotated on the X-axis

Let’s also add in a target object. There won’t be any logic behind it, just as a goal for the player.

Target object within Unity project

Creating the UI

Create a canvas with two text elements – showing the altitude and current move phrase.

Unity UI setup for voice controlled game

Now let’s create the UI script and attach it to the LUISManager object. Since we’re using TextMeshPro, we’ll need to reference the namespace.

using TMPro;

For our variables, we’re just going to have our info text, speech text and mover object.

// text which displays information
public TextMeshProUGUI infoText;

// text which displays speech to text feedback
public TextMeshProUGUI speechText;

// object which the player can control
public GameObject moverObject;

In the OnEnable function, let’s subscribe to the events we need and un-subscribe to them in the OnDisable function.

void OnEnable ()
{
    // subscribe to events
    LUISManager.instance.onSendCommand += OnSendCommand;
    LUISManager.instance.onStartRecordVoice += OnStartRecordVoice;
    LUISManager.instance.onEndRecordVoice += OnEndRecordVoice;
}

void OnDisable ()
{
    // un-subscribe from events
    LUISManager.instance.onSendCommand -= OnSendCommand;
    LUISManager.instance.onStartRecordVoice -= OnStartRecordVoice;
    LUISManager.instance.onEndRecordVoice -= OnEndRecordVoice;
}

In the Update function, we’re going to just update the info text to display the player’s Y position.

void Update ()
{
    // update info text
    infoText.text = "<b>Altitude:</b> " + (int)moverObject.transform.position.y + "m";
}

Here’s the functions the events call. It basically updates the speech text to show when your recording your voice, calculating it and execute it.

// called when a command is ready to be sent
// display the speech text if it was a voice command
void OnSendCommand (string command)
{
    speechText.text = command;
}

// called when we START recording our voice
void OnStartRecordVoice ()
{
    speechText.text = "...";
}

// called when we STOP recording our voice
void OnEndRecordVoice ()
{
    speechText.text = "calculating...";
}

Make sure to connect the text elements and mover object.

Unity UI Script component from the Unity Inspector

Conclusion

Now we’re done! You can press play and command the cube with your voice! If you missed some of the links you can find them here:

Web Class: Discover Blender for Low-Poly 3D Assets

$
0
0

You can access the full course here: Blender for Beginners – Craft Low-Poly Game Assets

Transcript 1

Hello everyone. Welcome to the basic introduction into Blender. As you can see we are currently sitting in Blender.

Now, if you have zero knowledge as to what Blender is, Blender is a free to use 3D modeling software that is quite powerful when compared to something like Maya, which is mainly used in the 3D modeling industry and animation industries. Blender is just slightly a little bit weaker than Maya, but it is about 90, 95% as powerful. And, another thing is, it is free. Now, it is quite easily accessible. You can use it on PC, Windows OS, or Mac OS, and currently I am using Blender on a Mac.

Now, with all that said, let’s go ahead and tweak some of these settings, user settings, so that it will make it easier for us to work around in. Now, we’re just gonna go over to the file section, and we’re gonna scroll down to the user preferences right here. And you’re gonna click into that. Now as you can see, we have all these options. We’re gonna go to the input tab right here, and usually, I guess, most people click with their left click, or, left mouse button to select something, I don’t exactly know why the default selection for Blender is set to right. But I just usually set it to left click. And that just makes it easier to integrate yourself into Blender.

Now another thing, since I’m currently using a Macbook, my keyboard does not extend to a numpad, I’m just gonna turn on the emulate numpad over here, this little check box, turn that on. Now this numpad sort of makes it easier for us to select certain viewpoints; I will show you what that is later. And after that, I’m just gonna go over to this little option, there should be a 3D view, all these options right here, we’re gonna go 3D view, there is a view selected option right here.

As you can see the keys that it is binded to is Control + Numpad period, or Numpad period. Since we don’t have a numpad, I’m just gonna click on this piece right here, gonna click Shift + F, and this will basically make it easier for me to sort of zoom in onto an object. With that done we can just save the user settings and close this. Now if you kind of mess things up a little, we can just click on this restore button, and it should restore this section right here. It’s not gonna touch on these, but just on these sort of keys, now you’ve sort of binded. Shift+F. Save this again, just close this. And if you’ve truly messed up everything in your sort of settings, you can just simply go down to load factory settings, and it should reset everything back to zero.

Everything such as the mouse click buttons, and your emulate buttons. And, yeah, there you go. We have our settings set. Now we can sort of, play around with our camera movement.

Now, as you can see, we are staring currently at this box right here. Now if you want to rotate around, or orbit around this box, we can just click on our middle mouse button, and just sort of drag, move around, move your mouse around, and you can just sort of move your camera around this box. Now if you want to pan to the side, say a little bit over there, you can just hold down the shift button, and hold down your middle mouse button as well, and just move around. You’re just panning around the object. And, well, not exactly object but just around the space here. And, there we go, we have that done.

Now the key that I binded, Shift + F, makes it so that I can simply zoom into a selected object here. With that done, let’s go ahead and play around with the viewpoints. Now, remember the numpad part? With that binded to, well, emulating the numpad with our keyboard number section right here, you can just click on, say 1, you can go into the front view, or in this case, it’s the front or side, cause it’s a box. You can slightly move it downwards, move it to the side with 2 and 4. And we can click on 7 to go to the top view. We can click on 6 to slightly rotate things. Click 8 to move these. Move around, rotate around with the number pad.

Also, currently we are using the perspective view, It’s what our eyes usually see an object as. Now if you want things to be more 2D and flat, we can go to something called the orthographic view, which is what happens when you click on 5. Notice how all the spaces around, or the faces around the cube are shown to you. As you can see we are looking dead onto the object right here. If you click back into perspective mode, you can’t see the top anymore cus it’s sort of turned into this perspective view. Click on 5 again, we’re back in this flattened orthographic view. And, sometimes it’s just easier to move around, mess around with the object in orthographic view.

And, yeah, there you go. That’s pretty much it for the basic set up of Blender. We will continue on with more additional movement and or object making in the next video. Thanks for watching, and I’ll see you next time.

Transcript 2

Hello everyone, as you can see we are currently back in Blender.

We are going to be focusing on object mode. As you can see right here, it says object mode. There are a few other types of modes here such as edit mode, sculpt mode, vertex, paint, weight painting, and texture painting. We’re mainly just gonna be focusing on object mode here.

Now, as you can see our cube here in object mode, we can move this piece, rotate it, and scale it. Now, to move we can click on G, and just simply free drag it anywhere we want. We’re gonna click on Command + Z to undo that movement. Now, if you wanted to be specifically moved on, say, the X, Y, or Z axes, you can just simply click on these axes’ handles here. And you can move them Y, X, and Z. I’m gonna undo again, put it back in the area. Now, as you can see the axes point is right here, or general axes are here. If you were to flip, say, the scene upside down, you can kind of tell sometimes that something is upside down. Let’s just go back up here. Yeah, that’s pretty much it on how to transform.

Now, if you click on G, and click on, say, the Y axis, you’ll be moving the cube only in the Y axis here. You can also click on X, move on the X axis, Z, on the Z axis here. Undo, and yeah, that’s pretty much it with the movement of our, say, our shape right here, or our object. Now, if you want to scale it we can just simply click on S. S is to generally scale it all around. We can scale it on the X axis by clicking X, you know, to thin this down. Click Y, thin it this way, or let’s stretch it up, or flatten it down on the Z axis. Pretty simple, there you go, and then there is rotation. We can click on the R, and just rotate it freely. But that’s not really good, I’m just gonna click out, undo it, put it back in its area.

And we’re gonna rotate, say, on the X axis. As you can see, we can rotate it here. It’s a lot less messy here. You can rotate it on the Y axis. And we can rotate it on the Z axis. This rotates over here, this seems pretty good. And undo that, and yeah, there you go. That’s the general sort of transformation movement of our object.

Now, if you wanted to be more precise, we can go over into the object layer right here. As you can see right now, we’ve selected the cube. It has the name cube right here, and all our settings right here. We can, you know, manually type in wherever we want. This should be X axis, Y axis, then the Z axis. We can say like 10, it’ll move up 10 spaces on the Z axis. I’m just gonna return it back to zero. And as you can see, we’ve previously slightly scaled our cube here, so it says 1.025 in size. Slightly a little bit larger than the 1. If we want to set it back to 1, we can just click on 1, 1, and 1, enter. And there you go, we have our cube back to its general shape.

Now, if you wanted to be, say, like a huge shape here, you can type 10, 10, and 10. And there you go, precise scaling of our cube here. Just undo all of that, and there you go, we have our cube again. Again, that’s the precise sort of movement transformation of our object. It’s all here, really simple and easy, and there you go. Now, if you accidentally sort of went too far ahead, and sort of messed up your object, and you want to restart. That’s really simple just select everything, once selected everything just double-click A. It grabs everything in our scene. And since we don’t need the lights and cameras, we’re just gonna delete it with it, click on X, and delete.

And there you go, all our pieces are gone. If you want to recreate a new object, just click on the create menu here. And as you can see all of these different options, plane, cube, circle, UV sphere, Ico sphere, cylinder, cone, and torus. We’re just gonna click on cube, and it should generally create a default cube right here.

Yeah, that’s pretty much it. Thanks for watching, I’ll see you in the next video.

Transcript 3

Hello everyone, we’re back in Blender.

Now, previously, we were playing around with the basic movements of our object in our scene. Now, since you’ve gotten used to moving around your set object, we can move on to creating new objects for our scene. I’m just gonna click A to select everything in our scene. Sometimes you probably need to double-click A to deselect the previous object and then click X to delete. After you clicked X you should click on the Okay option. Previously, I’ve also kind of glossed over how you can just click on the Create menu here, and create a basic Primitive aka the Cube.

Now, if you click on the Cube, there should be additional options down below the sort of menu here. You can see Add Cube, there are these options here. Now, for every single object here, there should generally be the Location and Rotation options right off the bat. And you can generally just play around with these options, if you want. You don’t exactly need to do anything here. Radius, if you want to scale it right here, instead of scaling it down here, you can type in and say five scaled. If you want to slightly rotate this, let’s say 45 degrees, you can probably see how it rotates. As you can see like the green axis is Y, so we’re gonna rotate it this way over here. Just gonna click on Enter, and you’ll see it rotates on the Y-axis. And if I wanted to, I could also rotate on the X-axis or Z-axis, but I’m not gonna do that.

Let’s go ahead and delete this cube and show you the other types of objects. Say the UV sphere. I’m just gonna skip over the circle ’cause this is a flat piece, and it’s not as many options to go over. Let’s go, click on UV Sphere. Now, again, you can see the Location, Rotation of the object when it’s freshly made. And right now, we have a few different options here, such as Segments, Rings and Size.

Well, Size, it’s still the same thing. It’s basically the scale of our object, say five to scale this up again. It scales up to that much. Now, the Segments is the amount of sort of edges here. Each polygon or mesh has a bunch of edges to provide itself the shape. Let’s go into the top-view and orthographic, click five and seven. Yeah, and right here in the top, it will say Top Ortho. If we decrease the amount of, say, segments or drop the roundness, not roundness, the smoothness of our object here, we can clearly tell the flat surfaces of all these areas now, and if we were to, say, increase it to 50, it will look a lot rounder. So, generally, Segments just makes it look rounder.

Let’s go down here. We can increase the rings. Rings is basically the horizontal or edges over here that flow along our sphere. We can drop down like a lot too. Let’s go like 10. You can clearly tell from the side here, or let’s go to the front-view or right-view. You can tell that the rings right here has been cut down. If we increase this as well to, say, 50, our sphere is a lot smoother compared to before. Yeah, it’s generally the options for our sphere, and drop, delete this. Gonna create a cylinder now. Cylinder is basically the same thing.

There are these options. It’s closely resembling the UV Sphere. We can increase the Vertices, make this smoother, if you look at it from the top. We decrease it down, say, again, 16, type in. You can tell that it’s not as smooth anymore. We can jump this up to 50, super smooth. And there you go. Now, Radius, same thing, it just sort of makes it larger, say 50. That’s a little bit too big. You can drop it down to, like, 10 again. See, it just scales it out on the X- and the Y-axis. The depth is the up and down, so the Z-axis. We can jump it up to 10, and it just scales it up. We can scale this down again. Just put it down here, and there you go, yeah. Let’s delete this.

Let’s see, Ico Sphere is basically the same as a sphere, but instead of having rings, it has triangles here, so that creates subdivisions. So we can subdivide this or unsubdivide this and make it even less. Let’s go to one. You can clearly tell that the triangles of this object get larger. Increase this more and more and more, the triangles get smaller and smaller, but the smoothness of the sphere gets smoother, right here as you can see. Looks pretty cool, looks like a golf ball right now. I’m just gonna delete this. Let’s go down to the Cone. Basically same thing. We can increase the height. Can’t really see, if you can tell this thing is getting taller. Let’s say five. Yeah, Depth, Radius, increase the radius of the top. There’s Radius 1 and Radius 2, this is the bottom, top.

And Vertices, again, same thing, makes this smoother from the side, if you look at it from the top. And that is it for those options. We can delete this, go to Torus. We can increase the amount here. Let’s go, oh, no, I gotta use the presets. Major Segments, Minor Segments, it should be, these are the smoothness from here, if you look from the top. Oh, top-view, you can tell that there are an increase of edges around our torus right here. And also Minor Segments in the inner sort of rings, we can increase this to make this look a lot more smoother, an actual donut sort of shape. We can go, like, say 30, and as you can see, it looks a lot smoother. Now, that is basically it for our polygon-type of meshes.

I can create a grid too. Grid Plane, same thing, we can just delete that, but there should be some additional edges in here as a grid, if we go into Edit Mode, you can tell. I will talk about Edit Mode in a different video. For now, we just leave it here, and you can delete this. There is a sort of default monkey head that Blender has provided. It’s just there for fun, and it’s basically for, I guess, training purposes. If you wanna, you know, texture this, play around with it. They just left it there. I’m just gonna delete that.

But yeah, that’s pretty much it for our polygons, polygon shapes, and thanks for watching. I see you in the next video.

Transcript 4

Okay, now that we understand how to move and create objects, let’s move on to adding materials or colors onto our objects. It’s really simple.

First, delete the lights and cameras. I’m just gonna click on the object, here, hold Shift and click on this light right here to select both of these objects and we’re just gonna delete those. Now, the reason why I didn’t click on A to select everything here is because I still want my cube, here. Now, let’s click on our cube. We’re not gonna do any changes on it. Let’s just drag our menu, here, a little bit outwards so that we can reach the, sort of, Materials section.

Now, the Materials section is this circular, sort of, object right or this tab, right here. Gonna click on this and right here we get, what we call, the material, which is the color. Now, it is defaulted to just the base material, right here. I’m gonna create a new material and it’s create new, click on New. Now, to get here, again, simply click on the plus icon, right here.

We can delete this defaulted overall material. Just click on that, minus and we are going to apply this material onto … well, it’s already applied, right now, because it’s the only material on this object. Let’s call this “Red”. Just simply double-click and type in “Red”. Gonna go down to the Diffuse. Diffuse is the color of the material. Let’s just simply select a red. Something like this is good and there you go. We have a red cube, now. All we have to do, next, is to rename our object. Let’s just go over to our object menu, right here.

As you can see, we have all the options, here. All we wanna do is just simply type in, well, select “Cube” section, here, the name. Let’s call it, “Red “Object” and as you can see, in the layer over here, the overall layers, you can see that our object went from “Cube” and turned into “Red Object”. Now, let’s go ahead and duplicate this piece. I’m gonna move this to the side. To duplicate objects, it’s really simple. I’m just gonna click Shift + D ^and I’m gonna move it on the Y axis. There you go, we have two red objects, right now and as you can see, when you duplicate something it’s gonna be using the same name with an additional dot 001. Now, we don’t want this to also be a red object.

I’m just gonna grab this piece, grab the name right here in the Object menu, just call it the “Green “Object” and once you rename it, it should rename it over here in our layer, over here and let’s go over to the Materials. Gonna do the same thing. Create new. Click New. Add New and we are going to just call this “Green” and with that done, let’s just select, say, a green color, here. Now, nothing has changed, yet, don’t worry. I’m just gonna click on the “Red”, gonna click minus and it should apply it to the object, here. Let’s do it once more. Move this, duplicate it, move it on to the side of the Y axis. Let’s minus this. Create New. Let’s call this “Blue”. So, we get R-G-B. Let’s go, blue. Dark blue, rename the object to “Blue “Object” and there you go.

We have the basic understandings of how to add a color and organizing all your things, here, in the Material and the Object menu, here, and yeah, that’s really simple to add materials on to your objects to make them look pretty. That’s pretty much it. Thanks for watching. I’ll see you in the next video.

Transcript 5

Hello, everyone; welcome back into Blender.

Now previously we worked on how to, sort of, do the basic movements of our object in our scene. Now this time I’m gonna show you a more precise way of moving our object with something called snap mode. Now, as you can see, I’m gonna just drag our menu out a little. Let’s go over to the cube, our sort of object layer. Just click on this tab, and right here, as you can see, if we were to move our icon; no, not our icon, our object here on the Y axis, we can move it in increments that are like really tiny increments right here. If you don’t like it like so, we can, let’s click on zero, and put it back in the origin. Down here we can turn on something called snap.

Now this tiny icon, this magnet icon down here; you can turn that on. You can either click Shift + Tab or just, you know, directly click on the icon right here. It even tells you the shortcut, Shift + Tab. Now if we were to move our object on the Y axis again, it will snap on to the grid area here of increments of one. As you can see, one, two, three, four, five, six, seven, eight, zero, and so on. Now if you don’t like it, you know, snapping that large of a sort of range here, we can simply click on, well, you gotta click on the Y axis first, then you click on or click and hold Shift. Now, we’re just gonna move this down on the Y axis.

As you can see, it’s moving at increments of .1. .1,.4, .5, blah blah blah, and so on; and that’s pretty much it with snap mode. And it’s just really simple, makes life a lot easier, makes movement of certain objects little bit more cleaner. Yeah, thanks for watching; I’ll see you in the next video.

Transcript 6

Hello everyone, now that we’ve gotten used to playing around with the incremental movements in snapmode, we’re gonna also play around with the additionals, or settings that snapmode provides us with.

Now, again, I’m just gonna turn on snapmode, this icon here, the magnet icon. And we’re gonna click on this, sort of, icon right beside the magnet icon. As you can see if we click into it you’ll see these other additional settings, these snap elements as it’s called. The volume, face, edge, and vertex. Now, right now, our object is moving, say, in incrementals of a way. If we were to turn it to say vertex, it’s going to just, you know, snap to the vertexes of this cube. Now, since we have one cube here, I’m gonna duplicate it, so we can demonstrate what it looks like. I move this, click Shift + D to duplicate it, and move it on the Y axis, click on Y. Let’s move it down, say, here.

Now, I’m gonna describe what vertex, face, and edges are. If I were to click on something, say, the edit mode. I’m gonna click into edit mode, click Tab. This right now, let’s us go into this option where we can select individuals, or points right here. Now, a vertex is the singular point of our, say, our object right here. These points sort of shape up to make this cube. If we were to click on Control + Tab, we can go into something called a mesh selection mode. With that, we can select either edge, face, or vertex. Since we’re currently on vertex, we can go to edge, and play around with selecting the individual edges of our cube. And, or go to the face mode. Control + Tab, select face, and click each individual face around our cube.

Now, with that done, let’s go ahead and sort of move our object. Let’s go back in the object mode, simply click on Tab. And since we’re going to, let’s say test out vertex, we can snap this, say, onto these vertex points right here as you can see. You just select that, it will automatically snap to this object’s vertex. If I were to say, move on an X axis right now. You can click on these, move it down. This, maybe, move it again, snap it there. There, it snaps right to the vertex. It’s basically the same for the edges and faces. Say, look at the edge, and just snap to that edge right there. And it’ll snap our cube onto the other sort of object here.

Yeah, that’s pretty much it with the additional, sort of, settings of snapmode. If there are any issues, you can sort of just play around with it, get used to it. And it will come in handy in the future if you are, you know, wanting to snap an object to another object, sort of combining them together.

Yeah, thanks for watching, I’ll see you next time.

Transcript 7

At layer one, since you’ve gotten used to the basic movements and transformations of objects in Blender, let’s take those skills that you’ve learned out for a spin.

Now, as you can see, I’ve created this very simple, low poly character model or a snowman model right here just by using the basic skills of movement and scaling, rotation of objects to create ourselves this nice looking simple snowman. For you, this is going to be your challenge; just gonna do the same thing, use your skills that you’ve learned to create something similar or maybe even better than what I’ve made here. It depends on how much fun you’re gonna have, you know, making something simple like this.

In fact, you can maybe add on, like, additional arms, make this larger, make it look like a freaky looking, I don’t know, snowman or maybe a group of snowmen. It doesn’t really matter.

Yeah, it’s all up to you; this is your small challenge, and it shouldn’t take you that long. It should be quite simple; but, yeah, have fun and I’ll see you in the next video.

Interested in continuing? Check out the full Blender for Beginners – Craft Low-Poly Game Assets course, which is part of our Unity Game Development Mini-Degree.

Create a Fast Paced Math Game in Unity – Part 1

$
0
0

In this tutorial, we’re going to be creating a 2D math game, in a similar vein to Math Blaster. This project is going to feature a player character that can move and fly. Above them will be a math problem and 4 tubes with different answers on them. The goal of the game is to fly into the correct tubes and finish all of the problems. To add in some challenge, there will be a ticking timer for each question and obstacles that the player needs to avoid.

This is a game that’s meant to stimulate the player’s mind, having them solve math problems while constantly needing to focus on multiple things at once.

The project is very expandable and contains elements that you can use in future educational games.

Project Files

This project will feature various sprites, animations and a particle effect. You can download the project files here.

Project Setup

First of all, create a new 2D Unity project. Then we need to make sure that our “Main Camera” has an orthographic size of 5. This is due to the scale we’re working with.

Unity camera options within the Inspector

Since we’re working in 2D and the fact that we’re utilizing the whole height and width of the screen, it’s important that it’s consistent across most platforms. Go to the Game window and set the aspect ratio to 16:9.

Unity aspect ratio set to 16:9

For this project we’re going to need to add in some tags, sorting layers and one layer. If you’ve downloaded the project files and are using that, then you can skip this step.

Tags: Floor, Entrance, Obstacle

Sorting Layers: Background, Jetpack, Player, Obstacle, Ship, UI

Make sure that the sorting layers are in that specific order, as this determines what sprites render in-front of others.

Layers: Player

Unity Tags & Layers options

Scene Setup

Now, create an empty GameObject (right click Hierarchy > Create Empty), and call it “Ground”. This is going to be where we store all of our ground tiles. Then, drag in the “GroundTile” sprite as a child of the object.

Unity scene with ground tile sprite added

To make the floor usable, we need to add a BoxCollider2D component to the tile, and set its tag to “Floor”. If you don’t have a “Floor” tag, just add one.

Unity ground tile with Box Collider 2D component added

Now duplicate that tile and lay them out horizontally along the bottom border of the camera frame.

Unity ground object with 18 ground tile sprites

Next, drag in the “Ship” sprite to the top of the frame. You may see that it’s a bit too small, so just increase the scale to 1.15. Then, set the sorting layer to “Ship” and add a BoxCollider2D component, resizing it so it fits the ship.

Ship object on top of Unity Scene view

For our tubes, we’re going to drag in the “Tube” sprite, add a BoxCollider2D, set the tag to “Entrance” and sorting layer to “Ship” with an order in layer to 1. This basically means that it’s on the same layer as the ship but it will render in-front.

Then duplicate them. In our case we’re having 4 possible answers, but you can have as many as you want.

Tube objects added to Unity math game

Now at the moment, our background is just the default blue. So what we’re going to do is change the color to something a bit more ‘alien’. Click on the camera and change the “Clear Flags” property to Solid Color. Then you can set the background color. For me I used a blue/green color (hexadecimal: 4BC1AC).

Unity Main Camera background adjusted to aqua

Setting up the Player

Now it’s time to move onto our player. Before jumping into scripting it, we need to set up a few things first.

Drag the “Player_Default” sprite into the scene (part of the Player sprite sheet). Then set the tag, layer and sorting layer to “Player”. Finally, add a CapsuleCollider2D. We’re not using a box collider because they can get stuck if moving along a surface with multiple other colliders. Capsule collider allow us to glide much smoother.

Player character added to Unity math game

We also need to add a Rigidbody2D component. Set the “Linear Drag” to 1 and enable “Freeze Rotation”. This will prevent the player from falling over.

Player Rigidbody 2D component within Unity

For the player, if you downloaded the project files you will have some animations. They’ve all been connected and setup inside of the “Player” animation controller. So to add it, just add an Animator component and set the controller to be the “Player” controller.

Animator component in Unity with Player added as Controller

If you double click on the player controller, you will see in the Animator window what it’s made up of. Our various animations play determined based on the “State”. This is a number we’ll talk about more when we script the player.

Player Animator states within Unity Animator window

To add some interesting visual elements, we’ve got a jetpack particle which will blast particles when the player flies.

Drag in the “FlyParticle” prefab into the scene as a child of the player. Position it in a way so it comes out from the player’s jetpack.

Jetpack particles added to Player object in Unity

Scripting the Player Controller

To begin, let’s create a new C# script called “PlayerController” and attach it to the player object we just made.

Opening it up, we can start by adding a new enumerator called “PlayerState” at the top of our class. This enum will contain the player’s current state. If you look back at the player animation controller, you will see that the “State” float value correlates to the id of each enum value.

public enum PlayerState
{
    Idle,       // 0
    Walking,    // 1
    Flying,     // 2
    Stunned     // 3
}

Now back in our class, let’s add the variables we’re going to be using. First, we have our state, some values for speeds and durations and finally a list of components that we can access.

public PlayerState curState;            // current player state

// values
public float moveSpeed;                 // force applied horizontally when moving
public float flyingSpeed;               // force applied upwards when flying
public bool grounded;                   // is the player currently standing on the ground?
public float stunDuration;              // duration of a stun
private float stunStartTime;            // time that the player was stunned

// components
public Rigidbody2D rig;                 // Rigidbody2D component
public Animator anim;                   // Animator component
public ParticleSystem jetpackParticle;  // ParticleSystem of jetpack

To begin with our functionality, let’s add a “Move” function. This is going to be called every frame. It gets the horizontal axis (-1 to 1) which maps to the left/right arrows and A/D keys. Then we check if the player is moving left or right and flip the X scale depending on that. This will make the player flip their facing direction. Finally, we set our horizontal velocity to be the direction with the move speed applied.

// moves the player horizontally
void Move ()
{
    // get horizontal axis (A & D, Left Arrow & Right Arrow)
    float dir = Input.GetAxis("Horizontal");

    // flip player to face the direction they're moving
    if (dir > 0)
        transform.localScale = new Vector3(1, 1, 1);
    else if (dir < 0)
        transform.localScale = new Vector3(-1, 1, 1);

    // set rigidbody horizontal velocity
    rig.velocity = new Vector2(dir * moveSpeed, rig.velocity.y);
}

Another function is “Fly”. This gets called whenever the player holds the up arrow key and adds force upwards to the player’s rigidbody. We also play the jetpack particle.

// adds force upwards to player
void Fly ()
{
    // add force upwards
    rig.AddForce(Vector2.up * flyingSpeed, ForceMode2D.Impulse);

    // play jetpack particle effect
    if (!jetpackParticle.isPlaying)
        jetpackParticle.Play();
}

Something we need to know for changing states is whether or not the player is standing on the ground. For this we have the “IsGrounded” function which returns a bool value of true or false.

We shoot a short raycast downwards and check if it hit the floor. If so, return true, otherwise return false.

// returns true if player is on ground, false otherwise
bool IsGrounded ()
{
    // shoot a raycast down underneath the player
    RaycastHit2D hit = Physics2D.Raycast(new Vector2(transform.position.x, transform.position.y - 0.85f), Vector2.down, 0.3f);

    // did we hit anything?
    if(hit.collider != null)
    {
        // was it the floor?
        if(hit.collider.CompareTag("Floor"))
        {
            return true;
        }
    }

    return false;
}

Speaking of states, we need a way to change it. So let’s make a function called “SetState” which will be called every frame. First up, we check if we’re not stunned, because if we are the state can’t change.

The Idle state is determined if the player’s velocity is 0 and they’re grounded. Walking is if the player’s horizontal velocity isn’t 0 and they’re grounded, and Flying is if the player’s velocity isn’t 0 and they’re not grounded. Fairly simple.

Then we tell the Animator we’ve set our state, which will change the currently playing animation.

// sets the player's state
void SetState ()
{
    // don't worry about changing states if the player's stunned
    if (curState != PlayerState.Stunned)
    {
        // idle
        if (rig.velocity.magnitude == 0 && grounded)
            curState = PlayerState.Idle;
        // walking
        if (rig.velocity.x != 0 && grounded)
            curState = PlayerState.Walking;
        // flying
        if (rig.velocity.magnitude != 0 && !grounded)
            curState = PlayerState.Flying;
    }

    // tell the animator we've changed states
    anim.SetInteger("State", (int)curState);
}

“Stun” is a function that will be called when the player gets stunned. We set the state and make their velocity shoot them downwards so they hit the ground. Also setting the stun time and stopping any jetpack particles.

// called when the player gets stunned
public void Stun ()
{
    curState = PlayerState.Stunned;
    rig.velocity = Vector2.down * 3;
    stunStartTime = Time.time;
    jetpackParticle.Stop();
}

So how does the player actually call these functions? With the “CheckInputs” script. This calls the “Move” function which has its own inputs. For flying we check for up arrow inputs and at the end we set the state as it may have changed.

// checks for user input to control player
void CheckInputs ()
{
    if (curState != PlayerState.Stunned)
    {
        // movement
        Move();

        // flying
        if (Input.GetKey(KeyCode.UpArrow))
            Fly();
        else
            jetpackParticle.Stop();
    }

    // update our current state
    SetState();
}

What calls “CheckInput” is the “FixedUpdate” function. This is a function that is similar to the “Update” function. The difference is that unlike being called every frame, this is called at a consistent rate (0.02 seconds). Why? Well because we are altering the physics of the rigidbody. This needs to be a consistent rate otherwise things can mess up.

In this function, we also update the “grounded” bool to be if the player is grounded or not. We also check if the player is stunned and if so, has the stun time ran out? If so, make them idle.

void FixedUpdate ()
{
    grounded = IsGrounded();
    CheckInputs();

    // is the player stunned?
    if(curState == PlayerState.Stunned)
    {
        // has the player been stunned for the duration?
        if(Time.time - stunStartTime >= stunDuration)
        {
            curState = PlayerState.Idle;
        }
    }
}

One last function is an OnTriggerEnter2D check. We’re checking if we’re entering an “Obstacle” object. If so, we get stunned.

// called when the player enters another object's collider
void OnTriggerEnter2D (Collider2D col)
{
    // if the player isn't already stunned, stun them if the object was an obstacle
    if(curState != PlayerState.Stunned)
    {
        if(col.GetComponent<Obstacle>())
        {
            Stun();
        }
    }
}

Going back to the editor now, we can enter in the values for our player and test it out. The best values that I found for the game are:

  • Move speed = 4
  • Flying speed = 0.28
  • Stun duration = 4

Make sure you also add in the components and press play!

Player jetpacking around in Unity math game

Creating an Obstacle

Now, we’re going to begin to create the obstacles for the player to avoid.

Drag in the “Obstacles_0” sprite (a part of the Obstacles sprite sheet) into the scene. Set the tag and sorting layer to “Obstacle” and add a CircleCollider2D. a good thing would be to make the collider a bit smaller than the actual sprite. This will make it so when the player get’s stunned, they don’t think “I didn’t even touch that!”. It allows for more near misses.

Obstacle sprite with Circle Collider in Unity

Now create a new C# script called “Obstacle”, attach it to the obstacle object and open it up.

Our variables are fairly simple. We have the direction that it’s going to move in which is determined by the spawner when it’s created. The move speed is how fast it moves and aliveTime is how long until it will be destroyed.

public Vector3 moveDir;         // direction to move in
public float moveSpeed;         // speed to move at along moveDir

private float aliveTime = 8.0f; // time before object is destroyed

In the “Start” function, we want to call the Destroy function. Now this won’t instantly destroy it, but we can set a time delay. This means the object will be destroyed after “aliveTime” seconds.

void Start ()
{
    Destroy(gameObject, aliveTime);
}

In the “Update” function, we want to move the object in the direction specified. As well, we want to rotate it over time in the direction that it’s moving. This just makes the movement look better and as if something ‘threw’ it.

void Update ()
{
    // move obstacle in certain direction over time
    transform.position += moveDir * moveSpeed * Time.deltaTime;

    // rotate obstacle
    transform.Rotate(Vector3.back * moveDir.x * (moveSpeed * 20) * Time.deltaTime);
}

Now back in the editor, we can duplicate the obstacle for each of the 4 sprites. You can create your own, or use the ones included (math related symbols). Then save them as prefabs and you’re done!

Various obstacle sprites for Unity math game

Continued in Part 2

We now have a character and some obstacles to face, but there’s quite a bit to go in the math department.

In Part 2, we’ll be creating a system to spawn the obstacles we just made. Also, we’ll learn how to set up a game loop of displaying problems, solving them, and receiving a new problem – with UI elements to help out.

Web Class: Language Recognition AI with Unity and Azure

$
0
0

You can access the full course here: Language Recognition AI with Unity and Azure

Transcript 1

Welcome everyone, to the voice recognition and AI course for Unity. I’m gonna be your course instructor, Daniel Buckley. So let’s get started.

This is what we’re gonna be creating. We’re gonna be creating an app that is gonna sorta simulate the landing of a Mars rover and you’ll be able to command where it moves based on talking into the mic. So for example, you go to press Enter, say move left three meters, press it again and then the cube will move left three meters. Let’s have a look at it. Move left five meters. Move forwards three meters. And as you can see, it looks great. You’re able to control where it goes, which direction and how far. So what are we gonna be learning?

Well, first of all we’re gonna be learning about the Microsoft Cognitive Services and these are gonna be two different things. First of all LUIS, which is the language and understanding. And what that basically is, is it’s gonna allow us to send over a message to this service and it is gonna be able to pick up intents and entities from that.

So for example, when we say move right, it’ll pick up the intent of move and the entity of the direction which is right. And it’ll be able to then send us back a JSON file with all this information that we can analyze. Then we’re gonna be using Speech to Text to convert our audio from our microphone into text which we can then send to the LUIS system. We’re gonna be also using the Postman API Developer Environment to test out our LUIS program, our app and this is basically a free to download program which allows you to input various different things to send to API’s and that is what we’re gonna be using to test it out.

We’re also gonna be learning the Unity canvas and UI Elements, putting them together and then scripting them to connect them up to the rest of the app and the rest of the systems. And we’re also gonna be using the Unity’s build and networking to send and receive web requests. We’re gonna be sending over the information such as the phrase we spoke and we’re gonna be receiving back the information of what we should do with that. And finally, we’re also gonna be creating a Mover object. This is gonna be an object that is gonna take the results from what we spoke and it is going to analyze it and move depending on the results.

ZENVA is an online learning academy with over 350,000 students. We feature a wide range of courses for people who are just starting out or for people who just wanna try something they don’t already know. The course is also very versatile, allowing you to view them whenever you want and we’ve included project files you can follow along or just soak up the information. Thank you for watching. Now let’s get started on the project.

Transcript 2

Hey everyone, and welcome to the course. We’re going to be learning how to create a voice-controlled game inside of Unity using Microsoft’s cognitive services. The first service we’re gonna be using is LUIS, and this is basically a language-understanding AI, which means that we can say, for example to the game, can you move forward and what it will do is it’ll take from that an intent and an entity. The intent being move, and the entity being the move direction, which is forward.

We can see here, on the LUIS website, which is just LUIS.ai, or www.LUIS.ai. If we scroll down, we can have an example here. We have Book me a flight to Cairo, and what this does is, it gets the intent, which is book flight, and down here in our entities, we have entity type location, which is Cairo. So from Book me a flight to Cairo, it can get from that that you want to book a flight, and the location is Cairo, and with that you can then do other services and many other things. For example, we’re gonna keep it quite simple, we’re just gonna have one intent, of move, and two entities, actually, of move direction and move distance. So you can say to the game, for example, “Move left five meters” and it will know that you wanna move left, and it will then know that you wanna move left five meters.

So to get, let’s go to the LUIS website here, at LUIS.ai, and we just want to Login / Sign up. If you’ve got an account, if you go to Microsoft Account, you can just log on to that, but if you don’t, you can easily create one. All right, once that’s done, it should take you to the LUIS applications page, and what we wanna do here, is we wanna simply click on Create new app. The name, it doesn’t really matter what the name is, because what’s important is actual IDs and codes that we’ll be using, but for the name, let’s just call this TestApp. Culture, which is basically the language, we’ll just have that as English, and the description we’ll just have this VoiceControlledGame. Okay, click Done, and then it should take you over to the My Apps page here.

Let’s click on our test app, open it up, and here we can start entering in our information. Now for our intents, we wanna click on Create new intent, and for this, we’ll call this intent Move. Click on Done, and once we’re here, now here on this screen, we can actually enter in phrases, ’cause what we have to do is you have to train the app. For the app to be able to know what it’s looking for and what sort of phrases it should detect, you have to enter in examples.

We’re gonna do that soon, but first of all we’re gonna be creating our entities. So let’s go over here to the left, to Entities, and we wanna create two Entities, so Create new Entity, and we’ll call this one MoveDirection, keep that as Simple, click Done and this is gonna be basically be forwards, backwards, back, left, right. Let’s create another Entity, and call this MoveDistance, it’s just gonna be a number, and click Done.

Now, at the moment, the app doesn’t actually know what these are, or what they should be, and that is why we train. So let’s go back to Intents, click on our Move intent, and we can start entering some examples, and then assigning the Entities to those examples. So for example, let’s go can you move backwards, click Enter, wait for it to load, there it is, and what we can do now is, if we hover over the text, we can see that it actually pops up with these brackets. So, what we can do is, we can click on backwards, and select MoveDirection, so now it knows that backwards is a MoveDirection, and what we can then do now is enter in some more Intents. So let’s go, can you move left five meters, enter that in, and what we can do then, let’s assign left to the MoveDirection and five to the MoveDistance.

Now what’s important when doing this, is that you wanna have very varied messages. So, try putting the MoveDistance ahead of the MoveDirection, so here he could go, move six meters forwards, it’ll create it, and let’s assign six to either distance and the forwards to the direction. Now you wanna do this for each of the move directions, for us, we’re gonna be having forwards, backwards, back, which is basically the same thing as backwards, but some people say it differently, and left and right. So try and have around three, I’d say, for each of those, and with very different distances, different numbers, put in meters, don’t put in meters, see, let’s go for that now.

Okay, I got around a dozen or so, I’d say, and what we wanna do now is we wanna go up here and click on the Train button. This will train our app, it’ll go through the machine learning and try and understand what our intents and entities actually are. So lets click on that, shouldn’t take too long, it probably takes around 10 or so seconds, I’d say, at the moment it’s just queuing, now it’s training it, and there we go, it’s finished, easy as that. Now what we can actually do inside of the web page is actually test it out. So let’s click on the Test button up here, and this will open up a little panel over here, and we can enter in a test utterance. An utterance is basically a phrase that we’re gonna say. So let’s go, move left, and you can click on Inspect, and as you can see, Entities, the move direction is, left.

We can also then do something a bit more complex, we’ll go please move five meters forwards, see if this actually does it, we might have to enter a few more, example phrases, if this doesn’t. Click Inspect, and as you can see, MoveDistance, five, and MoveDirection, forwards. So, basically, just go over this and enter in a few examples, making them quite complex maybe, if you want, and if you see they’re not really lining up the correct Entities, or if they’re missing Entities, just enter in more varied phrases here, in the examples area.

So great, once we’re done with that, we can actually publish the app, so let’s go over up here, to Publish, click on that, and yep, we want to Production, click Publish, and there we go, it’s finished. What we wanna do now is go over to Manage, ’cause we wanna actually get a few things that we will need to actually link to the API. And for that, we need to get our, skip part of this here, and so click on Manage, and this’ll take you to the Application Settings. We need to go down here, to Keys and Endpoints, and all we really need is this Authoring Key, so basically you just copy that, and we also need the Endpoint here. So just keep those two things on hand as we continue through the project.

Transcript 3

Alright, welcome back everyone. In this lesson we’re gonna be testing out our API, before we hop in Unity ’cause since in Unity we need to write up all the scripts and connect up in that way, using something called Postman is going to help us out in this. Postman is basically a program you can download where you can test out APIs really easily and quick. So what you wanna do is you wanna go to getpostman.com, sign up or sign in if you already have an account.

You can also scroll right to the bottom here and click on downloads to download it here for Windows and we can just select which version of Windows you have or if you’re on MAC OS or Linux, you can download it from here. Once the download’s finished, and you’ve opened up the program, you can just sign in, here I’m just going to sign in with Google, and we are in. Okay what we wanna do now is get our endpoint link that we actually copied when we were creating the app. And what we wanna do is we wanna separate this up, ’cause in here there are different parameters that are being sent.

First of all, wherever you see a question mark, that is the beginning of, that is where the parameters begin. And so the first one is verbose=true. Now what this means is that will it return just the top-scoring intent ’cause when you actually send over a request with your phrase, it will send over a JSON file, and inside of that will be a list of all the different intents that it got from it. Since we only have one intent, there’s no real purpose to try and get multiple so we’ll just keep that at true.

The timezone offset, when we created the app, it gave us a sort of region, ours was west US, we’re just gonna keep that for now, if you are in a different region, you can try and find, you can try and set it up so it’s different, but we’ll just keep it on west US for now, and that’s just the offset from that timezone. Subscription key is the authoring key that we had on the site, and the Q is just our actual phrase, a question.

So in here what we’re gonna do, is before we open, is you want to copy this all the way up to the first question mark, so just before the question mark, we just wanna copy that, and inside of Postman here, we should have a get request, we just wanna enter it in here, into the enter request URL, and you want to enter in that URL we entered. There we go.

Now up here in our parameters, we wanna start entering our keys. So first of all, verbose is true, so let’s enter in verbose with a value of true, we have our timezone offset 360, we also have our subscription key, which is this number here, so let’s just copy that. And enter in subscription key, paste that in, and finally, we have our Q, which is our question. And for our Q, let’s just say can you move forward five meters? Can you move back five meters? And once we have that, let’s press on the send button and see what we get in return. And as you can see, we got a JSON file back. With our intents here, we got the intent of move, which is the top-scoring one of .98, so it’s basically moving.

And down here in our entities, we got a MoveDirection of back, and a MoveDistance of five. So we can actually set verbose to false, since I actually had it the wrong way around. Value set false, click send. And yep, we only get the top-scoring intent which is what we want. So if verbose is false, timezone offset 360, it doesn’t really matter what you sent your timezone offset to, subscription key, it has to be that authoring key from the site, and the Q can be whatever question you wanna ask.

Alright so we know it now works and it’s connected, we can now begin setting it up inside Unity.

Interested in continuing? Check out the full Language Recognition AI with Unity and Azure course, which is part of our EdTech Mini-Degree.

Viewing all 1620 articles
Browse latest View live